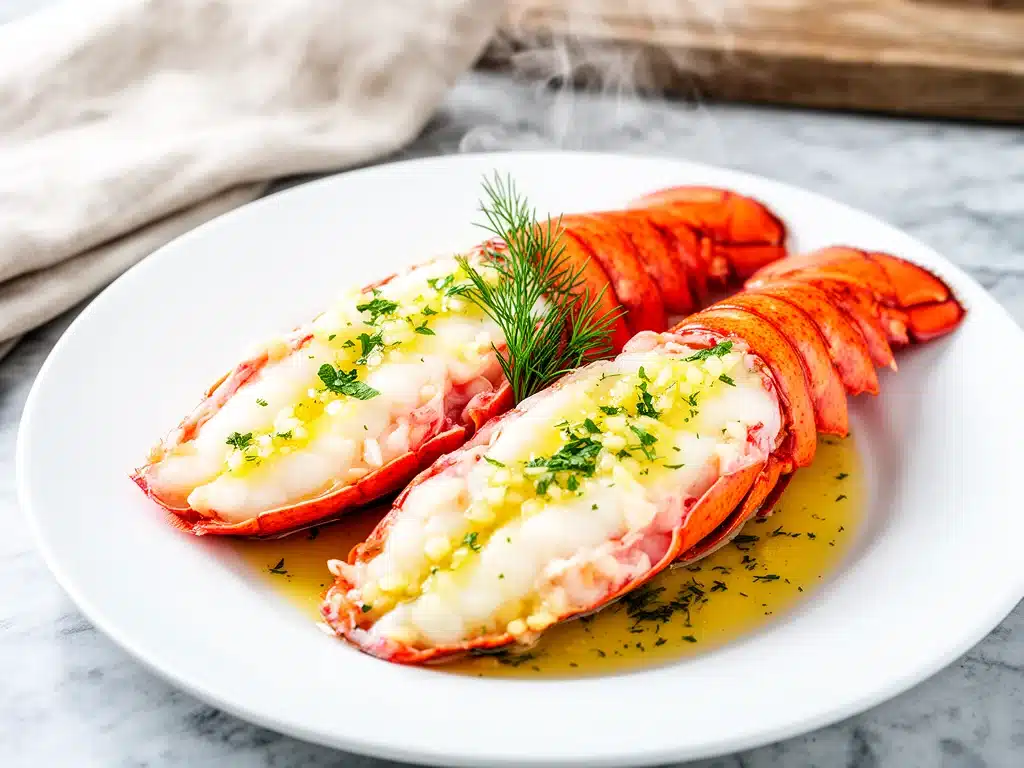
Let me be honest with you. For years, I avoided lobster tails like they were radioactive. Not because I didn’t love the taste—I do, deeply—but because every time I tried to make them at home, they came out rubbery, chewy, and honestly? Kind of sad. I’d buy these beautiful, expensive crustaceans, treat them with reverence, and then accidentally turn them into shoe leather in the oven. It was a expensive lesson.
Then, last summer, I was at this little seafood shack down the coast. I ordered the garlic butter lobster tail, expecting the usual dry, overcooked disappointment. Instead, I got something that practically melted off the shell. It was buttery, sweet, tender, and packed with enough garlic flavor to make me question my entire life. I ate three of them that night. I didn’t even care that I spent more on dinner than my grocery bill for the week.
That was the moment I decided I needed to recreate that magic at home. I wanted Restaurant-Style Garlic Butter Lobster Tails that were better than takeout, faster to make, and didn’t require a degree in marine biology to pull off. After about six failed attempts (yes, six), I finally found the sweet spot. The secret isn’t fancy equipment or complicated techniques. It’s actually pretty simple, once you know what to look for.
Now, I make this Restaurant-Style Garlic Butter Lobster Tails recipe for date nights, holidays, or just because I’m feeling fancy on a random Tuesday. It’s elegant enough to serve to guests who think they know everything about seafood, but easy enough that you’re not stressed out in the kitchen. And the best part? It takes less time than you’d think. Seriously. If you can melt butter, you can make this.
Why You’ll Love This Recipe
There are a lot of seafood recipes out there, but this one has completely changed how I view home-cooked luxury. I’ve made this for everyone from my picky brother to my food-snobby friends, and everyone asks for the recipe. Here’s why it’s become a staple in my rotation.
It Feels Fancy but Isn’t — You get that high-end restaurant experience without the high-end price tag or the stress. I’ve calculated the cost, and making this at home saves me about 40% compared to ordering it out. Plus, you skip the markup for “service” and “ambiance.”
Lightning Fast — From thawing to plating, this takes about 15-20 minutes. The actual cooking time is just 5-8 minutes per side. I make this on weeknights when I want something special but don’t have hours to spend over a stove. It’s faster than ordering takeout and arrives hot.
Garlic Butter Heaven — The sauce is the star. It’s not just melted butter; it’s infused with fresh garlic, lemon, and herbs. It’s rich, aromatic, and makes you want to dip every piece of bread into the bowl. I’ve tried other versions with just plain butter, and they just don’t compare.
Hard to Mess Up — Lobster is forgiving if you don’t overcook it. Once you learn the visual cues, you’ll never undercook or overcook it again. I used to guess, but now I know exactly what “done” looks like. It’s a confidence booster in the kitchen.
Better Than Takeout — Let’s be real. Takeout lobster is often reheated, dried out, and drowned in cheap butter. This version is fresh, vibrant, and made with love. My family says it’s the best seafood dinner we’ve ever had, and that’s saying a lot.
This is my go-to when I need to impress without trying too hard. No complicated techniques, no weird ingredients, just reliable, delicious food that makes everyone happy. It’s the kind of meal that makes you feel like a pro chef.
Ingredients You’ll Need
Here’s the best part: you probably have most of this already. Lobster is the star, but the supporting cast is simple pantry staples. I’m particular about a few things here, and I’ll tell you exactly why.
Lobster Tails (4 tails, about 4-6 oz each) — Look for fresh or frozen tails. If frozen, thaw them slowly in the fridge overnight. Don’t rush this. Fresh is best, but high-quality frozen works perfectly. I prefer tails that are still attached to the shell for easier handling.
Unsalted Butter (½ cup / 115g) — Use good quality butter. It makes a huge difference in flavor. I use European-style butter when I can find it because it’s richer, but regular unsalted works fine. Don’t use salted butter because you can control the salt level better.
Garlic (4 cloves, minced) — Yes, four cloves. Don’t skimp. Fresh only—no jarred garlic in this recipe. Jarred garlic has a metallic taste that clashes with the delicate lobster. Mince it finely so it melts into the butter.
Extra Virgin Olive Oil (2 tablespoons) — This adds depth and prevents the butter from burning. I use a good quality EVOO here. It’s not just for flavor; it raises the smoke point slightly.
Lemon (1 large, juiced) — Fresh lemon juice is non-negotiable. Bottled lemon juice tastes flat and artificial. Squeeze it yourself. The acidity cuts through the richness of the butter and brightens the whole dish.
White Wine (¼ cup / 60ml) — Dry white wine like Sauvignon Blanc or Pinot Grigio. It adds complexity and deglazes the pan. If you don’t drink alcohol, use chicken broth or extra lemon juice. It won’t be the same, but it’ll still work.
Red Pepper Flakes (½ teaspoon) — Optional but adds a nice kick. Start with less if you’re sensitive to spice. I love the contrast of heat with the sweet lobster.
Fresh Parsley (2 tablespoons, chopped) — For color and freshness. Flat-leaf parsley is best. It adds a clean, herbal note that balances the richness.
Salt and Black Pepper — To taste. I use kosher salt because it’s easier to control. Freshly cracked black pepper adds a nice bite.
Optional Add-ins:
Cayenne Pepper (pinch) — For extra heat.
Chives (1 tablespoon, chopped) — For a milder onion flavor.
Lemon Zest (1 teaspoon) — For intense citrus aroma.
Equipment Needed
You don’t need fancy equipment for this. Here’s what I actually use.
Skillet or Cast Iron Pan — 12-inch works best. I prefer stainless steel or cast iron because they hold heat well. Non-stick works too, but you might not get that nice sear.
Kitchen Shears — For cutting through the shell. Regular scissors work, but kitchen shears are stronger and easier to clean. I keep a dedicated pair for seafood.
Basting Brush — Silicone works fine. I use it to brush the garlic butter over the lobster while it cooks. It helps the flavors penetrate.
Tongs — For flipping the tails. Regular tongs work, but kitchen tongs give you better control.
Measuring Spoons — Pretty standard stuff. Dollar store versions work fine.
Small Saucepan — For melting the butter and garlic. Or you can just use the skillet. I use a small saucepan to keep the butter warm while I cook the lobster.
Plating Platter — Any large platter works. I like to serve the tails on the shell for presentation.
How to Make It: Step-by-Step
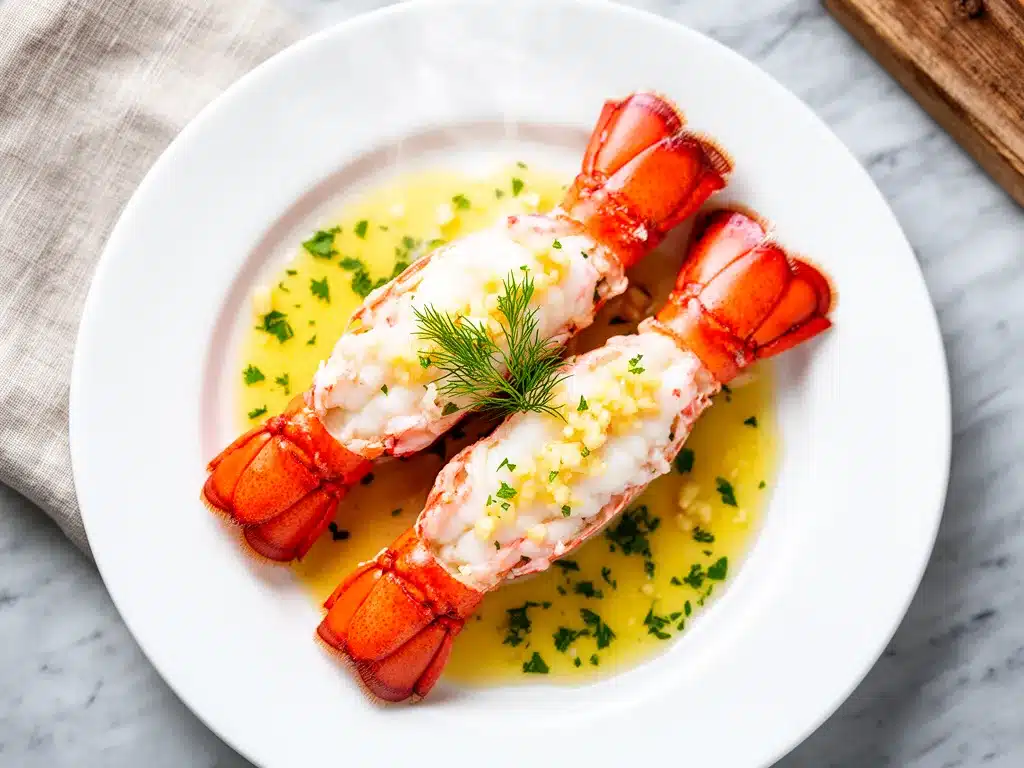
Alright, let’s make this! I’m walking you through exactly how I do it, including the little tricks I’ve picked up.
Step 1: Prep the Lobster (5 minutes)
If your lobster tails are frozen, thaw them in the fridge overnight. If they’re fresh, skip this. Using kitchen shears, cut down the center of the top shell, starting from the tail fan and going all the way to the base. Be careful not to cut into the meat. Gently pry the shell open and lift the meat out, resting it on top of the tail fan. This is called “butterflying” the lobster. It helps it cook evenly and makes it look fancy. Secure the meat to the fan with a toothpick if it keeps sliding off. Season the meat lightly with salt and pepper.
Step 2: Make the Garlic Butter Sauce (5 minutes)
In a small saucepan or skillet, melt the butter over low heat. Add the minced garlic, olive oil, white wine, red pepper flakes, and lemon juice. Stir well and let it simmer gently for 2-3 minutes. The garlic should be fragrant but not brown. Remove from heat and stir in half of the chopped parsley. Keep warm.
Step 3: Sear the Lobster (2 minutes per side)
Heat a large skillet over medium-high heat. Add a tablespoon of olive oil. Place the lobster tails meat-side down in the skillet. Sear for 2 minutes until the meat turns opaque and golden. Flip them over and cook the shell-side for another 2 minutes. This sear adds flavor and texture.
Step 4: Baste and Finish (3-4 minutes)
Reduce the heat to medium. Pour the garlic butter sauce over the lobster tails. Use a basting brush to coat the meat generously. Cover the skillet with a lid and cook for 3-4 minutes, basting every minute. The lobster is done when the meat is opaque, firm, and reaches an internal temperature of 145°F (63°C). Don’t overcook it! It will continue to cook slightly after you remove it from the heat.
Step 5: Serve
Remove the toothpicks. Transfer the lobster tails to a platter. Drizzle any remaining garlic butter sauce over the top. Garnish with the remaining parsley and lemon wedges. Serve immediately with crusty bread to soak up the sauce.
Total Time: About 15 minutes (5 minutes prep, 10 minutes cooking)
Expert Tips & Tricks
Here’s everything I’ve learned from making this dozens of times. These tips will save you from my mistakes.
Don’t Overcook It
This is the #1 mistake people make. Lobster cooks fast. Once the meat turns opaque and white, it’s done. If it’s translucent, keep cooking. If it’s rubbery, you waited too long. Use a meat thermometer if you’re unsure—it should read 145°F (63°C).
Butterfly Properly
Cutting through the shell and lifting the meat out allows the heat to penetrate evenly. If you leave the meat inside the shell, it cooks slower and can become tough. Plus, it looks more impressive.
Use Fresh Garlic
Jarred garlic has a different flavor profile that doesn’t work well here. Fresh garlic infuses the butter with a clean, sharp taste that complements the sweet lobster. Mince it finely so it melts into the sauce.
Baste Generously
The garlic butter sauce is what makes this dish special. Don’t skimp on it. Baste the lobster frequently to keep it moist and flavorful. The sauce also helps cook the meat evenly.
Save the Shell
If you’re serving this for a dinner party, leave the lobster in the shell for presentation. It looks beautiful and helps keep the meat warm. You can also use the shells to make a quick seafood stock later.
Common Mistakes (and how to avoid them):
Mistake: Meat is rubbery
Fix: You overcooked it. Next time, check the temperature earlier. Lobster continues to cook after removing from heat, so take it off at 140°F (60°C).
Mistake: Sauce is too thin
Fix: Let the sauce simmer longer to reduce. Or add a teaspoon of cornstarch mixed with water to thicken it.
Mistake: Garlic is burnt
Fix: Lower the heat. Garlic burns quickly. If it starts to brown, remove the pan from heat immediately and add the wine to stop the cooking.
Variations & Substitutions
Once you’ve nailed the basic version, here’s how you can mix it up. I’ve tried all of these.
Herb-Crusted Version
Add 1 teaspoon dried thyme and 1 teaspoon dried oregano to the garlic butter. It adds an earthy, herbal note that pairs well with the lemon.
Spicy Cajun Style
Swap the red pepper flakes for 1 teaspoon Cajun seasoning. Add ½ teaspoon smoked paprika. Totally different vibe—spicy and smoky. My friends who love heat request this version.
Lemon Herb
Add the zest of 1 lemon to the garlic butter. Brightens everything up. Great for summer. I make this when I want something lighter.
Dietary Modifications:
Gluten-Free
This recipe is naturally gluten-free. Just make sure your white wine is gluten-free (most are).
Dairy-Free
Replace butter with olive oil or dairy-free butter substitute. It’s not the same richness, but it works. I use olive oil when I’m avoiding dairy.
Lower-Fat
Use half the butter and replace the rest with chicken broth. It’s lighter but still flavorful. I make this when I’m trying to be “healthy.”
Serving & Storage
How to Serve:
I usually serve this straight from the skillet at the dinner table—it looks rustic and stays warm. But here are other ways I’ve enjoyed it:
Side Dishes:
– Asparagus spears roasted with lemon
– Garlic mashed potatoes
– Simple green salad with vinaigrette
– Rice pilaf to soak up the sauce
Toppings Bar:
When I have guests, I put out: extra lemon wedges, red pepper flakes, fresh parsley, crispy bacon bits. Everyone customizes their bowl.
Wine Pairing:
My wine-snob friend says Sauvignon Blanc or Chardonnay works great with this. The acidity cuts through the richness.
Storage Instructions:
Refrigerator:
Store in an airtight container for up to 2 days. The lobster will continue to cook slightly, so reheat gently.
Reheating:
Best method: Add to a skillet with a splash of broth or water over low heat. Heat gently until warmed through.
Microwave method: Heat in 30-second intervals, stirring between. Add a splash of water to prevent drying out.
Never works: Trying to reheat in the oven at high heat. It will dry out the lobster.
Freezing:
Honestly, this doesn’t freeze well because the texture changes. The lobster becomes rubbery when thawed. Make it fresh or store in the fridge for up to 2 days.
Nutrition Information
I’m not a nutritionist, but here’s the breakdown if you’re tracking.
Per Serving (based on 4 servings):
– Calories: 320
– Protein: 28g
– Carbs: 4g
– Fiber: 1g
– Sugar: 1g
– Fat: 22g
– Saturated Fat: 12g
– Cholesterol: 180mg
– Sodium: 450mg
– Calcium: 60mg
What’s Good:
– High protein from the lobster
– Low carb
– Rich in vitamins B12 and E
What to Know:
– Higher in saturated fat from the butter
– Contains dairy
– Moderate sodium (use low-sodium broth to reduce)
My Take:
Look, this is rich, buttery seafood. It’s not a diet recipe. But it’s way better than takeout, costs less, and I know exactly what’s in it. When I want to make it lighter, I use less butter and more lemon. But usually? I just eat a reasonable portion and enjoy it.
Final Thoughts
So that’s my go-to Restaurant-Style Garlic Butter Lobster Tails! I’ve probably talked your ear off at this point, but when you make a recipe this often, you have a lot to say about it.
This has saved dinner parties more times than I can count. It’s my answer to “what’s for dinner” when I want to impress but don’t want to stress. My guests are happy, my family’s happy, and I’m happy because I’m not stressed about cooking.
Make it yours! Try different herbs, swap in your favorite spices, adjust the garlic (though more is always better in my opinion). The best recipes are the ones you adapt to your family’s tastes.
If you make this, drop a comment and let me know what you think! I love hearing how recipes turn out in your kitchen. And if something doesn’t work, tell me that too—I’m here to help troubleshoot.
Happy cooking! And I hope your kitchen smells half as good as mine does right now.
Frequently Asked Questions
Q: Can I use frozen lobster tails?
A: Absolutely. Just thaw them slowly in the fridge overnight. Don’t thaw them in warm water or the microwave—it can make the meat tough. If you’re in a hurry, you can thaw them in cold water, but check them frequently.
Q: How do I know when the lobster is done?
A: The meat should be opaque, white, and firm. It should reach an internal temperature of 145°F (63°C). If it’s translucent, keep cooking. If it’s rubbery, you waited too long. Use a meat thermometer if you’re unsure.
Q: Can I make this ahead for a dinner party?
A: Sort of. Prep the lobster tails by butterflying them and making the sauce ahead. Store them separately in the fridge. Cook the lobster right before serving. It won’t be quite as good as fresh, but it’s close and saves you stress during the party.
Q: Why did my lobster get rubbery?
A: The heat was too high or you cooked it too long. Lobster cooks fast. Once the meat turns opaque, it’s done. Overcooking is the most common mistake. Remove it from the heat as soon as it’s done.
Q: Can I use jarred garlic?
A: You can, but fresh tastes so much better in this recipe. Jarred garlic has a weird metallic taste that really shows up in butter sauces. If you must use it, use half the amount because it’s stronger. But honestly, mincing 4 cloves takes like 2 minutes.
Q: How do I reheat leftovers without it getting dry?
A: Add a splash of broth or water to a skillet, add your leftover lobster, and heat gently over low heat, stirring frequently. The extra liquid brings back the moisture. Microwave sort of works but tends to dry it out.
Q: Can I double this recipe?
A: Absolutely! Double everything and use your biggest skillet. The cooking times stay the same. I do this when I’m feeding a crowd. Just make sure your skillet is big enough for all the tails—you might need to cook in batches.
For more quick and easy meal ideas, check out our back-to-school ham and cheese pretzel roll-ups for a fun lunch option, or our chewy banana oat breakfast cookies for a healthy start to the day.
Pin This Recipe!
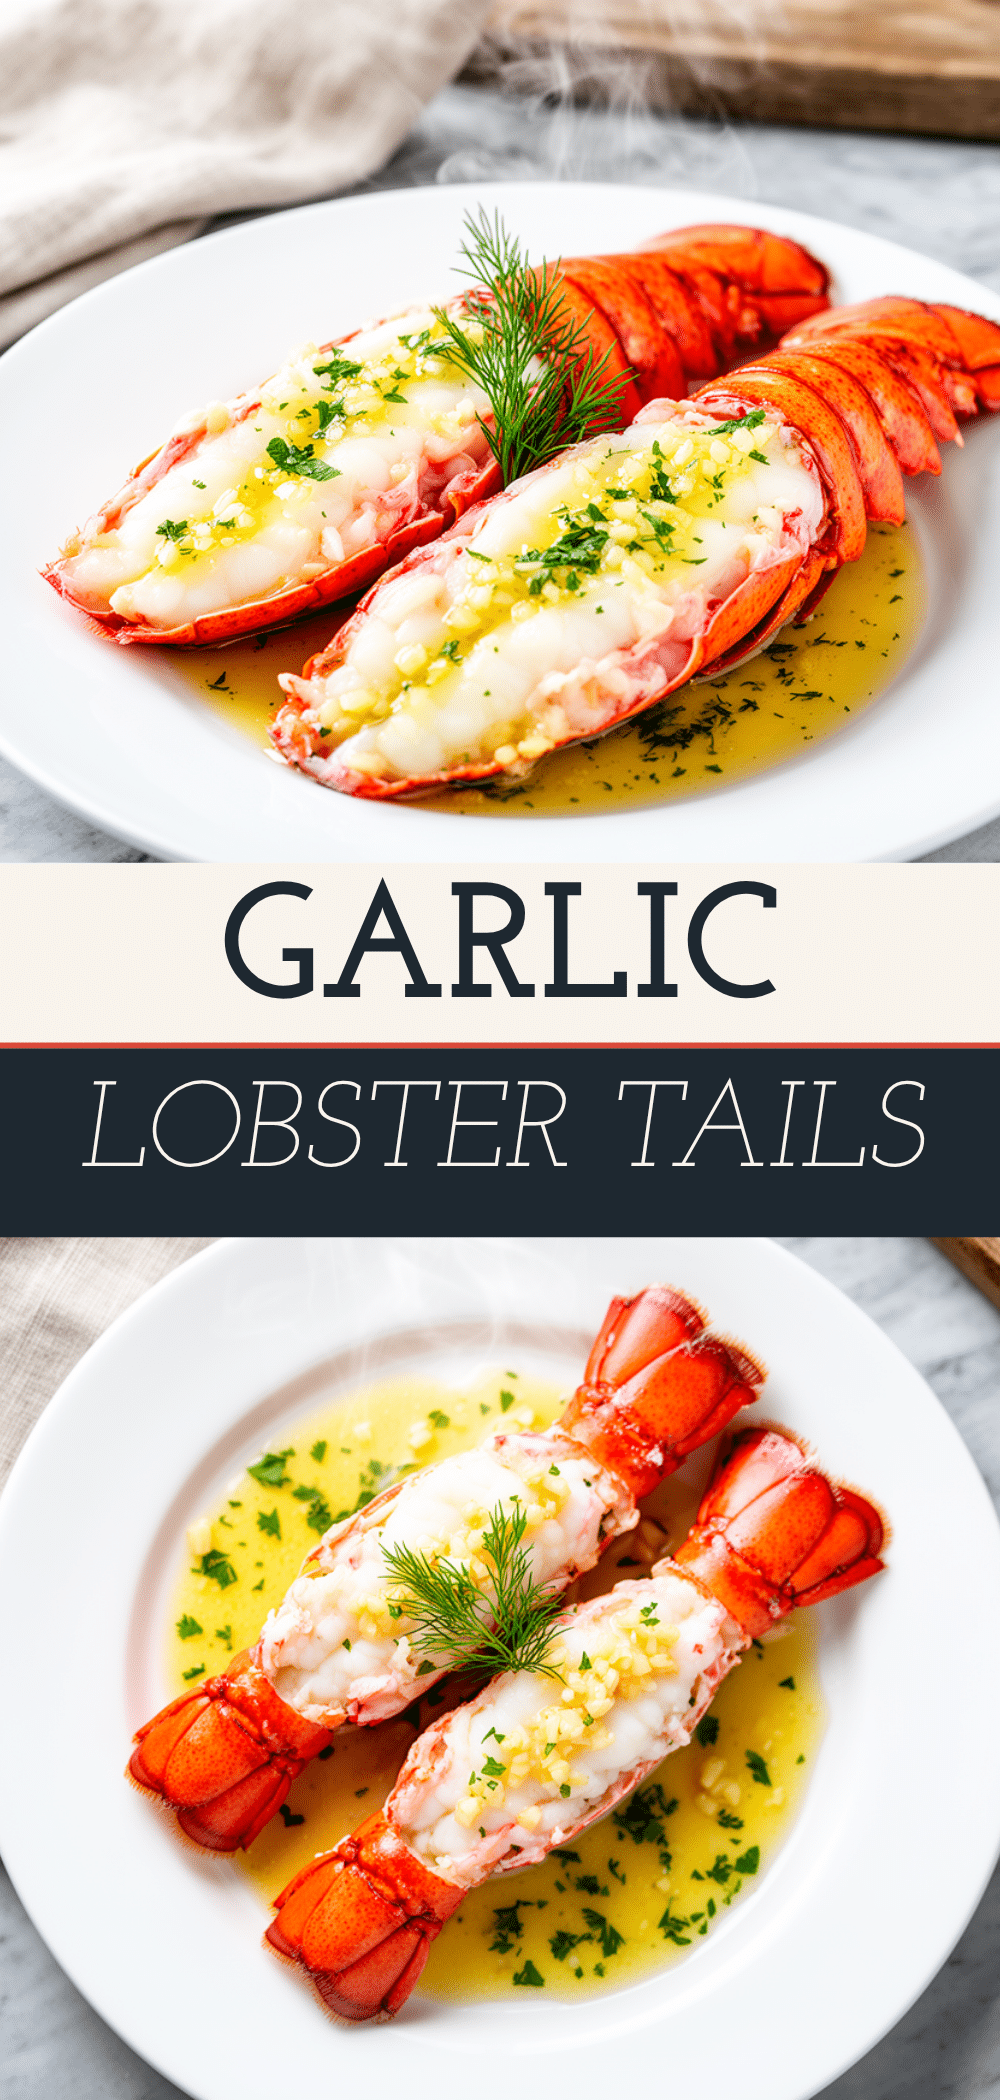
Restaurant-Style Garlic Butter Lobster Tails: 5-Min Perfect
- Total Time: 15 minutes
- Yield: 4 servings 1x
Description
Create restaurant-quality garlic butter lobster tails at home in just 15 minutes. This easy recipe features tender, buttery lobster with a rich garlic sauce, perfect for date nights or impressing guests.
Ingredients
- 4 lobster tails (4–6 oz each), fresh or thawed frozen
- 1/2 cup (115g) unsalted butter
- 4 cloves garlic, minced
- 2 tablespoons extra virgin olive oil
- 1 large lemon, juiced
- 1/4 cup (60ml) dry white wine (e.g., Sauvignon Blanc)
- 1/2 teaspoon red pepper flakes
- 2 tablespoons fresh parsley, chopped
- Salt and black pepper to taste
- Toothpicks (optional, for securing meat)
Instructions
- Thaw frozen lobster tails in the fridge overnight if necessary.
- Butterfly the lobster tails: Use kitchen shears to cut down the center of the top shell, pry it open, and lift the meat out, resting it on top of the tail fan. Secure with a toothpick if needed. Season lightly with salt and pepper.
- In a small saucepan, melt butter over low heat. Add minced garlic, olive oil, white wine, red pepper flakes, and lemon juice. Simmer gently for 2-3 minutes until fragrant. Remove from heat and stir in half of the parsley.
- Heat a large skillet over medium-high heat with a tablespoon of olive oil.
- Place lobster tails meat-side down in the skillet. Sear for 2 minutes until opaque and golden.
- Flip tails and cook shell-side for another 2 minutes.
- Reduce heat to medium. Pour the garlic butter sauce over the tails. Baste generously with the sauce.
- Cover the skillet and cook for 3-4 minutes, basting every minute, until the internal temperature reaches 145°F (63°C).
- Remove toothpicks, transfer to a platter, drizzle with remaining sauce, and garnish with remaining parsley and lemon wedges. Serve immediately.
Notes
Do not overcook the lobster; it should be opaque and firm. If the sauce is too thin, let it simmer longer to reduce. Fresh garlic is essential for the best flavor. For a dairy-free version, substitute butter with olive oil or a dairy-free alternative.
- Prep Time: 5 minutes
- Cook Time: 10 minutes
- Category: Main Course
- Cuisine: Seafood
Nutrition
- Serving Size: 1 lobster tail per s
- Calories: 320
- Sugar: 1
- Sodium: 450
- Fat: 22
- Saturated Fat: 12
- Carbohydrates: 4
- Fiber: 1
- Protein: 28
Keywords: lobster tails, garlic butter lobster, seafood recipe, easy dinner, restaurant style lobster, gluten-free seafood, quick dinner


