It was 11 PM on a Tuesday. I had exactly $4.50 in my checking account and a bag of bananas in my kitchen that had turned from “yellow with spots” to “completely black and mushy.” I knew the grocery store was closed, and I definitely wasn’t ordering takeout. I was hungry, broke, and staring at what looked like trash.
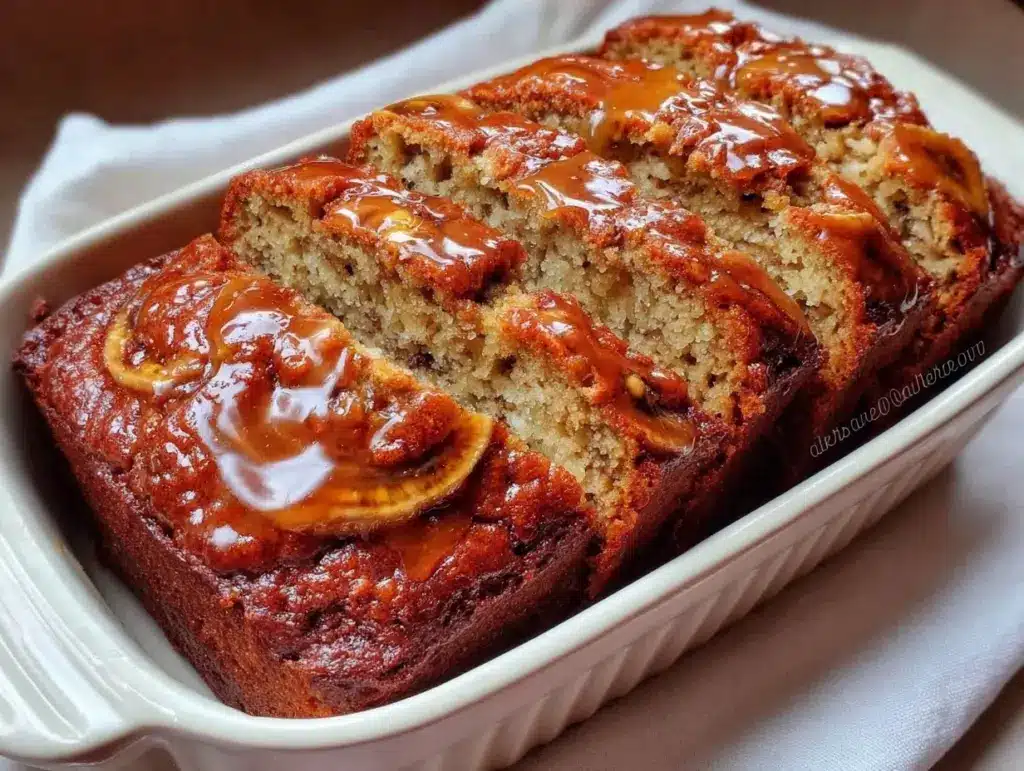
Then I remembered I had a box of baking mix, a carton of milk, and some butter hiding in the back of the fridge. I dumped everything into one bowl. No fancy techniques. No expensive almond flour. No organic honey. Just the bare minimum. Twenty minutes later, the smell of warm banana and sugar filled my tiny apartment. That first slice was dense, sweet, and impossibly moist. It tasted like I’d spent an hour at the bakery, not five minutes at the sink.
That was the night I stopped buying banana bread from the store and started making my own one-bowl banana bread. It’s become my lifeline on those tight-budget weeks. It turns “gross” bananas into a treat that feels luxurious. It costs me less than $2 to make a whole loaf. And because it’s so forgiving, I can whip it up with whatever cheap staples I have left.
If you’re eating on a budget, you need recipes that stretch every dollar. This one-bowl banana bread is exactly that. It’s practical, it’s cheap, and it saves you from throwing away perfectly good food. Let’s get into how you can make this for pennies.
Why You’ll Love This Recipe
I’ve tested this version of one-bowl banana bread dozens of times, mostly on nights when I’m tired and my wallet is empty. Here’s why it stays in my regular rotation:
- Stupidly Simple — Seriously, if you can mash a banana with a fork, you can make this. One bowl. One spoon. No mixer, no stand mixer, no fuss. I make this while watching TV.
- Pennies Per Slice — The whole loaf costs about $1.80 to make. That’s roughly 12 cents a slice. Compare that to the $4.50 loaf at the bakery, and you see why this is my budget hero.
- Zero Waste — Bananas go bad fast. This recipe uses them at their most overripe stage, so you’re not throwing food away. You’re turning a potential loss into a win.
- Breakfast and Snack Ready — It’s sweet enough for dessert but filling enough for breakfast. I often pair it with a cup of coffee in the morning or eat it as a late-night snack. It’s versatile.
- Freezer Friendly — I slice it up and freeze it. When I need a quick, cheap meal, I just grab a slice and toast it. It tastes fresh out of the oven.
This isn’t just about saving money. It’s about having a reliable, cheap comfort food that you can make with what you already have. No special trips to the store. No impulse buys. Just simple, budget-friendly baking.
Ingredients You’ll Need
Here’s the best part: you probably have most of this already. I’m being very specific about what to buy and what to skip, because on a budget, every penny counts.
For the Bread Base
Ripe Bananas (3 large / about 1.5 cups mashed) — This is the star. Look for bananas that are completely black on the outside. They’re sweeter and easier to mash. If you don’t have ripe ones, you can bake them in the oven at 300°F for 15 minutes to speed up the process.
Yellow Cake Mix (15.25 oz box) — I know, it sounds weird to use a boxed mix for “from scratch” bread. But hear me out. It’s the cheapest way to get the perfect texture. It includes flour, sugar, and leavening agents. I use the standard yellow cake mix because it’s often on sale. You can use vanilla, but yellow has a richer flavor.
Milk (1/3 cup / 80ml) — Any kind works. Whole milk makes it richer, but skim works fine too. If you have buttermilk, use that—it adds tang and moisture. But don’t buy special milk just for this. Use what you have.
Vegetable Oil (1/3 cup / 80ml) — Oil keeps banana bread moist longer than butter. It’s also usually cheaper. I use whatever vegetable or canola oil I have. Don’t skip this—it’s key for the “ultra-moist” part.
For the Flavor
Vanilla Extract (1 teaspoon) — Just a splash to make it taste homemade. If you’re out, skip it. It’s not a dealbreaker.
Salt (1/4 teaspoon) — Even with the sugar in the cake mix, a pinch of salt balances the flavor. If your mix already has salt, you might not need this, but I always add a little.
Optional Add-Ins
Walnuts or Pecans (1/2 cup) — If you have nuts lying around, toss them in. If not, don’t buy them. They’re expensive. The bread is fine without them.
Chocolate Chips (1/2 cup) — A cheap way to make it feel like a dessert. I buy the big bag of semi-sweet chips and keep them in the freezer. They last forever.
Cinnamon (1 teaspoon) — If you like a spiced banana bread, add this. It’s cheap and adds warmth.
Equipment Needed
You don’t need fancy equipment for this. Here’s what I actually use:
Large Mixing Bowl — Just a regular bowl. I use a 4-quart mixing bowl. It needs to be big enough to mash the bananas and mix the batter without making a mess.
Fork or Potato Masher — For mashing the bananas. A fork works fine. I like a masher because it gets the lumps out faster.
Wooden Spoon or Spatula — For mixing. You don’t need an electric mixer. Hand mixing is easier and less cleanup.
9×5 Loaf Pan — Standard loaf pan. I use a metal one. Glass pans take longer to bake, so you might need to add 5 minutes. If you don’t have a loaf pan, you can use a muffin tin for banana bread muffins. They bake faster (15-18 minutes).
Parchment Paper — Optional, but I always line my pan. It makes cleanup so much easier. If you’re out, just grease the pan well with oil or butter.
Cooling Rack — If you have one. If not, just let it cool on the counter. It’ll be fine.
Knife — For slicing. A serrated knife works best for bread.
How to Make It: Step-by-Step
Alright, let’s make this! I’m walking you through exactly how I do it, including the little tricks I’ve picked up over time.
Step 1: Prep Your Oven and Pan (2 minutes)
Preheat your oven to 350°F (175°C). Line your 9×5 loaf pan with parchment paper or grease it well. I grease mine with a little oil and then dust it with a teaspoon of flour to make sure nothing sticks. This saves you from fighting with your bread later.
Step 2: Mash the Bananas (2 minutes)
Peel your ripe bananas and put them in the large mixing bowl. Mash them with a fork until they’re mostly smooth. You don’t need it to be a perfect puree—some small lumps are fine. You should have about 1.5 cups of mashed banana. If you have less, add another banana. If you have more, it’s okay, but you might need a tiny bit more flour.
Step 3: Mix the Wet Ingredients (1 minute)
Into the bowl with the bananas, add the milk, vegetable oil, and vanilla extract. Stir them together with your fork or spoon. The mixture will look a bit curdled. That’s normal. Just make sure the oil and milk are combined.
Step 4: Add the Cake Mix (1 minute)
Open your box of yellow cake mix and pour it into the bowl. Don’t sift it. Just dump it in. If you’re adding nuts, chocolate chips, or cinnamon, add them now.
Step 5: Stir It All Together (2 minutes)
Stir everything together with a wooden spoon or spatula. Mix until the dry flour is just incorporated. Do not overmix! If you mix too much, the bread will be tough. It’s okay if there are a few small streaks of flour left. Stop when it looks like a thick, lumpy batter.
Step 6: Bake the Bread (45-55 minutes)
Pour the batter into your prepared loaf pan. Smooth the top with your spoon. Put it in the oven and bake for 45-55 minutes. After 45 minutes, check it. Insert a toothpick into the center. If it comes out clean or with just a few moist crumbs, it’s done. If it has wet batter on it, bake for another 5-10 minutes. Every oven is different, so keep an eye on it.
Step 7: Cool and Slice (10 minutes)
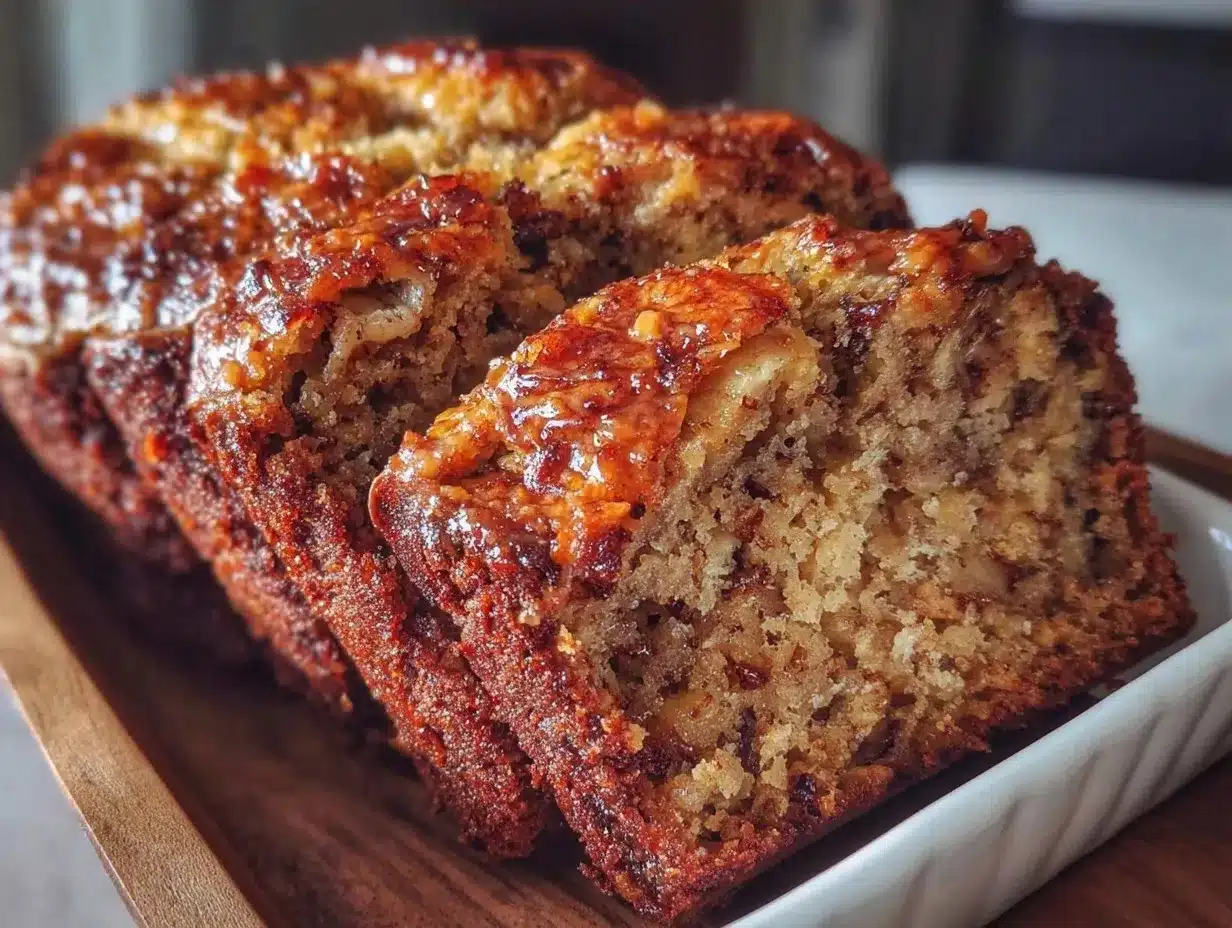
Take the loaf out of the oven and let it cool in the pan for 10 minutes. Then, lift it out using the parchment paper and let it cool on a rack for another 10 minutes. It’s tempting to cut it hot, but it’s very fragile then. Let it set for a bit. Then slice and enjoy.
Total Time: About 1 hour (10 minutes active, 50 minutes baking)
Expert Tips & Tricks
Here’s everything I’ve learned from making this dozens of times. These tips will save you from my mistakes.
The Banana Rule
Black bananas are non-negotiable for flavor. If your bananas are still yellow, they won’t be sweet enough. If you’re in a hurry, bake them on a sheet pan at 300°F for 15 minutes until they turn black. It works like magic.
Don’t Overmix
I know we’re taught to mix until smooth, but with cake mix and bananas, overmixing makes the bread dense. Mix until you *just* see no dry flour. It should look thick and chunky.
The Toothpick Test
Don’t trust the timer. Trust the toothpick. If it comes out with wet batter, keep baking. If it comes out clean, it’s done. If it comes out with moist crumbs, it’s perfect.
Storage Strategy
Store leftovers in an airtight container at room temperature for up to 3 days. If it’s hot outside, put it in the fridge. It’ll last a week there. For longer storage, slice it and freeze it. Wrap individual slices in plastic wrap and put them in a freezer bag. They last 3 months.
Reheating
Reheat slices in the microwave for 20-30 seconds. It brings back the moisture. Or toast them in the toaster oven for a crispy edge. Both are great.
Variations & Substitutions
Once you’ve nailed the basic version, here’s how you can mix it up. I’ve tried all of these.
Chocolate Chip Banana Bread
Add 1/2 cup of semi-sweet chocolate chips to the batter. It’s a classic for a reason. The chocolate melts into pockets of goodness.
Spiced Banana Bread
Add 1 teaspoon of cinnamon, 1/2 teaspoon of nutmeg, and 1/4 teaspoon of ginger. It tastes like fall in every bite. Great for colder months.
Nutty Banana Bread
Add 1/2 cup of chopped walnuts or pecans. If you have nuts that are a bit stale, toast them in the oven for 5 minutes first to revive the flavor.
Gluten-Free Version
Use a gluten-free yellow cake mix. Most major brands make one. It works just as well. Just check the label to make sure it’s certified gluten-free if you have celiac disease.
Dairy-Free Version
Use water instead of milk. Or use almond milk or soy milk. The oil is already dairy-free, so you’re good. It’s slightly less rich, but still delicious.
Vegan Version
Use a vegan cake mix (or a standard one, since most cake mixes are already vegan). Use water or plant-based milk. It’s naturally vegan if you don’t add butter or eggs.
Mini Muffin Version
Pour the batter into a greased muffin tin. Bake for 18-22 minutes. They’re perfect for portion control and packing in lunches.
Serving & Storage
How to Serve
I serve this warm, straight from the oven. It’s best with a cup of black coffee or tea. But it’s also great cold for breakfast on the go. I often pack slices in my lunchbox.
Side Dishes
This bread is sweet, so it pairs well with savory things. I like it with scrambled eggs or a side of bacon. But it’s also fine on its own. It’s a complete snack.
Storage Instructions
Room Temperature: Store in an airtight container for up to 3 days. Keep it in a cool, dry place.
Refrigerator: Store in an airtight container for up to 1 week. It might get a bit denser in the fridge, but it’s still good.
Freezer: Slice the bread, wrap each slice in plastic wrap, and put them in a freezer bag. They last 3 months. Thaw at room temperature or microwave.
Pro Tip
If you’re meal prepping, make a double batch. Freeze half. You’ll thank yourself on busy mornings when you don’t have time to cook.
Nutrition Information
I’m not a nutritionist, but here’s the breakdown if you’re tracking. This is per slice (1/12 of the loaf).
| Nutrient | Amount |
|---|---|
| Calories | 220 |
| Protein | 3g |
| Carbs | 35g |
| Fiber | 1g |
| Sugar | 22g |
| Fat | 8g |
| Saturated Fat | 1g |
| Cholesterol | 0mg |
| Sodium | 250mg |
What’s Good: It’s cheap and easy. The bananas add some potassium and fiber.
What to Know: It’s high in sugar and carbs because of the cake mix. It’s a treat, not a health food. But it’s better than buying a $5 loaf from the store.
Final Thoughts
So that’s my go-to one-bowl banana bread! I’ve probably talked your ear off at this point, but when you make a recipe this often, you have a lot to say about it.
This has saved me from hunger and waste more times than I can count. It’s my answer to “what’s for breakfast” when I’m broke and tired. It’s cheap, it’s easy, and it tastes amazing. My friends are always surprised when I tell them how much it costs to make.
Make it yours! Try different add-ins, swap in your favorite milk, or just enjoy it plain. The best recipes are the ones you adapt to your budget and your tastes.
If you make this, drop a comment and let me know what you think! I love hearing how recipes turn out in your kitchen. And if something doesn’t work, tell me that too—I’m here to help troubleshoot.
Happy cooking! And I hope your kitchen smells half as good as mine does right now.
Frequently Asked Questions
Can I use yellow cake mix instead of vanilla?
Yes! Yellow cake mix has a richer, buttery flavor that works great with bananas. Vanilla is fine too, but yellow is my preference. Just make sure it’s a standard cake mix, not a “baking mix” like Bisquick.
Why did my banana bread turn out dense?
You probably overmixed the batter. Mix until the flour is just incorporated. Also, check your bananas. If they weren’t ripe enough, they won’t have enough moisture and sugar. And make sure your cake mix isn’t expired.
Can I make this ahead for a party?
Absolutely. Make the bread a day ahead and store it in an airtight container. It actually tastes better the next day as the flavors meld. Just slice it and serve it at room temperature.
Can I use self-rising flour instead of cake mix?
You can, but the texture will be different. Cake mix has leavening and sugar already in it. If you use self-rising flour, you’ll need to add sugar and baking powder separately. It’s more work, so I stick with the cake mix for simplicity.
How do I reheat leftovers without it getting dry?
Microwave it for 20-30 seconds. Or toast it in the toaster oven. Both methods bring back the moisture. Don’t bake it in the oven to reheat—it’ll dry out.
Can I double this recipe?
Yes, but you’ll need two loaf pans or a larger pan. If you use two pans, reduce the baking time by 5-10 minutes. Keep an eye on them.
Is this recipe similar to other banana breads?
It’s similar to banana baked oatmeal in terms of simplicity, but this one is a true bread. It’s also a great alternative to banana pudding if you want something more substantial.
Pin This Recipe!
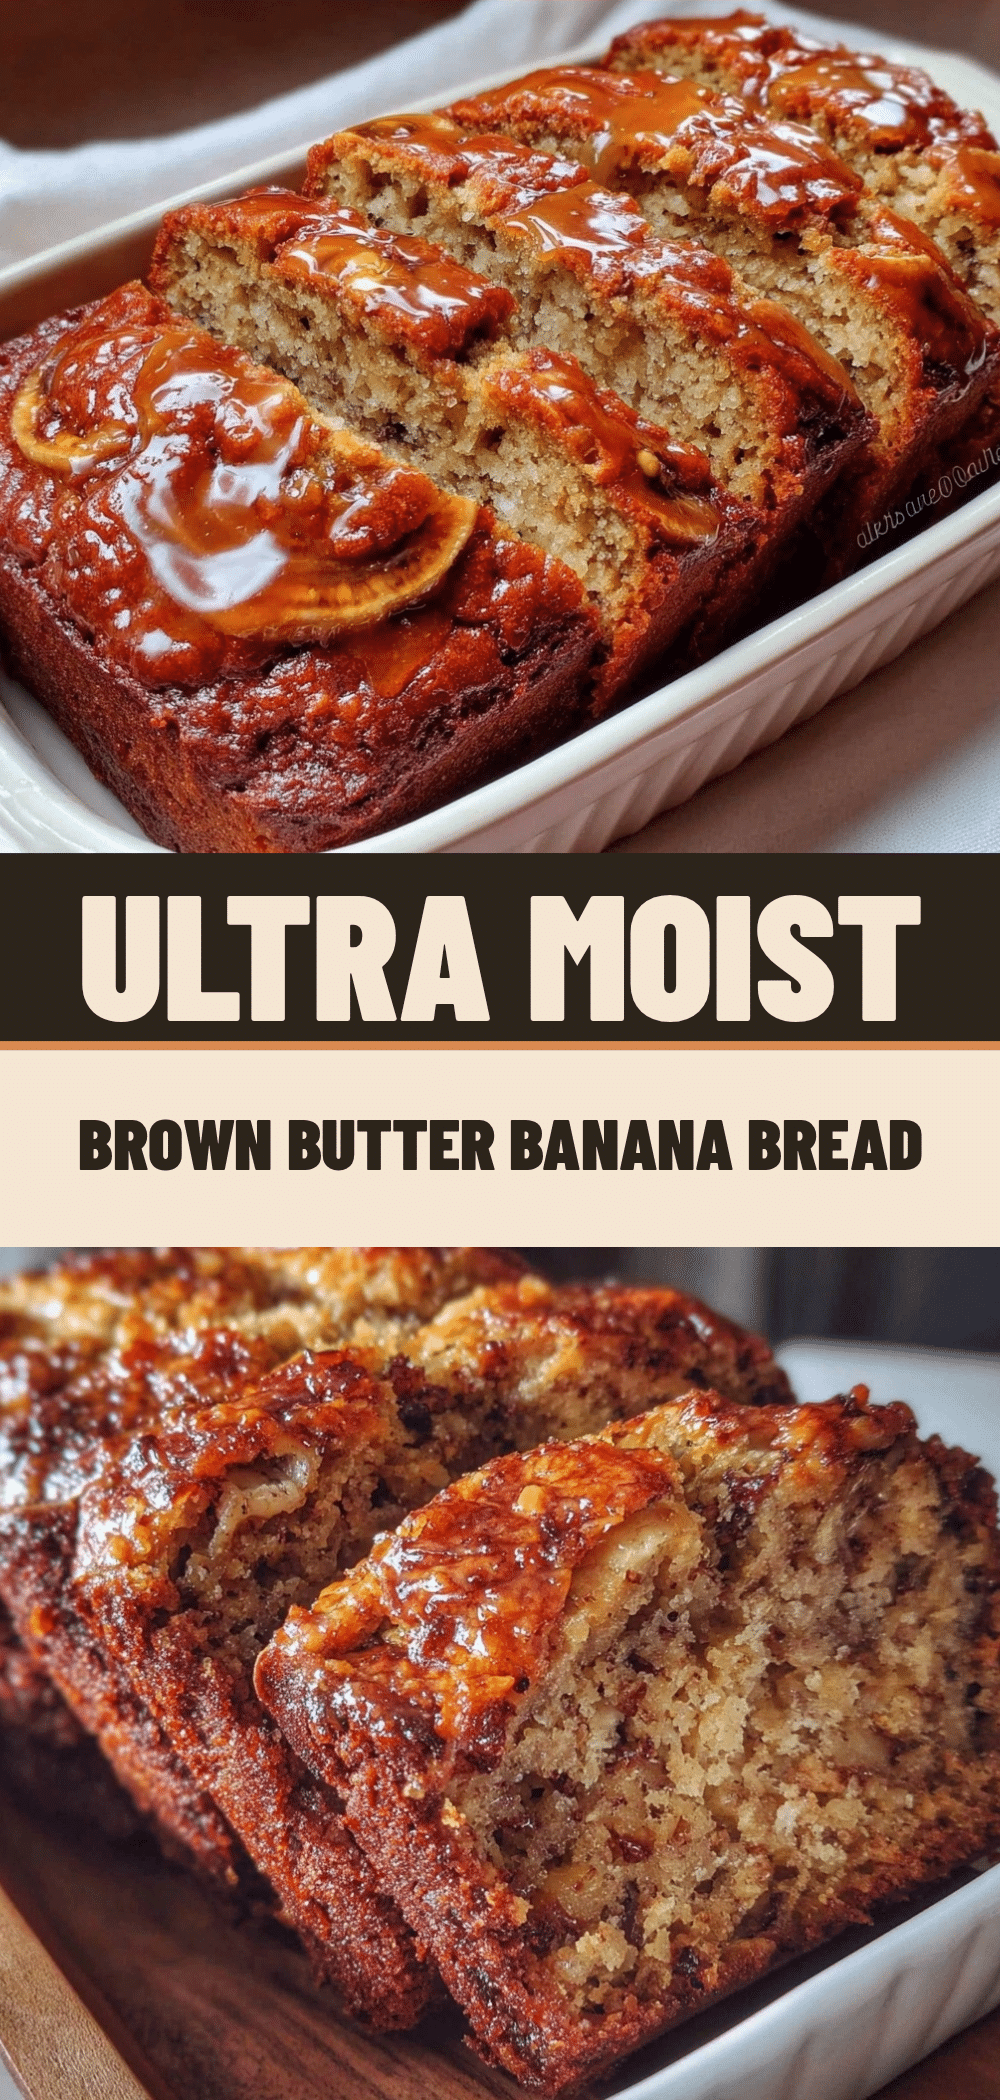
One-Bowl Banana Bread: 5 Cheap Ingredients
- Total Time: 1 hour
- Yield: 12 servings 1x
Description
A budget-friendly, ultra-moist banana bread made with just five simple ingredients in a single bowl. Perfect for using overripe bananas and requiring no special equipment.
Ingredients
- 3 large ripe bananas (about 1.5 cups mashed)
- 15.25 oz box yellow cake mix
- 1/3 cup milk
- 1/3 cup vegetable oil
- 1 teaspoon vanilla extract
- 1/4 teaspoon salt
- Optional: 1/2 cup walnuts or pecans
- Optional: 1/2 cup chocolate chips
- Optional: 1 teaspoon cinnamon
Instructions
- Preheat oven to 350°F (175°C). Line a 9×5 loaf pan with parchment paper or grease well.
- Peel ripe bananas and mash them in a large mixing bowl until mostly smooth.
- Add milk, vegetable oil, and vanilla extract to the mashed bananas. Stir to combine.
- Pour in the yellow cake mix. Add optional nuts, chocolate chips, or cinnamon if desired.
- Stir with a wooden spoon or spatula until just incorporated. Do not overmix.
- Pour batter into the prepared loaf pan and smooth the top.
- Bake for 45-55 minutes, or until a toothpick inserted into the center comes out clean.
- Cool in the pan for 10 minutes, then transfer to a wire rack to cool completely before slicing.
Notes
Use bananas that are completely black on the outside for best flavor and sweetness. Do not overmix the batter to avoid a dense texture. Store leftovers in an airtight container at room temperature for up to 3 days, or freeze slices for up to 3 months.
- Prep Time: 10 minutes
- Cook Time: 50 minutes
- Category: Breakfast
- Cuisine: American
Nutrition
- Serving Size: 1 slice (1/12 of the
- Calories: 220
- Sugar: 22
- Sodium: 250
- Fat: 8
- Saturated Fat: 1
- Carbohydrates: 35
- Fiber: 1
- Protein: 3
Keywords: banana bread, one bowl recipe, budget baking, cheap recipes, easy banana bread, cake mix banana bread, zero waste cooking