It was 11 PM on a rainy Saturday, and my kitchen looked like a flour bomb had exploded inside it. My kids were arguing over who got the last bite of the brownie batter (I told them to stop, but let’s be real—I encouraged it), and I was staring at a pan of brownies that just… weren’t enough. They were good. Chocolatey, fudgy, the works. But they were missing that one thing that makes you close your eyes and sigh: the gooey, melty, slightly charred marshmallow top.
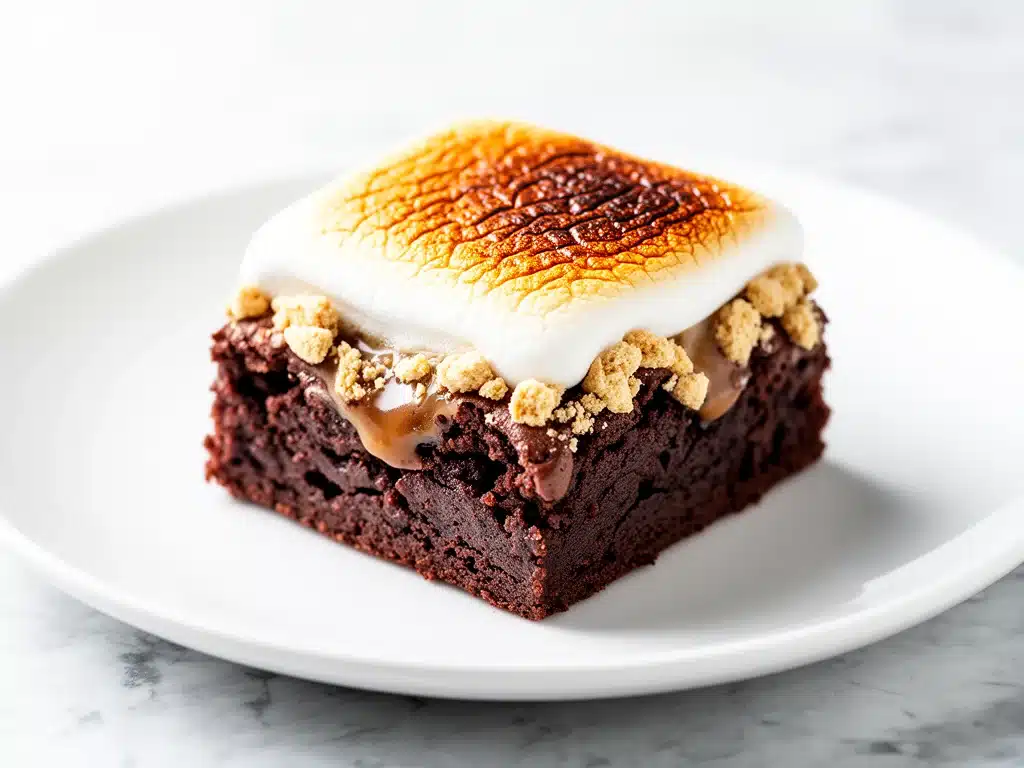
I had a bag of jumbo marshmallows in the pantry and a broiler that hadn’t been used in months. Why not? I dumped the marshmallows on top, threw them under the broiler, and waited for the magic. When I pulled that pan out, the marshmallows were puffed up like clouds, golden brown in spots, and dripping down the sides in sticky, sweet ribbons. The smell hit the house before I even opened the oven door. My son ran in, grabbed a warm square, and mumbled something that sounded like “best. ever.” through a mouthful of goo.
That was the night Gooey S’mores Brownies with Toasted Marshmallow became a permanent fixture in our dessert rotation. We’re talking about three times a week. Yes, three. They’re messy. They’re indulgent. They’re absolutely worth the cleanup. I’ve tested this recipe at least a dozen times—adjusting the chocolate ratio, playing with broiler times, figuring out how to keep the brownies fudgy without turning them into soup—and I think I’ve finally cracked the code. These aren’t just brownies with marshmallows on top. They’re a hybrid. A chocolate-marshmallow-cookie hybrid that hits every single craving center in your brain.
If you’ve ever made back-to-school ham and cheese pretzel roll-ups for a quick lunch, you know I believe in recipes that are simple but high-impact. These brownies are the dessert equivalent. You don’t need fancy equipment. You don’t need to be a pastry chef. You just need chocolate, butter, sugar, eggs, and a willingness to embrace the mess. And trust me, once you taste that first bite—the crisp edge, the fudgy middle, the sticky, toasted marshmallow—you’ll be making these for every birthday, movie night, and “I had a hard day” moment. Let’s get into how to make them right.
Why You’ll Love This Recipe
I’ve made a lot of brownies in my life. Boxed, from scratch, flourless, keto, vegan, gluten-free. But this Gooey S’mores Brownies with Toasted Marshmallow recipe? It’s in a league of its own. Here’s why it’s become my go-to when I need to impress or comfort (or both):
- Zero Fuss, Maximum Reward — Seriously, if you can melt chocolate and stir eggs, you can do this. I’ve made this while juggling a toddler on my hip and a phone call with my mom. The dough comes together in one bowl. No double boiler, no tempering chocolate, no complicated steps. Just dump, stir, bake, toast.
- The Texture Play is Insane — We’re talking about three textures in one bite. The crusty, crackly top layer. The dense, fudgy brownie interior. And then that pillowy, gooey marshmallow cloud on top. It’s not just sweet; it’s a textural experience. My husband says it’s like eating a campfire inside a bakery.
- Perfect for Meal Prep (Sort of) — I know, brownies aren’t exactly “meal prep” food. But hear me out. These keep beautifully in the fridge for up to five days. In fact, I’ve found they’re even better the next day when the marshmallow has settled into the brownie layer. I make a batch on Sunday, and we’re fighting over them until Thursday. I actually keep a separate container for myself because my kids are ruthless.
- Customizable for Any Crowd — Add crushed Oreos? Go for it. Stir in chopped pecans? Done. Use dark chocolate instead of semi-sweet? Absolutely. I’ve made these with white chocolate chips for my niece who hates “dark” stuff, and with peanut butter swirls for my husband who thinks everything is better with peanut butter. The base recipe is flexible enough to handle your family’s quirks.
- Cost-Effective Indulgence — Making these at home costs about $6-8 for a 9×13 pan. Buying s’mores bars at the bakery? That’s easily $20. Plus, you control the sugar level and the quality of the chocolate. I use a decent semi-sweet bar, not the cheapest chips, and it makes a world of difference. The kids don’t notice the price; they just notice the joy.
This recipe is my answer to “what’s for dessert?” when I want something that feels special but doesn’t require a weekend of baking. It’s reliable, it’s delicious, and it brings people together. Seriously, watch your guests fight over the last corner piece. It’s a universal truth.
Ingredients You’ll Need
Here’s the thing about s’mores brownies: the ingredient list looks short, but the quality matters. You’re not hiding flavors here; you’re highlighting them. I’m particular about three things in this recipe, and I’ll tell you exactly why.
For the Brownie Base
Unsalted Butter (1 cup / 226g) — Yes, a full cup. This is what makes them fudgy. Don’t try to cut this down. Melt it completely. I use a microwave-safe bowl and zap it in 30-second intervals, stirring in between. If you use salted butter, reduce the added salt in the recipe by half.
Semi-Sweet Chocolate Chips (1 ½ cups / 270g) — I love Ghirardelli or Guittard here. They melt smoothly and have a rich cocoa flavor. Avoid the super cheap chips; they have stabilizers that make the texture waxy. If you want a deeper chocolate flavor, swap half for chopped chocolate bars.
Sugar (1 ½ cups / 300g, divided) — We use both white and brown sugar. The white sugar gives that crackly top. The brown sugar adds moisture and a hint of caramel. I use 1 cup white and ½ cup brown. Don’t skip the brown sugar; it’s key for the chewiness.
Eggs (3 large) — Room temperature eggs incorporate better into the batter. I take them out of the fridge 20 minutes before I start. If I forget, I warm them in a bowl of hot water for 5 minutes. Cold eggs can seize the chocolate.
All-Purpose Flour (1 cup / 125g) — Just standard flour. Don’t go overboard with measuring; scoop and level. Too much flour = cakey brownies. We want fudgy.
Cocoa Powder (½ cup / 45g) — Unsweetened, natural cocoa powder. I use Hershey’s or Dutch-process if I want a darker color. This boosts the chocolate flavor without adding more sugar.
Salt (½ teaspoon) — Essential to balance the sweetness. Don’t skip it.
For the Topping
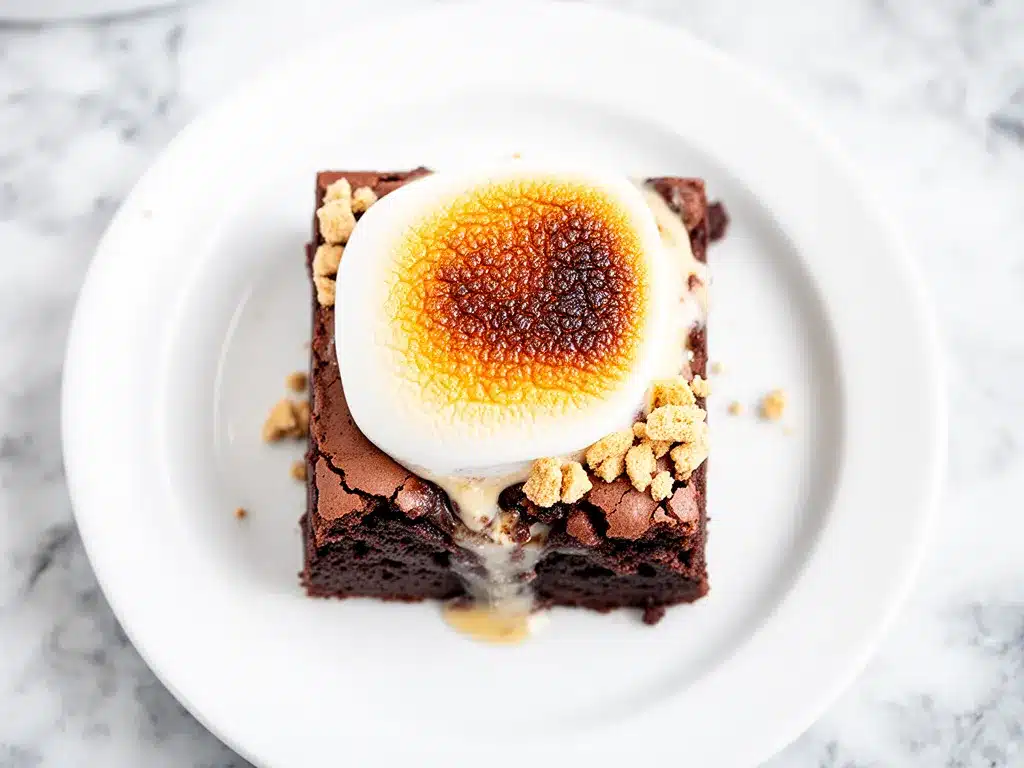
Jumbo Marshmallows (10 oz / 283g) — This is the star. Use jumbo ones, not the mini kind. Mini marshmallows melt too fast and burn before the brownies are done. Jumbo marshmallows give you that perfect puff-and-char. I usually buy a large bag and freeze the extra for future batches.
Optional: Chocolate Drizzle — Melted semi-sweet or white chocolate for drizzling after baking. It’s not necessary, but it looks fancy and adds another layer of flavor.
Optional: Graham Cracker Crumbs — Sprinkled on top before broiling for that authentic s’mores crunch. I do this about 50% of the time. It adds texture, but some people find it too gritty. Taste test your crowd.
Pro Tip: I always keep a bag of jumbo marshmallows in the pantry now. It’s a specific habit I’ve built because this recipe is so frequent. If you don’t have them, you can use regular marshmallows, but you’ll need to double the amount and watch them closely—they melt faster.
Equipment Needed
You don’t need fancy gadgets for this. Here’s what I actually use, and what works:
9×13 Inch Baking Pan — I use a metal pan, not glass. Metal conducts heat better and gives you that crispy edge. Glass can make the edges undercooked. If you only have glass, reduce the oven temp by 25°F.
Microwave-Safe Bowl — For melting the butter and chocolate. I prefer this over a double boiler because it’s faster and easier to clean. Just stir frequently to avoid burning.
Mixing Bowl — A large one. I use a 5-quart bowl. It needs to be big enough to hold the melted chocolate mixture and the dry ingredients without spilling.
Whisk — For mixing the eggs and sugar. A whisk incorporates air better than a spoon, which helps with the crackly top.
Spatula — A sturdy silicone spatula for folding in the flour and chocolate chips. You need to scrape the sides and bottom to get a uniform batter.
Broiler — Your oven’s broiler is essential for the toasted marshmallow top. Make sure it works! If your broiler is inconsistent, you can use a kitchen torch, but that takes longer and requires more skill. I stick with the broiler.
Parchment Paper — Line your pan with parchment, leaving an overhang on the sides. This is non-negotiable for easy removal. I call it “the sling.” It saves you from digging brownies out of corners.
Small Saucepan or Microwave Cup — For melting the chocolate drizzle, if you choose to use it.
Tool Tip: I’m obsessed with my chewy banana oat breakfast cookies recipe, which also uses a simple mixing bowl and whisk setup. I like that these brownies use the same basic tools. It means less cleanup and less clutter in my kitchen.
How to Make It: Step-by-Step
Alright, let’s make these! I’m walking you through exactly how I do it, including the little tricks I’ve picked up over dozens of batches.
Step 1: Prep Your Pan and Oven (5 minutes)
Preheat your oven to 350°F (175°C). Line your 9×13 inch pan with parchment paper, leaving a 2-inch overhang on the long sides. This makes lifting the brownies out super easy. Grease the parchment lightly with butter or cooking spray. Set your oven rack to the middle position for baking, but remember you’ll move it to the top for the broiling step later.
Step 2: Melt the Chocolate and Butter (3 minutes)
In a microwave-safe bowl, combine the melted butter and semi-sweet chocolate chips. Microwave in 30-second intervals, stirring well after each interval, until smooth and glossy. This should take about 1-2 minutes total. Don’t let it boil or burn. If you’re using a stovetop, use a double boiler and stir constantly. Set aside to cool slightly.
Step 3: Mix the Wet Ingredients (2 minutes)
To the melted chocolate mixture, add the white sugar, brown sugar, eggs, and vanilla extract. Whisk vigorously for about 1-2 minutes. You want the mixture to look shiny and slightly thickened. This step is crucial for that crackly top. If you rush this, you won’t get the same texture. The sugar needs to dissolve into the fat.
Step 4: Add the Dry Ingredients (2 minutes)
Stir in the cocoa powder and salt. Then, add the flour. Fold gently with a spatula until just combined. Do not overmix! Once the flour disappears, stop. Overmixing develops gluten, which makes brownies cakey instead of fudgy. Now, fold in the chocolate chips. Reserve a small handful for sprinkling on top later if you like extra chocolate pockets.
Step 5: Bake the Brownies (25-30 minutes)
Pour the batter into the prepared pan and spread it evenly. Bake for 25-30 minutes. The test for doneness: insert a toothpick into the center. It should come out with moist crumbs attached, not wet batter, but not completely clean either. If it’s clean, they’re overbaked. We want fudgy. If the edges are set but the center is still jiggly, they’re done.
Step 6: Add the Marshmallows
Remove the pan from the oven. Immediately pile the jumbo marshmallows over the hot brownies. They’ll start to melt right away. Spread them out to cover the entire surface. Don’t worry if there are gaps; they’ll melt and fill in. Let them sit for 2-3 minutes to soften.
Step 7: Broil to Perfection (2-4 minutes)
Move the oven rack to the top position. Turn on the broiler. Watch the pan closely! Broilers vary wildly. Some burn in 60 seconds; others take 5 minutes. Start checking at 2 minutes. You want the marshmallows puffed and golden brown in spots. If they’re just white, give them another minute. If they’re dark brown, they’re done. Pull them out the second they look perfect.
Step 8: Cool and Slice (30+ minutes)
Let the brownies cool in the pan for at least 30 minutes. This is the hardest part. The marshmallows will be extremely hot and sticky. If you cut them too soon, they’ll tear and look messy. Once cooled, use the parchment sling to lift the entire block out of the pan. Slice into squares. If you’re drizzling with chocolate, do it now.
Troubleshooting: If the marshmallows burn, your broiler was too hot or too close. Next time, start checking at 1 minute. If the brownies are undercooked, the center was too thick. Next time, reduce the baking time by 2-3 minutes. If the marshmallows don’t puff, they were old or stale. Always use fresh marshmallows.
Expert Tips & Tricks
Here’s everything I’ve learned from making these dozens of times. These tips will save you from my mistakes.
Don’t Skip the Whisking
I know it feels like extra work, but whisking the sugar and eggs into the chocolate mixture for a full 2 minutes creates that shiny, crackly top. If you just stir it in, you’ll get a matte, cakey top. The agitation matters. I set a timer. No excuses.
Watch the Broiler Like a Hawk
Broilers are unpredictable. I leave the oven door cracked open slightly (if your oven allows it) to keep an eye on the marshmallows. They go from golden to charcoal in seconds. I’ve lost more marshmallows to this than I care to admit. When in doubt, pull them out. You can always broil for another 30 seconds. You can’t un-burn them.
Use Fresh Marshmallows
Old marshmallows lose their moisture and don’t puff up. They just melt into a sticky mess. If your bag has been open for months, toss it. Fresh marshmallows are airy and responsive to heat. This is the difference between a cloud and a glue trap.
Cool Completely Before Cutting
I know, I know. You want to eat them now. But hot brownies are messy. The marshmallows are liquid gold, and they’ll stick to your knife and your fingers. Let them cool for at least 30 minutes. The texture sets, and the slices come out clean. Trust me on this.
Freeze for Later
These freeze beautifully. Wrap individual squares in plastic wrap, then put them in a freezer bag. They last up to 3 months. Thaw at room temperature for 30 minutes. The marshmallows might lose a little puff, but the flavor is still amazing. I do this when I make a double batch.
Pro Trick: The Salt Flake Finish
Right after broiling, sprinkle a tiny bit of flaky sea salt (like Maldon) on top. The salt contrasts with the sweet marshmallow and chocolate. It elevates the flavor profile from “kid dessert” to “grown-up indulgence.” My friends always ask what the secret ingredient is. It’s just salt.
Variations & Substitutions
Once you’ve nailed the basic version, here’s how you can mix it up. I’ve tried all of these.
Mini S’mores Version
Use mini marshmallows instead of jumbo. You’ll need about 20 oz. Sprinkle them over the brownies before baking. They’ll melt into the surface, creating a gooey layer rather than a puffy top. Great for a more uniform texture.
Peanut Butter Swirl
Before adding the marshmallows, dollop spoonfuls of peanut butter over the hot brownies. Swirl with a knife. Then add the marshmallows. The salty-sweet combo is incredible. My husband’s favorite variation.
Dark Chocolate Upgrade
Use 70% dark chocolate chips and dark cocoa powder. This reduces the sweetness and adds a sophisticated bitterness. Great for adults who find regular brownies too sugary.
Gluten-Free Option
Swap the all-purpose flour for a 1:1 gluten-free flour blend (like Bob’s Red Mill). The texture is almost identical. I’ve tested this, and my gluten-free friend couldn’t tell the difference. Just make sure your chocolate chips and marshmallows are certified gluten-free.
Vegan Version
Use vegan butter, vegan chocolate chips, and flax eggs (1 tbsp ground flax + 3 tbsp water per egg). Use vegan marshmallows (like Dandies). The texture is slightly different—less fudgy, more cakey—but still delicious. It’s a good option for vegan guests.
Cookie Butter Twist
Swirl in Nutella or Biscoff spread before adding the marshmallows. It adds a caramel-like depth that pairs perfectly with the toasted marshmallow.
Serving & Storage
How to Serve
I usually serve these warm, right out of the oven. The marshmallows are still gooey, and the brownies are soft. But they’re also great at room temperature. If you’re having a party, cut them into small squares. They’re rich, and people tend to eat more than they realize. I’ve had guests complain they were too filling (I didn’t believe them until I saw the empty plate).
Side Dishes: These don’t need sides. They’re a complete dessert. But if you want a contrast, serve with a cold glass of milk or a scoop of vanilla ice cream. The cold cream cuts through the sweetness. Or serve with a simple green salad if you’re feeling fancy (don’t judge me; it works).
Storage Instructions
Refrigerator: Store in an airtight container for up to 5 days. The marshmallows will harden slightly in the fridge. To soften, let them sit at room temperature for 20 minutes before eating. Or microwave a square for 10 seconds.
Freezer: Wrap tightly in plastic wrap, then foil. Freeze for up to 3 months. Thaw at room temperature. Do not refreeze after thawing.
Reheating: Microwave for 15-20 seconds to melt the marshmallows again. The oven doesn’t work well for reheating because it dries out the edges. Stick to the microwave.
Pro Tip: If you’re making these for a crowd, bake them in two 8×8 pans instead of one 9×13. They bake faster and are easier to store. Plus, you get more crispy edges per square. I prefer this method for parties.
Nutrition Information
I’m not a nutritionist, but here’s the breakdown if you’re tracking. Keep in mind, this is an indulgent dessert, so portions matter.
Per Serving (based on 16 squares):
- Calories: 320
- Protein: 4g
- Carbs: 42g
- Fiber: 2g
- Sugar: 32g
- Fat: 16g
- Saturated Fat: 9g
- Cholesterol: 35mg
- Sodium: 120mg
What’s Good: The chocolate provides some antioxidants. The eggs add protein. It’s filling, so you don’t need to eat a whole pan.
What to Know: High in sugar and saturated fat. This is a treat, not a health food. Enjoy in moderation. If you want to lighten it up, reduce the sugar by ¼ cup and use dark chocolate. It’s still sweet but less cloying.
Final Thoughts
So that’s my go-to Gooey S’mores Brownies with Toasted Marshmallow! I’ve probably talked your ear off at this point, but when you make a recipe this often, you have a lot to say about it.
This has saved dessert nights more times than I can count. It’s my answer to “what’s for dessert?” when I want something that feels special but doesn’t require a weekend of baking. My kids are happy, my husband’s happy, and I’m happy because I’m not stressed about cooking. It’s reliable, it’s delicious, and it brings people together.
Make it yours! Try different add-ins, swap in your favorite chocolate, adjust the marshmallow amount. The best recipes are the ones you adapt to your family’s tastes. If you make this, drop a comment and let me know what you think! I love hearing how recipes turn out in your kitchen. And if something doesn’t work, tell me that too—I’m here to help troubleshoot.
Happy baking! And I hope your kitchen smells half as good as mine does right now.
Frequently Asked Questions
Can I use regular marshmallows instead of jumbo?
You can, but you’ll need to use more of them. Jumbo marshmallows puff up and hold their shape better. Regular marshmallows melt faster and can burn before they puff. If you use regular, spread them out and watch them closely. You might need to broil for a shorter time. I recommend jumbo for the best texture, but regular works in a pinch.
Why did my marshmallows burn?
Broilers vary wildly. Some are very hot, some are gentle. Start checking your brownies at 2 minutes. If they’re browning too fast, pull them out and let them sit for a minute, then go back in. Or move the pan to a lower rack. The key is to watch them, not set a timer and walk away. Also, make sure your marshmallows are fresh. Old ones burn easier.
Can I make these ahead of time?
Yes! Bake the brownies up to 2 days ahead. Store them in an airtight container at room temperature. When you’re ready to serve, add the marshmallows and broil just before serving. This is actually my preferred method because it keeps the marshmallows fresh and puffy. If you store them with the marshmallows on top, they can get sticky and hard.
Why are my brownies cakey instead of fudgy?
Too much flour or overmixing. Make sure you’re measuring the flour correctly (spoon and level, don’t scoop). Also, don’t overmix the batter once you add the flour. Fold it in until just combined. And make sure you’re not overbaking. The toothpick should have moist crumbs, not be clean. If you bake them too long, they’ll dry out.
Can I freeze the brownies with the marshmallows on top?
I don’t recommend it. The marshmallows can get icy and lose their texture. It’s better to freeze the brownies plain, then add fresh marshmallows and broil when you’re ready to eat. If you must freeze them with marshmallows, wrap them very tightly to prevent freezer burn. Thaw at room temperature, and they’ll be less fluffy but still tasty.
Can I use dark chocolate instead of semi-sweet?
Absolutely. Dark chocolate will make the brownies less sweet and more intense. I use 70% dark chocolate for a richer flavor. Just be aware that the overall sweetness of the dessert will be lower, so you might want to add a little more sugar if you like it sweeter. It’s a great option for adults who find regular brownies too sugary.
How do I store leftovers?
Store in an airtight container at room temperature for up to 3 days, or in the fridge for up to 5 days. The marshmallows will harden in the fridge, so let them sit at room temperature for 20 minutes before eating. You can also microwave them for 10-15 seconds to soften the marshmallows. Do not freeze for more than 3 months, as the texture will suffer.
Pin This Recipe!
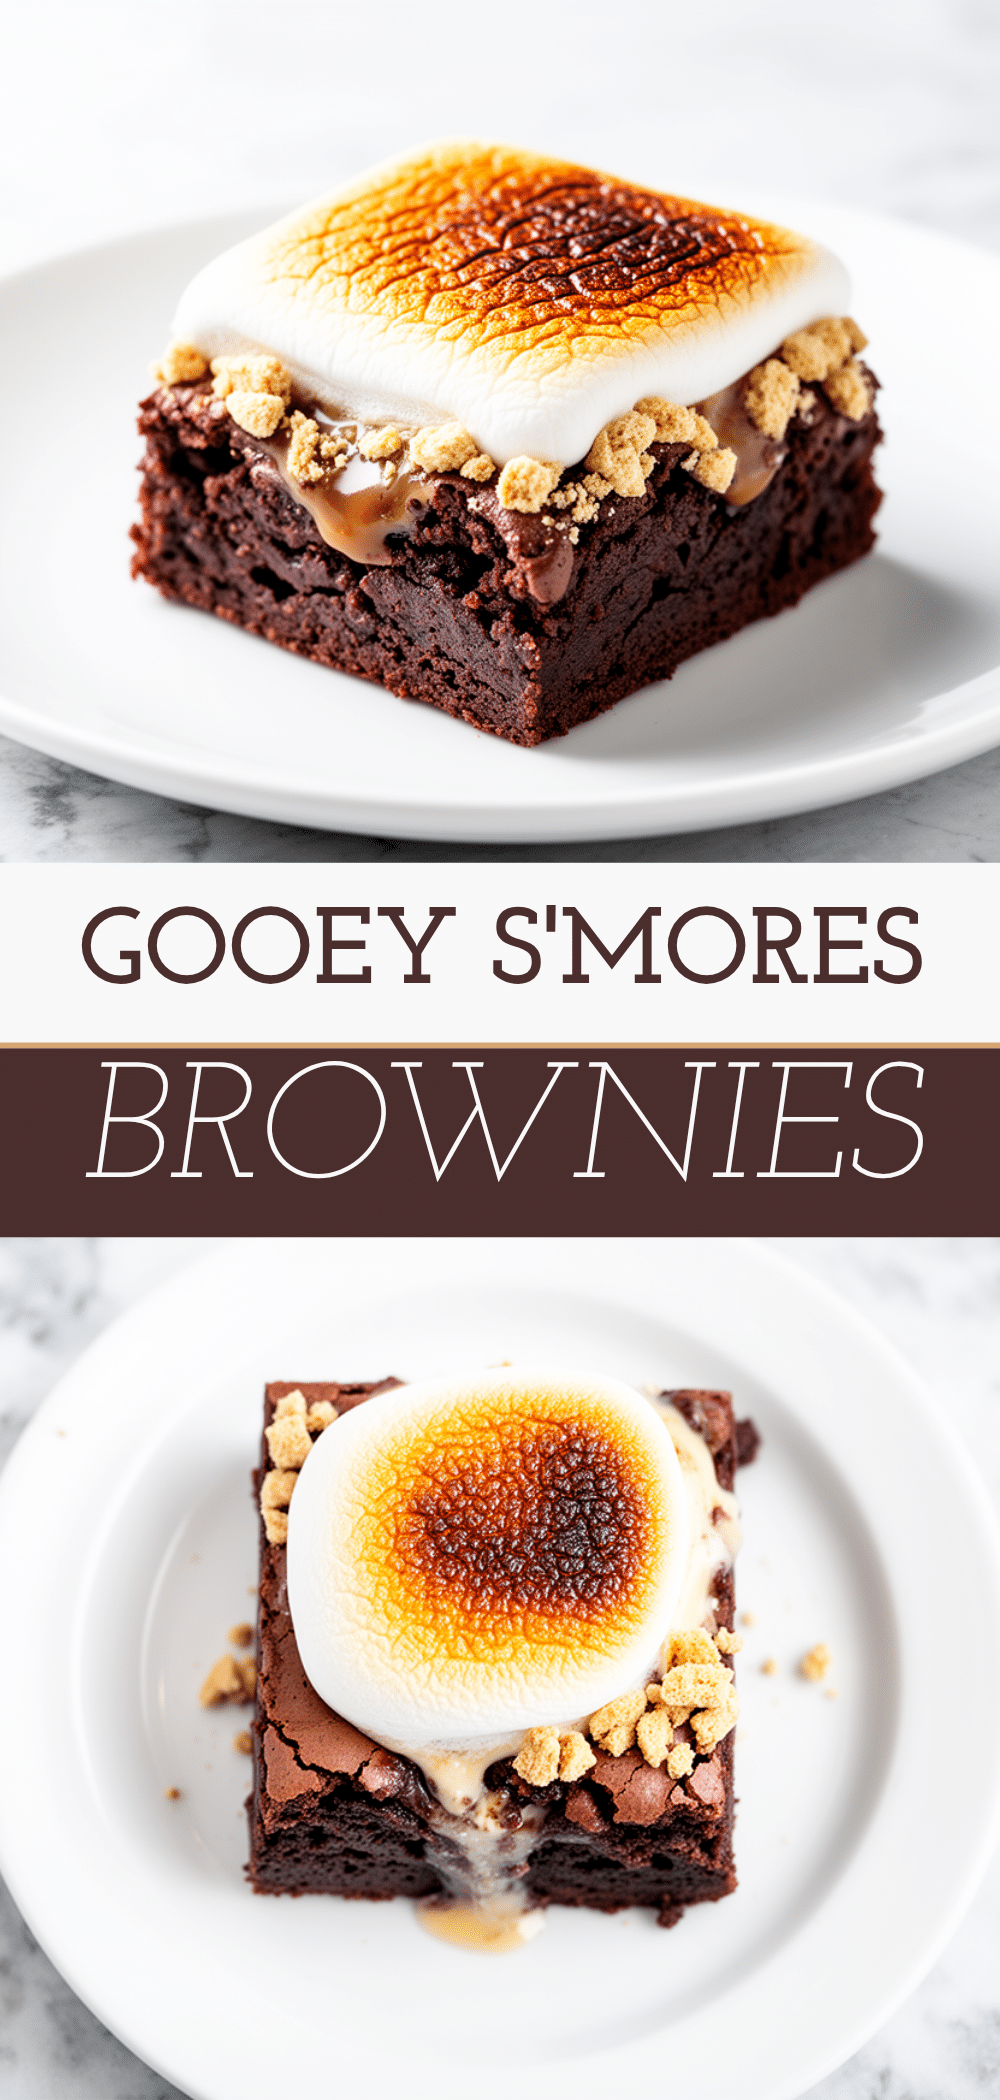
Gooey S’mores Brownies with Toasted Marshmallow
- Total Time: 40 minutes
- Yield: 16 servings 1x
Description
Fudgy chocolate brownies topped with jumbo marshmallows that are broiled until puffed and golden brown, creating a hybrid dessert with crackly, fudgy, and gooey textures.
Ingredients
- 1 cup (226g) unsalted butter
- 1 ½ cups (270g) semi-sweet chocolate chips
- 1 cup white sugar
- ½ cup brown sugar
- 3 large eggs, room temperature
- 1 teaspoon vanilla extract
- 1 cup (125g) all-purpose flour
- ½ cup (45g) unsweetened cocoa powder
- ½ teaspoon salt
- 10 oz (283g) jumbo marshmallows
- Optional: Chocolate drizzle
- Optional: Graham cracker crumbs
- Optional: Flaky sea salt for finishing
Instructions
- Preheat oven to 350°F (175°C). Line a 9×13 inch baking pan with parchment paper, leaving a 2-inch overhang on the long sides, and grease lightly.
- In a microwave-safe bowl, combine butter and chocolate chips. Microwave in 30-second intervals, stirring until smooth and glossy. Set aside to cool slightly.
- Whisk white sugar, brown sugar, eggs, and vanilla extract into the melted chocolate mixture vigorously for 1-2 minutes until shiny and thickened.
- Stir in cocoa powder and salt. Add flour and fold gently with a spatula until just combined. Do not overmix. Fold in reserved chocolate chips if using.
- Pour batter into prepared pan and spread evenly. Bake for 25-30 minutes until a toothpick inserted in the center comes out with moist crumbs.
- Remove from oven and immediately pile jumbo marshmallows over the hot brownies, spreading to cover the surface. Let sit for 2-3 minutes to soften.
- Move oven rack to top position and turn on broiler. Broil marshmallows for 2-4 minutes, watching closely, until puffed and golden brown in spots.
- Let brownies cool in the pan for at least 30 minutes before slicing. Drizzle with chocolate or sprinkle with sea salt if desired.
Notes
Use fresh marshmallows for best puffing results. Do not overmix the batter to maintain fudgy texture. Watch the broiler closely as it can burn marshmallows quickly. Cool completely before cutting to prevent mess. Can be frozen for up to 3 months without marshmallows.
- Prep Time: 10 minutes
- Cook Time: 30 minutes
- Category: Dessert
- Cuisine: American
Nutrition
- Serving Size: 1 square
- Calories: 320
- Sugar: 32
- Sodium: 120
- Fat: 16
- Saturated Fat: 9
- Carbohydrates: 42
- Fiber: 2
- Protein: 4
Keywords: s'mores brownies, toasted marshmallow, fudgy brownies, easy dessert, broiled marshmallows, chocolate dessert, family friendly