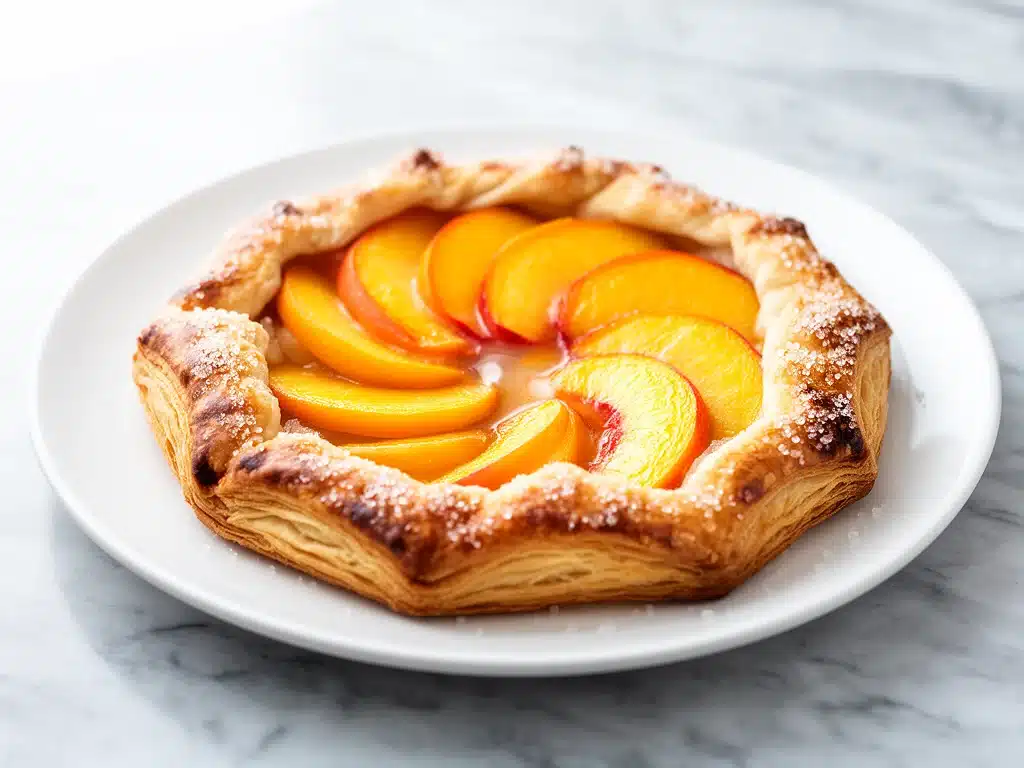
I have a confession to make: I used to be terrified of fruit tarts. Not just nervous—actually, full-on panic-inducing scared. Every time I tried to make a pie, the crust would shrink into the pan like a shy turtle, or worse, it would turn into a soggy mess the second I added the filling. I spent years buying those frozen crusts from the grocery store, telling myself it was “efficient,” when really, I was just avoiding the heartbreak of a broken pastry.
That all changed last summer, when I stumbled upon the concept of a galette. It’s essentially a free-form tart, but the beauty is in the name. It’s rustic. It’s forgiving. And if you mess up the edges? Who cares? It’s supposed to look imperfect. That night, I threw together a fresh peach galette using overripe peaches from my neighbor’s tree, some butter I actually cared about, and zero pretension. I expected a mediocre dessert. What I got was a golden, flaky masterpiece that had my husband asking for the recipe before the first slice was even finished.
Since then, I’ve made this fresh peach galette probably fifty times. Fifty. I’ve tested different types of flour, different butter temperatures, and different ways to seal the edges (spoiler: you don’t need to seal them perfectly). I’ve learned that the secret isn’t fancy technique—it’s patience and good butter. This recipe has become my go-to for summer entertaining, but it’s also the thing I make when I need a quick win after a long day. It looks like you spent hours in the kitchen, but it’s actually one of the easiest easy homemade flaky pie recipes you’ll ever try. If you’ve been intimidated by pie crusts, this is your invitation to stop buying frozen ones and start making something that actually tastes like summer.
Why You’ll Love This Recipe
There are a few reasons this fresh peach galette has taken over my weekend routine, but let’s be real—there’s one main reason. It works. Every single time. Here’s why you’re going to want to add this to your rotation immediately.
It’s Forgiving as Hell — Unlike a traditional pie that requires a double crust, a lattice top, and a level of precision that feels like bomb disposal, a galette is just a circle of dough with fruit in the middle. You fold the edges over. If it looks messy? That’s the point. It’s rustic charm. I’ve made these with lopsided edges and they still taste incredible. It takes the pressure off being a “perfect” baker.
Zero Pie Dish Required — This is huge for me. I don’t have room in my cabinet for a pie plate I use twice a year. With a galette, you just use a standard baking sheet. Less cleanup, less storage, less stress. I can make this on a Tuesday night after work and not have to hunt down a specific pan.
The Flavor is Unmatched — Because the crust is exposed, you get a beautiful crunch that you just don’t get with a bottom crust. Plus, the juices from the peaches caramelize on the baking sheet, creating these little pockets of sticky, sweet syrup that are honestly dangerous. I’ve lost count of how many times I’ve scraped the pan with a spoon after serving.
It’s Actually Quick — Don’t let the “homemade” label fool you. If you use a food processor (which I highly recommend), the dough comes together in minutes. The rest is just chilling time and baking time. You’re looking at about 20 minutes of active work. Compare that to the 30 minutes it takes to drive to a bakery and wait in line for a slice of peach pie, and this wins every time.
It Pairs Perfectly with Other Bakes — If you’re making a spread for a party, this sits beautifully next to other treats. It has the same buttery richness as my chewy banana oat breakfast cookies, but in a savory-sweet tart form. It’s versatile enough to stand alone or be part of a larger dessert table.
Ingredients You’ll Need
Here’s the thing about galettes: the ingredient list is short, but the quality of each item matters more than you think. You don’t need fancy imports, but you do need to respect the basics. I’m particular about three things here, and I’ll tell you exactly why.
For the Flaky Butter Crust
All-purpose flour (2 ½ cups / 315g) — This is your base. Don’t swap in whole wheat unless you want a dense, cracker-like texture. For that shattering, tender flake, stick to standard all-purpose. I like King Arthur Brand because it has a consistent protein content that helps with structure without getting tough.
Unsalted butter (1 cup / 2 sticks / 226g, cold) — This is non-negotiable. Cold butter creates steam when it hits the oven, which lifts the layers of dough. If your butter is soft, the crust will be greasy and dense. I keep a block of butter in the fridge and grate it into the flour while it’s still frozen-hard. It’s the easiest way to ensure those little butter bits stay intact.
Heavy cream (4-6 tablespoons / 60-90ml) — Some recipes use ice water, but I’ve found that heavy cream adds just enough fat to make the crust tender and rich. It also helps the dough come together faster, so you don’t overwork it. Use full-fat cream. Low-fat cream makes the dough dry.
Salt (1 teaspoon / 6g) — Salt isn’t just for flavor; it strengthens the gluten slightly and balances the sweetness. Don’t skip it. I use kosher salt because it’s easier to pinch, but table salt works too—just use a bit less.
Granulated sugar (1 tablespoon / 12g) — Just a touch. It helps with browning and balances the tartness of the fruit. You don’t want the crust to be sweet; the peaches will handle that.
For the Peach Filling
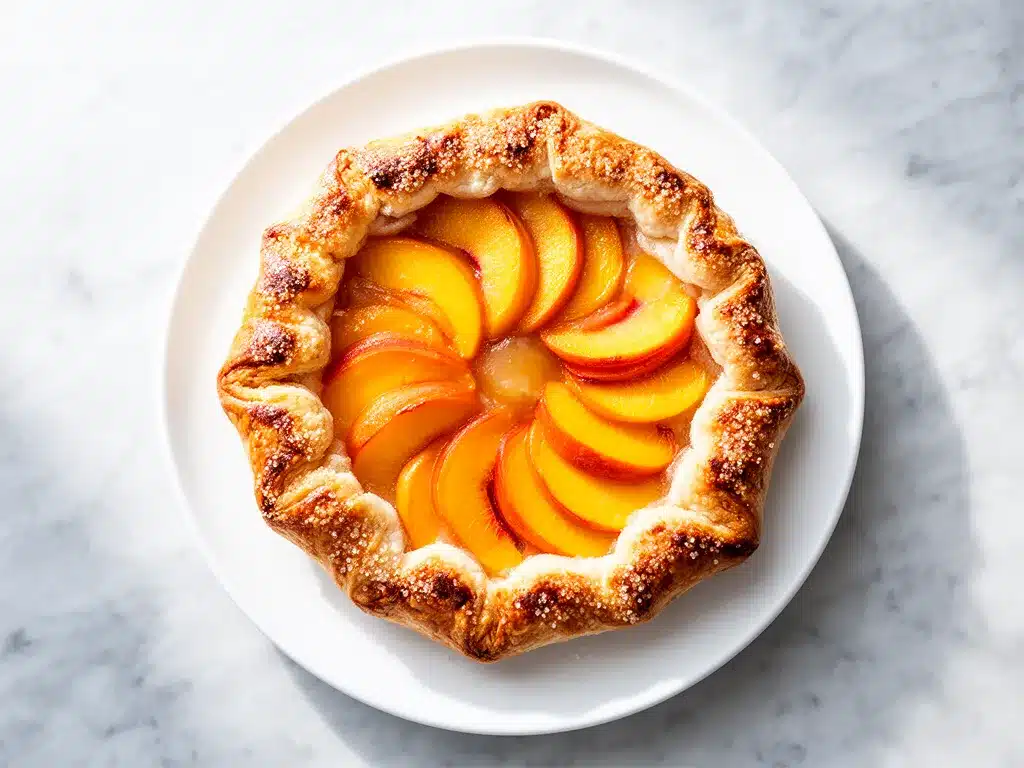
Ripe peaches (4-5 medium / about 1.5 kg) — This is the star. Look for peaches that are fragrant and yield slightly to pressure. If they’re hard, they’re not ripe. If they’re mushy, they’re overripe. You want that perfect sweet-tart balance. Yellow peaches are juicier and sweeter, while white peaches are more floral and delicate. I prefer yellow for this because they hold up better in the oven.
Lemon juice (1 tablespoon / 15ml) — Freshly squeezed. This prevents the peaches from browning and adds a bright acidity that cuts through the richness of the butter. It’s a small step, but it makes a big difference in the final flavor profile.
Granulated sugar (¼ cup / 50g) — Depending on how sweet your peaches are, you might need less or more. Taste a slice before you add it. If they’re super sweet, cut this down to 2 tablespoons.
Cornstarch (2 tablespoons / 16g) — This is the thickener. Peaches release a lot of juice. Without cornstarch, you’ll end up with a soggy bottom and a puddle on your baking sheet. Cornstarch absorbs that liquid and turns it into a glossy, jam-like sauce.
Vanilla extract (1 teaspoon / 5ml) — Just a hint. It adds warmth and depth. I use pure vanilla, not imitation, because the flavor is subtle enough to notice.
For the Finish
Coarse sugar (for sprinkling) — This gives you that bakery-style crunch on top. Sanding sugar works too, but coarse sugar looks more rustic and professional.
Heavy cream (for brushing) — Brushing the crust with cream before baking helps it turn golden brown and gives it a shiny, appetizing finish.
Equipment Needed
You don’t need a fancy kitchen to make this. Here’s what I actually use, along with honest opinions on what’s necessary.
Food Processor — I’m a huge advocate for this. It cuts the butter into the flour quickly and evenly without warming it up with your hands. If you don’t have one, a pastry cutter works, but it takes more arm strength and time. A food processor is a game-changer for consistency.
Large Baking Sheet — A standard 13×18 inch sheet pan. Make sure it’s heavy-duty so it doesn’t warp in the oven. I use a half-sheet pan that fits perfectly in my oven. Line it with parchment paper for easy cleanup—trust me, those caramelized peach juices will stick.
Parchment Paper — Essential. It prevents sticking and makes transferring the galette in and out of the oven a breeze. I never bake a galette directly on the metal.
Rolling Pin — Any standard rolling pin works. I like a wooden one because it doesn’t stick to the dough as much as plastic can.
Sharp Knife — For slicing the peaches. A paring knife is fine for smaller peaches, but a chef’s knife gives you more control for larger ones.
Pastry Brush — For brushing the cream on the crust. A silicone brush is easier to clean than bristle, but both work.
Mixing Bowls — One large bowl for the dough, one medium for the filling. Keep them simple.
How to Make It: Step-by-Step
Alright, let’s make this! I’m walking you through exactly how I do it, including the little tricks I’ve picked up over dozens of attempts.
Step 1: Make the Dough (5 minutes)
Start by pulsing the flour, salt, and sugar in your food processor for a few seconds to combine. Add the cold, cubed butter. Pulse about 15-20 times until the mixture looks like coarse meal with some pea-sized bits of butter remaining. These butter bits are crucial—they create the flakes. Don’t over-process until it’s a fine crumb.
Step 2: Bind the Dough (2 minutes)
With the processor running, slowly drizzle in the heavy cream, one tablespoon at a time. Stop and check the texture after each addition. You want the dough to just start to come together when you pinch it. It might look shaggy at first, but keep going. Add up to 6 tablespoons if needed. Do not over-mix. Once it forms a rough ball, stop.
Step 3: Chill the Dough (30 minutes)
Turn the dough out onto a clean surface. Divide it into two uneven disks—one slightly larger for the bottom crust, one smaller for the top if you’re doing a double crust (but for a galette, you usually just use one disk). Wrap each tightly in plastic wrap. Chill in the fridge for at least 30 minutes, or up to 2 days. This relaxes the gluten and re-chills the butter. If you skip this, your crust will shrink and be tough.
Step 4: Prep the Peaches (10 minutes)
While the dough chills, peel and slice the peaches. If you’re struggling to peel them, score an X on the bottom, drop them in boiling water for 30 seconds, then plunge into ice water. The skins will slip right off. Slice them into ¼-inch thick wedges. Toss them in a bowl with the lemon juice, sugar, cornstarch, and vanilla. Let them sit for 10 minutes so the sugar draws out some juices.
Step 5: Roll and Fill (10 minutes)
Preheat your oven to 400°F (200°C). Line your baking sheet with parchment paper. On a floured surface, roll out the larger dough disk into a 12-inch circle. It doesn’t need to be perfect. Transfer it to the baking sheet. Arrange the peaches in the center, leaving a 2-inch border around the edges. Pile them slightly in the middle to create a mound. This helps contain the juices.
Step 6: Fold the Crust (5 minutes)
This is the fun part. Fold the edges of the dough over the peaches, pleating as you go. You don’t need to cover the fruit completely—in fact, leaving some exposed is beautiful and helps the fruit caramelize. If the dough tears, just patch it with your fingers. It’s rustic, remember? Brush the folded edges with heavy cream and sprinkle generously with coarse sugar.
Step 7: Bake (35-40 minutes)
Bake on the middle rack for 35-40 minutes. You’re looking for a golden-brown crust and bubbling, caramelized peach juices. The juices should be thick and syrupy, not watery. If the edges are browning too fast, tent them with foil. Let it cool on the pan for at least 20 minutes before slicing. This allows the filling to set so it doesn’t run out when you cut it.
Expert Tips & Tricks
Here’s everything I’ve learned from making this dozens of times. These tips will save you from my mistakes.
Keep Everything Cold — This is the golden rule of pie crust. If your butter melts before it hits the oven, you lose the flakiness. Work quickly. If your dough feels warm, put it back in the fridge for 10 minutes. I even chill my bowl and food processor blade beforehand.
Don’t Skimp on the Cornstarch — Peaches are juicy. If you’re tempted to reduce the cornstarch, don’t. It’s the difference between a gooey, delicious filling and a soggy, sad bottom crust. If you’re using very dry peaches, you can reduce it to 1 tablespoon, but 2 is safe for most varieties.
Use a Parchment Paper Guide — Draw a 10-inch circle on the back of your parchment paper before you flip it over. This gives you a visual guide for rolling your dough and piling the fruit. It keeps everything centered.
Bake on a Preheated Sheet — For extra-crispy bottoms, put your empty baking sheet in the oven while it preheats. Then, slide the galette (on its parchment) onto the hot sheet. This gives an immediate burst of heat to the bottom crust.
Let It Cool Completely — I know it’s tempting to slice into it hot. But the filling is liquid when it comes out of the oven. If you cut it now, it will spill everywhere. Wait 20 minutes. The residual heat will continue to cook the filling and set it.
Variations & Substitutions
Once you’ve nailed the basic version, here’s how you can mix it up. I’ve tried all of these.
Berry Galette — Swap peaches for mixed berries (strawberries, raspberries, blueberries). Use 2 tablespoons of flour instead of cornstarch, as berries release less juice. Add a pinch of cinnamon.
Apple Cinnamon Galette — Thinly sliced apples tossed with cinnamon and nutmeg. Add a layer of almond paste under the apples for extra richness. This is a great fall variation.
Plum Galette — Plums are less juicy than peaches, so you might only need 1 tablespoon of cornstarch. The tartness pairs beautifully with the sweet crust.
Gluten-Free Option — Use a 1:1 gluten-free flour blend that contains xanthan gum. The texture will be slightly more tender and less flaky, but still delicious. Add an extra tablespoon of ice water if the dough feels dry.
Dairy-Free Crust — Substitute the butter with cold coconut oil or a dairy-free butter alternative. The flavor will be slightly different, but the texture will still be flaky. Use coconut cream instead of heavy cream.
Serving & Storage
How to Serve: — I usually serve this warm, right off the baking sheet. It pairs perfectly with a scoop of vanilla bean ice cream or a dollop of whipped cream. The contrast of hot, juicy fruit and cold cream is heavenly. I also like it with a slice of sharp cheddar cheese if I’m going savory-sweet.
Side Dishes: — This is a dessert, so keep sides light. A simple arugula salad with lemon vinaigrette cuts through the richness. Or serve it alongside coffee or tea.
Storage: — Store leftovers in an airtight container at room temperature for up to 2 days. The crust will soften slightly, but it’s still good. For longer storage, refrigerate for up to 4 days. Reheat in a 350°F oven for 10 minutes to crisp up the crust. It does not freeze well after baking because the crust becomes soggy upon thawing. Make the dough and freeze it separately, then bake fresh when needed.
Nutrition Information
I’m not a nutritionist, but here’s the breakdown if you’re tracking. Keep in mind that this is a rich, buttery pastry, so portions matter.
Per Serving (based on 8 slices):
- Calories: 380
- Protein: 4g
- Carbs: 45g
- Fiber: 3g
- Sugar: 22g
- Fat: 20g
- Saturated Fat: 12g
What’s Good: — It contains fruit, which adds fiber and vitamins. The crust provides energy from carbs and fats. It’s a balanced dessert in terms of macronutrients, though high in calories due to the butter and sugar.
What to Know: — Higher in saturated fat from the butter and cream. Contains gluten and dairy. Moderate sodium. If you’re watching sugar, reduce the amount in the filling and skip the coarse sugar topping.
Final Thoughts
So that’s my go-to fresh peach galette! I’ve probably talked your ear off at this point, but when you make a recipe this often, you have a lot to say about it. This has saved my summer dinners more times than I can count. It’s my answer to “what’s for dessert” when I want something homemade but don’t have hours to spare. My kids are happy, my husband’s happy, and I’m happy because I’m not stressed about making a perfect pie.
Make it yours! Try different fruits, different spices, different sugars. The best recipes are the ones you adapt to your family’s tastes. If you make this, drop a comment and let me know what you think! I love hearing how recipes turn out in your kitchen. And if something doesn’t work, tell me that too—I’m here to help troubleshoot.
Happy baking! And I hope your kitchen smells half as good as mine does right now.
Frequently Asked Questions
Q: Can I use frozen peaches instead of fresh?
A: You can, but you’ll need to thaw them completely and drain off the excess liquid. Frozen peaches are much juicier, so you might need an extra tablespoon of cornstarch. Pat them dry with paper towels before adding them to the crust to prevent a soggy bottom.
Q: Why did my crust shrink in the oven?
A: This usually happens if the dough wasn’t chilled long enough before rolling, or if you stretched the dough while rolling it out. Dough wants to shrink back. If you stretch it, it will snap back. Always let the dough rest in the fridge for at least 30 minutes, and handle it gently.
Q: Can I make the dough ahead of time?
A: Absolutely. You can keep the wrapped dough disks in the fridge for up to 3 days, or in the freezer for up to 3 months. Let it thaw in the fridge overnight if frozen before rolling.
Q: My filling is too watery. What happened?
A: Either you didn’t use enough cornstarch, or you didn’t bake it long enough. The juices need to bubble vigorously to thicken. If it’s still watery after baking, you can return it to the oven for 5 more minutes. Next time, increase the cornstarch slightly.
Q: Can I use a pie dish instead of a baking sheet?
A: Yes, but it won’t be a galette anymore—it’ll be a pie. A galette is defined by its free-form shape. If you use a pie dish, you’ll need to trim the edges and possibly add a top crust. The cooking time will be similar, but the texture will be different.
Q: How do I know when the crust is done?
A: It should be a deep golden brown, not pale yellow. The edges should look flaky and set. If it’s pale, it needs more time. The filling should be bubbling in the center.
Q: Can I add nuts to the filling?
A: Yes! Toasted sliced almonds or chopped pecans add a wonderful crunch and nutty flavor. Sprinkle them over the peaches before folding the crust. They pair especially well with the peach and vanilla flavors.
Pin This Recipe!


Fresh Peach Galette: Easy Homemade Flaky Pie
- Total Time: 1 hour 25 minutes
- Yield: 8 servings 1x
Description
A rustic, free-form tart featuring juicy peaches and a shattering, flaky butter crust. This forgiving recipe requires no pie dish and delivers bakery-quality results with minimal effort.
Ingredients
- 2 ½ cups all-purpose flour
- 1 teaspoon salt
- 1 tablespoon granulated sugar
- 1 cup unsalted butter, cold and cubed
- 4–6 tablespoons heavy cream
- 4–5 medium ripe peaches, peeled and sliced
- 1 tablespoon lemon juice
- ¼ cup granulated sugar
- 2 tablespoons cornstarch
- 1 teaspoon vanilla extract
- Coarse sugar for sprinkling
- Heavy cream for brushing
Instructions
- Pulse flour, salt, and sugar in a food processor. Add cold cubed butter and pulse 15-20 times until mixture resembles coarse meal with pea-sized butter bits.
- With processor running, slowly drizzle in heavy cream, one tablespoon at a time, until dough just begins to come together. Form into a rough ball.
- Divide dough into disks, wrap in plastic, and chill in the fridge for at least 30 minutes.
- While dough chills, toss sliced peaches with lemon juice, sugar, cornstarch, and vanilla. Let sit for 10 minutes.
- Preheat oven to 400°F (200°C). Roll out dough into a 12-inch circle on a floured surface and transfer to a parchment-lined baking sheet.
- Arrange peaches in the center, leaving a 2-inch border. Fold edges of dough over fruit, pleating as you go.
- Brush folded edges with heavy cream and sprinkle generously with coarse sugar.
- Bake for 35-40 minutes until crust is golden brown and juices are bubbling.
- Cool on the pan for at least 20 minutes before slicing to allow filling to set.
Notes
Keep all ingredients cold to ensure a flaky crust. Do not skip the chilling step. If using frozen peaches, thaw completely and drain excess liquid. Let the galette cool completely before slicing to prevent the filling from running.
- Prep Time: 45 minutes
- Cook Time: 40 minutes
- Category: Dessert
- Cuisine: American
Nutrition
- Serving Size: 1 slice
- Calories: 380
- Sugar: 22
- Fat: 20
- Saturated Fat: 12
- Carbohydrates: 45
- Fiber: 3
- Protein: 4
Keywords: peach galette, rustic tart, homemade pie crust, summer dessert, easy baking, flaky pie, fruit tart


