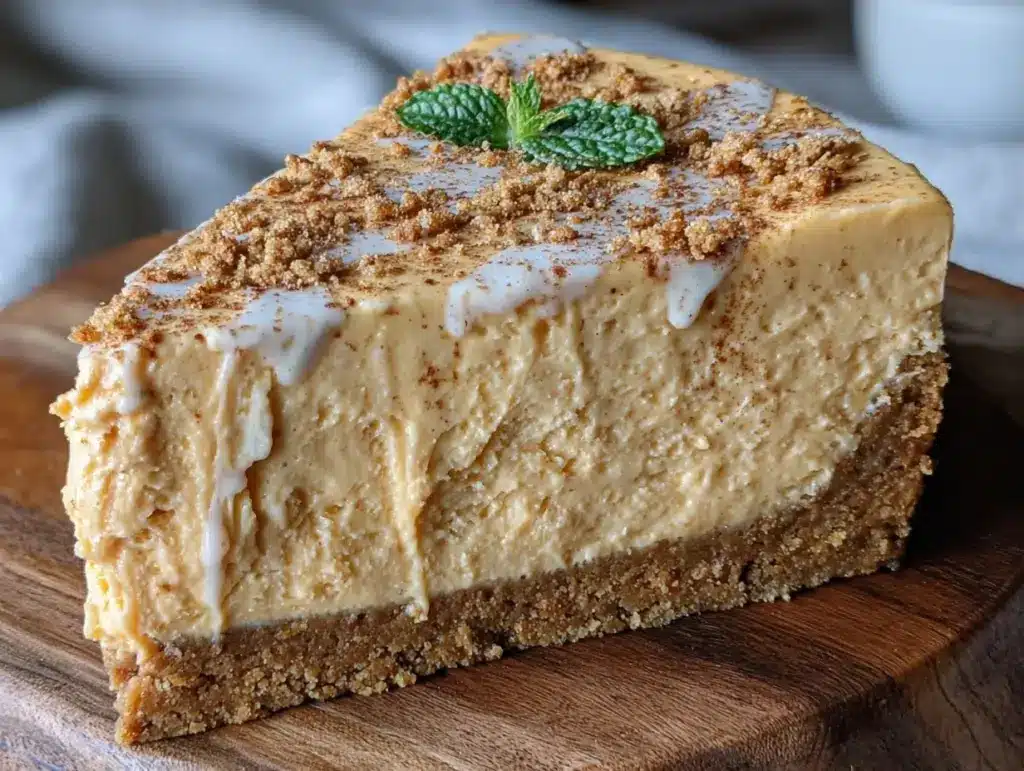
It was 2019, and I was standing in my kitchen at 11 PM on the night before Thanksgiving. I had promised my sister-in-law I’d bring dessert. The oven was already full of turkey, stuffing, and three different casseroles. I had zero oven space, zero time, and a growing sense of panic that I was going to show up empty-handed or with store-bought cookies. That’s when I remembered a trick my aunt used to pull off: no-bake desserts. I grabbed some cream cheese, a can of pumpkin, and my favorite spices. I mixed, chilled, and presented a slice of what I thought would be a quick fix. The result? My sister-in-law asked for the recipe before she even finished her second slice. Everyone assumed I’d spent all day baking. I hadn’t. I’d spent twenty minutes mixing.
That night changed how I approach holiday hosting. I’ve been making this creamy no bake pumpkin cheesecake for holiday parties ever since. It’s become the most reliable dish in my rotation for gatherings where the kitchen is a war zone. There’s something magical about a dessert that looks like it took hours of labor but actually requires almost no heat. It’s rich, it’s spiced, and it’s incredibly easy to transport. I’ve tweaked this creamy no bake pumpkin cheesecake for holiday parties dozens of times over the last four years, perfecting the texture until it’s as smooth as buttercream and as flavorful as a fresh pie.
Why do I love it so much? Because it takes the stress out of entertaining. You can make it two days in advance. It holds up in the fridge without drying out. And the best part? It tastes like autumn in a bite. If you’re looking for a dessert that wows guests without frying you out in the kitchen, this is it. This creamy no bake pumpkin cheesecake for holiday parties is the secret weapon I keep in my back pocket. Let me show you how to make it.
Why You’ll Love This Dessert
Real talk: hosting is hard work. Your energy is spent, your nerves are frayed, and you just want to enjoy your own party. This recipe is designed for that exact moment. It’s not just “easy”; it’s strategically simple. Here’s why this specific version of creamy no bake pumpkin cheesecake for holiday parties has earned a permanent spot on my holiday table.
- Zero Oven Heat — This is the biggest selling point. Your oven is likely packed with sides or main dishes. By keeping this dessert cold, you free up valuable oven space. I once made this while roasting a 20-pound turkey, and it was a lifesaver. No heat means no waiting for preheats or monitoring temps.
- Make-Ahead Magic — You need to chill this for at least 6 hours, ideally overnight. This means you can prepare it on Tuesday for a Saturday party. It actually tastes better the next day as the flavors meld. I’ve never had a guest complain that it was “too firm”; they always ask how I got it so creamy.
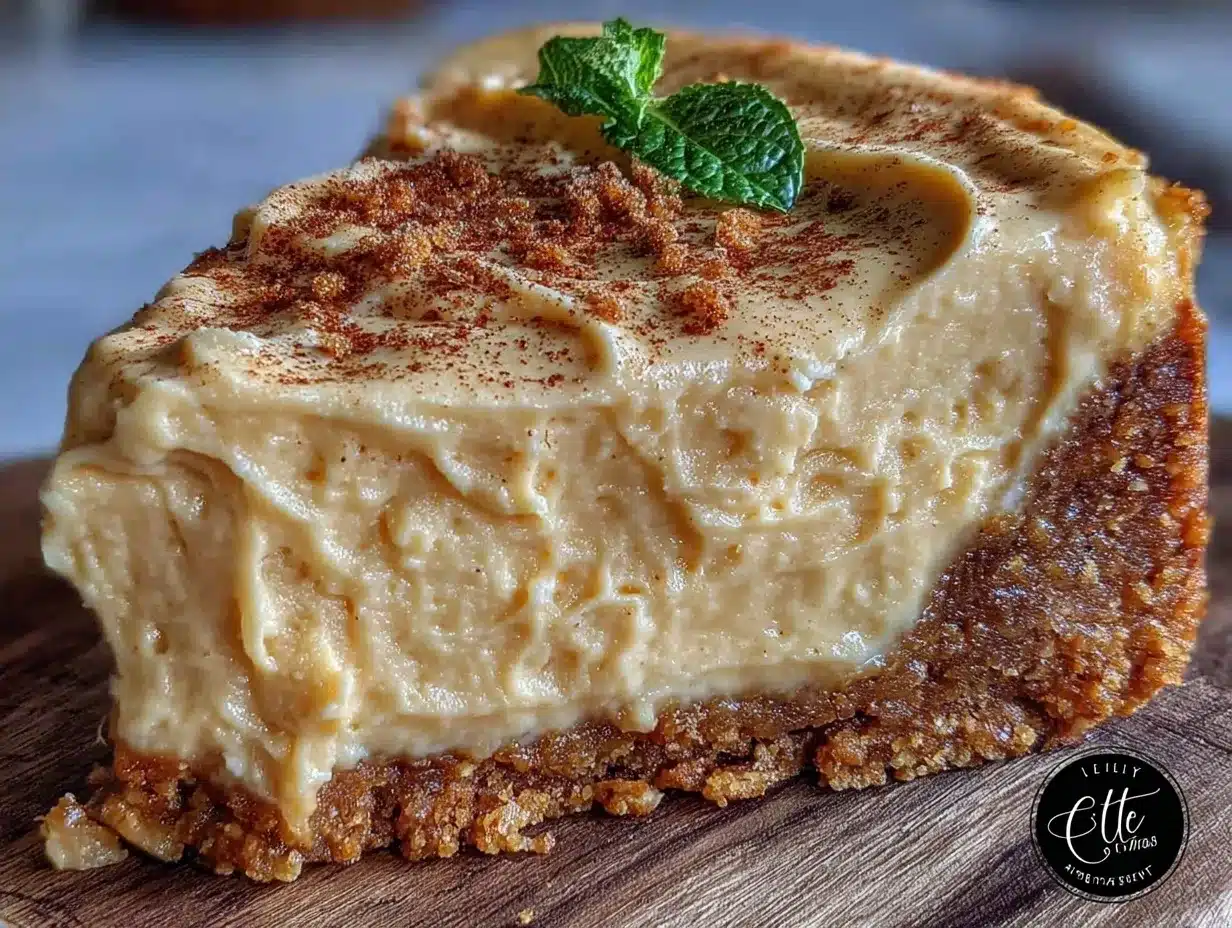
- Restaurant-Quality Texture — Many no-bake cheesecakes turn out grainy or icy. Not this one. By using full-fat cream cheese and whipping it properly, you get a texture that rivals a New York-style baked cheesecake but with the lightness of a mousse. It melts in your mouth.
- Perfectly Spiced — Pumpkin pie spice is great, but I add a touch of ginger and nutmeg for depth. It tastes like it came from a high-end patisserie. The spice profile is warm and inviting, perfect for cold weather gatherings.
- Transport Friendly — Unlike a custard-based pie, this doesn’t wobble or break when you lift it. It’s sturdy. I’ve carried it in my car on bumpy roads to potlucks, and it arrived intact. Just keep it cold until serving.
This is my go-to when dinner needs to just work. It’s indulgent, it’s seasonal, and it lets you be a host, not a chef, for the final course.
Key Ingredients for the Best Creamy No Bake Pumpkin Cheesecake for Holiday Parties
Since there are no eggs or flour to balance out the flavors, every ingredient matters. You can’t hide behind baking powder here. Here’s what you need, with exact measurements so you don’t have to guess.
For the Crust
Graham Cracker Crumbs (1 ½ cups / 150g) — Don’t skip the quality here. I use store-bought crumbs for convenience, but if you have time, crush a box of graham crackers in a food processor. It’s worth it for the fresher flavor. Avoid crumbs that are too sweet; you want a neutral base.
Unsalted Butter (5 tbsp / 70g) — Melted. This binds the crust. If you use salted butter, reduce any added salt in the filling. Real butter gives a richness that margarine just can’t match. I’ve tried both, and the difference is noticeable.
Granulated Sugar (2 tbsp / 25g) — Just a little bit to sweeten the crust. Since the filling is sweet, you don’t need much here.
For the Filling
Full-Fat Cream Cheese (32 oz / 900g) — This is non-negotiable. Low-fat cream cheese contains water and stabilizers that make the filling runny. You need the block kind, not the spreadable tub kind. Let it sit on the counter for 30 minutes before mixing. Softened cream cheese whips into a silky mousse; cold cream cheese leaves lumps.
Heavy Whipping Cream (2 cups / 480ml) — Cold. Very cold. This provides the lift and airiness. If you use half-and-half, it won’t hold its shape. I’ve made this mistake once, and the result was more like pumpkin pudding than cheesecake.
Pure Pumpkin Puree (15 oz / 425g) — One standard can. Do not use pumpkin pie filling, which is already sweetened and spiced. You want plain puree so you control the sweetness and spice levels.
Confectioners’ Sugar (1 cup / 120g) — Sifted. This dissolves instantly, unlike granulated sugar, which might leave gritty spots in a no-bake recipe. Sifting also removes lumps, ensuring a smooth texture.
Pumpkin Pie Spice (2 tsp) — A blend of cinnamon, ginger, nutmeg, and allspice. I buy a pre-mixed blend for consistency, but you can make your own. Cinnamon is the star here.
Vanilla Extract (2 tsp) — Use pure vanilla. Artificial vanilla tastes chemical and clashes with the warm spices.
For the Topping
Whipped Cream (1 cup / 240ml) — Freshly whipped. It adds a light contrast to the dense filling. You can use store-bought if you’re in a rush, but fresh is better.
Extra Pumpkin Pie Spice (1 tsp) — For dusting on top. It looks festive and adds a final aroma.
Tools You’ll Need
You don’t need fancy equipment. Here’s what I use. Keep it simple.
9-Inch Springform Pan — This is essential. The sides pop off, making it easy to slice and serve. If you don’t have one, a 9-inch pie plate works, but slicing will be messier. I use a 9-inch pan because it’s the standard size for this volume of filling.
Electric Hand Mixer or Stand Mixer — You could do this by arm, but why? An electric mixer ensures the cream cheese is smooth and the whipped cream holds peaks. I use a hand mixer because it’s easier to clean than a stand mixer bowl.
Large Mixing Bowls — You’ll need one for the cream cheese and one for the whipped cream. Keep them separate until folding.
Spatula — A silicone spatula is best for folding. It scrapes the bowl clean and gently incorporates the whipped cream without deflating it.
Chill Time — Not a tool, but a requirement. Your fridge needs to be at 40°F (4°C) or below. This is what sets the cheesecake.
How to Make Creamy No Bake Pumpkin Cheesecake for Holiday Parties
Let’s get into the mix. This process is straightforward, but technique matters. Follow these steps, and you’ll get that perfect sliceable texture.
Step 1: Prep the Pan and Crust (10 minutes)
Start by greasing the bottom of your springform pan with a little butter or cooking spray. This prevents the crust from sticking. Take your graham cracker crumbs, melted butter, and sugar. Mix them in a bowl until it looks like wet sand. Press this mixture firmly into the bottom of the pan. Use the bottom of a measuring cup to pack it down tight. If the crust is loose, it will crumble when you slice it. I press it up the sides slightly for a nice presentation, but only about half an inch up. Place the crust in the fridge while you make the filling. This sets it quickly.
Step 2: Whip the Cream Cheese (5 minutes)
In a large bowl, beat the softened cream cheese on medium-high speed. Beat it for about 2-3 minutes until it is completely smooth and creamy. Scrape down the sides of the bowl with a spatula. This step is crucial. If there are lumps of cream cheese, they will remain in the final product. I’ve learned this the hard way. Once it’s smooth, add the confectioners’ sugar, pumpkin puree, pumpkin pie spice, and vanilla extract. Mix on low speed until just combined. Do not overmix at this stage, or you’ll incorporate too much air. The mixture should be thick and pale orange.
Step 3: Whip the Heavy Cream (3 minutes)
In a separate, cold bowl, whip the heavy cream on high speed. Watch it closely. You want stiff peaks. This means when you lift the beater, the cream stands up straight. If you under-whip, the cheesecake won’t set. If you over-whip, it turns into butter. Stop as soon as you see stiff peaks. This usually takes 2-3 minutes depending on your mixer.
Step 4: Fold the Mixtures Together (3 minutes)
This is the most important step for texture. Add one-third of the whipped cream to the pumpkin mixture. Stir it in gently to lighten the dense pumpkin base. Then, add the remaining whipped cream. Use a spatula to fold it in. Fold from the bottom up, turning the bowl. Stop when you see no more white streaks. Over-mixing here will deflate the air you just whipped in, resulting in a dense, heavy cheesecake. It should look fluffy and uniform.
Step 5: Assemble and Chill (6+ hours)
Pour the filling into the prepared crust. Smooth the top with your spatula. Place the springform pan in the refrigerator. Do not put it in the freezer; it will freeze the water content and make the texture icy. Chill for at least 6 hours, but overnight is best. This allows the flavors to meld and the structure to set firmly.
Total Active Time: 20 minutes. Chill Time: 6-8 hours. Total Time: 6-8 hours.
Expert Tips for Success
Here’s everything I learned from making this too many times. These tips separate the good cheesecakes from the great ones.
The Game-Changers
Room Temperature Cream Cheese
This is the #1 mistake people make. Cold cream cheese creates lumps. I leave the blocks on the counter for 30-60 minutes before starting. If you’re in a rush, you can microwave them on low power in 10-second bursts, but be careful not to melt them. They should be soft, not liquid.
Cold Bowls for Whipping Cream
Place your mixing bowl in the freezer for 15 minutes before whipping the cream. Cold cream whips faster and holds peaks better. I’ve tested this, and the difference in volume is noticeable.
Don’t Skip the Sifting
Confectioners’ sugar has cornstarch in it, which clumps. Sifting ensures a silky smooth filling. It takes an extra minute but saves you from gritty bites.
Common Problems & Solutions
Filling is Runny
Did you use low-fat cream cheese? Or did you under-whip the heavy cream? Both lead to a runny texture. Ensure you use full-fat blocks and whip the cream to stiff peaks.
Cheesecake is Grainy
This usually happens if the confectioners’ sugar wasn’t sifted or if the cream cheese wasn’t beaten long enough. Beat the cream cheese for a full 3 minutes until it looks like frosting.
Crust Crumbles
You didn’t press it down hard enough, or there wasn’t enough butter. The crust should hold together when you squeeze a handful. If it falls apart, add a tablespoon more melted butter.
Pro Tricks
Warm Knife for Slicing
Run your knife under hot water and dry it before each cut. This gives you clean, professional slices. Wipe the blade between cuts. It makes a huge difference in presentation.
Freeze for Transport
If you’re bringing this to a party far away, freeze it for 2 hours before transport. It will thaw slightly by the time you arrive, but it will stay firm enough to slice.
Recipe Variations for Creamy No Bake Pumpkin Cheesecake for Holiday Parties
Once you’ve nailed the basic version, here’s how to mix it up. I like to keep these variations in mind for different crowds.
Maple Pecan Variation
Add ½ cup of toasted, chopped pecans to the crust. In the filling, substitute 1 tablespoon of maple syrup for 1 tablespoon of the confectioners’ sugar. The nuttiness complements the pumpkin beautifully. I love this version for fall weddings.
Spiced Rum Twist
Add 1 tablespoon of dark rum to the filling. The alcohol enhances the spices and adds a sophisticated depth. Skip the rum if serving to children.
White Chocolate Swirl
Melt 4 oz of white chocolate and swirl it into the filling before pouring it into the crust. It adds sweetness and a marbled look. It’s visually stunning for parties.
Dairy-Free Option
Use vegan cream cheese blocks (like Kite Hill or Violife) and coconut cream instead of heavy whipping cream. Coconut cream whips similarly to dairy cream. The flavor will be slightly coconutty, which pairs well with pumpkin.
Gluten-Free Crust
Swap graham cracker crumbs for gluten-free graham crackers or crushed gluten-free ginger snaps. The rest of the recipe remains the same.
Low-Sugar Version
Use a erythritol-based confectioners’ sugar substitute. Note that some substitutes have a cooling aftertaste, so taste your mixture before chilling.
Serving & Storage
Serving
Remove the springform ring carefully. Dust the top with extra pumpkin pie spice for a pop of color. I serve this with a dollop of fresh whipped cream and a few candied pecans. It pairs beautifully with one bowl banana bread if you’re making a spread of baked goods. For a savory balance, consider serving it after a hearty meal like Crockpot creamy Tuscan garlic chicken.
Side Dish Ideas:
Serve with spiced tea or coffee. The warmth of the drink complements the cold dessert. I also like it with a side of fresh cranberry sauce for a tart contrast.
Topping Suggestions:
Candied ginger, toasted coconut, or a drizzle of salted caramel. Salted caramel is a game-changer if you have time.
Storage
Refrigerator:
This cheesecake keeps well in the fridge for up to 5 days. Cover it tightly with plastic wrap or foil. It actually tastes better on day 2 or 3 as the flavors mature.
Freezer:
Yes, this freezes well! Wrap the whole cheesecake (or individual slices) in plastic wrap and then foil. It freezes for up to 3 months. Thaw overnight in the fridge. Do not thaw at room temperature, or it may become watery.
Meal Prep Tips:
Make the crust and filling on Sunday. Chill until Wednesday. This is perfect for holiday planning. Just decorate the day of serving.
Nutrition Information
I’m not a nutritionist, but here’s the breakdown. This is a rich dessert, so moderation is key.
Per Serving (1/12th of cheesecake):
| Nutrient | Amount |
|---|---|
| Calories | 380 kcal |
| Protein | 6g |
| Carbohydrates | 28g |
| Fiber | 1g |
| Fat | 28g |
| Sodium | 220mg |
My Take:
This is comfort food with cream cheese and sugar. Not diet food. But it’s better than takeout and I know what’s in it. The pumpkin adds a tiny bit of fiber, but don’t kid yourself—this is a treat. Enjoy it with a cup of black coffee to balance the sweetness.
Final Thoughts
Making this creamy no bake pumpkin cheesecake for holiday parties has saved me more times than I can count. It’s reliable, it’s delicious, and it lets you enjoy your own gatherings. I hope you try it and make it your own. Feel free to add your favorite spices or toppings. If you make this, drop a comment! I love hearing how it turns out in your kitchen. Happy cooking!
FAQs
Can I make this cheesecake a day ahead?
Absolutely. In fact, I recommend it. The flavors meld overnight, and the texture sets perfectly. You can make it up to 2 days in advance. Just keep it covered in the fridge.
Why is my cheesecake watery?
This usually happens if the cream cheese wasn’t softened properly before mixing, or if the heavy cream was over-whipped and separated. Ensure your cream cheese is at room temperature and whip the cream only until stiff peaks form.
Can I use pumpkin pie filling instead of puree?
No. Pumpkin pie filling is already sweetened and spiced. If you use it, your cheesecake will be too sweet and the spice balance will be off. Stick to plain puree.
How do I store leftovers?
Store in an airtight container in the refrigerator for up to 5 days. You can also freeze individual slices for up to 3 months. Thaw in the fridge overnight.
Can I freeze the whole cheesecake?
Yes. Wrap it tightly in plastic wrap and then foil. Freeze for up to 3 months. Thaw in the fridge. Do not refreeze after thawing.
What if I don’t have a springform pan?
You can use a 9-inch pie plate, but slicing will be messier. Alternatively, you can line the pie plate with parchment paper and lift the cheesecake out once it’s set.
Is this recipe gluten-free?
The filling is naturally gluten-free. To make the crust gluten-free, use gluten-free graham crackers or almond flour. Check your spice blend to ensure it’s certified gluten-free.
Pin This Recipe!
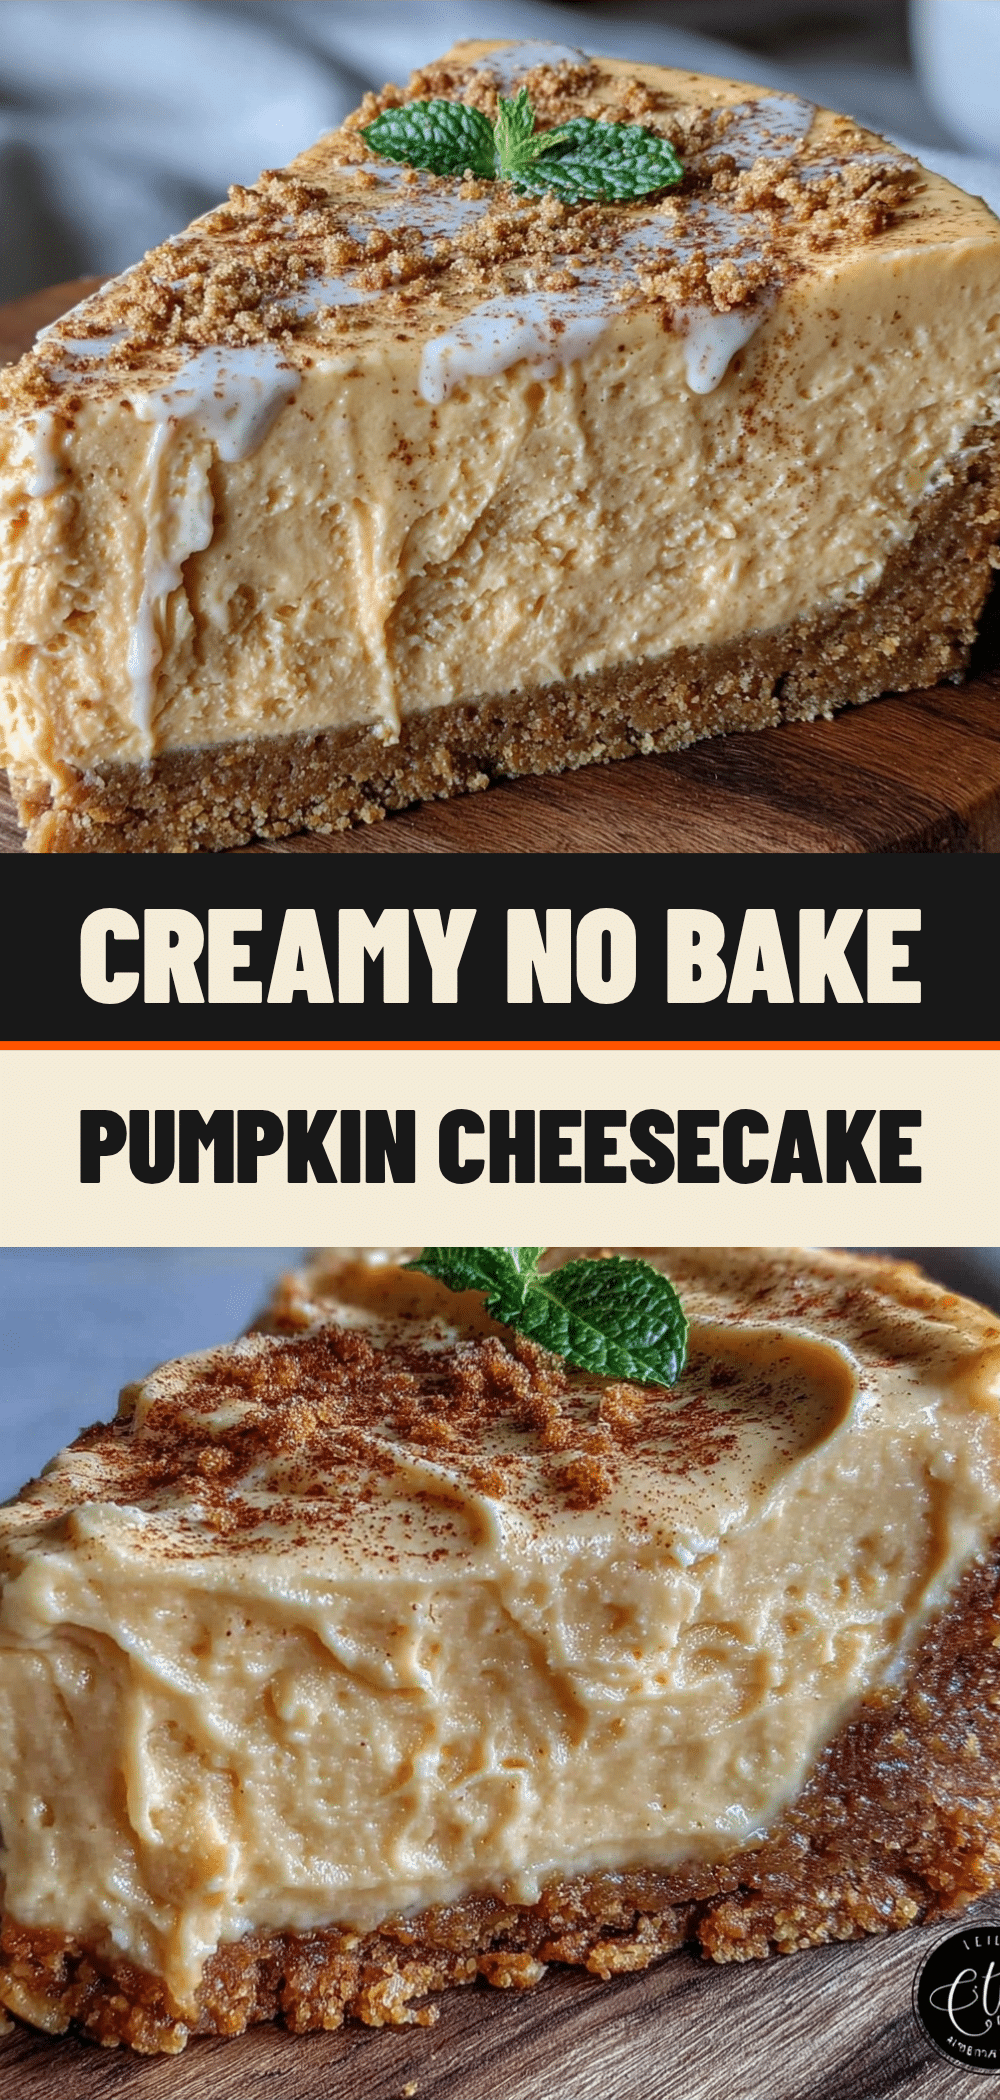
Creamy No Bake Pumpkin Cheesecake: Best Holiday Dessert
- Total Time: 6 hours 20 minutes
- Yield: 12 servings 1x
Description
A rich, spiced, and incredibly easy no-bake pumpkin cheesecake that requires zero oven heat. Perfect for holiday parties, this dessert can be made ahead of time and offers a restaurant-quality texture with minimal effort.
Ingredients
- 1 ½ cups (150g) graham cracker crumbs
- 5 tbsp (70g) unsalted butter, melted
- 2 tbsp (25g) granulated sugar
- 32 oz (900g) full-fat cream cheese, softened
- 2 cups (480ml) heavy whipping cream, cold
- 15 oz (425g) pure pumpkin puree
- 1 cup (120g) confectioners’ sugar, sifted
- 2 tsp pumpkin pie spice
- 2 tsp vanilla extract
- 1 cup (240ml) fresh whipped cream (for topping)
- 1 tsp extra pumpkin pie spice (for dusting)
Instructions
- Grease the bottom of a 9-inch springform pan. Mix graham cracker crumbs, melted butter, and granulated sugar until resembling wet sand. Press firmly into the bottom of the pan and slightly up the sides. Chill in the fridge.
- In a large bowl, beat the softened cream cheese on medium-high speed for 2-3 minutes until completely smooth. Scrape down the sides.
- Add confectioners’ sugar, pumpkin puree, pumpkin pie spice, and vanilla extract to the cream cheese. Mix on low speed until just combined.
- In a separate cold bowl, whip the heavy cream on high speed until stiff peaks form.
- Add one-third of the whipped cream to the pumpkin mixture and stir gently to lighten. Fold in the remaining whipped cream using a spatula, folding from the bottom up until no white streaks remain.
- Pour the filling into the prepared crust and smooth the top. Chill in the refrigerator for at least 6 hours, ideally overnight, until set.
Notes
Ensure cream cheese is at room temperature to avoid lumps. Use full-fat block cream cheese, not spreadable tubs. Do not use pumpkin pie filling; use plain puree. Chill the mixing bowl for the cream in the freezer for 15 minutes before whipping for better volume. For clean slices, run a knife under hot water and dry it before each cut.
- Prep Time: 20 minutes
- Cook Time: 0 minutes
- Category: Dessert
- Cuisine: American
Nutrition
- Serving Size: 1/12th of cheesecake
- Calories: 380
- Sugar: 24
- Sodium: 220
- Fat: 28
- Saturated Fat: 17
- Carbohydrates: 28
- Fiber: 1
- Protein: 6
Keywords: no bake pumpkin cheesecake, holiday dessert, thanksgiving dessert, easy cheesecake, make ahead dessert, fall recipes, pumpkin pie spice