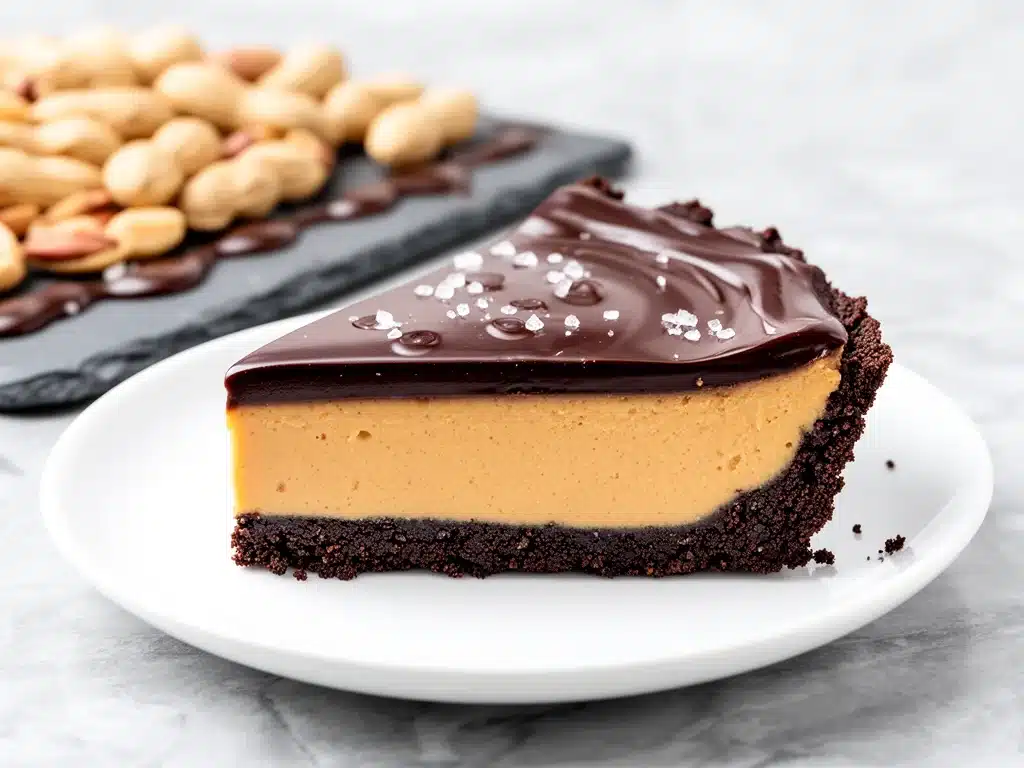
Last Saturday, I was staring into the fridge at 9 PM, feeling that specific kind of post-dinner regret. You know the one. The stomach is full, but the brain is screaming for something sweet, salty, and overwhelmingly chocolatey. I didn’t have any dessert planned. I didn’t have time to bake (who has time to bake at 9 PM?), and I certainly didn’t want to order takeout. So, I grabbed a bag of Oreos, a jar of peanut butter, and some chocolate chips. I figured, “What’s the worst that could happen? It’ll be a mess.”
It wasn’t a mess. It was magic.
I’ve made this creamy no-bake peanut butter cup pie at least a dozen times since that night. It has become my go-to “I need to impress guests but I’m lazy” dessert, my “I had a bad day and need comfort” fix, and my “my kids are begging for sugar” emergency solution. It’s that good. And the best part? You don’t need an oven, you don’t need to be a pastry chef, and you only need four main ingredients to pull it off.
This isn’t just a dessert; it’s a vibe. It’s the taste of childhood peanut butter cups turned into a slice of heaven that melts on your tongue. I tested this recipe with my skeptical husband, who claims he “doesn’t like dessert,” and he ate two slices. He didn’t even admit it until I pointed it out, but I caught him sneaking a third piece later. That’s the power of this pie.
If you’ve ever wondered how to make a restaurant-quality dessert in your own kitchen without turning it into a disaster zone, you’re in the right place. This creamy no-bake peanut butter cup pie you’ll make on repeat is about to become your new best friend. Let’s talk about why this simple combination works so well and how you can make it without any stress.
Why You’ll Love This Recipe
There are about ten reasons I keep coming back to this pie, but here are the big ones that sold me immediately.
Zero Baking Required — Seriously. If you can mix ingredients in a bowl, you can make this. No preheating the oven, no waiting for cakes to cool, no burning the edges. It’s pure no-fuss magic. I’ve made this while helping my kids with homework, and it hasn’t burned once. That’s a win in my book.
Four Ingredients (Seriously) — I’m not exaggerating. Oreos, peanut butter, cream cheese, and chocolate. That’s it. You don’t need fancy vanilla extract or exotic spices. You’re using what’s likely already in your pantry or fridge. It’s stupid simple, and I love stupid simple.
The Texture is Unbeatable — The crust is crunchy, the filling is impossibly smooth and creamy, and the topping is rich and snap-worthy. It’s a textural dream. Every bite has something different to chew on, which keeps it from getting boring. I’ve tried other no-bake pies, but none of them have this perfect balance of crunch and cream.
Makes Amazing Leftovers — This pie actually tastes better the next day. The flavors meld together overnight, and the crust softens just enough to be pleasant, not soggy. I deliberately make extra for lunch (yes, dessert for lunch is a thing in my house) because it’s so good cold.
Impresses Without the Effort — When I bring this to a potluck or a dinner party, people ask for the recipe immediately. They assume it took hours. They assume I bought it from a fancy bakery. I just smile and say, “It’s four ingredients and ten minutes of work.” Watching their faces when they realize how easy it is is half the fun.
This is my go-to when I need dessert to just work. No complicated techniques, no weird ingredients, just reliable, delicious food that makes everyone happy. It’s comfort food in slice form.
Ingredients You’ll Need
Here’s the best part: you probably have most of this already. This looks like a short list, but each ingredient plays a critical role. I’m particular about three things here, and I’ll tell you exactly why.
OREO COOKIES (24 cookies / about 1.5 cups crumbs) — These are your crust. Yes, store-bought Oreos. Don’t try to make your own chocolate sandwich cookies from scratch unless you have a serious obsession and extra time. The pre-made cookies give you that consistent, crunchy base that holds up against the creamy filling. I use regular Oreos, but double-stuff works too if you want a sweeter crust. Just pulse them in a food processor until they’re fine crumbs.
PEANUT BUTTER (1 cup / 250g) — This is the star of the show. Use creamy, natural peanut butter if you can. I like Skippy or Jif for consistency, but if you’re using a natural brand where the oil separates, make sure you stir it in thoroughly or melt it slightly so it mixes smoothly with the cream cheese. Chunky peanut butter adds crunch, but it can make the filling grainy. For that silky, smooth pie texture, creamy is king.
CREAM CHEESE (8 ounces / 225g, softened) — This is what gives the pie its structure and tang. You can’t skip this. It balances the sweetness of the Oreos and the richness of the peanut butter. Make sure it’s fully softened to room temperature. If you try to mix cold cream cheese, you’ll end up with lumps that you’ll spend twenty minutes trying to whisk out. I learned this the hard way. Plan ahead and take it out of the fridge an hour before you start.
CHOCOLATE CHIPS (1 cup / 170g) — For the topping. Semi-sweet chocolate chips work best because they aren’t too sweet, which balances the sugary crust. Milk chocolate is fine if you have a serious sweet tooth, but it might be too much sugar combined with the Oreos. I like to use Ghirardelli semi-sweet chips because they melt smoothly and have a great flavor. You can also use chopped chocolate bars for a more rustic look.
HEAVY CREAM (½ cup / 120ml) — You’ll need this to melt the chocolate chips for the topping. It adds richness and helps the chocolate set with a nice snap. Don’t use milk; it won’t have enough fat to create that glossy, firm topping.
SALT (a pinch) — Just a tiny pinch in the filling to enhance the peanut butter flavor. It’s the secret ingredient that makes the pie taste complex instead of just sweet.
Optional Toppings: — Crushed peanuts for garnish, extra chocolate drizzle, or even a few mini Reese’s Pieces for fun. I usually keep it simple, but if I’m feeling fancy, I sprinkle chopped peanuts on top for that extra crunch.
Equipment Needed
You don’t need fancy equipment for this. Here’s what I actually use.
Food Processor or Blender — To crush the Oreos into fine crumbs. If you don’t have one, you can put the cookies in a zip-top bag and crush them with a rolling pin. It takes more effort, but it works. I use my food processor because it’s faster and gives me more consistent crumbs.
8-inch Springform Pan — This is the classic pan for no-bake pies. The sides come off, making it super easy to remove the pie without breaking it. If you don’t have a springform pan, a regular 8-inch round cake pan works, but you’ll need to line it with parchment paper for easy removal. I love my springform pan because it’s so forgiving.
Mixing Bowls — Two medium bowls. One for the crust, one for the filling. I use glass bowls because they’re easy to clean and I can see what’s mixing.
Electric Mixer or Whisk — To beat the cream cheese and peanut butter until smooth. An electric hand mixer is best because it incorporates air and makes the filling light. If you’re using a whisk, you’ll need strong arms. I’ve done it, but it takes about five minutes of vigorous whisking. Don’t say I didn’t warn you.
Microwave-Safe Bowl — For melting the chocolate chips and heavy cream. I use a glass measuring cup because it’s easy to stir and pour. Microwave in 30-second intervals to avoid burning.
Spatula — For scraping the bowl and spreading the filling. A silicone spatula is best because it gets every bit of mixture out of the bowl. I hate wasting food, so I scrape the sides and bottom every time.
How to Make It: Step-by-Step
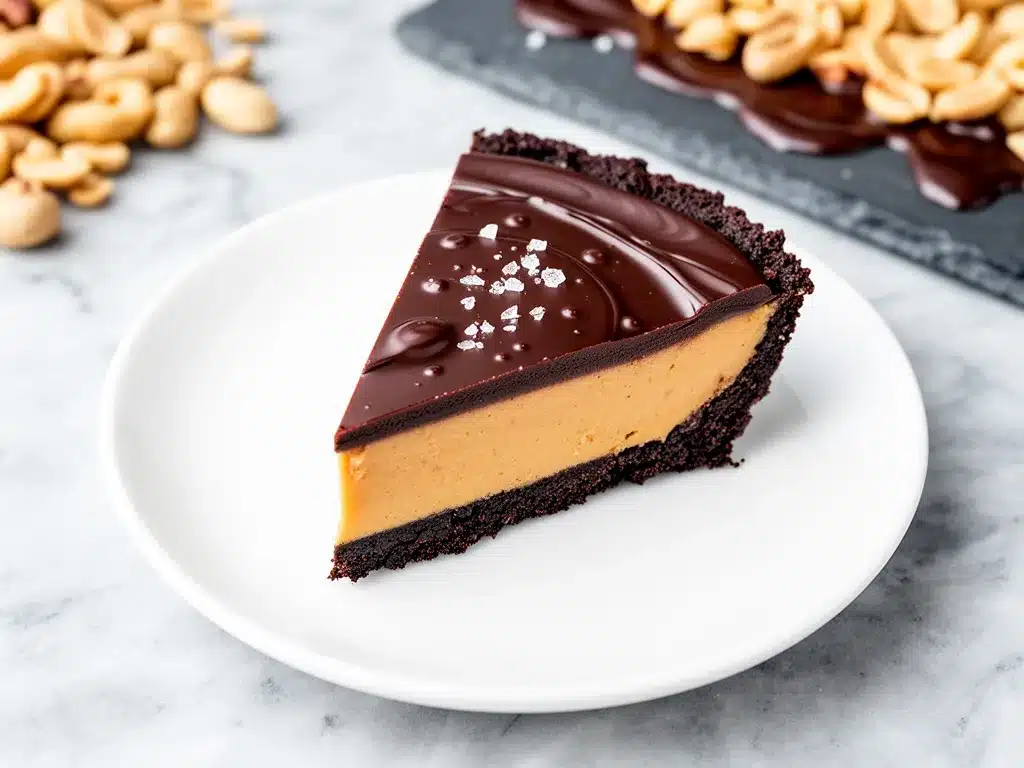
Alright, let’s make this! I’m walking you through exactly how I do it, including the little tricks I’ve picked up.
Step 1: Prepare the Crust (5 minutes)
Start by crushing your Oreos. Remove the cream filling if you want a less sweet crust (I usually leave it in for maximum indulgence), but either way works. Pulse the cookies in a food processor until they’re fine crumbs. Pour them into a bowl and mix in a tablespoon of melted butter (optional, but it helps the crust hold together). Press the crumbs firmly into the bottom and slightly up the sides of your springform pan. Use the bottom of a glass to pack it down tight. A loose crust will crumble when you slice it, so don’t be shy with the pressure. Chill the crust in the fridge while you make the filling.
Step 2: Beat the Cream Cheese (2 minutes)
In a large mixing bowl, beat the softened cream cheese until it’s completely smooth and creamy. This is crucial. If there are any lumps, your pie will have lumps. Use an electric mixer on medium-high speed for about 1-2 minutes. Scrape down the sides of the bowl with a spatula to ensure everything is incorporated. This step takes patience, but it pays off.
Step 3: Add the Peanut Butter (2 minutes)
Add the creamy peanut butter and the pinch of salt to the cream cheese. Beat on low speed just until combined. Don’t overmix once the peanut butter is in, or you might incorporate too much air, which can make the pie fluffy but less dense. You want a rich, dense texture. Scrape the sides again.
Step 4: Fold in the Cookies (3 minutes)
Pulse a few more Oreos in the food processor to make coarse crumbs (about ½ cup). Fold these into the peanut butter mixture by hand with a spatula. This adds texture to the filling, so you get little chunks of cookie in every bite. If you prefer a uniform texture, skip this step and just use fine crumbs for the crust. I love the contrast, so I always add the chunky bits.
Step 5: Fill the Crust (2 minutes)
Pour the filling into the chilled crust. Spread it out evenly with a spatula. Tap the pan gently on the counter to remove any air bubbles. Smooth the top so it’s level. Pop it back in the fridge for at least 30 minutes to firm up. This step is important because it makes the pie easier to slice later.
Step 6: Make the Chocolate Topping (5 minutes)
In a microwave-safe bowl, combine the chocolate chips and heavy cream. Microwave in 30-second intervals, stirring in between, until the mixture is smooth and glossy. If it looks grainy, keep microwaving in 10-second bursts. Do not boil it. Once smooth, let it cool for a minute so it’s not hot, then pour it over the chilled pie. Use a spatula to spread it evenly to the edges. You want a nice, thick layer of chocolate.
Step 7: Chill and Slice (30+ minutes)
Return the pie to the fridge for at least another hour, or ideally overnight. This allows the chocolate topping to set completely and the flavors to meld. When you’re ready to serve, run a warm knife around the edge of the springform pan, release the latch, and lift off the sides. Slice with a sharp knife, wiping the blade between cuts for clean slices.
Total Time: About 20 minutes active, plus 1-2 hours chilling.
Expert Tips & Tricks
Here’s everything I’ve learned from making this dozens of times. These tips will save you from my mistakes.
Room Temperature is Key — I cannot stress this enough. Your cream cheese must be fully softened. If it’s cold, you will have lumps. If you forget, microwave it in 5-second bursts, stirring in between, until it’s soft but not melted. Same goes for the peanut butter—if it’s too thick, warm it slightly so it mixes easily.
Don’t Skip the Chill — I know it’s tempting to eat it right away. But the pie needs time to set. If you slice it too soon, it will be a mess. The chocolate topping also needs time to harden. Patience is a virtue, especially with dessert.
Use a Warm Knife — For clean slices, dip your knife in hot water and wipe it dry before each cut. This prevents the chocolate and filling from sticking to the blade. It’s a small trick that makes a huge difference in presentation.
Store Properly — Keep this pie covered in the fridge. It lasts up to 5 days. If you’re serving it later, wrap the whole pan in plastic wrap to prevent it from absorbing fridge smells. I’ve had pie taste like leftover onions once, and it was not pleasant.
Customize the Crust — If you’re not a fan of Oreos, you can use graham crackers or Nilla Wafers. The texture will be slightly different, but it still works. For a gluten-free version, use gluten-free chocolate sandwich cookies.
Variations & Substitutions
Once you’ve nailed the basic version, here’s how you can mix it up. I’ve tried all of these.
Chocolate Peanut Butter Cup — Add a layer of mini Reese’s Pieces or chopped peanut butter cups into the filling before adding the chocolate topping. It’s extra crunchy and extra chocolatey.
Salted Caramel — Drizzle caramel sauce over the filling before adding the chocolate topping. Or mix caramel into the chocolate chips. This adds a sweet, salty kick that’s amazing.
Almond Butter — Swap the peanut butter for almond butter. It’s slightly nuttier and less sweet. Great if you’re tired of peanut butter but still want that nutty flavor.
White Chocolate — Use white chocolate chips for the topping instead of semi-sweet. It’s sweeter and creamier. Good if you have a serious sweet tooth.
Gluten-Free — Use gluten-free Oreos or graham crackers. Make sure your chocolate chips are certified gluten-free. Everything else is naturally gluten-free.
Dairy-Free — Use dairy-free cream cheese (like Tofutti or Violife) and dairy-free chocolate chips. You’ll also need to use a plant-based heavy cream alternative for the topping. It’s not quite the same texture, but it’s still delicious.
Vegan — Use vegan cream cheese, vegan peanut butter, and vegan chocolate chips. The result is surprisingly good, though the texture might be slightly less firm.
Serving & Storage
How to Serve: — I usually serve this straight from the fridge. It’s best cold. I pair it with a simple green salad or just enjoy it on its own with a glass of milk. It’s rich, so a little goes a long way.
Side Dishes: — Fresh berries (strawberries, raspberries) cut the richness nicely. A dollop of whipped cream is classic. Or just eat it plain if you’re like me and don’t need anything else.
Storage Instructions: — Store in an airtight container or covered with plastic wrap in the fridge for up to 5 days. It does not freeze well because the cream cheese filling can become grainy when thawed. Make it fresh or store in the fridge.
Pro Tip: — If leftovers are drying out, cover them tightly with plastic wrap. The crust might soften over time, but it’s still edible. Just don’t let it sit out at room temperature for more than 2 hours.
Nutrition Information
I’m not a nutritionist, but here’s the breakdown if you’re tracking. This is a rich dessert, so portion control is key.
Per Slice (based on 8 servings):
- Calories: 450
- Protein: 8g
- Carbs: 42g
- Fiber: 3g
- Sugar: 32g
- Fat: 28g
- Saturated Fat: 12g
- Sodium: 250mg
What’s Good: — It has some protein from the cream cheese and peanut butter. It’s satisfying, so you’re less likely to overeat.
What to Know: — It’s high in sugar and fat, which is expected for a dessert like this. It’s not a diet recipe. Enjoy it as a treat.
My Take: — Look, this is comfort food. It’s not a salad. But it’s way better than store-bought dessert, costs less, and I know exactly what’s in it. When I want to make it lighter, I use a smaller slice and pair it with fruit. But usually? I just enjoy a slice and savor every bite.
Final Thoughts
So that’s my creamy no-bake peanut butter cup pie! I’ve probably talked your ear off at this point, but when you make a recipe this often, you have a lot to say about it. This has saved dessert nights more times than I can count. It’s my answer to “what’s for dessert” when I’m tired, don’t want to bake, and still want something that tastes really good. My kids are happy, my husband’s happy, and I’m happy because I’m not stressed about cooking.
Make it yours! Try different toppings, swap in your favorite chocolate, or add some crunch with nuts. The best recipes are the ones you adapt to your family’s tastes. If you make this, drop a comment and let me know what you think! I love hearing how recipes turn out in your kitchen. And if something doesn’t work, tell me that too—I’m here to help troubleshoot.
Happy cooking! And I hope your kitchen smells half as good as mine does right now.
Frequently Asked Questions
Can I use crunchy peanut butter?
You can, but the filling will be chunky. If you want a smooth pie, use creamy peanut butter. If you like the crunch, crunchy is fine. Just be aware that the texture will be different. I usually stick to creamy for that classic peanut butter cup feel.
Can I make this ahead of time?
Yes! This pie is actually better made a day ahead. The flavors meld overnight, and the crust sets up nicely. I usually make it on Sunday for a Wednesday night treat. It keeps well in the fridge for up to 5 days.
Why did my chocolate topping crack?
This usually happens if the chocolate was too hot when you poured it over the pie, or if the pie wasn’t cold enough. Make sure the pie is fully chilled before adding the topping. Also, don’t overheat the chocolate. Melt it gently, or it can seize and crack as it cools.
Can I freeze this pie?
I don’t recommend it. The cream cheese filling can become grainy and separate when thawed. It’s best enjoyed fresh from the fridge. If you must freeze it, freeze the crust and filling separately, but even then, the texture might not be ideal.
Can I use a different pan?
A springform pan is ideal because it’s easy to remove the pie. If you don’t have one, use an 8-inch round cake pan lined with parchment paper. Just be careful when slicing and serving, as you’ll need to lift the pie out with the parchment.
Is this recipe gluten-free?
The standard recipe uses Oreos, which contain gluten. To make it gluten-free, use gluten-free chocolate sandwich cookies or graham crackers. Check your chocolate chips to ensure they are certified gluten-free, as some brands process them in facilities with wheat.
Can I reduce the sugar?
You can use less sweet chocolate chips or sugar-free peanut butter, but the Oreos are quite sweet. If you’re watching sugar, you might want to use a lighter crust (like graham crackers) and less chocolate topping. But honestly, this is a dessert, so embrace the sugar!
Pin This Recipe!
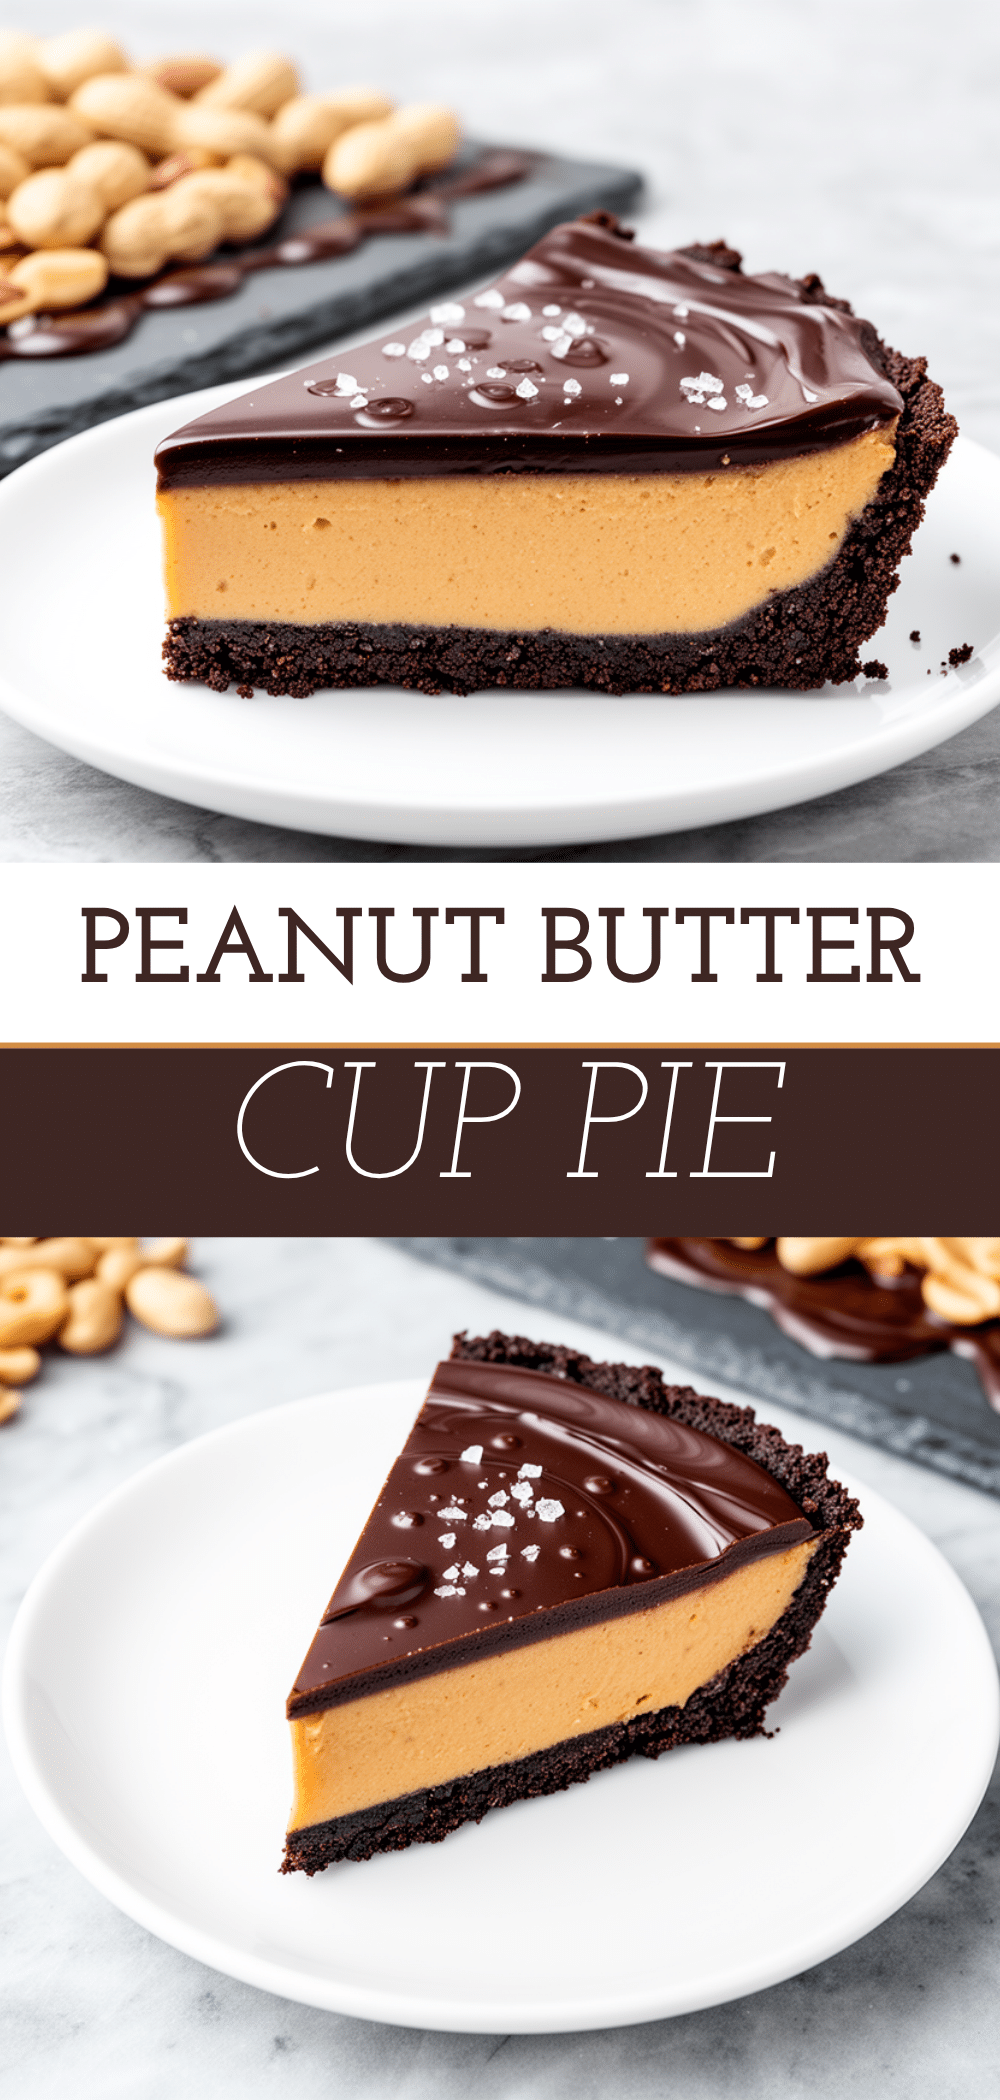
Creamy No-Bake Peanut Butter Cup Pie
- Total Time: 1 hour 20 minutes
- Yield: 8 servings 1x
Description
An easy, four-ingredient no-bake dessert featuring a crunchy Oreo crust, a rich peanut butter and cream cheese filling, and a smooth chocolate topping. Perfect for impressing guests with minimal effort.
Ingredients
- 24 Oreo cookies (about 1.5 cups crumbs)
- 1 cup (250g) creamy peanut butter
- 8 ounces (225g) cream cheese, softened
- 1 cup (170g) semi-sweet chocolate chips
- ½ cup (120ml) heavy cream
- 1 tablespoon melted butter (optional, for crust)
- Pinch of salt
Instructions
- Crush the Oreos into fine crumbs using a food processor. Mix with melted butter if using, then press firmly into the bottom and slightly up the sides of an 8-inch springform pan. Chill in the fridge.
- In a large mixing bowl, beat the softened cream cheese until completely smooth using an electric mixer.
- Add the peanut butter and pinch of salt to the cream cheese. Beat on low speed just until combined.
- Pulse a few more Oreos to make coarse crumbs (about ½ cup) and fold them into the peanut butter mixture by hand.
- Pour the filling into the chilled crust, spread evenly, and refrigerate for at least 30 minutes to firm up.
- In a microwave-safe bowl, combine chocolate chips and heavy cream. Microwave in 30-second intervals, stirring between, until smooth and glossy.
- Pour the chocolate topping over the chilled pie and spread evenly to the edges.
- Refrigerate for at least 1 hour or overnight until the topping is set.
- Run a warm knife around the edge of the pan, release the latch, and slice to serve.
Notes
Ensure cream cheese is fully softened to room temperature to avoid lumps. The pie tastes better the next day as flavors meld. Store covered in the fridge for up to 5 days. Do not freeze as the texture may become grainy. Use a warm knife for clean slices.
- Prep Time: 20 minutes
- Cook Time: 0 minutes
- Category: Dessert
- Cuisine: American
Nutrition
- Serving Size: 1 slice
- Calories: 450
- Sugar: 32
- Sodium: 250
- Fat: 28
- Saturated Fat: 12
- Carbohydrates: 42
- Fiber: 3
- Protein: 8
Keywords: no-bake, peanut butter, chocolate, Oreo, dessert, easy, 4-ingredient, creamy, pie, comfort food


