There is a specific kind of panic that hits every August around 3 PM. It’s not the panic of the summer ending (okay, maybe a little of that). It’s the panic of the empty lunchbox. You’re standing in your kitchen, staring at a Tupperware container like it owes you money, wondering how to pack a lunch that is actually good enough for a seven-year-old to open without whining, but healthy enough that you don’t feel like you’re failing as a parent.
I’ve been there. Oh, I’ve been there. Last week, my son looked at his sandwich—again—and sighed that heavy, world-weary sigh that says, “I would rather eat paste.” I knew if I packed another PB&J or a boring turkey wrap, I’d be ordering takeout by 2 PM, which defeats the purpose of packing lunch in the first place. We’re trying to save money and eat better, not fund the local pizza place.
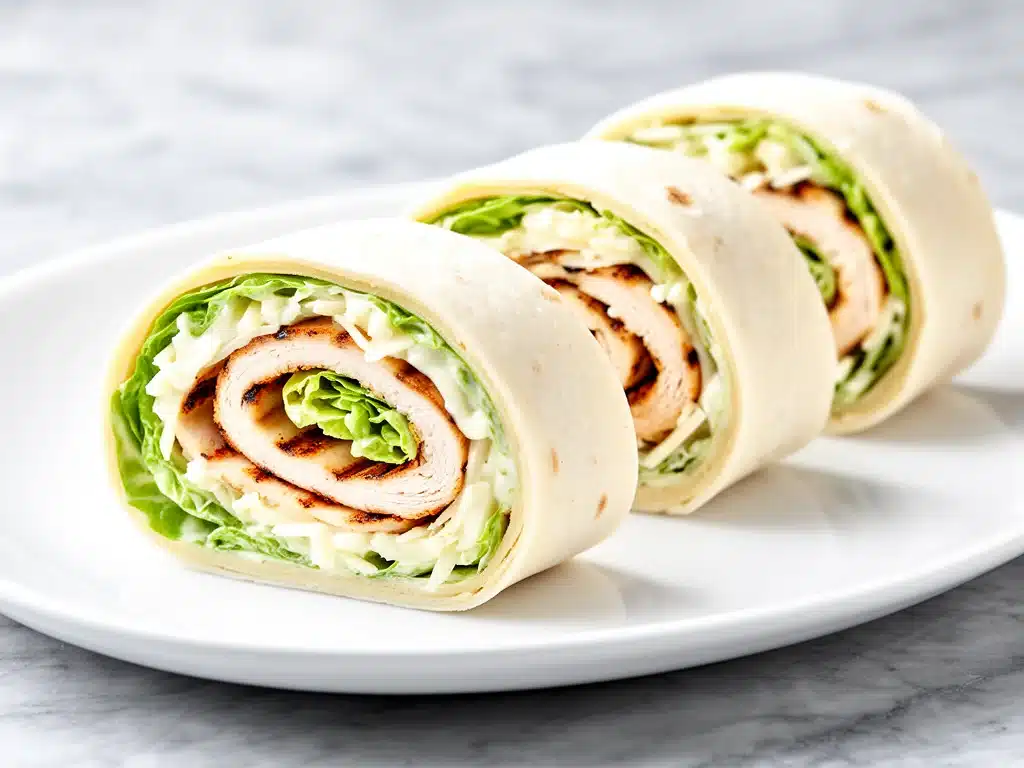
That’s when I decided to stop trying to reinvent the wheel and just make something classic, but fun. Something that looks like a treat but tastes like a proper meal. Enter the Chicken Caesar Pinwheels.
These aren’t just rolled-up tortillas. They’re crispy, creamy, crunchy, and infinitely customizable. I’ve made these for my kids, for my husband’s work lunch, and even for a quick afternoon snack when the hunger strikes at 3:30 PM. They are the kind of recipe that saves your sanity. They come together in about 15 minutes, they travel well (no soggy bread issues here), and best of all? My son actually ate them. All of them. Without a single complaint.
If you’re drowning in the back-to-school rush, let me introduce you to your new best friend. This is the Chicken Caesar Pinwheels recipe you’ll make on repeat. Seriously, I’ve already made them four times in ten days.
Why You’ll Love These Chicken Caesar Pinwheels
I don’t say this lightly, but these pinwheels have completely changed our lunch routine. Here’s why they’re worth the extra five minutes of prep:
- Zero Soggy Bread Disaster — The biggest killer of lunchbox sandwiches is wet bread. By using a sturdy tortilla and keeping the dressing on the inside, the “shell” stays firm. You can pack these in the morning and they’re still perfect by noon.
- Kid-Approved Flavor — It’s Caesar salad, but in a handheld format. The creamy dressing, the salty Parmesan, the crunch of romaine—it hits all the right notes. Even my picky eater, who usually refuses to eat “cold food,” loves these.
- Protein-Packed — We’re using shredded rotisserie chicken, so you get a solid hit of protein to keep kids (and adults) full until dinner. No empty carbs here.
- Meal Prep Friendly — I make a big batch on Sunday night. They last in the fridge for up to 3 days. That means I’m not packing lunches every single morning during the school week. Freedom, right?
- Fun Factor — They look like little spirals of deliciousness. The cross-section is pretty, which matters when you’re trying to bribe a kid into eating vegetables. Plus, they’re easy to dip in extra ranch or Caesar dressing if you’re feeling fancy.
This is my go-to when I need lunch to just work. No complicated techniques, no weird ingredients, just reliable, delicious food that makes everyone happy. And if you’re looking for other quick lunch ideas, you might also enjoy trying Ham and Cheese Pretzel Roll-Ups for a savory twist.
Ingredients You’ll Need
Here’s the best part: you probably have most of this already. This recipe relies on simple, pantry-friendly staples. I’m particular about three ingredients here, and I’ll tell you exactly why.
For the Tortillas
Large flour tortillas (8-inch / 20cm) — I use large, soft flour tortillas. They’re pliable and don’t crack when you roll them. Don’t use the tiny taco-sized ones; they’re too small and hard to roll tightly. I like the brand La Tortilla Factory, but any large, soft brand works.
For the Filling
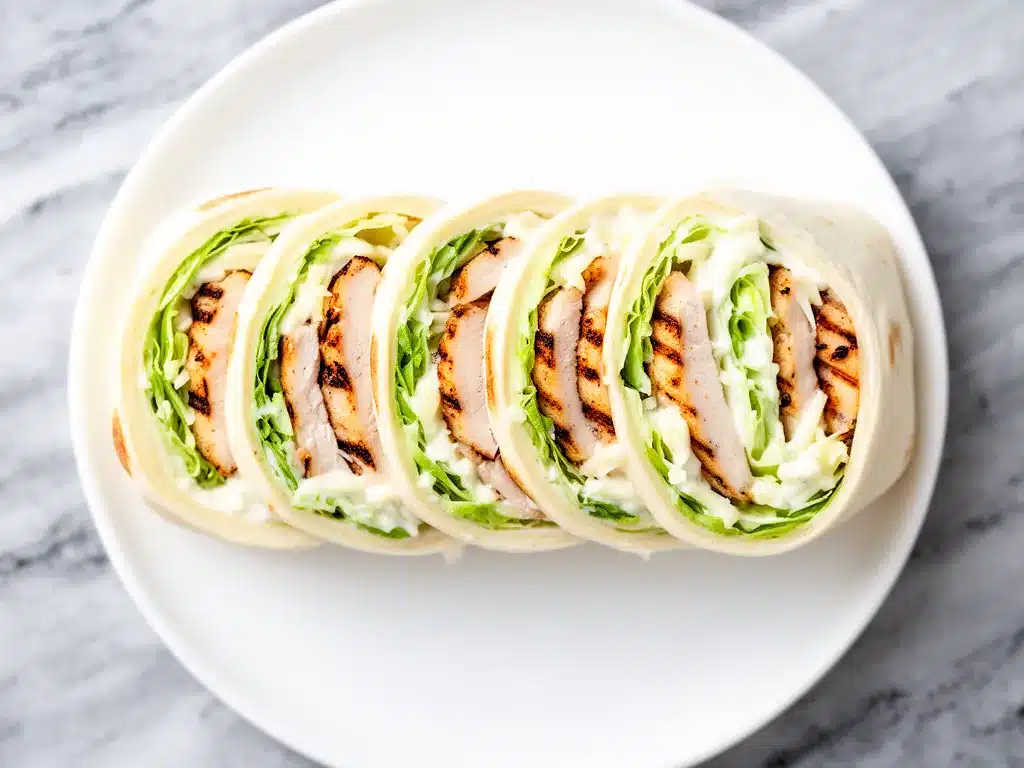
Cooked chicken breast (2 cups / 300g, shredded) — Rotisserie chicken is your best friend here. It’s already cooked, seasoned, and easy to shred. If you’re boiling chicken breasts from scratch, make sure to shred them while they’re still warm—it shreds much easier. You can also use canned chicken, but the texture is a bit different.
Cream cheese (4 oz / 115g, softened) — This is the glue. It holds everything together and adds that rich, creamy texture. Use full-fat cream cheese. Light cream cheese can be a bit grainy and doesn’t spread as smoothly. Let it sit out for 15 minutes before you start so it’s easy to spread.
Ranch dressing (¼ cup / 60ml) — Yes, ranch. Or Caesar. I usually use a creamy Caesar dressing for the authentic flavor, but ranch is a kid favorite. Just make sure it’s a thick, creamy variety, not the watery kind. You want it to coat the tortilla, not run off.
Romaine lettuce (2 cups, finely chopped) — This is the crunch factor. I chop it really fine so it’s easy to bite through in the pinwheel. If you don’t like romaine, iceberg works too, but romaine has a better flavor. Wash and dry it thoroughly—wet lettuce makes soggy pinwheels.
Shredded Parmesan cheese (½ cup / 50g) — The salty, savory kick. Buy a block and grate it yourself if you can. Pre-grated cheese has anti-caking agents that can make the filling a bit gritty. Freshly grated melts and blends better.
Croutons (½ cup, crushed) — This is my secret weapon. Crushed croutons add that classic Caesar salad crunch. I crush them in a ziplock bag with a rolling pin. If you’re avoiding carbs, you can skip this, but I don’t recommend it. The crunch is what makes this special.
For the Finish
Black pepper — Freshly cracked black pepper is a must. It adds a little heat and bite.
Optional: Bacon bits — If you want to make these extra indulgent, add some crispy bacon bits. My husband loves these with bacon. It’s like a BLT meets Caesar salad.
Equipment Needed
You don’t need fancy equipment for this. Here’s what I actually use.
- Sharp knife — For chopping the lettuce and slicing the pinwheels. A dull knife will squash the pinwheel and make a mess. I use my Japanese chef’s knife for this.
- Cutting board — Any size works. I use a large plastic one for easy cleanup.
- Rolling pin — Or just your hands. I use a rolling pin to crush the croutons. It’s faster than doing it by hand.
- Silicone spatula — For spreading the cream cheese and dressing. It’s flexible and gets into the corners of the tortilla.
- Plastic wrap — To wrap the pinwheels before slicing. This helps them hold their shape.
- Ziplock bags — For storing the croutons and packing the lunch.
That’s it. No food processor, no mixer, no fancy gadgets. Just basic kitchen tools you already have.
How to Make It: Step-by-Step
Alright, let’s make this! I’m walking you through exactly how I do it, including the little tricks I’ve picked up.
Step 1: Prep Your Chicken and Lettuce (5 minutes)
Shred your cooked chicken. If you’re using rotisserie chicken, just pull it apart with two forks. If you’re boiling it, let it cool slightly, then shred. Chop your romaine lettuce into small pieces. You want them small enough that they don’t poke out of the pinwheel, but big enough to add crunch. Drain any excess liquid from the lettuce—this is crucial. Wet lettuce = soggy pinwheels.
Step 2: Make the Filling (5 minutes)
In a medium bowl, combine the shredded chicken, chopped lettuce, crushed croutons, and shredded Parmesan. Add the ranch or Caesar dressing and mix until everything is evenly coated. Taste it. Does it need more salt? More pepper? Adjust as needed. The mixture should be moist but not soupy. If it’s too dry, add a little more dressing. If it’s too wet, add a few more croutons.
Step 3: Spread the Tortillas (5 minutes)
Lay out your tortillas on a clean cutting board or large plate. Spread the softened cream cheese evenly over each tortilla, leaving a ½-inch border around the edges. This border is important—it helps seal the pinwheel so it doesn’t fall apart. If you spread the cream cheese all the way to the edge, it will squeeze out when you roll.
Step 4: Add the Filling and Roll (5 minutes)
Spoon the chicken mixture onto the tortilla, starting about 2 inches from the bottom edge. Spread it evenly, leaving a border on the sides too. Now, here’s the trick: use the plastic wrap to help you roll. Lift the edge of the plastic wrap and the tortilla, and start rolling tightly away from you. Use the plastic wrap to guide the roll and keep it tight. Once you’ve rolled it into a log, use the plastic wrap to twist the ends like a candy wrapper. This helps it hold its shape.
Step 5: Chill and Slice (10 minutes)
Place the rolled pinwheels in the fridge for at least 10 minutes. This step is non-negotiable. Chilling firms up the cream cheese and makes slicing much easier. If you skip this, your pinwheels will be a mess. After chilling, use a sharp knife to slice each tortilla into 4-6 pinwheels. Wipe your knife between cuts if it gets messy. You want clean, neat slices.
Step 6: Pack and Serve
Arrange the pinwheels in your lunchbox or on a plate. They’re ready to eat! If you’re packing them for school, put them in a container with a lid. They’ll stay fresh for hours. If you’re serving them as an appetizer, arrange them on a platter and garnish with a little extra Parmesan or a drizzle of dressing.
Total Time: About 25 minutes (10 minutes active, 15 minutes chilling)
Expert Tips & Tricks
Here’s everything I’ve learned from making these dozens of times. These tips will save you from my mistakes.
The Cream Cheese is Key
I cannot stress this enough: soften your cream cheese. If it’s cold and hard, you’ll tear the tortilla trying to spread it. Take it out of the fridge 15-20 minutes before you start. If you’re in a hurry, you can microwave it for 10-15 seconds, but be careful not to melt it. It should be spreadable, not liquid.
Don’t Overfill
It’s tempting to pile on the filling, but if you overfill the tortilla, it will burst when you roll it. Stick to a thin, even layer. You can always add a second layer of filling if you’re really hungry, but for pinwheels, less is more. The goal is a clean roll, not a stuffed burrito.
Crush the Croutons Properly
Don’t just throw whole croutons in. They’ll create uneven chunks and make the pinwheel unstable. Crush them into small, pea-sized pieces. This ensures every bite has that crunchy texture. I use a rolling pin on a ziplock bag—it’s fast and satisfying.
Chill Before Slicing
I know it’s tempting to slice them right away, but wait. The chill time is what makes the difference between a messy pinwheel and a perfect one. The cream cheese sets, the tortilla firms up, and the slices come out clean. Trust me on this.
Common Mistakes (and how to avoid them)
Mistake: Pinwheels fall apart.
Fix: You didn’t roll them tightly enough, or you didn’t chill them. Use the plastic wrap trick to roll tightly, and definitely chill for 10 minutes.
Mistake: Tortilla tears.
Fix: Your cream cheese was too cold, or you spread it too thickly. Soften the cream cheese and spread it in a thin, even layer.
Mistake: Filling leaks out.
Fix: You didn’t leave a border around the edges. Always leave a ½-inch border on all sides to seal the roll.
Variations & Substitutions
Once you’ve nailed the basic version, here’s how you can mix it up. I’ve tried all of these.
Turkey Avocado Pinwheels
Swap the chicken for sliced turkey breast and add thin slices of avocado. The avocado adds creaminess and healthy fats. This is a great option if you’re trying to reduce poultry intake.
Veggie-Loaded Pinwheels
Add finely diced cucumbers, bell peppers, and carrots to the filling. This boosts the vegetable content and adds more crunch. Great for kids who need to eat more veggies.
Spicy Jalapeño Pinwheels
Add diced jalapeños and use a spicy ranch or chipotle dressing. This is for the heat lovers. My husband loves these. Just start with a little jalapeño and add more to taste.
Gluten-Free Option
Use gluten-free tortillas. They can be a bit more fragile, so handle them gently when rolling. I use the Siete brand, which holds up well. The filling stays the same.
Dairy-Free Option
Replace the cream cheese with a dairy-free cream cheese alternative, and use a dairy-free dressing. It’s not exactly the same, but it works. I’ve made this for my lactose-intolerant friend, and she loved it.
Protein Boost
Add a scoop of cooked quinoa or black beans to the filling for extra protein and fiber. This makes it more filling and sustains energy longer.
Serving & Storage
How to Serve:
I usually serve these straight from the fridge—they’re best cold or room temperature. They make a great lunchbox item, party appetizer, or quick snack. If you’re serving them as an appetizer, arrange them on a platter with a side of extra Caesar or ranch dressing for dipping.
Side Dishes:
– Apple slices with peanut butter
– Carrot sticks with hummus
– A piece of fruit (grapes, berries, or orange segments)
– A small bag of chips (because sometimes you just need chips)
Storage Instructions:
Store the pinwheels in an airtight container in the fridge for up to 3 days. They will stay fresh and delicious. If you pack them in a lunchbox, they’ll last the whole day. Do not freeze them—the lettuce and cream cheese don’t freeze well. They’ll become watery and mushy when thawed.
Reheating:
These are best eaten cold or at room temperature. If you really want to warm them up, you can microwave them for 10-15 seconds, but be careful not to overheat them, or the tortilla will get chewy. I don’t recommend reheating them in the oven.
Nutrition Information
I’m not a nutritionist, but here’s the breakdown if you’re tracking.
Per Pinwheel (based on 24 pinwheels, 4 per serving):
- Calories: 180
- Protein: 8g
- Carbs: 18g
- Fiber: 1g
- Sugar: 2g
- Fat: 9g
- Saturated Fat: 4g
- Cholesterol: 25mg
- Sodium: 350mg
What’s Good:
– Decent protein from the chicken
– Low in sugar
– Easy to customize with veggies for more fiber
What to Know:
– Higher in sodium from the dressing and cheese
– Contains dairy and gluten
– Can be made lighter by using low-fat cream cheese and dressing
My Take:
Look, this is a fun, tasty lunch option. It’s not a diet food, but it’s balanced enough to keep you full. When I want to make it lighter, I use less dressing and add more veggies. But usually? I just enjoy them as a treat. They’re better than takeout, costs less, and I know exactly what’s in them.
Final Thoughts
So that’s my go-to Chicken Caesar Pinwheels recipe! I’ve probably talked your ear off at this point, but when you make a recipe this often, you have a lot to say about it.
This has saved our lunch routine more times than I can count. It’s my answer to “what’s for lunch?” when I’m tired, don’t want to cook, and still want something that tastes really good. My kids are happy, my husband’s happy, and I’m happy because I’m not stressed about packing lunch every morning.
Make it yours! Try different fillings, swap in your favorite veggies, adjust the dressing. The best recipes are the ones you adapt to your family’s tastes. And if you’re looking for more easy lunch ideas, check out these Chewy Banana Oat Breakfast Cookies for a sweet treat on busy mornings.
If you make this, drop a comment and let me know what you think! I love hearing how recipes turn out in your kitchen. And if something doesn’t work, tell me that too—I’m here to help troubleshoot.
Happy packing! And I hope your lunchbox smells half as good as my kitchen does right now.
Frequently Asked Questions
Can I use a different type of tortilla?
Yes, but flour tortillas are the best choice. They’re soft and pliable, which makes them easy to roll. Whole wheat tortillas can work, but they’re a bit stiffer and might crack. Spinach or sun-dried tomato tortillas are fun options, but make sure they’re large and soft. Avoid corn tortillas—they’re too brittle for rolling.
Why did my pinwheels fall apart?
Usually, this happens because the filling was too wet, the tortilla wasn’t rolled tightly enough, or you didn’t chill them before slicing. Make sure to drain your lettuce and chicken well. Roll the tortilla tightly, using plastic wrap to help. And definitely chill for at least 10 minutes before slicing.
Can I make these ahead of time?
Yes! You can make them up to 24 hours in advance. Store them in an airtight container in the fridge. They’ll stay fresh and delicious. Just make sure to slice them right before you pack them, so they don’t get soggy.
Can I freeze these pinwheels?
I don’t recommend freezing them. The lettuce and cream cheese don’t freeze well. They’ll become watery and mushy when thawed. It’s best to make them fresh and eat them within 3 days.
What dressing works best?
Caesar dressing is the classic choice, but ranch, Italian, or even a simple olive oil and lemon dressing work well too. Just make sure it’s a creamy dressing, not a vinaigrette. You want the filling to be moist but not runny.
Can I add other vegetables?
Absolutely! Finely diced cucumbers, bell peppers, carrots, or spinach all work great. Just make sure to chop them finely so they fit easily in the pinwheel. Avoid watery veggies like tomatoes, unless you drain them very well.
How do I pack these for school?
Place them in an airtight container or a ziplock bag. If you’re packing them in a lunchbox, put them on top of the ice pack to keep them cool. They’ll stay fresh for hours. If you’re worried about them getting squished, pack them in a rigid container.
Pin This Recipe!
Chicken Caesar Pinwheels
- Total Time: 25 minutes
- Yield: 24 pinwheels 1x
Description
Crispy, creamy, and crunchy handheld pinwheels made with shredded chicken, cream cheese, and Caesar salad ingredients. Perfect for back-to-school lunches, meal prep, or quick snacks.
Ingredients
- 4 large flour tortillas (8-inch / 20cm)
- 2 cups cooked chicken breast, shredded
- 4 oz cream cheese, softened
- 1/4 cup ranch or Caesar dressing
- 2 cups romaine lettuce, finely chopped
- 1/2 cup shredded Parmesan cheese
- 1/2 cup croutons, crushed
- Black pepper, to taste
- Optional: Bacon bits
Instructions
- Shred the cooked chicken and finely chop the romaine lettuce. Drain any excess liquid from the lettuce to prevent soggy pinwheels.
- In a medium bowl, combine the shredded chicken, chopped lettuce, crushed croutons, and shredded Parmesan. Add the ranch or Caesar dressing and mix until evenly coated. Adjust seasoning with salt and pepper if needed.
- Lay out the tortillas on a clean surface. Spread the softened cream cheese evenly over each tortilla, leaving a 1/2-inch border around the edges.
- Spoon the chicken mixture onto the tortilla, starting about 2 inches from the bottom edge. Spread evenly, leaving a border on the sides.
- Use plastic wrap to help roll the tortilla tightly away from you. Twist the ends of the plastic wrap like a candy wrapper to help the pinwheel hold its shape.
- Place the rolled pinwheels in the fridge for at least 10 minutes to firm up.
- Using a sharp knife, slice each tortilla into 4-6 pinwheels. Wipe the knife between cuts for clean slices.
- Serve immediately or pack in an airtight container for lunch.
Notes
Ensure cream cheese is fully softened to avoid tearing the tortillas. Do not overfill the tortillas to prevent bursting. Chilling is essential for clean slicing. These do not freeze well due to the lettuce and cream cheese.
- Prep Time: 15 minutes
- Cook Time: 0 minutes
- Category: Lunch
- Cuisine: American
Nutrition
- Serving Size: 4 pinwheels
- Calories: 180
- Sugar: 2
- Sodium: 350
- Fat: 9
- Saturated Fat: 4
- Carbohydrates: 18
- Fiber: 1
- Protein: 8
Keywords: chicken caesar pinwheels, back to school lunch, easy lunch ideas, meal prep, kid-friendly lunch, tortilla roll-ups, chicken salad pinwheels


