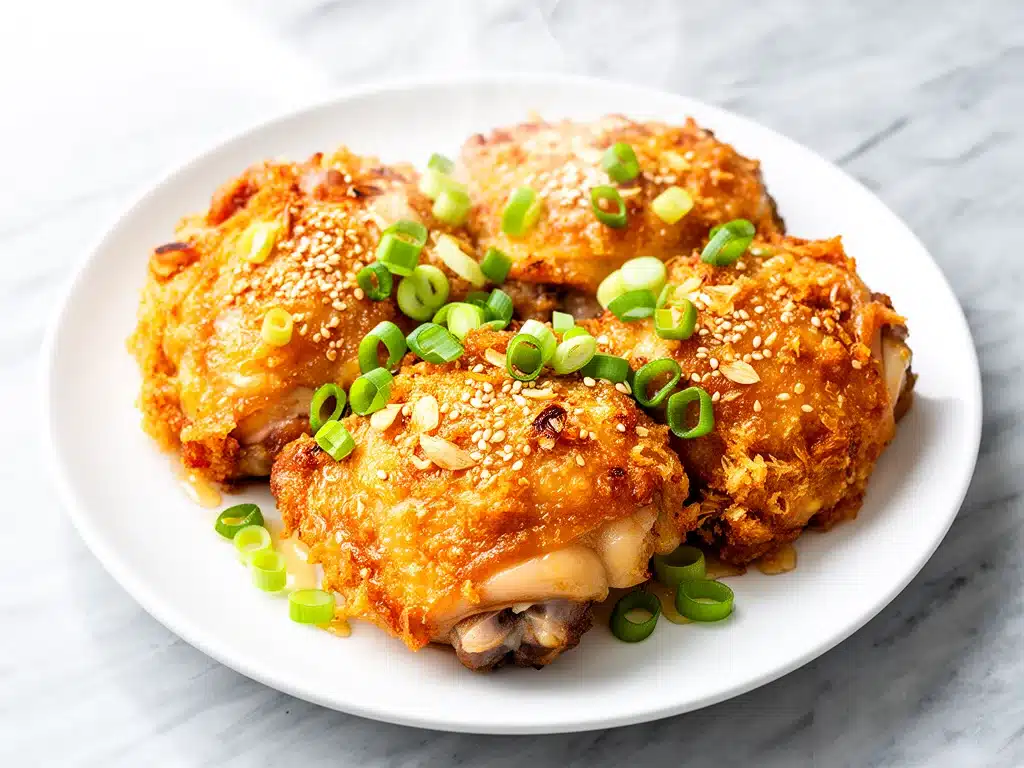
Last Tuesday, I was staring into my refrigerator with the specific desperation that only comes at 5:45 PM on a workday. My kids were already complaining about being hungry. I was exhausted. And the only thing staring back at me was a package of chicken thighs, a jar of honey, and a bottle of garlic sauce I’d been meaning to use for months. I didn’t have the energy to chop vegetables, I didn’t want to order takeout (again), and I definitely didn’t want to stand over a hot stove stirring something for an hour.
I threw the chicken in a bowl, dumped in the honey and garlic, tossed it around, and slid it into the oven. Twenty minutes later, the smell hitting the hallway was enough to make my husband walk in from the garage with his tools still in his hand. The chicken was crispy. The sauce was sticky and sweet and savory. It tasted like something I’d paid $20 for at a bistro, but it took me less time to prep than it would have to browse a delivery app.
That was the moment crispy baked honey garlic chicken thighs officially entered my permanent rotation. I’ve made them at least fifteen times since that night. Sometimes I add chili flakes for heat. Sometimes I serve them over rice. Sometimes I just eat them straight out of the pan because I can’t wait. But the core recipe? It stays the same. It’s reliable. It’s fast. And it actually works.
If you’re tired of dry chicken breast and complicated marinades that require ingredients you don’t have, this is the recipe for you. It’s the kind of dinner that makes you feel like a hero without requiring you to be a chef. Let’s get into why this specific combination of sweet, savory, and crispy is so good, and exactly how to make it happen.
Why You’ll Love This Recipe
There are a dozen reasons I keep coming back to this honey garlic chicken, but if I had to narrow it down, it’s because it hits every single button for a perfect weeknight meal. It’s not just “easy”—it’s foolproof. It’s not just “quick”—it’s genuinely fast. And it’s not just “tasty”—it’s the kind of flavor that gets requests for seconds.
Here’s the real deal on why this crispy baked honey garlic chicken thighs recipe works so well:
- Zero Guesswork — Seriously, if you can stir a sauce and arrange chicken on a baking sheet, you can make this. I’ve walked my teenager through it over FaceTime. He got it right the first time.
- Lightning Fast — 20 minutes from start to finish, and only 5 of those are active prep. The rest is just the oven doing the heavy lifting. I make this on nights when I get home at 7pm and want dinner on the table by 7:30.
- Pantry-Friendly — You probably have every single ingredient already. Honey, garlic, soy sauce, cornstarch. I keep these stocked just so I can throw this together on a whim.
- Crispy Without Frying — This is the big one. Most “baked” chicken is sad and soggy. This method uses a cornstarch coating that crisps up in the oven like it was deep-fried. No oil splatter, no mess, just crunchy skin.
- Makes Amazing Leftovers — Actually tastes better the next day. The sauce thickens and clings even more. I deliberately make extra for lunch throughout the week.
- Budget-Smart — Feeds 4-6 people for under $12. Chicken thighs are cheaper than breast, and honey/garlic are cheap staples. That’s less than one meal at a fast-food place.
This is my go-to when I need dinner to just work. No complicated techniques, no weird ingredients, just reliable, delicious food that makes everyone happy. And honestly? It pairs perfectly with simple sides. If you’re looking for a quick lunch to pair with this for next day’s meals, these ham and cheese pretzel roll-ups are a fantastic grab-and-go option that kids love.
Ingredients You’ll Need
Here’s the best part: you probably have most of this already. This isn’t a recipe that requires a special trip to a specialty store. It’s built on basics that elevate each other. I’m particular about three things here, and I’ll tell you exactly why.
Chicken thighs (2 pounds / 900g) — Boneless, skinless thighs. Do not use chicken breast. Thighs have enough fat to stay juicy in the oven. Breast meat dries out instantly under high heat. If you must use breast, cut them very small and watch them like a hawk.
Cornstarch (2 tablespoons / 15g) — This is the secret weapon. It creates that crispy coating. Flour doesn’t get as crispy. Breadcrumbs add too much bulk. Cornstarch is the gold standard for oven-fried texture.
Honey (1/3 cup / 120ml) — Use real honey. Not the high-fructose corn syrup “honey” product in the bear bottle. Real honey caramelizes. It gets sticky and glossy. I use wildflower or clover, but any clear honey works.
Garlic (6 cloves, minced / about 2 tablespoons) — Yes, six cloves. Don’t skimp. Fresh only—no jarred garlic in this recipe. Jarred garlic has a metallic taste that clashes with the sweetness of the honey. If you’re being lazy, buy pre-peeled cloves, but mince them yourself.
Soy sauce (3 tablespoons / 45ml) — Use low-sodium if you can. It lets you control the salt level. Regular soy sauce works, but you might need to skip adding extra salt later. Fish sauce is a weird but amazing substitute if you want umami depth.
Rice vinegar (1 tablespoon / 15ml) — Or apple cider vinegar. This cuts the sweetness. Without acid, this sauce is cloying. The vinegar balances the honey perfectly.
Sesame oil (1 teaspoon / 5ml) — Toasted sesame oil. Not the raw kind. Just a teaspoon. It adds that nutty aroma that makes you think you’re at a restaurant. You can skip it if you’re out, but don’t.
Red pepper flakes (½ teaspoon) — Optional but adds nice kick. Start with less if you’re sensitive to spice. I like a little heat to contrast the sweet sauce.
Green onions (2 stalks, sliced) — For garnish. Adds fresh color and a mild onion bite. I throw these on right before serving.
Sesame seeds (1 tablespoon) — Toasted sesame seeds. Adds crunch and visual appeal. I buy them pre-toasted to save time.
Equipment Needed
You don’t need fancy equipment for this. Here’s what I actually use.
Baking sheets — I use two standard half-sheet pans. If you only have one, do two batches. Crowding the pan steams the chicken instead of crisping it. I learned this the hard way with a sad, soggy batch of chicken.
Parchment paper — Line your sheets. This is non-negotiable for cleanup. The honey burns if it touches the metal directly. Parchment saves you scrubbing later.
Large mixing bowl — For tossing the chicken in cornstarch. Any bowl works.
Small saucepan or microwave-safe bowl — For heating the sauce. I use the microwave because it’s faster. Takes 60 seconds.
Whisk — For mixing the sauce. A fork works in a pinch.
Sharp knife — For mincing garlic and slicing green onions. Dull knives make you cry more—learned this the hard way.
Measuring cups and spoons — Pretty standard stuff. Dollar store versions work fine.
Optional but nice: Kitchen shears — For trimming fat off the chicken thighs if they’re particularly fatty. I usually skip this step because the fat renders out anyway.
How to Make It: Step-by-Step
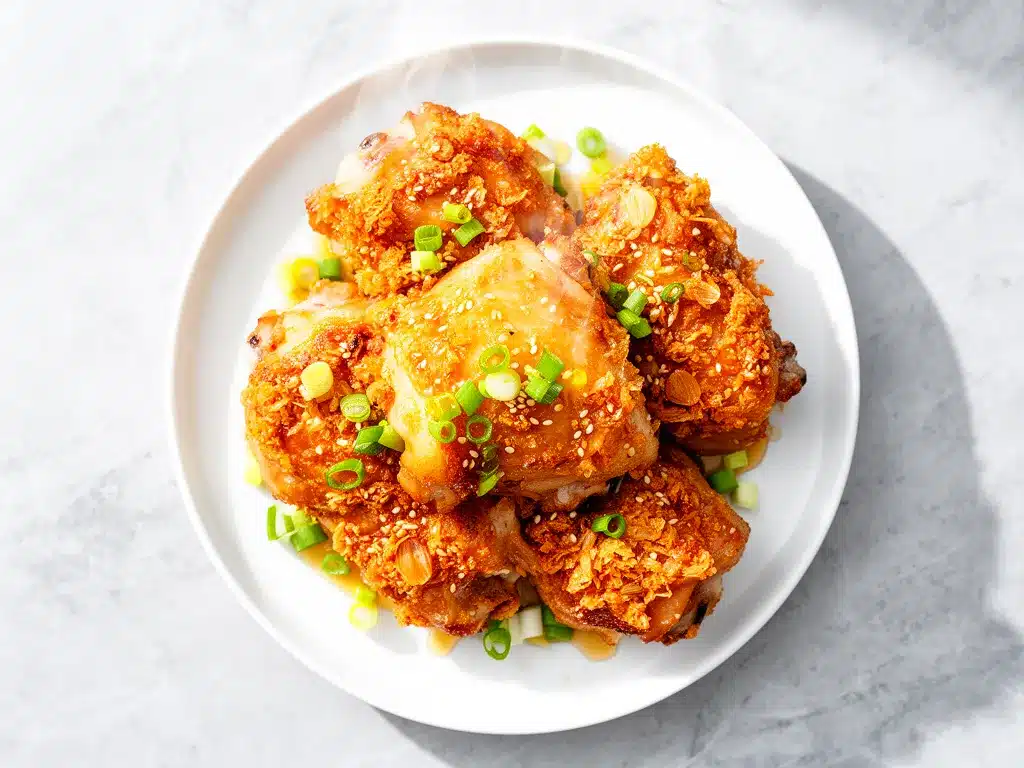
Alright, let’s make this! I’m walking you through exactly how I do it, including the little tricks I’ve picked up. This crispy baked honey garlic chicken thighs recipe is straightforward, but the order matters.
Step 1: Prep the Chicken (5 minutes)
Pat the chicken thighs completely dry with paper towels. This is crucial. Moisture is the enemy of crispiness. If the chicken is wet, the cornstarch turns into mush instead of a crust. I know it’s tedious, but don’t skip it.
Place the dried thighs in a large bowl. Sprinkle the cornstarch over them. Toss until every piece is lightly coated. It should look dusty, not pasty. You want a thin layer, not a batter.
Step 2: Arrange on the Pan (2 minutes)
Line your baking sheets with parchment paper. Arrange the chicken in a single layer. Do not let the pieces touch. Air needs to circulate around them to crisp up. If you’re using one pan, leave more space between pieces.
Place them in the oven while you make the sauce. They’ll start to dry out and firm up, which helps the sauce stick later.
Step 3: Make the Sauce (3 minutes)
While the chicken is in the oven, whisk together the honey, soy sauce, minced garlic, rice vinegar, sesame oil, and red pepper flakes in a small bowl. Heat it in the microwave for 30-45 seconds until it’s warm and runny. This helps the honey blend with the soy sauce. If you skip heating, the honey might clump.
Step 4: The Bake (12-15 minutes)
Take the chicken out. It should look dry and slightly firm. Brush or drizzle half of the sauce over the chicken. Flip the pieces over and brush the other side. The sauce will start to bubble and glaze immediately.
Put it back in the oven for another 5-7 minutes. You’re looking for the sauce to caramelize and the chicken to be cooked through (165°F internal temperature). The edges should be dark and sticky.
Step 5: Rest and Garnish (2 minutes)
Take the pan out. Let the chicken rest for 2 minutes. This lets the juices redistribute. If you cut it immediately, the juice runs out and the meat gets dry.
Transfer to a serving platter. Sprinkle with sliced green onions and sesame seeds. Serve immediately while the crust is still crispy.
Total Time: About 20 minutes (5 minutes active, 15 minutes mostly hands-off).
Built-in Troubleshooting:
- Sauce too thin? Simmer it on the stove for 2 extra minutes before brushing. Or just brush more layers.
- Sauce too thick? Add a teaspoon of water to loosen it.
- Chicken not crispy? You crowded the pan. Next time, use two pans or two batches.
Expert Tips & Tricks
Here’s everything I’ve learned from making this dozens of times. These tips will save you from my mistakes.
Pat the Chicken Dry
This is the #1 tip. I’ve made this recipe with wet chicken twice. Both times, the result was soggy and disappointing. Once I started patting it dry, the difference was night and day. The cornstarch needs a dry surface to adhere to and crisp up.
Don’t Skip the Single Layer
I tried making this in a slow cooker once because I was lazy. It tasted good, but it had zero texture. Crispiness comes from dry heat and surface area. If you crowd the pan, the chicken steams in its own moisture. Use two pans if you have to.
Warm the Sauce
Room temperature honey is thick and hard to mix. Warming it slightly makes it pourable and easier to brush. It also helps the sauce spread evenly over the chicken.
Use Thighs, Not Breast
I know thighs have more fat. But that fat renders out in the oven, basting the meat from the inside. Breast meat has no fat to speak of, so it dries out in the high heat required for crispiness. If you must use breast, cut it into bite-sized chunks and reduce cook time by 3 minutes.
Pro Trick: Double Dip
For extra crispy, brush with sauce, bake, take out, brush again, and bake for 2 more minutes. The second layer of sauce caramelizes on top of the first, creating a glass-like shell.
Variations & Substitutions
Once you’ve nailed the basic version, here’s how you can mix it up. I’ve tried all of these.
Spicy Honey Garlic
Add 1 teaspoon of gochujang (Korean chili paste) or 1 tablespoon of sriracha to the sauce. It adds a fermented depth and real heat. My friend who loves spice requests this version.
Teriyaki Style
Swap the rice vinegar for mirin (sweet rice wine). Add 1 teaspoon of grated ginger. It’s sweeter and more Japanese-inspired.
Asian Slaw Side
This chicken pairs amazingly with crunchy salads. If you’re serving this for a dinner party, try a simple banana oat breakfast cookies for a sweet contrast if you’re doing a brunch-style dinner, or just stick to a simple vinegar-based slaw for lunch leftovers.
Dairy-Free
This recipe is naturally dairy-free. Just make sure your soy sauce and honey are vegan-friendly (some honey is filtered through beeswax, which some vegans avoid, but most honey is considered vegan). Use tamari instead of soy sauce if you need gluten-free.
Gluten-Free
Use tamari instead of soy sauce. Everything else is naturally gluten-free. Cornstarch is fine.
Lower Sugar
Reduce honey to ¼ cup and add a pinch of erythritol or stevia to balance the salt. It’s not as glossy, but it’s lower carb. I won’t lie—it’s not as good, but it works if you’re watching sugar.
Serving & Storage
How to Serve:
I usually serve this straight from the baking sheet at the dinner table—it looks rustic and stays warm. But here are other ways I’ve enjoyed it:
- Over Rice — Steamed jasmine or brown rice. Spoon the extra sauce from the pan over the top.
- With Noodles — Tossed with soba or rice noodles.
- In Lettuce Wraps — Chop the chicken and put it in butter lettuce cups with the sauce. Fun and light.
- With Roasted Veggies — Broccoli or green beans roasted on a separate sheet pan at the same time.
Storage Instructions:
Refrigerator: Store in an airtight container for up to 4 days. The sauce will thicken in the fridge—totally normal.
Reheating: Best method: Add to a skillet with a splash of water over low heat. Stir until heated through and the sauce loosens. Microwave method: Heat in 30-second intervals, stirring between. Add a splash of water if it’s too thick. Never works: Trying to reheat in the air fryer at high heat—it dries out the coating. If you use an air fryer, go low and slow.
Freezing: Honestly, this doesn’t freeze well because the cornstarch coating gets weird when thawed and reheated. The texture becomes soft and soggy. Make it fresh or store in the fridge for up to 4 days.
Meal Prep: Cook the chicken and sauce on Sunday. Store separately. Reheat gently during the week. It’s a great make-ahead option.
Nutrition Information
I’m not a nutritionist, but here’s the breakdown if you’re tracking.
Per Serving (based on 4 servings, 4 thighs each):
- Calories: 380
- Protein: 35g
- Carbs: 22g
- Fiber: 0g
- Sugar: 18g
- Fat: 18g
- Sodium: 650mg
What’s Good: High protein. Low carb if you skip the rice. No dairy.
What to Know: Higher in sugar from the honey. Moderate sodium from soy sauce. Use low-sodium soy sauce to reduce salt.
My Take: Look, this is comfort food with honey and soy sauce. It’s not a diet recipe. But it’s way better than takeout, costs less, and I know exactly what’s in it. When I want to make it lighter, I serve it over cauliflower rice instead of white rice. But usually? I just eat a reasonable portion and enjoy it.
Final Thoughts
So that’s my go-to crispy baked honey garlic chicken thighs! I’ve probably talked your ear off at this point, but when you make a recipe this often, you have a lot to say about it.
This has saved weeknight dinners more times than I can count. It’s my answer to “what’s for dinner” when I’m tired, don’t want takeout, and still want something that tastes really good. My kids are happy, my husband’s happy, and I’m happy because I’m not stressed about cooking.
Make it yours! Try different add-ins, swap in your favorite vegetables, adjust the garlic (though more is always better in my opinion). The best recipes are the ones you adapt to your family’s tastes.
If you make this, drop a comment and let me know what you think! I love hearing how recipes turn out in your kitchen. And if something doesn’t work, tell me that too—I’m here to help troubleshoot.
Happy cooking! And I hope your kitchen smells half as good as mine does right now.
Frequently Asked Questions
Can I use chicken breast instead of thighs?
You can, but the texture will be different. Breast meat is leaner and dries out faster. If you use breast, cut it into uniform 1-inch pieces and reduce the cook time by 3-4 minutes. Check the temperature early so it doesn’t get rubbery. Thighs are just more forgiving.
Why is my chicken soggy instead of crispy?
Usually means you didn’t pat the chicken dry enough, or you crowded the pan. Moisture prevents crisping. If the pieces are touching, they steam each other. Use two pans, or bake in two batches. Also, make sure your oven is fully preheated.
Can I make the sauce ahead of time?
Yes! Mix the sauce ingredients and store in a jar in the fridge for up to 3 days. Warm it slightly before using to make it easier to brush. It might separate a bit—just whisk it back together.
How do I reheat leftovers without drying them out?
Add a splash of water or broth to a skillet, add the chicken, and heat gently over medium-low heat. Cover the pan to trap steam. This rehydrates the chicken and loosens the sauce. Microwave heating tends to dry out the coating, so if you must microwave, add a few drops of water and cover with a damp paper towel.
Can I use garlic powder instead of fresh garlic?
I don’t recommend it. Fresh garlic has a brightness and sweetness that powder lacks. Powder can taste dusty or metallic in a quick sauce. If you must, use 1 teaspoon of garlic powder, but fresh is worth the 2 minutes of mincing.
Is this recipe spicy?
Not inherently. The red pepper flakes are optional and mild. If you add them, it’s a gentle warmth. If you want it spicy, add sriracha or chili flakes. The base flavor is sweet and savory, not hot.
Can I double this recipe?
Absolutely! Double everything and use two baking sheets. Cook time stays the same. Just make sure your oven has space between the racks for air circulation. I do this when I’m meal-prepping or feeding a crowd.
Pin This Recipe!

Crispy Baked Honey Garlic Chicken Thighs
- Total Time: 20 minutes
- Yield: 4 servings 1x
Description
A foolproof, 20-minute weeknight dinner featuring juicy chicken thighs coated in cornstarch for crispiness and glazed with a sticky, sweet, and savory honey garlic sauce.
Ingredients
- 2 pounds boneless, skinless chicken thighs
- 2 tablespoons cornstarch
- 1/3 cup honey
- 6 cloves garlic, minced
- 3 tablespoons soy sauce (low-sodium recommended)
- 1 tablespoon rice vinegar
- 1 teaspoon toasted sesame oil
- 1/2 teaspoon red pepper flakes (optional)
- 2 green onions, sliced (for garnish)
- 1 tablespoon toasted sesame seeds (for garnish)
Instructions
- Preheat oven to 400°F (200°C). Line two baking sheets with parchment paper.
- Pat chicken thighs completely dry with paper towels to ensure crispiness.
- Place dried chicken in a large bowl, sprinkle with cornstarch, and toss until lightly coated.
- Arrange chicken in a single layer on the baking sheets, ensuring pieces do not touch.
- Bake chicken for 12-15 minutes until dry and slightly firm.
- While chicken bakes, whisk together honey, soy sauce, minced garlic, rice vinegar, sesame oil, and red pepper flakes in a small bowl.
- Heat the sauce in the microwave for 30-45 seconds until warm and runny.
- Remove chicken from oven. Brush half the sauce over the chicken, flip pieces, and brush with remaining sauce.
- Return to oven and bake for another 5-7 minutes until sauce caramelizes and chicken reaches 165°F internal temperature.
- Remove from oven and let rest for 2 minutes.
- Garnish with sliced green onions and sesame seeds. Serve immediately.
Notes
Patting the chicken dry is crucial for crispiness. Do not crowd the pan; use two sheets or bake in batches to avoid steaming. For extra crispy results, brush with sauce, bake, brush again, and bake for 2 more minutes. This recipe does not freeze well as the coating becomes soggy upon thawing.
- Prep Time: 5 minutes
- Cook Time: 15 minutes
- Category: Main Course
- Cuisine: Asian Fusion
Nutrition
- Serving Size: 4 thighs per serving
- Calories: 380
- Sugar: 18
- Sodium: 650
- Fat: 18
- Saturated Fat: 4
- Carbohydrates: 22
- Protein: 35
Keywords: honey garlic chicken, crispy baked chicken, quick dinner, weeknight meals, chicken thighs recipe, easy dinner, gluten-free options


