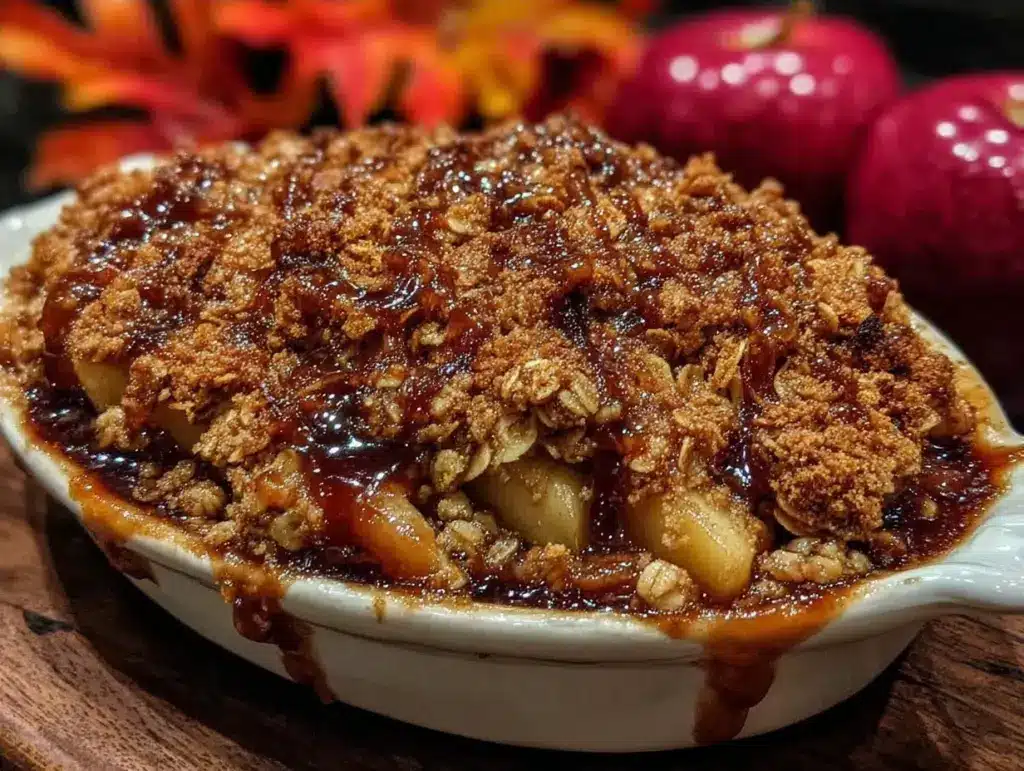
I remember the first time I made this apple crisp for a dinner party, I was actually terrified. Not because I couldn’t cook, but because I knew my guests. They were the kind of people who showed up with homemade bread to impress, who brought wines they’d actually read about, and who noticed if the napkins were slightly crooked. I wanted to match that energy, but I also wanted something that felt like a warm hug, not a high-stakes performance.
So I made this easy fall dessert apple crisp with buttery oat crumble. I didn’t use any fancy techniques. I didn’t try to make a complex lattice crust that required hours of patience. I just threw apples in a dish, made a crunchy topping, and baked it until the kitchen smelled like autumn itself. When I pulled it out of the oven, the aroma hit everyone before the plate did. Within minutes, half the bowl was gone. And yes, three different people asked for the recipe before the main course was even cleared.
That’s the magic of this apple crisp. It’s not just a dessert; it’s a mood. It’s the feeling of stepping outside when the air turns crisp and your cheeks get cold. It’s the comfort of a cozy chicken and wild rice soup on a rainy Tuesday, but in dessert form. It’s shareable, it’s forgiving, and it looks like you spent all day in the kitchen (even though you didn’t).
Over the last year, I’ve made this apple crisp recipe at least a dozen times. I’ve served it to large groups, I’ve made it for quiet nights with my partner, and I’ve even made it in a slow cooker when the power went out. It works every single time. The secret isn’t in the ingredients—it’s in the ratio of butter to oats, and knowing exactly how to get those apples tender but not mushy. I’ve tested this recipe so many times that I can practically see the final dish in my sleep. And now, I’m sharing it with you, so you can be the host who always has the best dessert on the table.
Why You’ll Love This Apple Crisp Recipe
There are a lot of apple desserts out there. You’ve got pies, tarts, cakes, and muffins. But this easy fall dessert apple crisp with buttery oat crumble hits a different spot. It’s rustic, it’s textural, and it’s incredibly satisfying. Here’s why this has become my go-to when I need to impress without the stress:
- Zero Pie Crust Stress — I can’t roll dough to save my life. Every time I try, it tears or shrinks. This crisp skips the crust entirely. You just scoop the apples in, sprinkle the topping, and bake. It’s foolproof. I’ve made this while holding a baby, and it still turned out perfect.
- The Crumble Topping is Everything — The star of this show is the buttery oat crumble. It’s crunchy, salty, sweet, and buttery all at once. It’s not just a topping; it’s a texture experience. It contrasts perfectly with the soft, spiced apples underneath. I’ve tried making it with just flour, but the oats make it so much better. Trust me on this.
- Uses What You Have — You probably have most of these ingredients in your pantry right now. Apples, oats, flour, sugar, butter, cinnamon. If you have those, you can make this. I don’t require any exotic spices or hard-to-find items. This is a pantry-friendly recipe that feels gourmet.
- Makes Amazing Leftovers (If You Can Resist Them) — I’m not going to lie, this is usually gone in one sitting. But if you have leftovers, they’re amazing the next day. The oats get even crunchier, and the apples soften further. I often eat this cold for breakfast with a spoon, no shame. It’s basically apple pie in a bowl.
- Feeds a Crowd for Cheap — Apples are cheap in the fall. You can make a large, impressive dessert for under $10. That’s a fraction of the cost of buying a slice at a bakery. And it tastes better, too. I made this for a group of 12, and it cost me about $8 at the grocery store. My guests thought I’d ordered it from a fancy shop.
This recipe is my answer to “What can I bring to the potluck?” or “What should I make when friends come over?” It’s comforting, it’s easy, and it always gets a reaction. It’s the kind of dessert that makes people stay at the table a little longer, sipping coffee and scraping the last bits of crumble from the dish.
Ingredients You’ll Need
This apple crisp recipe is simple, but the quality of your ingredients matters. You don’t need a lot, but you need good stuff. Here’s what you’ll need, along with my personal tips for each:
For the Apple Filling
Apples (6-7 medium, about 3-4 pounds / 1.5-2 kg) — This is the most important part. You want a mix of tart and sweet apples. I love using a combination of Granny Smith and Honeycrisp. Granny Smiths hold their shape and add tartness, while Honeycrisps add sweetness and softness. If you only have one type, that’s fine, but a mix is best. Avoid Red Delicious; they get mealy and bland when baked.
Granulated Sugar (½ cup / 100g) — This helps draw out the juices from the apples and caramelizes slightly. If you’re using very sweet apples, you can reduce this to ⅓ cup. I prefer ½ cup for that perfect balance of sweet and tart.
Apple Cider (2-3 tablespoons / 30-45ml) — A splash of cider adds a deep, autumnal flavor that vanilla can’t match. It’s optional, but I highly recommend it. If you don’t have cider, apple juice works too. I used cinnamon apple cider donut bars inspiration for this flavor profile, and it works beautifully here.
Lemon Juice (1 tablespoon / 15ml) — Prevents the apples from browning and adds brightness. It cuts through the richness of the butter and sugar. Fresh lemon is best; bottled doesn’t have the same punch.
Cinnamon (1 teaspoon / 2g) — The classic fall spice. Use ground cinnamon, not sticks. I like to use a good quality brand like McCormick; it’s potent and fresh.
Nutmeg (¼ teaspoon / 0.5g) — Just a pinch. It adds warmth and depth. Don’t overdo it; you don’t want to taste nutmeg, you want to taste the apple.
Cornstarch (1 tablespoon / 8g) — Thickens the apple juices so you don’t end up with a soupy bottom. If you don’t have cornstarch, arrowroot powder works too.
For the Buttery Oat Crumble
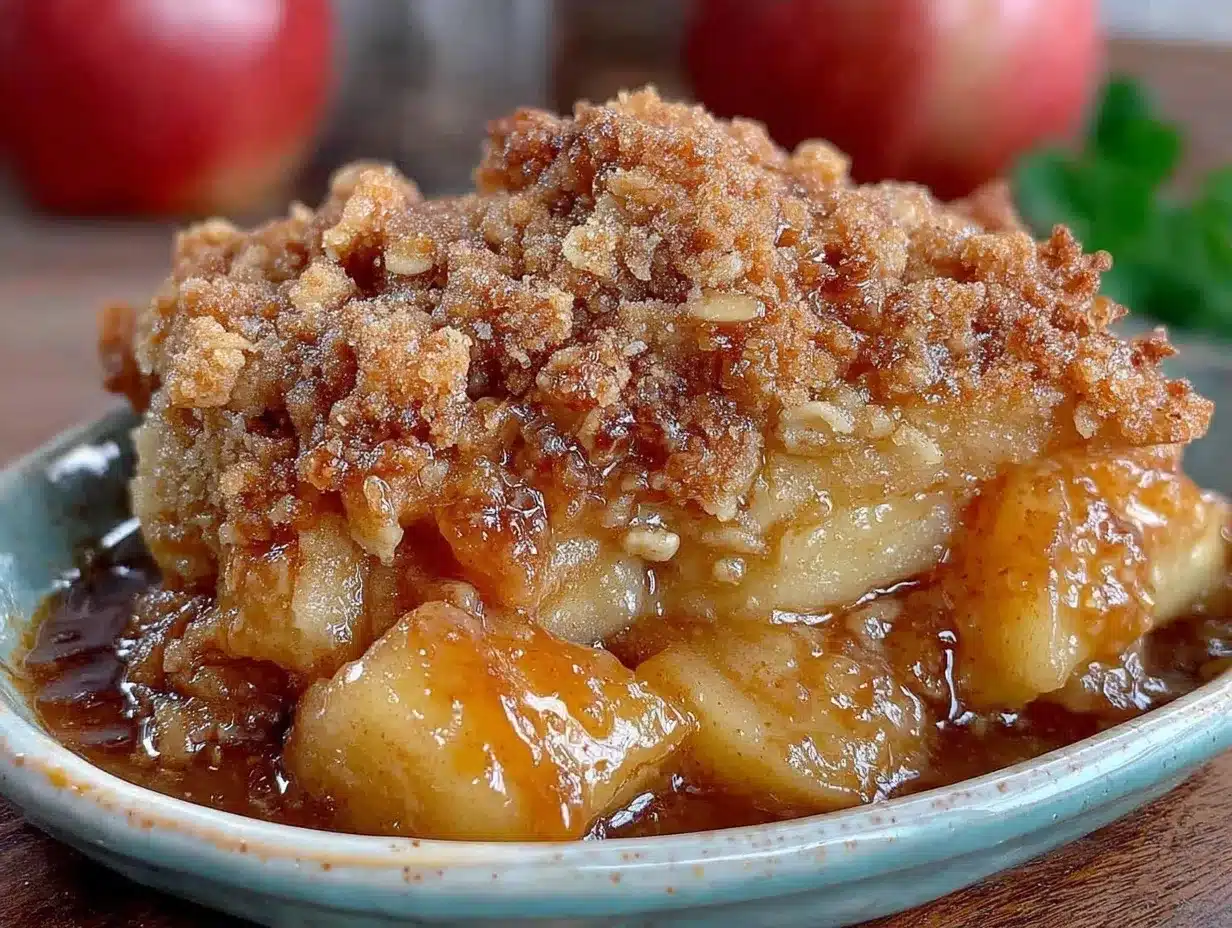
Old-Fashioned Rolled Oats (1 cup / 90g) — Do not use quick oats or steel-cut oats. Old-fashioned oats give you the right texture—chewy and crunchy. Quick oats turn to mush. This is non-negotiable for the best texture.
All-Purpose Flour (1 cup / 120g) — Binds the topping together. If you need a gluten-free version, use a 1:1 gluten-free flour blend. I’ve tested this with Bob’s Red Mill, and it works well.
Light Brown Sugar (¾ cup / 150g) — Adds moisture and a caramel-like flavor. Dark brown sugar works too if you like a deeper molasses taste. I prefer light for a softer crumble.
Cold Unsalted Butter (½ cup / 113g, cubed) — This is crucial. The butter must be cold. Cold butter creates steam pockets as it melts, creating flaky, crunchy bits. If the butter is soft, the topping will be dense and cake-like. Cut it into small cubes so it incorporates easily.
Flaky Sea Salt (½ teaspoon / 3g) — Salt enhances the sweetness and adds a savory contrast. I use Maldon sea salt flakes because they crunch nicely. Regular table salt works, but sprinkle it on top after baking for that extra crunch.
Vanilla Extract (1 teaspoon / 5ml) — Adds a subtle warmth. Pure vanilla is best; imitation tastes chemical. I keep a bottle of Nielsen-Massey in my pantry.
Optional Add-ins — I sometimes add ½ cup of chopped pecans or walnuts to the topping for extra nuttiness. It’s delicious, but not required. If you’re allergic to nuts, skip it.
Equipment Needed
You don’t need fancy gadgets for this. Here’s what I actually use:
9×13 Inch Baking Dish — A standard ceramic or glass baking dish works best. I use my Pyrex dish because it heats evenly. You can use a smaller 8×8 dish if you want a thicker crisp, but a 9×13 is perfect for feeding a crowd.
Large Mixing Bowl — For tossing the apples with spices and sugar. I use a stainless steel bowl because it’s heavy and doesn’t slip.
Medium Mixing Bowl — For the crumble topping. I like to use a separate bowl so I don’t mix up my apples and topping.
Pastry Blender or Fork — To cut the butter into the flour and oats. I use a fork because it’s what I have handy, but a pastry blender makes it faster. If you don’t have either, use your fingers, but be quick so the butter stays cold.
Peeler and Knife — To peel and slice the apples. I use a Y-peeler for speed and a serrated knife for slicing. Uniform slices (about ¼ inch thick) ensure even cooking.
Measuring Cups and Spoons — Standard stuff. I use metal measuring spoons because they’re durable.
Spatula — For spreading the topping evenly. A rubber spatula works well.
Optional: Apple Slicer — If you have an apple corer/slicer, it saves time. I don’t have one, but my sister swears by it. It’s a nice gadget if you make apple desserts often.
How to Make It: Step-by-Step
Alright, let’s make this! I’m walking you through exactly how I do it, including the little tricks I’ve picked up over the years. This easy fall dessert apple crisp with buttery oat crumble is simple, but attention to detail makes it great.
Step 1: Prep the Apples (10 minutes)
Preheat your oven to 350°F (175°C). Grease your 9×13 baking dish with butter or cooking spray. Peel, core, and slice the apples. I cut them into ¼-inch wedges. Uniformity is key here—if some pieces are thick and others thin, the thick ones will be raw when the thin ones are mushy. Toss the apple slices in a large bowl with the granulated sugar, lemon juice, cinnamon, nutmeg, and cornstarch. Make sure every slice is coated. The cornstarch will thicken the juices, so don’t skip it.
Step 2: Assemble the Filling (5 minutes)
Pour the apple mixture into the prepared baking dish. Spread it out evenly. If you’re adding apple cider, drizzle it over the apples now. It will pool at the bottom and create a delicious syrup as it bakes. Don’t worry if it looks wet; that’s where the flavor is. Use a spatula to flatten the top slightly so the topping sits evenly.
Step 3: Make the Crumble Topping (5 minutes)
In a medium bowl, whisk together the rolled oats, flour, and brown sugar. Add the cold, cubed butter. Here’s the trick: use your fingers, a pastry blender, or a fork to cut the butter into the dry ingredients. You want the mixture to look like coarse crumbs, with some pea-sized chunks of butter remaining. Don’t overmix! If you make it too fine, you’ll get a dough instead of a crumble. The chunks of butter are what create the crunchy, buttery bits.
Step 4: Add the Topping (2 minutes)
Spread the crumble mixture evenly over the apples. Don’t press it down; let it sit loosely on top. This allows air to circulate and helps it crisp up. If you’re using nuts, sprinkle them over the top now. Drizzle the vanilla extract over the crumble. It sounds weird, but it helps the topping brown evenly and adds flavor.
Step 5: Bake Until Golden (45-50 minutes)
Place the dish in the preheated oven. Bake for 45-50 minutes. You’ll know it’s done when the topping is golden brown and the apples are bubbling vigorously in the center. The bubbling is a good sign—it means the juices are thickening and the apples are cooked through. If the topping starts browning too quickly, loosely tent it with foil for the last 10 minutes. I usually check at 40 minutes.
Step 6: Cool and Serve (15 minutes)
Remove the crisp from the oven and let it cool for at least 15 minutes. This step is hard because it smells amazing, but cooling allows the filling to set slightly. If you serve it immediately, the filling will be too runny. Serve warm with a scoop of vanilla ice cream or whipped cream. The contrast between the hot crisp and cold ice cream is heavenly. I also like a dollop of whipped cream on top for extra indulgence.
Total Time: About 1 hour (15 minutes prep, 45 minutes bake).
Expert Tips & Tricks
Here’s everything I’ve learned from making this dozens of times. These tips will save you from my mistakes.
Choose the Right Apples
This is the #1 mistake people make. If you use Gala or Fuji, they might turn to mush. If you use only Granny Smith, they might be too tart. A mix is best. I’ve tried using only Honeycrisp, and it worked, but the mix is more complex. Ask your grocer for apples that hold their shape when baked.
Keep the Butter Cold
I cannot stress this enough. If your butter is soft, your crumble will be dense. Cut the butter into cubes and put it back in the fridge for 10 minutes before adding it to the dry ingredients. If your kitchen is warm, work quickly. Cold butter = crunchy topping. Soft butter = cakey topping.
Don’t Skip the Salt
Salt is not just for flavor; it balances the sweetness. The flaky sea salt on top adds a textural contrast that’s addictive. I’ve made this without salt, and it tasted flat. Don’t skip it.
Bubble Check
Look for bubbling edges and center. If the juices aren’t bubbling, the apples aren’t cooked, and the cornstarch hasn’t activated. If you’re worried it’s not done, bake for another 5-10 minutes. Undercooked apples are unpleasant.
Storage and Reheating
Store leftovers in the refrigerator for up to 4 days. The topping will soften in the fridge, but you can reheat it in the oven at 350°F for 10 minutes to crisp it back up. I don’t recommend microwaving, as it makes the topping soggy. If you reheat in the microwave, do it in short bursts and serve immediately.
Variations & Substitutions
Once you’ve nailed the basic version, here’s how you can mix it up. I’ve tried all of these.
Pear Crisp
Swap the apples for pears. Pears are softer, so reduce the baking time by 5-10 minutes. Add a little extra cinnamon. It’s delicate and beautiful.
Strawberry Rhubarb Crisp
Use a mix of strawberries and rhubarb. Rhubarb is tart, so you might need a bit more sugar. This is a classic spring/early summer combination.
Gluten-Free
Use a 1:1 gluten-free flour blend in the topping. Ensure your oats are certified gluten-free. Everything else is naturally gluten-free. I’ve tested this with Bob’s Red Mill, and it works perfectly.
Dairy-Free
Replace the butter with cold coconut oil or a dairy-free butter alternative. Coconut oil works well, but it will add a slight coconut flavor. Vegan butter works too. The texture might be slightly different, but it’s still delicious.
Spiced Variations
Add a pinch of cardamom or allspice for a different flavor profile. I love adding a little cardamom for a Scandinavian twist. It’s subtle but sophisticated.
Crunchy Add-ins
Add chopped pecans, walnuts, or almonds to the topping. Toast them first for extra flavor. I sometimes add a tablespoon of demerara sugar for extra crunch.
Serving & Storage
How to Serve: I usually serve this straight from the baking dish at the table—it looks rustic and stays warm. But here are other ways I’ve enjoyed it:
- With Ice Cream: Vanilla bean ice cream is classic. It melts into the crisp and creates a sauce. I also like salted caramel ice cream for a sweet-salty combo.
- With Whipped Cream: Homemade whipped cream is light and airy. Sweeten it lightly with powdered sugar.
- With Yogurt: For a lighter option, serve with Greek yogurt. It adds protein and tang.
- With Coffee: This pairs perfectly with a strong cup of coffee. It’s a great afternoon treat.
Storage: Store in an airtight container in the refrigerator for up to 4 days. The topping will soften, but you can reheat it in the oven to crisp it up.
Reheating: Reheat in the oven at 350°F for 10-15 minutes. This restores the crunch. Microwave reheating makes the topping soggy, so avoid it if you want the best texture.
Freezing: You can freeze the unbaked crisp. Assemble it, wrap it tightly in plastic wrap and foil, and freeze for up to 3 months. Thaw overnight in the fridge before baking. You may need to add 5-10 minutes to the baking time.
Nutrition Information
I’m not a nutritionist, but here’s the breakdown if you’re tracking. Note that this is per serving (based on 8 servings).
Per Serving:
- Calories: 320
- Protein: 4g
- Carbs: 52g
- Fiber: 5g
- Sugar: 32g
- Fat: 12g
- Saturated Fat: 7g
- Cholesterol: 30mg
- Sodium: 150mg
What’s Good: High in fiber from the oats and apples. It’s a relatively simple dessert with no artificial ingredients.
What to Know: It’s high in sugar due to the brown sugar and apples. If you’re watching sugar, reduce the brown sugar to ½ cup and use less sweet apples.
My Take: Look, this is a dessert. It’s meant to be indulgent. But it’s better than a processed bar or cake because you know what’s in it. When I want to make it lighter, I reduce the sugar and add more nuts for protein. But usually? I just enjoy a small portion and savor it.
Final Thoughts
So that’s my go-to easy fall dessert apple crisp with buttery oat crumble! I’ve probably talked your ear off at this point, but when you make a recipe this often, you have a lot to say about it. This has saved me more times than I can count. It’s my answer to “What dessert can I make that feels special but is easy?” My guests are always impressed, and I’m always happy because I’m not stressed in the kitchen.
Make it yours! Try different apples, add nuts, or change the spices. The best recipes are the ones you adapt to your tastes. If you make this, drop a comment and let me know what you think! I love hearing how recipes turn out in your kitchen. And if something doesn’t work, tell me that too—I’m here to help troubleshoot.
Happy baking! And I hope your kitchen smells half as good as mine does right now.
Frequently Asked Questions
Can I use frozen apples?
You can, but thaw them first and drain the excess liquid. Frozen apples release a lot of water, which can make the crisp soupy. If you use frozen, reduce the cornstarch to 1 teaspoon and bake for an extra 5-10 minutes. Fresh apples are best for texture.
Why did my topping turn out soggy?
This usually happens if the butter was too soft or if the apples released too much liquid. Make sure your butter is cold and cubed. Also, ensure your apples are coated in cornstarch to thicken the juices. If the topping is soggy, you can broil it for 1-2 minutes to crisp it up, but watch it closely so it doesn’t burn.
Can I make this ahead of time?
Yes! Assemble the crisp up to 24 hours ahead. Cover it and refrigerate. When you’re ready to bake, let it sit at room temperature for 15 minutes, then bake as directed. You may need to add 5-10 minutes to the baking time since it’s starting cold. This is great for dinner parties.
What’s the best apple for apple crisp?
I recommend a mix of Granny Smith and Honeycrisp. Granny Smiths hold their shape and add tartness, while Honeycrisps add sweetness and softness. Other good options include Pink Lady, Braeburn, and Jonagold. Avoid Red Delicious, as they get mealy.
Can I use quick oats instead of rolled oats?
I don’t recommend it. Quick oats are thinner and will turn to mush when baked. You want the texture of old-fashioned rolled oats. If you only have quick oats, you can use them, but the topping will be less crunchy. Steel-cut oats won’t work at all; they’re too hard.
How do I store leftovers?
Store in an airtight container in the refrigerator for up to 4 days. Reheat in the oven at 350°F for 10 minutes to restore the crunch. Do not freeze the baked crisp, as the texture will suffer. You can freeze the unbaked crisp instead.
Pin This Recipe!

Apple Crisp Recipe: Best Easy Fall Dessert for Guests
- Total Time: 1 hour
- Yield: 8 servings 1x
Description
A rustic, foolproof fall dessert featuring tender spiced apples topped with a crunchy, buttery oat crumble. This easy-to-make crisp is perfect for impressing guests without the stress of pie crusts.
Ingredients
- 6–7 medium apples (about 3–4 lbs), peeled, cored, and sliced into ¼-inch wedges (mix of Granny Smith and Honeycrisp recommended)
- ½ cup granulated sugar
- 2–3 tablespoons apple cider
- 1 tablespoon lemon juice
- 1 teaspoon ground cinnamon
- ¼ teaspoon ground nutmeg
- 1 tablespoon cornstarch
- 1 cup old-fashioned rolled oats
- 1 cup all-purpose flour
- ¾ cup light brown sugar
- ½ cup cold unsalted butter, cubed
- ½ teaspoon flaky sea salt
- 1 teaspoon vanilla extract
- Optional: ½ cup chopped pecans or walnuts
Instructions
- Preheat oven to 350°F (175°C) and grease a 9×13 inch baking dish.
- In a large bowl, toss apple slices with granulated sugar, lemon juice, cinnamon, nutmeg, and cornstarch until evenly coated.
- Pour the apple mixture into the prepared baking dish and spread evenly. Drizzle apple cider over the top if using.
- In a medium bowl, whisk together rolled oats, flour, and brown sugar.
- Add cold cubed butter to the dry ingredients. Use a pastry blender, fork, or fingers to cut the butter in until the mixture resembles coarse crumbs with some pea-sized butter chunks remaining.
- Spread the crumble topping evenly over the apples. Do not press down. Drizzle vanilla extract over the topping.
- Bake for 45-50 minutes, or until the topping is golden brown and the apple juices are bubbling vigorously in the center.
- If the topping browns too quickly, tent loosely with foil for the last 10 minutes.
- Remove from oven and let cool for at least 15 minutes to allow the filling to set.
- Serve warm with vanilla ice cream or whipped cream.
Notes
Use cold butter for a crunchy topping; soft butter results in a dense texture. A mix of tart (Granny Smith) and sweet (Honeycrisp) apples provides the best flavor and texture balance. Avoid Red Delicious apples as they become mealy when baked. Leftovers can be stored in the refrigerator for up to 4 days and reheated in the oven to restore crunch. The unbaked crisp can be frozen for up to 3 months.
- Prep Time: 15 minutes
- Cook Time: 45 minutes
- Category: Dessert
- Cuisine: American
Nutrition
- Serving Size: 1 slice
- Calories: 320
- Sugar: 32
- Sodium: 150
- Fat: 12
- Saturated Fat: 7
- Carbohydrates: 52
- Fiber: 5
- Protein: 4
Keywords: apple crisp, fall dessert, easy dessert, oat crumble, buttery topping, gluten-free option, dairy-free option, party dessert, rustic dessert


