I’ve made this mistake at least five times now, and honestly? It’s my favorite kitchen accident. It was about 6:30 PM on a rainy Tuesday last month. I had just finished a brutal spin class, my muscles were screaming, and I was starving. I dug into my pantry, hoping for something quick, and found a jar of peanut butter that was so stiff I had to microwave it for ten seconds just to get a spoon in. Next to it was a bag of protein powder that had been sitting there since January, gathering dust and skepticism.
I didn’t have time to bake. I didn’t have energy to cook. So I threw everything into a bowl: oats, protein powder, that stubborn peanut butter, a splash of milk, and a handful of dark chocolate chips. I mixed it with my hands because the spoon was too tedious. The mixture was a disaster. It was crumbly, dry, and looked like bird feed. I almost threw it in the trash.
But then I remembered a tip I’d read about binding agents. I added a tablespoon of honey. I mixed again. Suddenly, it clumped. It held together. I rolled them into little balls, tossed them in the freezer for twenty minutes, and ate one while waiting for my dinner to finish cooking. The texture was dense, chewy, and intensely chocolatey. It hit the spot exactly when I needed it to. That was the moment I realized I didn’t need a complicated recipe. I just needed the right ratio of sticky to dry.
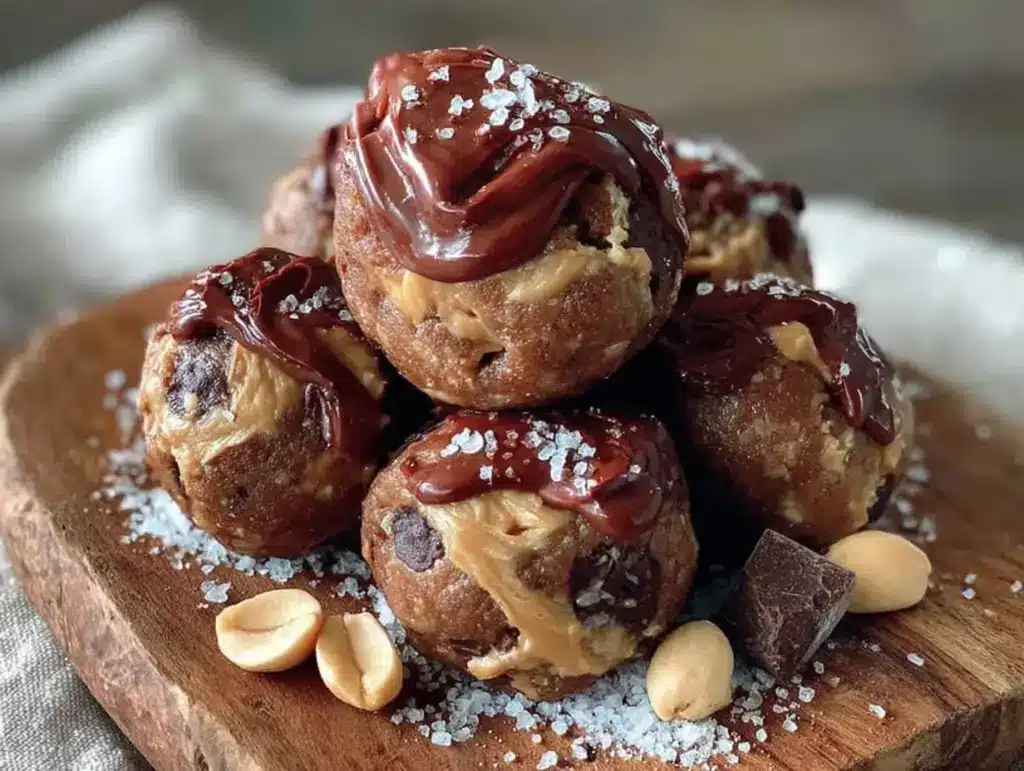
That accidental snack became the foundation for what is now my most requested recipe. These High-Protein Chocolate Peanut Butter Protein Balls are not just a snack; they are my secret weapon for busy afternoons, post-workout recovery, and that 3 PM slump when I want something sweet but don’t want to crash. I’ve tweaked the ratios so many times—testing different brands of protein powder, swapping nut butters, and figuring out exactly how much liquid makes them hold together without being gummy.
Here’s the thing about these High-Protein Chocolate Peanut Butter Protein Balls: they require zero baking. No oven, no mess, no waiting for timers. You just mix, roll, and chill. They taste like a peanut butter cup but pack enough protein to keep you satisfied for hours. I keep a container of them in the fridge right next to my loaded baked potato soup ingredients because, let’s be honest, comfort food comes in many forms. Whether you’re looking for a quick breakfast on the go or a late-night treat, these balls are the answer. I’ve made them for my kids, my gym buddies, and myself, and they always disappear within days. Let’s get into exactly how to make them perfect every single time.
Why You’ll Love This Recipe
There are a hundred protein ball recipes out there, but this one sticks. It’s not because it’s complicated; it’s because it actually works. I’ve tried recipes that fell apart in my hands and recipes that tasted like chalk. These High-Protein Chocolate Peanut Butter Protein Balls hit the sweet spot—literally and figuratively. Here is why they have earned a permanent spot in my weekly meal prep routine:
- Zero Baking Required — I made these on a whim while my pasta water was boiling. No oven heat, no preheating, no waiting. Just a bowl, a spoon, and twenty minutes in the fridge. It’s the ultimate lazy chef’s win.
- Actually Tastes Like Dessert — Many protein snacks taste medicinal. These taste like a high-end peanut butter cup. The combination of cocoa powder and creamy peanut butter masks the “supplement” flavor of the protein powder completely. My husband, who usually turns his nose up at “health food,” asks for these daily.
- Meal Prep Friendly — I make a batch on Sunday morning, and they last all week. They don’t get soggy, they don’t dry out, and they don’t require reheating. Grab one from the fridge, and you’re good to go. It’s better than grabbing a banana bread slice if you’re watching your sugar intake, because these keep your energy stable.
- Customizable Protein Sources — I’ve used whey, casein, and plant-based pea protein in this recipe. They all work. If you’re vegan, swap the honey for maple syrup. If you’re lactose intolerant, use almond milk. This recipe bends to your dietary needs without breaking.
- Pantry Staples — You likely have most of these ingredients right now. Oats, peanut butter, protein powder, cocoa powder. If you don’t, they’re cheap and easy to find. I don’t need fancy superfoods to make this work.
- Portion Control Built-In — Each ball is roughly 150 calories and 12-15 grams of protein. It’s a substantial snack that stops you from overeating later. I used to graze on crackers until dinner; now I have these ready to go.
This is my go-to when I need a snack that just works. No thinking, no cooking, just good food.
Key Ingredients for Perfect Texture
The secret to these High-Protein Chocolate Peanut Butter Protein Balls isn’t just the flavor; it’s the texture. If you use the wrong ratio of wet to dry, you end up with a crumbly mess or a rubbery brick. Here is exactly what I use and why each ingredient matters.
Rolled Oats (1 ½ cups / 150g)
Use old-fashioned rolled oats, not instant or steel-cut. Instant oats are too fine and will make the balls dense and pasty. Steel-cut oats are too hard and won’t bind properly. Rolled oats provide that chewy, hearty texture that makes these balls satisfying to eat. If you need gluten-free, make sure to buy certified gluten-free oats, as regular oats are often processed in facilities with wheat.
Creamy Peanut Butter (½ cup / 130g)
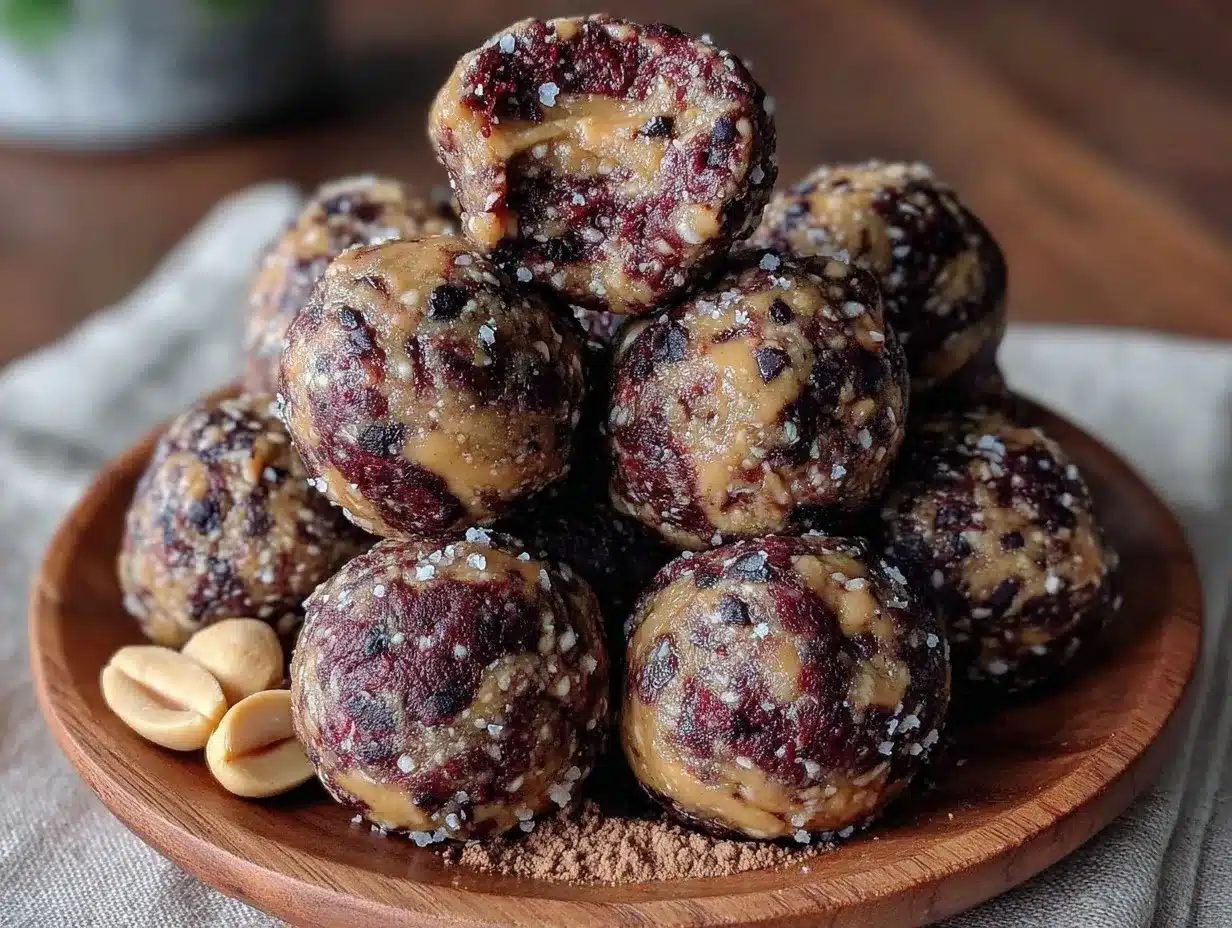
This is the primary binder and flavor driver. Use natural peanut butter if you prefer, but be aware that natural PB separates, so you’ll need to stir it thoroughly until it’s emulsified. Standard commercial peanut butter (like Skippy or Jif) works great because it’s already emulsified with stabilizers, making it easier to mix. Avoid “no-stir” crunchy peanut butter if you want a smooth ball; the chunks can make rolling difficult. If you’re allergic to peanuts, sunflower seed butter is a fantastic substitute.
Protein Powder (1 scoop / ~30g)
This is where people go wrong. Whey protein absorbs moisture differently than plant-based protein. I recommend a vanilla whey isolate or a vanilla plant-based blend. Chocolate protein powder works too, but you may need to reduce the cocoa powder in the recipe to avoid bitterness. If you use a flavored protein, taste the mixture before chilling—it’s your last chance to adjust sweetness.
Unsweetened Cocoa Powder (2 tbsp / 10g)
This gives them that chocolatey depth. Use high-quality cocoa powder. Hershey’s is fine, but if you have a nice dutched-process cocoa, it will make the chocolate flavor richer. This is unsweetened, so don’t skip it thinking it’s too bitter; the honey and protein powder will balance it out.
Honey or Maple Syrup (3 tbsp / 45ml)
This is the sticky glue. Honey adds a floral sweetness and helps bind the oats. Maple syrup is a great vegan alternative. If your peanut butter is very dry, you might need an extra tablespoon. If it’s very runny, start with 2 tablespoons. Add gradually until the mixture feels like damp sand.
Milk (2-3 tbsp / 30-45ml)
Dairy or non-dairy milk. I use almond milk to keep it lighter, but whole milk makes them richer. Add this slowly. You don’t want a soup; you want a dough. The milk hydrates the oats and protein powder, allowing them to swell and stick together.
Dark Chocolate Chips (¼ cup / 40g)
Stirred in at the end. These provide bursts of sweetness and texture. Use mini chips if you want them distributed evenly, or regular chips if you want bigger chunks. I like to reserve a few for rolling the outside of the balls for a fancy finish.
Tools You’ll Actually Need
You don’t need fancy equipment. I’m a home cook, not a pastry chef, and I don’t have a stand mixer for snacks. Here’s what I use:
- Large Mixing Bowl — I use a 4-quart stainless steel bowl. It’s big enough to mix everything without making a mess. Glass works too, but steel is easier to clean.
- Silicone Spatula — Essential for scraping the sides and mixing the sticky peanut butter. A wooden spoon works, but silicone gets into the nooks and crannies better.
- Ice Cream Scoop or Cookie Scoop — This is my game-changer. It ensures every ball is the same size, which means they chill evenly. I use a 1.5-tablespoon scoop. If you don’t have one, use two spoons to portion the dough.
- Baking Sheet — Line it with parchment paper. This prevents sticking and makes cleanup instant. I use a half-sheet pan, which fits perfectly in my fridge.
- Small Jar or Container — For storage. An airtight container keeps them fresh. I use a glass Tupperware with a snap-lock lid.
How to Make High-Protein Chocolate Peanut Butter Protein Balls
Let’s walk through the process. It’s simple, but there is one critical moment where most people mess up: the mixing consistency. Pay attention to that.
Step 1: Prep Your Dry Ingredients (2 minutes)
Start by measuring your rolled oats, protein powder, and cocoa powder into your large mixing bowl. Whisk them together briefly with a fork. This ensures the protein powder and cocoa are evenly distributed and there are no clumps. If you skip this, you might end up with a bite that is all protein powder and no flavor. Set aside.
Step 2: Combine Wet Ingredients (1 minute)
In a separate small bowl or directly into the dry mix, add the peanut butter, honey (or maple syrup), and milk. If your peanut butter is cold and stiff, microwave it for 15-20 seconds to soften it. This makes it much easier to mix. Pour the wet ingredients over the dry mix.
Step 3: The Mixing Phase (3-4 minutes)
This is the most important step. Use your silicone spatula to fold the ingredients together. Start by pressing the peanut butter into the oats. Then, add the milk slowly, tablespoon by tablespoon. Mix vigorously. You are looking for a consistency that looks like damp sand or crumbly cookie dough. It should hold together when you squeeze a handful in your palm. If it falls apart, add another teaspoon of milk. If it’s too sticky and sticks to your hands, add another teaspoon of oats.
Pro Tip: Do not overmix at this stage. Once the oats absorb the liquid, they swell. If you add too much liquid now, the balls will be gummy later. Better to err on the side of slightly dry; you can always add a drop more milk.
Step 4: Fold in Chocolate Chips (1 minute)
Once your dough is the right consistency, gently fold in the dark chocolate chips. Reserve a small handful if you want to roll the outside of the balls in them later. Mix just until distributed.
Step 5: Scoop and Roll (10 minutes)
Using your ice cream scoop, portion the dough onto the parchment-lined baking sheet. If you don’t have a scoop, use two spoons. Wet your hands slightly with water or oil to prevent sticking, then roll each portion into a smooth ball. Press them down gently to flatten them slightly—this helps them chill faster and feel less dense. Place them on the sheet, leaving a little space between them.
Step 6: Chill (20-30 minutes)
Place the baking sheet in the freezer for 20 minutes or the refrigerator for 30 minutes. This is non-negotiable. If you skip this, the peanut butter will be too soft to hold its shape, and the balls will fall apart in your hands. Chilling solidifies the fats, giving them that firm, biteable texture. After 20 minutes, check one. If it’s firm, they’re ready. If not, give them 5 more minutes.
Total Time Breakdown: Prep: 5 minutes. Mix: 4 minutes. Roll: 10 minutes. Chill: 20 minutes. Total active time: ~19 minutes. Total passive time: 20 minutes.
Expert Tips from a Kitchen Nerd
Here’s everything I learned from making these too many times. I want you to get it right the first time.
The “Damp Sand” Test
This is the #1 mistake. People add too much milk. The mixture should hold its shape when squeezed, but it should still look loose in the bowl. If it looks like a solid ball of dough in the bowl, it’s too wet. Remember, the oats will continue to absorb moisture even after you roll them. If it’s perfect in the bowl, it will be gummy in the fridge.
Room Temperature Peanut Butter
If your peanut butter is straight from the fridge, it will be stiff and hard to mix. It will also make the final balls cold and hard to chew. Let your peanut butter sit out for 10 minutes before using it. It should be soft and spreadable, not liquid.
Protein Powder Variance
Different brands absorb liquid differently. My favorite is extra crispy air fryer chicken thighs… wait, wrong recipe! Let me rephrase. Different protein powders have different textures. Whey isolate is very dry. Casein is very absorbent. Plant protein is often grittier. If you switch brands, you may need to adjust the milk by a tablespoon. Taste the raw dough! It’s safe to eat (assuming your protein powder is safe to eat raw) and tells you if it needs more sweetener.
Storage Hack
If you live in a hot climate, keep these in the fridge, not the pantry. The peanut butter can melt. If you want to meal prep for the whole week, freeze them in an airtight container. They thaw in 5 minutes at room temperature and taste just as good.
Recipe Variations to Mix It Up
Once you’ve nailed the basic version, here’s how to mix it up. These High-Protein Chocolate Peanut Butter Protein Balls are a blank canvas.
Almond Butter & Chocolate Chip
Swap the peanut butter for almond butter. Use chocolate chips and a pinch of sea salt on top. It tastes like a gourmet almond joy. Almond butter is slightly sweeter, so you might reduce the honey by half a tablespoon.
Matcha Green Tea
Skip the cocoa powder. Add 1 tablespoon of ceremonial grade matcha powder and use vanilla protein. Add white chocolate chips instead of dark. It’s earthy, sweet, and energizing. Great for a morning snack.
Coconut Lime
Add 1 tablespoon of lime zest and 2 tablespoons of shredded coconut to the dry mix. Use coconut oil instead of peanut butter for a dairy-free, nut-free option (if you’re careful with oil). Use coconut milk. It’s tropical and refreshing.
Vegan & Gluten-Free
Use certified gluten-free oats. Swap honey for maple syrup. Use a plant-based protein powder (like pea or rice blend). Use sunflower seed butter instead of peanut butter. The technique remains exactly the same.
Banana Peanut Butter
Replace the milk with half a mashed ripe banana. This adds natural sweetness and moisture. You can reduce the honey. This version is softer, so chill them longer (45 minutes).
Serving & Storage
Serving
I eat these straight out of the fridge. They are best cold. The cold peanut butter feels creamy, and the chocolate chips are firm. I pair them with a black coffee or a green tea. They are also great crumbled over yogurt or oatmeal if you want a breakfast bowl. Don’t overthink it—just eat them!
Storage
Refrigerator: Store in an airtight container for up to 5 days. They stay fresh and firm. I usually finish a batch in three days because they’re addictive.
Freezer: These freeze perfectly for up to 3 months. Place them in a single layer on a baking sheet to freeze initially, then transfer to a freezer bag. This prevents them from sticking together. Grab two when you need a quick snack.
Room Temperature: I don’t recommend storing them at room temperature for more than a few hours, especially in summer. The peanut butter can soften and make the balls messy.
Nutrition Information
I’m not a nutritionist, but here’s the breakdown based on my ingredients. Note that this varies depending on the specific protein powder and peanut butter brand you use.
| Nutrient | Per Ball (approx. 30g) |
|---|---|
| Calories | 150-170 |
| Protein | 12-15g |
| Carbs | 12-15g |
| Fiber | 2-3g |
| Fat | 8-10g |
| Sugar | 6-8g (natural sugars + honey) |
My Take: This is a nutrient-dense snack. It’s not “diet” food in the sense of being low-calorie, but it’s high in protein and healthy fats. It’s far better than a candy bar because it will keep you full. I use these to bridge the gap between lunch and dinner, preventing the afternoon crash.
Final Thoughts
These High-Protein Chocolate Peanut Butter Protein Balls have changed my snacking game. No more reaching for chips or sugary granola bars. I have something wholesome, delicious, and high-protein ready to go. It’s that simple trick of balancing wet and dry ingredients that makes all the difference. I encourage you to tweak the recipe to your taste. Maybe you like more chocolate? Add more chips. Maybe you like crunch? Add some crushed peanuts. Make it yours.
If you make this, drop a comment! I love hearing how it turns out in your kitchen. Did you use whey or plant protein? Did you add extra chips? Let me know. Happy cooking!
FAQs
Can I substitute the protein powder?
Yes! You can use whey, casein, or plant-based protein. Keep in mind that plant proteins (like pea or rice) tend to be drier and grittier. You may need to add an extra tablespoon of milk or liquid to get the right consistency. Whey is the easiest to work with for texture.
Why are my protein balls crumbly?
This usually means you didn’t add enough wet ingredients. The mixture needs to hold together when squeezed. Add milk or honey one teaspoon at a time until it sticks. Also, check your oats—using instant oats instead of rolled oats can cause crumbling because they don’t absorb liquid the same way.
Why are my protein balls too sticky?
Too much liquid or peanut butter that was too runny. Add more oats or protein powder, one tablespoon at a time, until the dough is manageable. If they are still sticky after chilling, you may have added too much milk initially. Next time, start with less liquid.
Can I make these ahead of time?
Absolutely. This is their best feature. Make them on Sunday, store them in the fridge, and grab one every day for work or school. They keep well for up to 5 days in the fridge or 3 months in the freezer.
Are these keto-friendly?
Not exactly. Oats and honey are high in carbs. If you are on a keto diet, swap the oats for almond flour or coconut flour, and swap the honey for erythritol or stevia. You will need to adjust the liquid content significantly as almond flour absorbs differently than oats.
Can I use crunchy peanut butter?
Yes, but the balls will have a chunky texture. If you want smooth balls, use creamy peanut butter. If you don’t mind chunks, crunchy works fine. Just be aware that the chunks might make rolling slightly more difficult.
Do I need to chill them?
Yes, chilling is crucial. The peanut butter needs to solidify so the balls hold their shape. If you eat them immediately, they will be soft and messy. At least 20 minutes in the freezer or 30 minutes in the fridge is necessary.
Pin This Recipe!
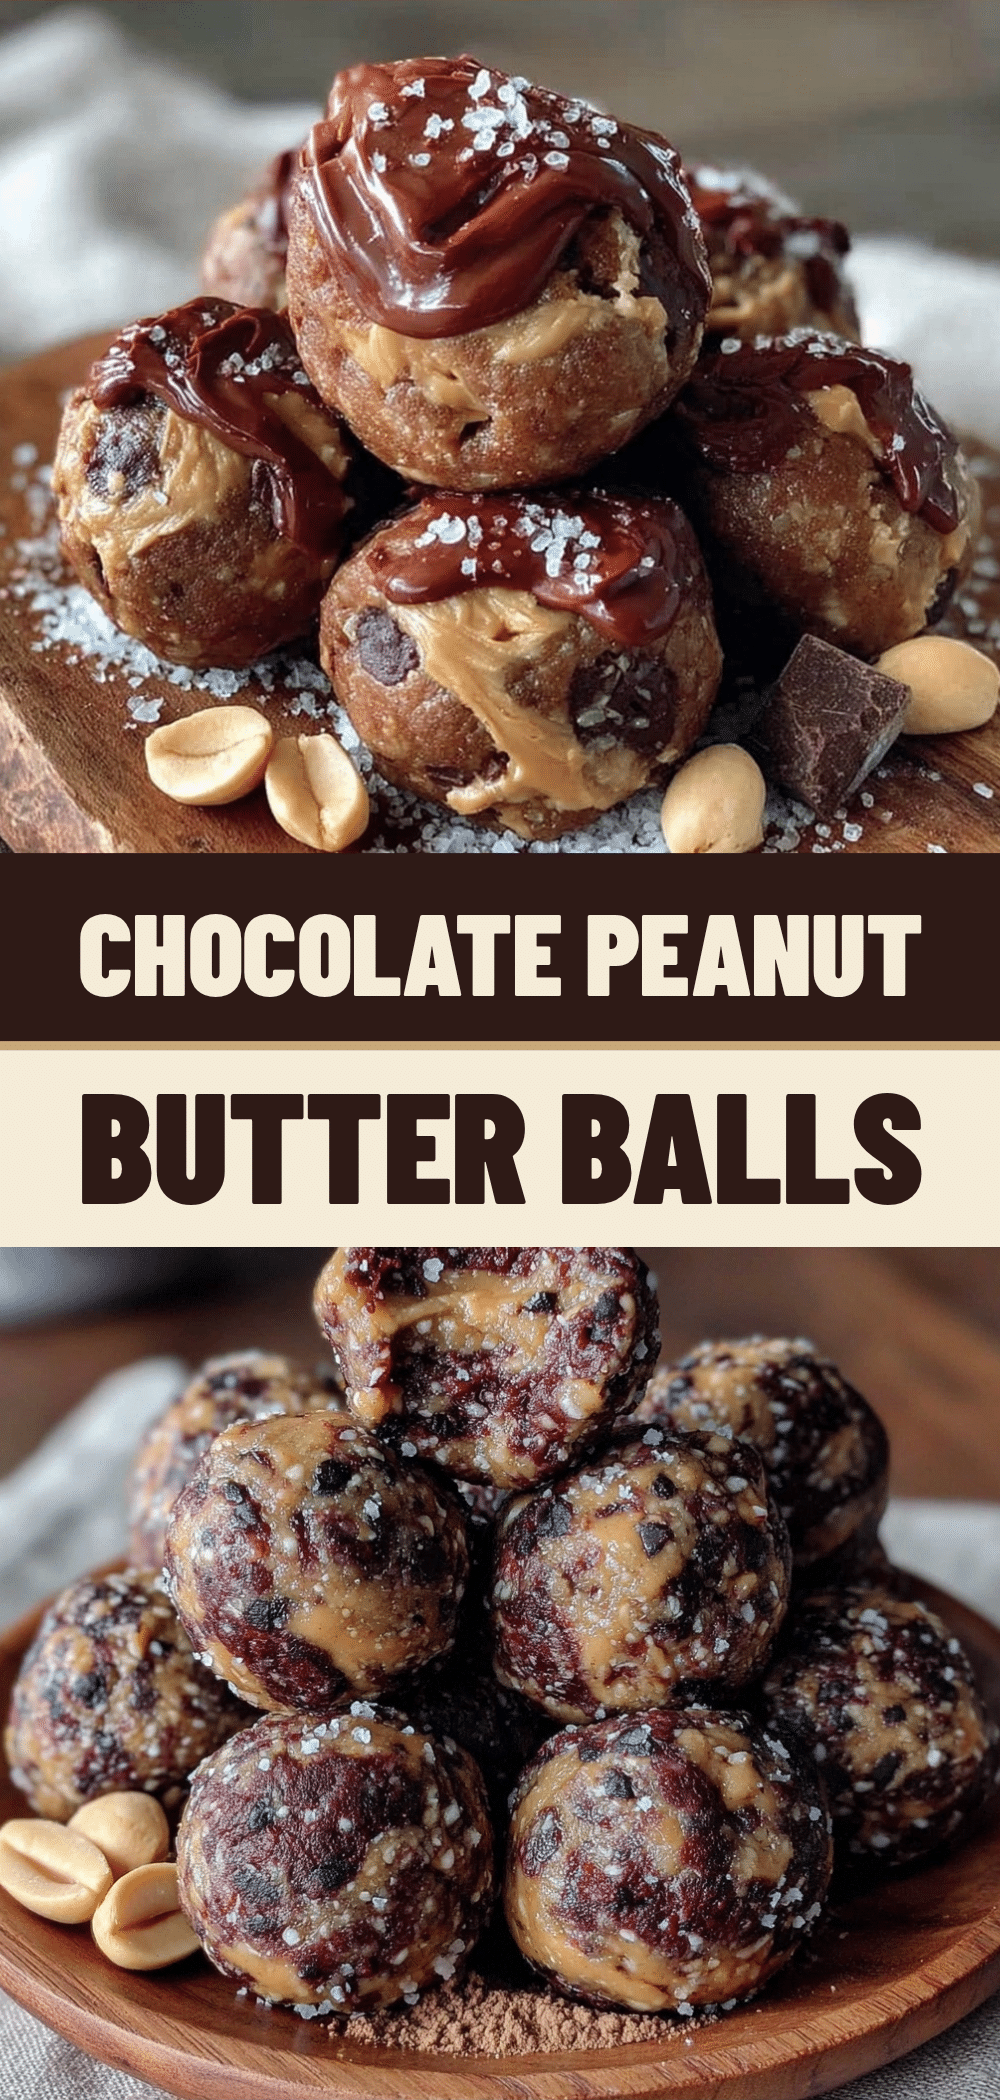

High-Protein Chocolate Peanut Butter Protein Balls
- Total Time: 25 minutes
- Yield: 12 servings 1x
Description
These no-bake protein balls are a dense, chewy, and intensely chocolatey snack that requires zero baking. Perfect for post-workout recovery or a quick energy boost, they combine oats, peanut butter, and protein powder for a high-protein treat.
Ingredients
- 1 ½ cups (150g) old-fashioned rolled oats
- ½ cup (130g) creamy peanut butter
- 1 scoop (~30g) vanilla whey or plant-based protein powder
- 2 tbsp (10g) unsweetened cocoa powder
- 3 tbsp (45ml) honey or maple syrup
- 2–3 tbsp (30-45ml) milk (dairy or non-dairy)
- ¼ cup (40g) dark chocolate chips
Instructions
- Whisk rolled oats, protein powder, and cocoa powder together in a large mixing bowl to ensure even distribution.
- Add peanut butter, honey (or maple syrup), and milk to the dry ingredients. If peanut butter is stiff, microwave for 15-20 seconds to soften.
- Mix vigorously with a silicone spatula until the consistency resembles damp sand or crumbly cookie dough. The mixture should hold together when squeezed in your palm.
- Gently fold in the dark chocolate chips.
- Portion the dough using an ice cream scoop or two spoons onto a parchment-lined baking sheet.
- Wet hands slightly and roll each portion into a smooth ball, pressing down gently to flatten slightly.
- Chill in the freezer for 20 minutes or the refrigerator for 30 minutes until firm.
Notes
Ensure the mixture holds together when squeezed but looks loose in the bowl to avoid gummy results. Chill thoroughly to solidify the fats. Store in the fridge for up to 5 days or freeze for up to 3 months.
- Prep Time: 5 minutes
- Cook Time: 0 minutes
- Category: Snack
- Cuisine: American
Nutrition
- Serving Size: 1 ball (approx. 30g)
- Calories: 150170
- Sugar: 68
- Sodium: 100
- Fat: 810
- Saturated Fat: 3
- Carbohydrates: 1215
- Fiber: 23
- Protein: 1215
Keywords: protein balls, no-bake, peanut butter, chocolate, high protein, meal prep, healthy snack, post-workout