Last Saturday, I was staring at a bag of potatoes and feeling that familiar Sunday night dread. You know the one. The weekend is over, the week is starting, and the only thing standing between me and a peaceful evening is figuring out what to cook. I didn’t want to order takeout again. I didn’t want to fight over what my picky five-year-old would eat. I wanted something that felt special but didn’t require me to stand over a stove for an hour.
That’s when I remembered the smashed potato trick I’d seen online. But I didn’t just make it for dinner. I made it for us. Specifically, I made it for my daughter, who has been in a phase where she refuses to eat anything unless she helped make it. So, I pulled out the baking sheets, set up a “potato station” on the counter, and invited her to be my sous-chef.
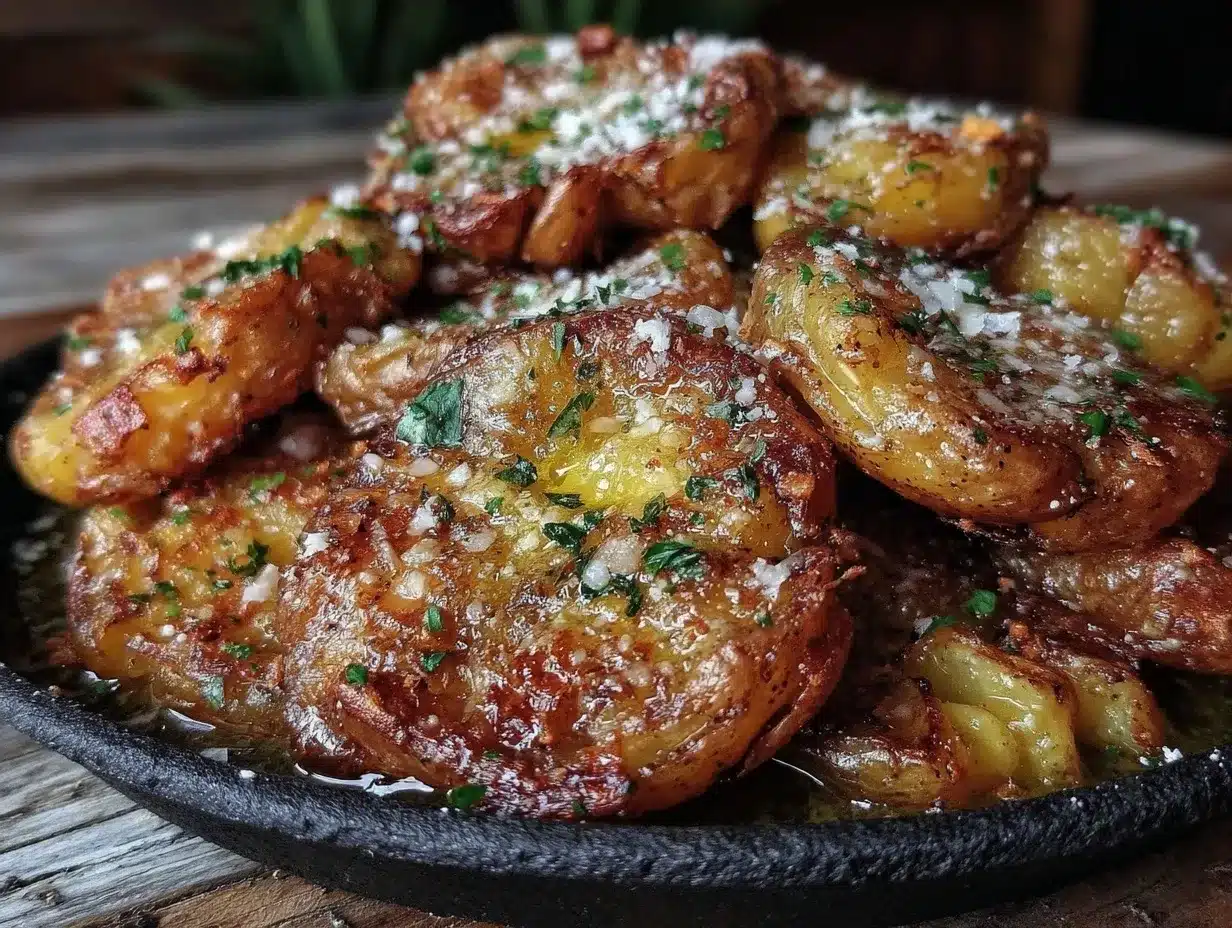
What followed was not a quiet, efficient cooking session. It was loud, messy, and absolutely magical. She got to smash the potatoes (which she finds endlessly satisfying), sprinkle the garlic parmesan butter (which she claims is “magic dust”), and watch them turn golden in the oven. By the time they came out, the smell of crispy, garlicky goodness had her jumping up and down. And the best part? She ate two servings. Two. Of potatoes.
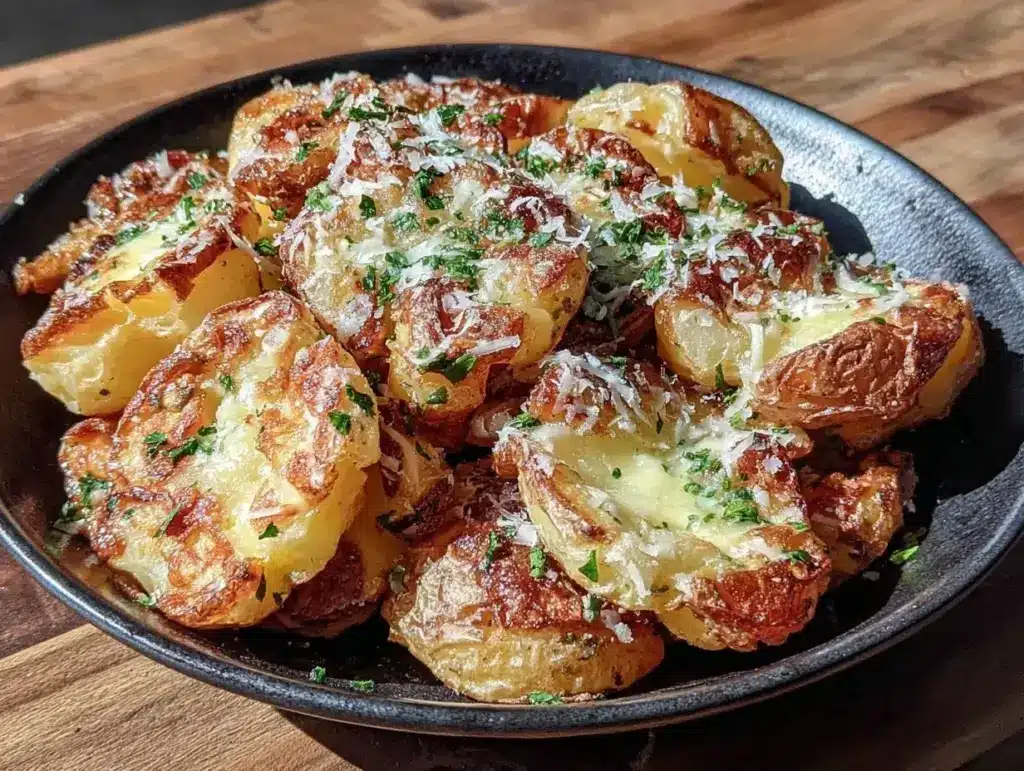
These Ultra-Crispy Smashed Potatoes with Garlic Parmesan Butter have become our new weekend ritual. They’re not just a side dish; they’re an activity. They’re the kind of recipe that turns a chaotic kitchen into a place of connection. And if you’re looking for a way to get your little ones off screens and into the kitchen, this is it. It’s simple, it’s safe, and it yields the crispiest, most flavorful potatoes you’ll ever make.
Why You’ll Love This Kid-Made Side Dish
There are a dozen reasons I keep coming back to this recipe, but let’s be honest: the real reason is the smile on my kid’s face when they pull the tray out of the oven. But here are the practical reasons why this recipe deserves a permanent spot in your rotation:
- It’s a Kid’s Dream Activity — Smashing potatoes is basically tactile play that results in food. My kids love the squishy texture of the boiled potatoes and the satisfying crunch when they press down with a glass. It’s safer than chopping and way more fun than peeling.
- Texture Overload — We’re talking about crispy edges, fluffy centers, and a cheesy, garlicky crust. It’s the best of both worlds: the comfort of mashed potatoes with the excitement of fries. If you’ve tried my maple sausage breakfast hash, you know I’m obsessed with crispy potatoes, but these take it to a whole new level.
- Forgiving Cooking Method — You can’t really mess this up. If they’re a little too smashed, they’re just thinner. If they’re a little undercooked, they’ll crisp up in the oven. It’s a low-stress recipe for low-stress parents.
- Flavor Bomb — The garlic parmesan butter mixture is the star. It’s savory, salty, and aromatic. It transforms a humble potato into something that feels like restaurant quality. It’s the kind of flavor that makes adults stop mid-bite and ask for the recipe.
- Perfect for Sharing — This recipe scales up easily. Whether you’re feeding a family of four or a party of twelve, the method stays the same. I often double the batch when we have guests over, and they always disappear faster than the chocolate peanut butter smoothie my husband makes for himself.
This isn’t just about getting dinner on the table. It’s about creating a memory. It’s about the laughter when a potato flies off the spoon and onto the counter. It’s about pride when your child says, “I made this!” And then, the delicious proof that they were right.
Ingredients You’ll Need for Crispy Success
Here’s the best part: you probably have most of this already. The beauty of smashed potatoes is how few ingredients you need to make something that tastes incredible. I’m particular about three things here, and I’ll tell you exactly why.
For the Potatoes:
Yukon Gold Potatoes (2 lbs / 900g) — I swear by Yukon Golds. They have a naturally buttery flavor and a waxy texture that holds its shape when smashed. Russets are too starchy and fall apart; red potatoes are too firm. Yukon Golds are the sweet spot. Look for medium-sized ones, about the size of a tennis ball, so they’re easy for little hands to handle.
Vegetable Oil (3 tablespoons) — You need an oil with a high smoke point for that deep crisp. Vegetable or canola oil works perfectly. Olive oil is fine, but it can burn at high temps. I use a neutral oil to keep the focus on the potato flavor.
Salt (1 tablespoon for boiling, plus more for seasoning) — Salt the boiling water generously. It should taste like the ocean. This seasons the potato from the inside out. If you skip this, you’ll need to salt aggressively later, and even then, it’s not the same.
For the Garlic Parmesan Butter:
Unsalted Butter (4 tablespoons / 60g) — Melted butter is the vehicle for all that flavor. Use real butter, not margarine. It makes a huge difference in taste and mouthfeel. If you’re dairy-free, you can use a high-quality plant-based butter, but the flavor profile will change slightly.
Garlic (4 cloves, minced) — Fresh garlic is non-negotiable here. Jarred garlic has a sharp, metallic taste that doesn’t mellow out like fresh garlic. Mince it finely so it distributes evenly. If your kids are sensitive to strong garlic, you can reduce to 2 cloves, but I recommend starting with 4 and letting them taste.
Parmesan Cheese (½ cup / 50g, freshly grated) — Buy the block and grate it yourself. Pre-grated cheese has anti-caking agents that prevent it from melting properly. You want that gooey, golden crust, not powdery bits. Grating it takes two minutes and is worth every second.
Dried Parsley (1 teaspoon) — Adds a pop of color and a hint of freshness. It’s optional, but I think it makes the dish look more inviting. Fresh parsley is great too, but it can burn in the oven. Dried is safer for this method.
Black Pepper (½ teaspoon) — Freshly cracked black pepper adds a little heat and depth. Don’t use the pre-ground stuff in the green shaker. It tastes dusty. Crack your own for the best flavor.
Optional Add-ins:
Chives — Chopped fresh chives sprinkled on top after baking add a mild onion flavor that kids usually love. It’s a great way to sneak in a vegetable, though technically it’s a garnish.
Red Pepper Flakes — If your family likes a little kick, a pinch of red pepper flakes adds warmth. My older kids love this, but I leave it off for the little ones.
Equipment You’ll Need
You don’t need fancy equipment for this. Here’s what I actually use:
Baking Sheets — I use two standard half-sheet pans. Make sure they’re rimmed so the butter doesn’t spill over. I line them with parchment paper for easy cleanup. Trust me, you don’t want to scrub baked-on cheese and butter off your pans later.
Large Pot — Needs to be big enough to hold the potatoes submerged in water. A 6-quart pot works well. My old stockpot from college still works fine for this.
Masher or Heavy Glass — A potato masher is traditional, but I find a heavy-bottomed glass (like a pint glass) works better for smashing. It has a flat bottom that creates a nice, even smash. If you have a masher, use it, but make sure the edges are smooth so they don’t tear the potato.
Small Bowl — For mixing the garlic parmesan butter. Any small bowl works.
Pastry Brush or Spoon — To brush the butter mixture onto the smashed potatoes. A brush gives an even coat, but a spoon works if you’re in a hurry.
Tongs — For transferring the boiled potatoes from the water to the baking sheet. Use tongs to avoid burning your fingers. Or just let them cool for a minute.
How to Make It: Step-by-Step
Alright, let’s make this! I’m walking you through exactly how I do it, including the little tricks I’ve picked up over the years. This is a great recipe to do with kids, so I’ve broken it down into steps where they can help.
Step 1: Boil the Potatoes (20-25 minutes)
Start by washing the potatoes thoroughly. You don’t need to peel them—the skin adds texture and nutrients. Cut them in half if they’re large, or leave them whole if they’re small. Bring a large pot of salted water to a boil. Once boiling, add the potatoes. Cook for 15-20 minutes, or until they are fork-tender. The fork should slide in with no resistance. This is the key to easy smashing later.
Kid Task: Let your child add the potatoes to the water and stir them gently. They can also help count the minutes if you’re using a timer.
Step 2: Prep the Garlic Parmesan Butter (5 minutes)
While the potatoes boil, melt the butter in a small bowl. I usually do this in the microwave for 30-45 seconds, stirring halfway through. Once melted, stir in the minced garlic, grated parmesan, dried parsley, and black pepper. Whisk it all together until it’s a smooth, fragrant mixture. The smell will fill the kitchen, which is exciting for kids.
Kid Task: This is a perfect mixing job for kids. Let them stir the butter mixture with a spoon. They can smell the garlic and see the cheese blend in. It’s safe and sensory.
Step 3: Smash the Potatoes (10 minutes)
Once the potatoes are tender, drain them carefully. Let them cool for about 5-10 minutes until they’re safe to touch. Line your baking sheets with parchment paper. Place a potato on the sheet and gently press down on it with a glass or masher. You want it to flatten out but not break apart completely. Aim for about ½-inch thickness. The edges should be jagged and rough—those are the crispy bits!
Kid Task: This is the main event. Let your child do the smashing. Show them how to press down firmly but gently. If a potato breaks, just press the pieces back together. They’ll love the tactile feedback.
Step 4: Brush and Bake (20 minutes)
Brush the garlic parmesan butter generously over each smashed potato. Make sure to get into the crevices. Place the baking sheets in a preheated oven at 425°F (220°C). Bake for 20-25 minutes, or until the edges are golden brown and crispy. Rotate the pans halfway through for even browning.
Kid Task: Let your child brush the butter on. They can be as generous or as careful as they want. Watch them with pride as they coat each potato.
Step 5: Cool and Serve (5 minutes)
Remove the potatoes from the oven and let them cool for 2-3 minutes. They will crisp up even more as they cool. Serve immediately while hot and crispy. Garnish with extra parmesan or chives if you like.
Kid Task: Let your child sprinkle the final garnish. Then, help them set the table or serve the dish. Pride is a powerful motivator.
Expert Tips & Tricks
Here’s everything I’ve learned from making this dozens of times. These tips will save you from my mistakes.
Don’t Skip the Parchment Paper — The butter and cheese will drip and caramelize on the pan. Parchment paper makes cleanup a breeze. Without it, you’ll be scrubbing for ages.
Space Them Out — Don’t crowd the potatoes on the baking sheet. They need space for air to circulate. If they’re touching, they’ll steam instead of crisp. Use two pans if necessary.
Let Them Cool Before Smashing — Hot potatoes are too soft to smash cleanly. Let them sit for 5-10 minutes. They’ll firm up slightly and be much easier to handle.
Use a Heavy Glass — A light glass might not press down enough. A heavy pint glass or a masher works best. If you use a masher, make sure the edges are smooth to avoid tearing.
Be Generous with Butter — The butter is what creates the crust. Don’t skimp. If you’re worried about calories, you can reduce slightly, but the flavor and texture suffer. It’s worth it.
Broil for Extra Crisp — If you want them extra crispy, broil for the last 2-3 minutes. Watch them closely! They can go from golden to burnt in seconds. I usually just bake them, but the broiler is a good trick for impatient cooks.
Variations & Substitutions
Once you’ve nailed the basic version, here’s how you can mix it up. I’ve tried all of these.
Ranch Style — Swap the parmesan for ranch seasoning mix. Add some dried dill to the butter. It’s a crowd-pleaser, especially with kids who love ranch flavor.
Herb Crusted — Add fresh rosemary and thyme to the butter mixture. It gives a more sophisticated, rustic flavor. Great for dinner parties.
Spicy Jalapeño — Add diced jalapeños to the butter mixture and sprinkle with cheddar cheese. It’s a fun twist for families who like heat.
Bacon Bits — Sprinkle cooked, crumbled bacon on top after baking. It adds a smoky, salty crunch. My kids love this version.
Dairy-Free — Use plant-based butter and nutritional yeast instead of parmesan. The texture won’t be exactly the same, but the flavor is still good. I’ve made this for friends with dairy allergies, and they loved it.
Serving & Storage
How to Serve: I usually serve these straight from the baking sheet at the dinner table. It looks rustic and keeps them warm. They pair well with almost anything. I often serve them with ground beef stroganoff for a cozy meal, or alongside mediterranean chicken skewers for a lighter option. They’re also great with high-protein chicken bowls if you’re meal prepping.
Storage: Store leftovers in an airtight container in the fridge for up to 3 days. They will lose some crispiness, but they’re still delicious.
Reheating: Reheat in the oven at 400°F for 10 minutes to restore crispiness. Microwave reheating makes them soggy, so avoid it if possible. If you must microwave, do it in short bursts and let them sit to steam slightly.
Freezing: I don’t recommend freezing these. The texture changes too much. They’re best enjoyed fresh.
Nutrition Information
I’m not a nutritionist, but here’s the breakdown if you’re tracking. Note that this is an estimate and can vary based on potato size and exact ingredient amounts.
Per Serving (based on 6 servings):
| Nutrient | Amount |
|---|---|
| Calories | 280 |
| Protein | 6g |
| Carbs | 35g |
| Fiber | 3g |
| Sugar | 2g |
| Fat | 14g |
| Saturated Fat | 7g |
| Cholesterol | 30mg |
| Sodium | 450mg |
What’s Good: Potatoes are a good source of potassium and vitamin C. The parmesan adds calcium and protein. It’s a wholesome side dish when made with real ingredients.
What to Know: The butter and cheese add saturated fat and sodium. If you’re watching your intake, you can reduce the butter or use less cheese. But remember, this is a treat, not a diet food. Enjoy it!
Final Thoughts
So that’s my go-to Ultra-Crispy Smashed Potatoes with Garlic Parmesan Butter! I’ve probably talked your ear off at this point, but when you make a recipe this often, you have a lot to say about it.
This has saved weekend dinners more times than I can count. It’s my answer to “what’s for dinner” when I want something special but also want to spend time with my kids. They’re happy because they get to smash potatoes, I’m happy because they’re eating vegetables, and we’re happy because we’re cooking together. It’s a win-win-win.
Make it yours! Try different herbs, add different cheeses, or let your kids experiment with the smash size. The best recipes are the ones you adapt to your family’s tastes. If you make this, drop a comment and let me know what you think! I love hearing how recipes turn out in your kitchen. And if something doesn’t work, tell me that too—I’m here to help troubleshoot.
Happy cooking! And I hope your kitchen smells half as good as mine does right now.
Frequently Asked Questions
Can I use russet potatoes instead of Yukon Gold?
You can, but they’re more likely to fall apart when smashed. Russets are very starchy and fluffy. If you use them, be very gentle when pressing. Yukon Golds are the best choice for their waxy texture, but red potatoes work too. Just know that the result will be slightly different.
Why did my potatoes stick to the parchment paper?
This usually happens if the parchment paper isn’t oiled or if the potatoes weren’t dry enough. Make sure you pat the boiled potatoes dry before smashing. Also, lightly oil the parchment paper before placing the potatoes. This creates a non-stick surface.
Can I make these ahead of time?
You can boil and smash the potatoes ahead of time, but don’t add the butter until you’re ready to bake. Store the smashed potatoes in the fridge in an airtight container. When ready to cook, brush with butter and bake as directed. They’ll take a few extra minutes in the oven if they’re cold.
My kids don’t like garlic. Can I skip it?
Yes, you can skip the garlic, but the flavor will be less complex. You can substitute with garlic powder (½ teaspoon) if you want the flavor without the chunks. Or just stick to butter, parmesan, and herbs. It’s still delicious.
How do I reheat leftovers without them getting soggy?
Avoid the microwave! Reheat in the oven or an air fryer at 400°F for 5-10 minutes. This will restore the crispiness. If you don’t have an oven, a skillet over medium heat works too. Just flip them every minute until crispy.
Can I freeze these?
I don’t recommend freezing smashed potatoes. The texture becomes mushy and they lose their crispiness. They’re best enjoyed fresh. If you have leftovers, eat them within 3 days.
Pin This Recipe!
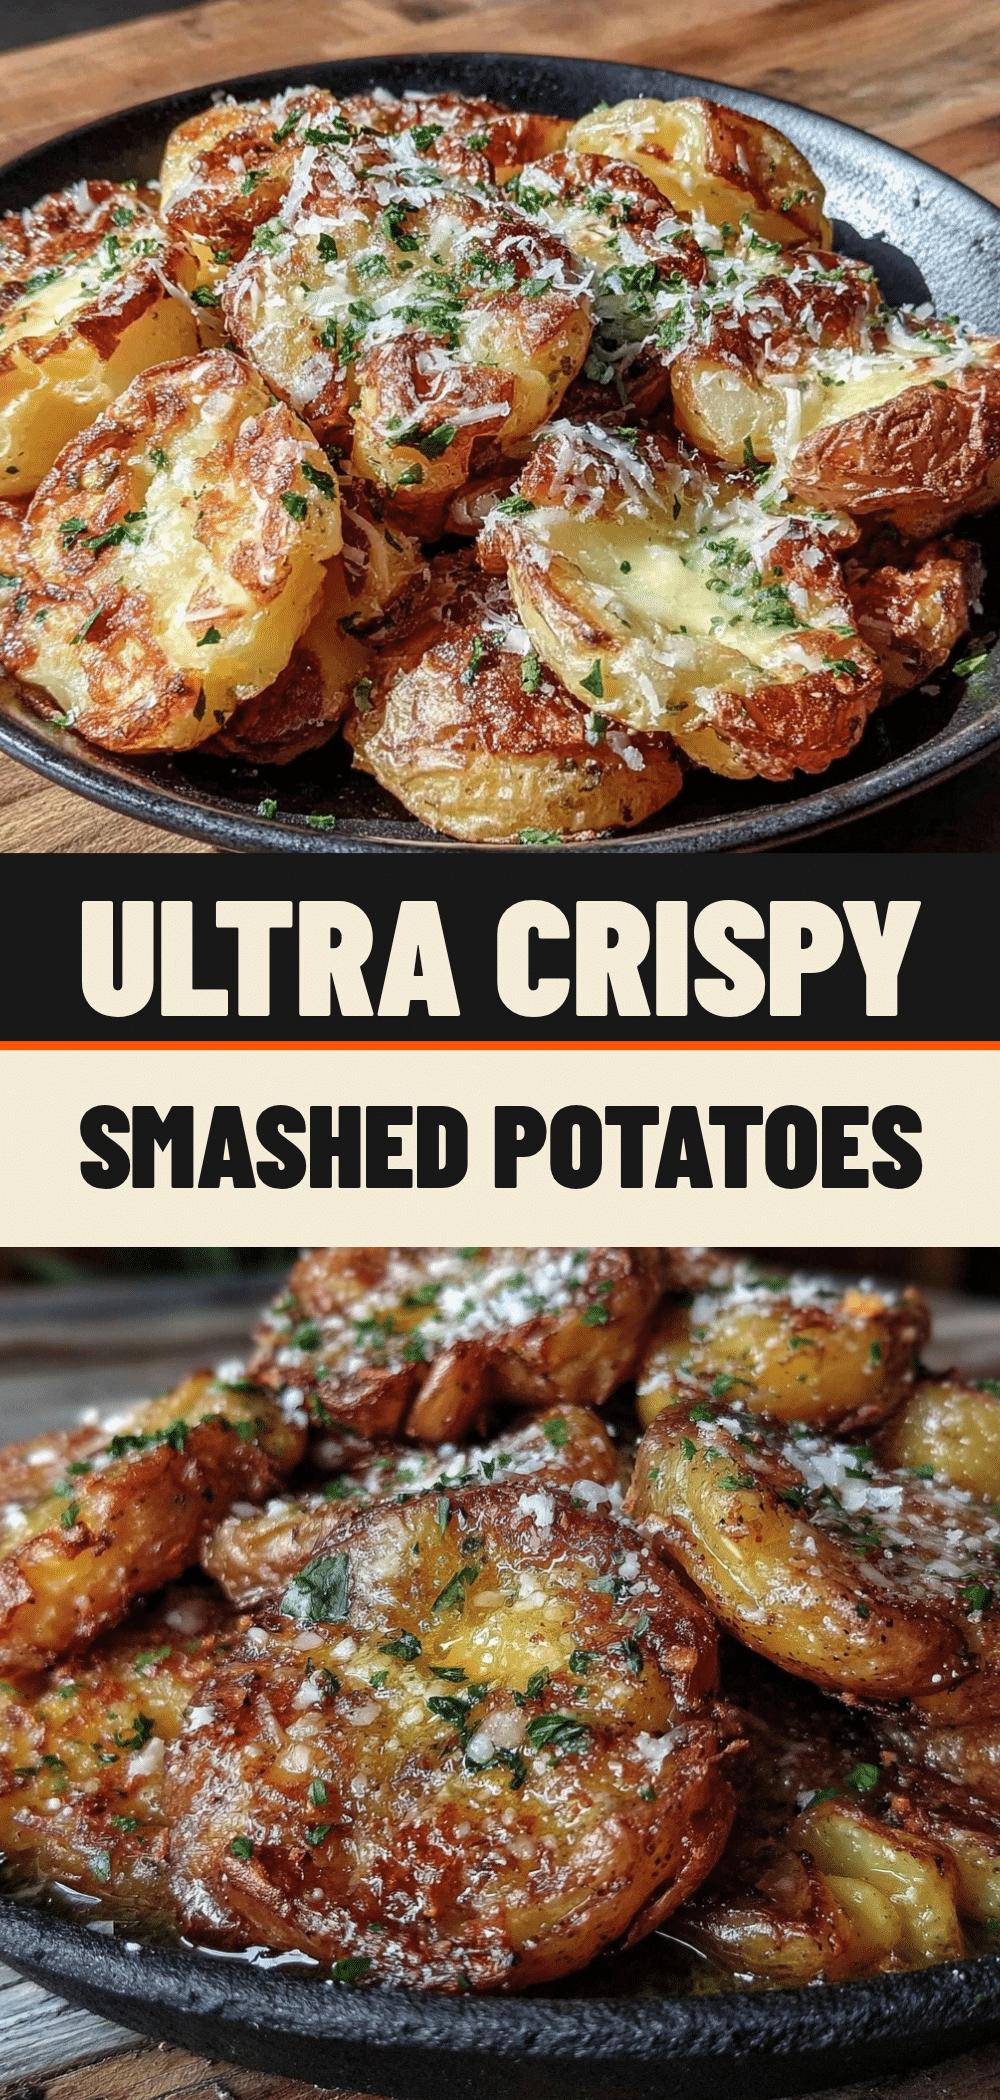

Ultra-Crispy Smashed Potatoes with Garlic Parmesan Butter
- Total Time: 60 minutes
- Yield: 6 servings 1x
Description
A fun, kid-friendly side dish featuring crispy, golden smashed potatoes topped with a savory garlic parmesan butter crust. Perfect for family cooking sessions.
Ingredients
- 2 lbs Yukon Gold potatoes
- 3 tablespoons vegetable oil
- 1 tablespoon salt (for boiling water)
- 4 tablespoons unsalted butter
- 4 cloves garlic, minced
- ½ cup freshly grated Parmesan cheese
- 1 teaspoon dried parsley
- ½ teaspoon black pepper
- Optional: Chopped fresh chives
- Optional: Red pepper flakes
Instructions
- Wash potatoes thoroughly (do not peel). Cut large potatoes in half or leave small ones whole.
- Bring a large pot of salted water to a boil. Add potatoes and cook for 15-20 minutes until fork-tender.
- While potatoes boil, melt butter in a small bowl (microwave 30-45 seconds). Stir in minced garlic, grated parmesan, dried parsley, and black pepper until smooth.
- Drain potatoes and let them cool for 5-10 minutes until safe to handle.
- Line baking sheets with parchment paper. Place a potato on the sheet and press down firmly with a heavy glass or masher to flatten to about ½-inch thickness.
- Brush the garlic parmesan butter mixture generously over each smashed potato.
- Preheat oven to 425°F (220°C). Bake for 20-25 minutes, rotating pans halfway through, until edges are golden brown and crispy.
- Let cool for 2-3 minutes before serving. Garnish with extra parmesan or chives if desired.
Notes
Use Yukon Gold potatoes for best texture as they hold their shape. Do not crowd potatoes on the baking sheet to ensure crispiness. Let potatoes cool slightly before smashing to prevent them from falling apart. For extra crispiness, broil for the last 2-3 minutes, watching closely to avoid burning.
- Prep Time: 15 minutes
- Cook Time: 45 minutes
- Category: Side Dish
- Cuisine: American
Nutrition
- Serving Size: 1 smashed potato
- Calories: 280
- Sugar: 2
- Sodium: 450
- Fat: 14
- Saturated Fat: 7
- Carbohydrates: 35
- Fiber: 3
- Protein: 6
Keywords: smashed potatoes, garlic parmesan, kid-friendly recipes, crispy potatoes, side dish, family cooking, easy dinner