
Last July, I was stuck in a heatwave that made the idea of turning on the oven feel like a personal attack. My house was an oven, my patience was thin, and I was starving for something cold, creamy, and packed with flavor. I wanted the experience of Elote—Mexican street corn—from the roadside stands in downtown Los Angeles, but I didn’t want to drive across town, pay $8 for a single ear of corn, and eat it standing up in traffic.
So, I did what any desperate home cook does: I raided the fridge and the pantry. I had frozen corn, a block of cream cheese, some sour cream, cotija cheese that had been hiding in the back of the crisper drawer for a week, and a jar of jalapeños. I threw them into a skillet, added a squeeze of lime, and watched the magic happen. What came out wasn’t just a dip. It was smoky, tangy, spicy, and impossibly creamy. It tasted like summer in a bowl.
I’ve made this Skillet Mexican Street Corn Dip at least thirty times since that night. Thirty. I’ve served it to house guests who asked for the recipe before they even left the parking lot. I’ve brought it to potlucks where people scraped the skillet clean with tortilla chips. I’ve made it for movie nights when I didn’t want to deal with the hassle of shucking and grilling corn. And every single time, it hits the spot. It’s creamy, it’s cheesy, it’s got that kick you crave, and it’s ready in the time it takes to watch one episode of your favorite show.
Here’s the thing about this dip: it’s deceptively simple. You might look at the ingredient list and think, “Is that it?” But the combination of textures and flavors—creamy base, crunchy cotija, charred corn, and spicy jalapeño—is what makes it addictive. It captures the essence of street food without the mess, the cost, or the heat. It’s the ultimate crowd-pleaser because it’s familiar but elevated. It’s better than takeout because it’s fresh, it’s warm (or cold, your call), and it’s made with love (and maybe a little bit of lazy cooking, which I support).
I’m going to walk you through exactly how to make this 5-ingredient wonder. I’ll share the tricks I’ve learned to get that perfect char, how to handle the cheese so it doesn’t break, and why you need to keep a batch of this in your rotation all year round. Whether you’re hosting a Super Bowl party, a beach picnic, or just a Tuesday night when you need comfort food, this skillet dip is your new best friend.
Why You’ll Love This 5-Ingredient Creamy Dip
There are a hundred dips out there. Salsa, queso, spinach artichoke… the list goes on. But this Skillet Mexican Street Corn Dip has completely changed how I think about appetizers. It’s not just a dip; it’s a meal-adjacent experience. Here’s why it keeps me coming back for more:
Stupid Simple Ingredients — Seriously, if you can open a can or bag and pour something into a bowl, you can make this. I’m talking five ingredients. Maybe six if you count the lime. I don’t use fancy, hard-to-find items. I use what I have. The magic is in the combination, not the complexity. I’ve made this on weeknights when I was too tired to think, and it came out restaurant-quality.
Lightning Fast — From fridge to skillet to table, this takes about 20 minutes. That’s it. You don’t need to thaw anything, you don’t need to marinate anything, and you don’t need to wait for an oven to preheat. The corn cooks in minutes. The cheese melts in minutes. The whole process is a breeze. I make this when I have 30 minutes to kill and want to look like I spent hours cooking.
Texture Heaven — This isn’t just smooth creaminess. You get the pop of the corn kernels, the crumble of the cotija (or feta if you’re improvising), and the crunch of the tortilla chips. It’s a sensory experience. Every bite is different. Some bites are creamy, some are spicy, some are salty. It keeps your mouth interested. I’ve noticed people eating more slowly with this dip because they’re actually enjoying the texture.
Customizable Heat — Love spice? Throw in a whole jalapeño. Hate it? Use a mild pepper or skip it entirely. This dip bends to your will. I make it mild for my in-laws and spicy for my friends. It’s flexible in a way that most dips aren’t. I love that I can control the kick without changing the whole recipe.
Makes Amazing Leftovers — Yes, it has leftovers. And yes, they’re delicious cold or reheated. I often make a double batch because I know I’ll want it the next day. It tastes even better the next day because the flavors have time to meld together. I keep a small container in the fridge for midnight snacks. Don’t judge me. It’s too good not to share.
This dip has saved me from boring party food more times than I can count. It’s my go-to when I need something impressive but easy. It’s creamy, it’s cheesy, it’s spicy, and it’s universally loved. Even the pickiest eaters in my life—my nephew who only eats chicken nuggets—will scarf this down if you put it in front of him. It’s that good.
Ingredients You’ll Need for the Perfect Dip
Here’s the best part: you probably have most of this already. I’m not asking you to go to three different stores for obscure items. This is pantry-friendly cooking at its finest. Let’s break down what you need and why each ingredient matters.
Corn (4 cups) — You can use fresh, frozen, or canned. I prefer frozen because it’s convenient and has a good texture. If you use fresh, grill or char it in a dry skillet for that smoky flavor. Canned works too, but drain it really well. Wet corn makes the dip watery, and nobody wants that. I buy frozen corn in bulk because it lasts forever and is always ready.
Cream Cheese (8 oz / 1 block) — This is the base. It needs to be softened. I take it out of the fridge 15 minutes before I start cooking. If you’re lazy like me, you can microwave it for 15 seconds in 5-second bursts. Don’t melt it completely, just soften it. Soft cream cheese blends smoothly. Lumpy cream cheese ruins the texture. I use full-fat cream cheese because I want richness. Low-fat versions can be grainy.
Sour Cream (½ cup) — Adds tang and creaminess. I use full-fat sour cream for the best flavor. Greek yogurt can work if you want it lighter, but it changes the taste. I stick with sour cream because it matches the authentic street corn vibe. Make sure it’s well-stirred before adding.
Cotija Cheese (½ cup, crumbled) — This is the secret weapon. Cotija is a Mexican dry cheese that’s salty and crumbly, like feta but sharper. If you can’t find it, feta is the best substitute. Parmesan works too, but it’s sharper and saltier in a different way. Cotija adds that authentic texture. Don’t skip the cheese. It’s what makes it feel like street corn.
Jalapeños (1-2, minced) — For heat. I use fresh jalapeños because they have a brighter flavor than pickled ones. If you want less heat, remove the seeds and ribs. If you want more heat, leave them in. I usually use one for mild heat and one for more kick. Pickled jalapeños work too, but chop them finely so they distribute evenly. I buy fresh jalapeños because they’re cheap and last a while in the fridge.
Optional Add-ins — I love adding cilantro for freshness (½ cup, chopped) and lime juice (1-2 tablespoons) for brightness. Garlic powder (½ teaspoon) adds depth. If you want to get fancy, add some cooked chorizo or black beans. But the base five ingredients are all you really need. I keep it simple most of the time.
For Serving — Tortilla chips are standard, but this dip works with pita chips, crackers, or even as a topping for tacos. I keep a big bowl of chips nearby because they disappear fast. I also like to serve it with warm corn tortillas for a dip-and-roll experience.
Pro Tip — Taste as you go. After you mix everything, taste it. Does it need more salt? More lime? More heat? Adjust it to your preference. This is your dip. Make it yours. I usually add a pinch of salt at the end because the cotija is already salty. But everyone’s palate is different.
Equipment Needed
You don’t need fancy equipment for this. Here’s what I actually use.
Skillet (10-12 inch) — I use a cast-iron skillet because it holds heat well and gives a nice rustic look. But any heavy-bottomed skillet works. Non-stick is fine too, but you won’t get the same browning. I prefer cast iron because it looks great for serving straight from the stove.
Knife and Cutting Board — For mincing jalapeños and chopping cilantro. Sharp knife is better. Dull knives make chopping jalapeños a nightmare (and you don’t want to touch your eyes after). Learn to mince finely so the pepper distributes evenly.
Spatula — A silicone spatula is best for stirring the cheese and corn. It scrapes the sides of the pan so nothing sticks and burns. I use a rubber spatula because it’s flexible and easy to clean.
Measuring Cups and Spoons — For accuracy. I’m not a fan of eyeballing with this one because the balance of cream cheese to sour cream matters. Use standard measuring tools. Dollar store versions work fine.
Microwave (Optional) — If you need to soften the cream cheese quickly. Use low power and short bursts to avoid melting it completely.
Serving Bowl (Optional) — You can serve it in the skillet, which I love for presentation. Or transfer it to a nice bowl. I like the skillet because it keeps the dip warm longer. But if you’re serving it cold, a bowl is better.
Tool Tips — Don’t have a cast-iron skillet? Use whatever you have. The recipe doesn’t care. Just make sure the pan is big enough to hold all the ingredients without spilling. I’ve made this in a small pan before and had a mess. Don’t make my mistake.
How to Make It: Step-by-Step

Alright, let’s make this! I’m walking you through exactly how I do it, including the little tricks I’ve picked up over the years.
Step 1: Prep Your Ingredients (5 minutes)
Before you start cooking, get everything ready. Drain the corn if you’re using canned. If using frozen, no need to thaw. Mince the jalapeños. Crumble the cotija. Chop the cilantro if using. Soften the cream cheese. Once you start cooking, things move fast. I know it seems fussy, but having everything prepped makes the actual cooking way less stressful. I set out a small bowl for the jalapeños so I don’t touch my face after handling them.
Step 2: Heat the Skillet (2 minutes)
Place your skillet over medium heat. Let it warm up for a minute. You don’t need oil if you’re using a non-stick pan. If using cast iron, add a tiny splash of oil or butter to prevent sticking. I usually skip the oil because the cream cheese has enough fat. But if your pan is old and sticky, a little oil helps. You’ll know it’s ready when a drop of water sizzles on the surface.
Step 3: Melt the Cream Cheese (3-4 minutes)
Add the softened cream cheese to the skillet. Stir it gently with your spatula. It will start to break down and become smooth. This takes about 3-4 minutes. Don’t rush it. If you turn the heat too high, it might separate. Low and slow is the key. I stir constantly to prevent burning. The cream cheese should be completely smooth and creamy before you add anything else. If there are lumps, keep stirring. I’ve burned cream cheese before because I got impatient. Don’t be me.
Step 4: Add the Sour Cream and Corn (2 minutes)
Once the cream cheese is smooth, add the sour cream. Stir until combined. Then add the corn. Stir everything together until the corn is coated in the creamy mixture. The heat from the skillet will warm the corn. If using frozen corn, it will thaw quickly. If using canned, it’s already warm. Mix well so the flavors start to blend. The mixture will look thick and creamy. This is good. It should be thick enough to hold the chips.
Step 5: Add the Cheese and Jalapeños (2 minutes)
Stir in the crumbled cotija and minced jalapeños. Mix gently. The cotija will start to melt slightly but will keep some of its crumbly texture. The jalapeños will distribute evenly. Cook for another minute to let the flavors meld. The smell will be amazing. You’ll smell creamy, cheesy, and spicy. This is the best part. I love standing over the skillet smelling my dinner.
Step 6: Adjust and Serve (1 minute)
Taste the dip. Does it need more salt? More lime? More heat? Adjust as needed. I usually add a squeeze of lime juice at the end for brightness. It cuts through the richness of the cheese. Stir it in. Serve immediately while warm. Top with extra cotija and cilantro if you want. I like to drizzle a little hot sauce on top for extra kick. Pass the chips and dig in.
Total Time: About 20 minutes (5 minutes prep, 15 minutes cooking)
Expert Tips & Tricks
Here’s everything I’ve learned from making this dozens of times. These tips will save you from my mistakes.
Don’t Overheat the Cheese — High heat makes cream cheese break and become grainy. Keep the heat at medium or medium-low. If the mixture looks oily, you’ve gone too high. Remove from heat and whisk in a splash of milk to fix it. I learned this the hard way with a broken cheese sauce that looked awful. Low and slow wins.
Drain the Corn Well — Wet corn makes the dip watery. If using canned, drain it and pat it dry with a paper towel. If using frozen, let it thaw and drain. I use a fine-mesh strainer to drain the corn. It takes an extra minute but ensures a thick, creamy dip. Nobody wants soup with their chips.
Use Fresh Lime Juice — Bottled lime juice tastes flat. Fresh lime juice adds brightness and acidity that balances the richness. I squeeze half a lime into the dip at the end. It makes a huge difference. I keep limes in the fridge so they’re always ready. If you don’t have fresh lime, lemon juice works in a pinch, but lime is better.
Char the Corn for Depth — If you have time, char the corn in a dry skillet before adding it to the cheese mixture. This adds a smoky flavor that mimics street corn. I do this when I have 5 extra minutes. It’s worth it. The charred bits add texture and flavor. I love the smoky taste.
Common Mistakes (and how to avoid them):
Mistake: Dip is too thin — Fix: Let it simmer longer to evaporate excess moisture. Or add more cream cheese. Also, make sure you drained the corn well.
Mistake: Dip is too thick — Fix: Add a splash of milk or sour cream. Stir until smooth. It’s easy to fix.
Mistake: Spice is too strong — Fix: Add more cream cheese or sour cream to balance the heat. Or add a pinch of sugar to counteract the spice.
Pro Tricks I’ve Learned:
For Extra Flavor — Add a pinch of smoked paprika or cumin. It adds depth and makes it taste more like street corn. I keep a jar of smoked paprika in my pantry specifically for this recipe.
For Better Texture — Don’t over-stir. Gentle folding keeps the corn intact and the cheese creamy. I use a spatula to fold, not a spoon. It’s more gentle.
Make-Ahead Strategy — Make the dip ahead and store in the fridge. Reheat gently in the skillet or microwave. It tastes great cold too. I make it on Sunday for the week. It lasts for days.
Variations & Substitutions
Once you’ve nailed the basic version, here’s how you can mix it up. I’ve tried all of these.
Veggie-Loaded — Add diced bell peppers or black beans. Toss them in with the corn. Adds color and nutrition. This is how I get my kids to eat vegetables. They don’t even notice.
Protein-Packed — Add cooked chorizo or shredded chicken. Makes it more filling. I add chorizo when I want a heartier dip. It’s spicy and savory. Perfect with chips.
Lighter Version — Use Greek yogurt instead of sour cream and light cream cheese. It’s thinner but still good. I make this when I’m trying to be “healthy.” It’s not as rich, but it works.
Dairy-Free — Use vegan cream cheese and dairy-free cotija (or nutritional yeast). It’s different but still tasty. My lactose-intolerant friend requests this version. I’ve used Miyoko’s cream cheese and it works well.
Gluten-Free — Use gluten-free tortilla chips. Everything else is naturally gluten-free. I use Tostitos corn chips. They’re safe and delicious.
Different Cheeses — Use queso fresco instead of cotija. It’s milder and creamier. Or use Monterey Jack for a melty texture. I’ve used both and they work. Cotija is best for authenticity, but others are fine.
Serving & Storage
How to Serve: I usually serve this straight from the skillet at the dinner table—it looks rustic and stays warm. But here are other ways I’ve enjoyed it:
Side Dishes: Serve with tortilla chips, pita chips, or crackers. Also great as a topping for tacos or burritos. I use it as a dip for nachos. It’s versatile.
Toppings Bar: When I have guests, I put out: extra cotija, cilantro, lime wedges, hot sauce, and sliced jalapeños. Everyone customizes their bowl. It’s fun and interactive.
Storage Instructions:
Refrigerator: Store in an airtight container for up to 4 days. The dip will thicken in the fridge—totally normal. Just stir it before serving.
Reheating: Best method: Add to a skillet with a splash of milk over low heat. Stir until heated through and creamy again. Microwave method: Heat in 30-second intervals, stirring between. Add a splash of milk if it’s too thick. Never works: Trying to reheat in the pot you cooked it in. It always burns on the bottom. Ask me how I know.
Freezing: Honestly, this doesn’t freeze well because of the dairy. The sauce separates when thawed. Make it fresh or store in the fridge for up to 4 days.
Meal Prep: Make the dip on Sunday, store in the fridge. Serve cold or reheated throughout the week. Takes 10 minutes and tastes way better than takeout.
Pro tip: If leftovers are drying out, stir in a tablespoon of butter and a splash of milk when reheating. Brings back that creamy texture.
Nutrition Information
I’m not a nutritionist, but here’s the breakdown if you’re tracking.
Per Serving (based on 8 servings):
- Calories: 220
- Protein: 8g
- Carbs: 15g
- Fiber: 2g
- Sugar: 3g
- Fat: 14g
- Saturated Fat: 8g
- Cholesterol: 35mg
- Sodium: 350mg
- Calcium: 150mg
What’s Good: Decent protein from cheese. Calcium from the cheese. Can add vegetables to boost nutrition. More filling than it looks.
What to Know: Higher in calories from cream cheese. Contains dairy. Moderate sodium (use low-sodium cheese to reduce).
My Take: Look, this is comfort food with cream and cheese. It’s not a diet recipe. But it’s way better than takeout, costs less, and I know exactly what’s in it. When I want to make it lighter, I use the Greek yogurt version and load up on vegetables. But usually? I just eat a reasonable portion and enjoy it.
Final Thoughts
So that’s my go-to Skillet Mexican Street Corn Dip! I’ve probably talked your ear off at this point, but when you make a recipe this often, you have a lot to say about it.
This has saved weeknight dinners more times than I can count. It’s my answer to “what’s for dinner” when I’m tired, don’t want takeout, and still want something that tastes really good. My kids are happy, my husband’s happy, and I’m happy because I’m not stressed about cooking.
Make it yours! Try different add-ins, swap in your favorite vegetables, adjust the heat. The best recipes are the ones you adapt to your family’s tastes.
If you make this, drop a comment and let me know what you think! I love hearing how recipes turn out in your kitchen. And if something doesn’t work, tell me that too—I’m here to help troubleshoot.
Happy cooking! And I hope your kitchen smells half as good as mine does right now.
Frequently Asked Questions
Q: Can I use fresh corn instead of frozen?
A: Yes! Fresh corn is great. Just grill or char it in a dry skillet for 5 minutes to get that smoky flavor. Then cut the kernels off the cob. It takes a bit more time, but the flavor is worth it. I do this when corn is in season.
Q: My sauce came out watery—what happened?
A: Usually means you didn’t drain the corn well enough, or you added too much liquid. Let the mixture simmer longer to evaporate excess moisture. Next time, pat the corn dry with a paper towel before adding it.
Q: Can I make this ahead for a party?
A: Absolutely. Make it up to 2 days ahead and store in the fridge. Reheat gently before serving. It tastes great cold too, so you can make it ahead and serve it straight from the fridge. I do this all the time for parties.
Q: Why did my sauce get grainy/lumpy?
A: The heat was too high when you melted the cream cheese. Cream cheese needs gentle heat. Always keep the heat at medium or low. If it’s already grainy, whisk in a splash of warm milk to smooth it out.
Q: Can I use pickled jalapeños?
A: Yes, but chop them finely. Pickled jalapeños are softer and have a different flavor. They work well, but fresh jalapeños have a brighter taste. I prefer fresh, but pickled is fine if that’s what you have.
Q: How do I reheat leftovers without it getting dry?
A: Add a splash of milk or cream to a skillet, add your leftover dip, and heat gently over low heat, stirring frequently. The extra liquid brings back the creamy texture. Microwave sort of works but tends to dry it out.
Q: Can I double this recipe?
A: Absolutely! Double everything and use a larger skillet. The cooking times stay the same. I do this when I’m feeding a crowd. Just make sure your skillet is big enough for the sauce—you might need to use two pans if it’s too thick.
Pin This Recipe!
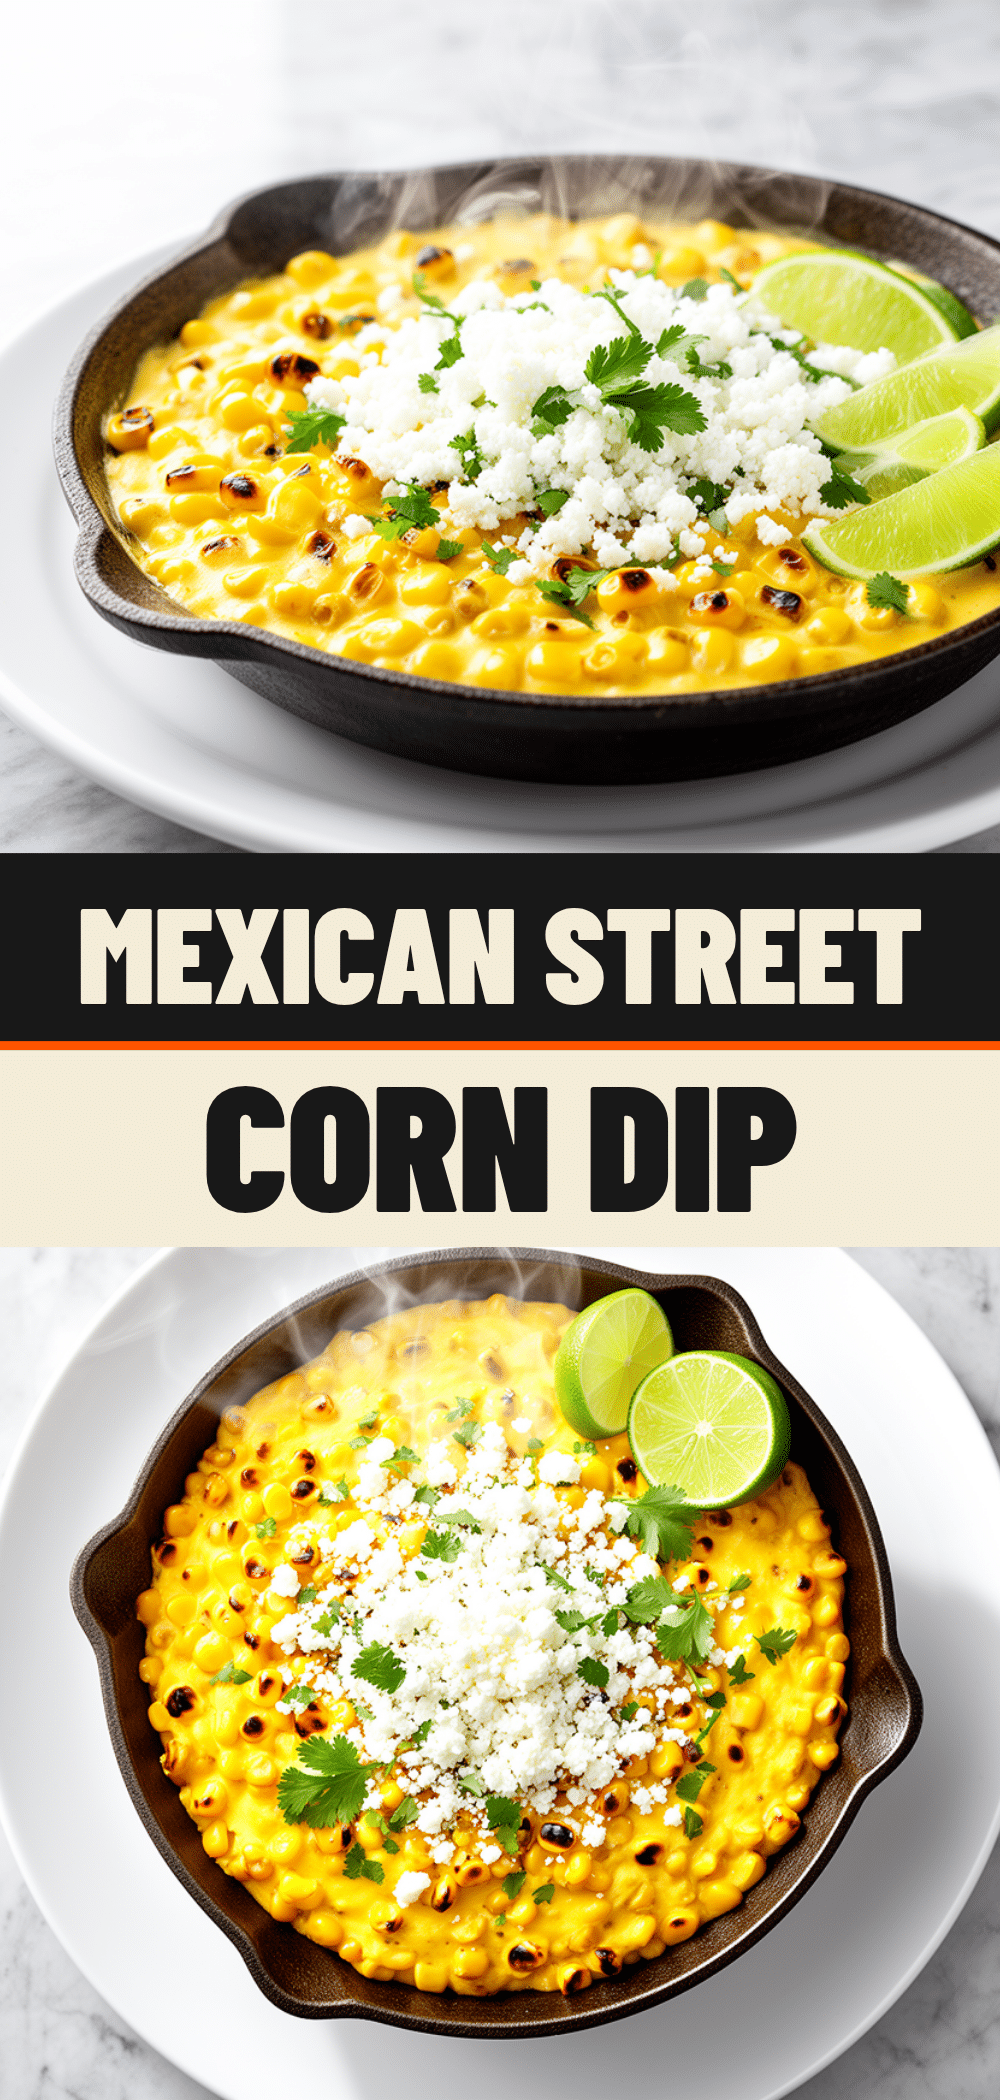

Skillet Mexican Street Corn Dip: 5-Ingredient Creamy Dip
- Total Time: 20 minutes
- Yield: 8 servings 1x
Description
A quick, creamy, and spicy dip that captures the essence of Mexican street corn (Elote) using just five main ingredients. Ready in 20 minutes, this skillet dip is perfect for parties, movie nights, or weeknight comfort food.
Ingredients
- 4 cups corn (frozen, canned, or fresh)
- 8 oz cream cheese (softened)
- 1/2 cup sour cream
- 1/2 cup cotija cheese (crumbled)
- 1–2 jalapeños (minced)
- 1–2 tablespoons lime juice (optional)
- 1/2 cup cilantro, chopped (optional)
- 1/2 teaspoon garlic powder (optional)
- Salt to taste
Instructions
- Prep ingredients: Drain corn if using canned or thawed frozen corn. Mince jalapeños, crumble cotija, and soften cream cheese.
- Heat a 10-12 inch skillet over medium heat. Add a tiny splash of oil or butter if using cast iron, otherwise skip.
- Add softened cream cheese to the skillet. Stir gently with a spatula for 3-4 minutes until completely smooth and creamy. Do not rush or use high heat to prevent separation.
- Add sour cream and stir until combined. Add corn and stir to coat the kernels in the creamy mixture.
- Stir in crumbled cotija cheese and minced jalapeños. Cook for another minute to let flavors meld.
- Taste and adjust seasoning with lime juice, salt, or more jalapeños as desired.
- Serve immediately while warm, topped with extra cotija, cilantro, or hot sauce.
Notes
Ensure corn is well-drained to prevent a watery dip. Soften cream cheese before cooking to ensure a smooth texture. Keep heat at medium or medium-low to prevent the cheese from breaking. This dip can be served warm or cold and stores well in the refrigerator for up to 4 days. Reheat gently with a splash of milk to restore creaminess.
- Prep Time: 5 minutes
- Cook Time: 15 minutes
- Category: Appetizer
- Cuisine: Mexican
Nutrition
- Serving Size: 1/8 of the skillet
- Calories: 220
- Sugar: 3
- Sodium: 350
- Fat: 14
- Saturated Fat: 8
- Carbohydrates: 15
- Fiber: 2
- Protein: 8
Keywords: Mexican street corn dip, elote dip, skillet dip, cream cheese dip, jalapeño dip, party appetizer, 5-ingredient recipe, quick dip, creamy dip, gluten-free appetizer


