I used to think meal prepping was just for grilled chicken and sad-looking quinoa bowls. I was wrong. The real game-changer for my week wasn’t the protein; it was having dessert ready to go before I even got home from work.
Here’s the confession: Last month, I had a brutal Tuesday. I came home exhausted, stared at the empty fridge, and felt that familiar urge to order takeout just to feel like I’d “earned” a treat. But then I remembered I’d prepped those No-Bake Biscoff Cheesecake Bars on Sunday afternoon. They were sitting in the fridge, perfectly set, waiting for me. I grabbed one, popped it in the freezer for ten minutes, and ate it while folding laundry. No guilt. No mess. No decision fatigue.
That was the moment I realized: If I can meal prep my dinner, why not my dessert? This No-Bake Biscoff Cheesecake Bars meal prep approach has saved my sanity more times than I can count. It’s sweet, it’s crunchy, it’s creamy, and best of all, it doesn’t require turning on the oven.
I’ve tested this recipe at least a dozen times to get the texture right—thick enough to hold its shape, but soft enough to melt in your mouth. Now, I make a double batch every Sunday. It’s become the anchor of my weekly routine. Whether you’re looking for a quick snack or a proper sweet treat after dinner, this method ensures you always have something delicious waiting for you. Let’s walk through how I organize my week with these bars.
Why You’ll Love This No-Bake Biscoff Cheesecake Bars Meal Prep
There are a few reasons why this has replaced my weekend baking ritual. Real talk? Most cheesecakes are high-maintenance. They crack. They weep water. They need hours in the fridge just to set. These bars? They’re forgiving, portable, and designed specifically for the meal-prepper’s lifestyle.
- Zero Oven Required — I don’t have to heat up my apartment in the summer or wait for my oven to cool down before cleaning. I mix, I press, I chill. Done in 20 minutes of active time.
- Perfect Portion Control — Because I cut them into squares before storing, I don’t overeat. I know exactly how many calories are in my “Tuesday treat.” It’s 3 bars, not half the pan.
- Freezer-Friendly Magic — This is the biggest win. These bars freeze beautifully. I can make a batch on Sunday, eat them throughout the week, and if I’m running low, I can pull another batch from the freezer without any texture loss.
- Grab-and-Go Convenience — I keep them in individual containers in the office fridge. When 3 PM hits and the sugar cravings hit, I don’t have to go to the vending machine. I just walk to the breakroom fridge.
- Make-Ahead Flexibility — You can make these up to 5 days in advance. In fact, they taste better on day three because the flavors have melded together. It’s the ultimate “set it and forget it” dessert.
This is my go-to when I want to feel organized but still indulge. It’s efficient, it’s delicious, and it proves that meal prep doesn’t have to be boring.
Key Ingredients for the Perfect Bar
Let’s talk about what goes into these No-Bake Biscoff Cheesecake Bars. I’ve found that sticking to specific measurements is crucial for that perfect set. Here’s what I use, with exact US metrics to ensure consistency.
Biscoff Cookies (15 oz / 425g) — This is the foundation. I use the standard Lotus Biscoff spreadable cookies. They have the perfect balance of cinnamon and caramel. Do not substitute with ginger snaps; the flavor profile is too sharp. You need that specific spiced sweetness.
Unsalted Butter (6 tbsp / 85g) — Yes, by weight. I melt this butter to bind the crust. Using unsalted butter lets you control the saltiness, especially since the Biscoff spread is already salty-sweet. If you’re using salted butter, reduce any added salt in the filling.
Cream Cheese (16 oz / 450g) — Full-fat is non-negotiable. Light cream cheese will not set properly in a no-bake recipe. It needs the fat content to become thick and stable. Let it come to room temperature before mixing, or you’ll end up with lumpy bars.
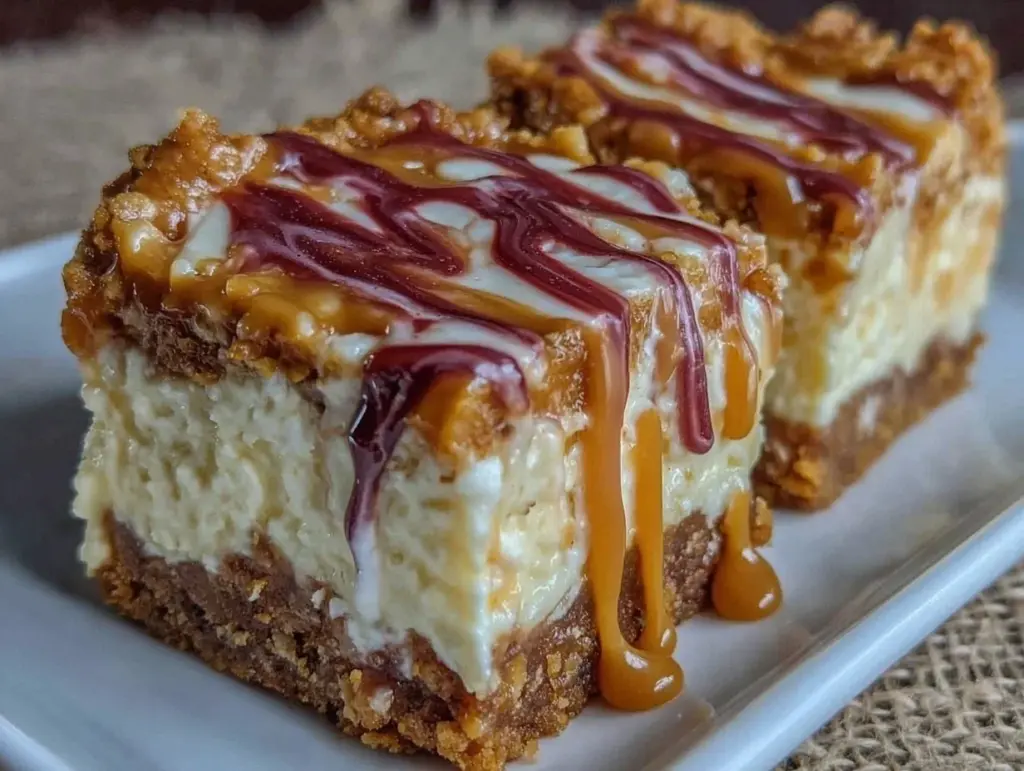
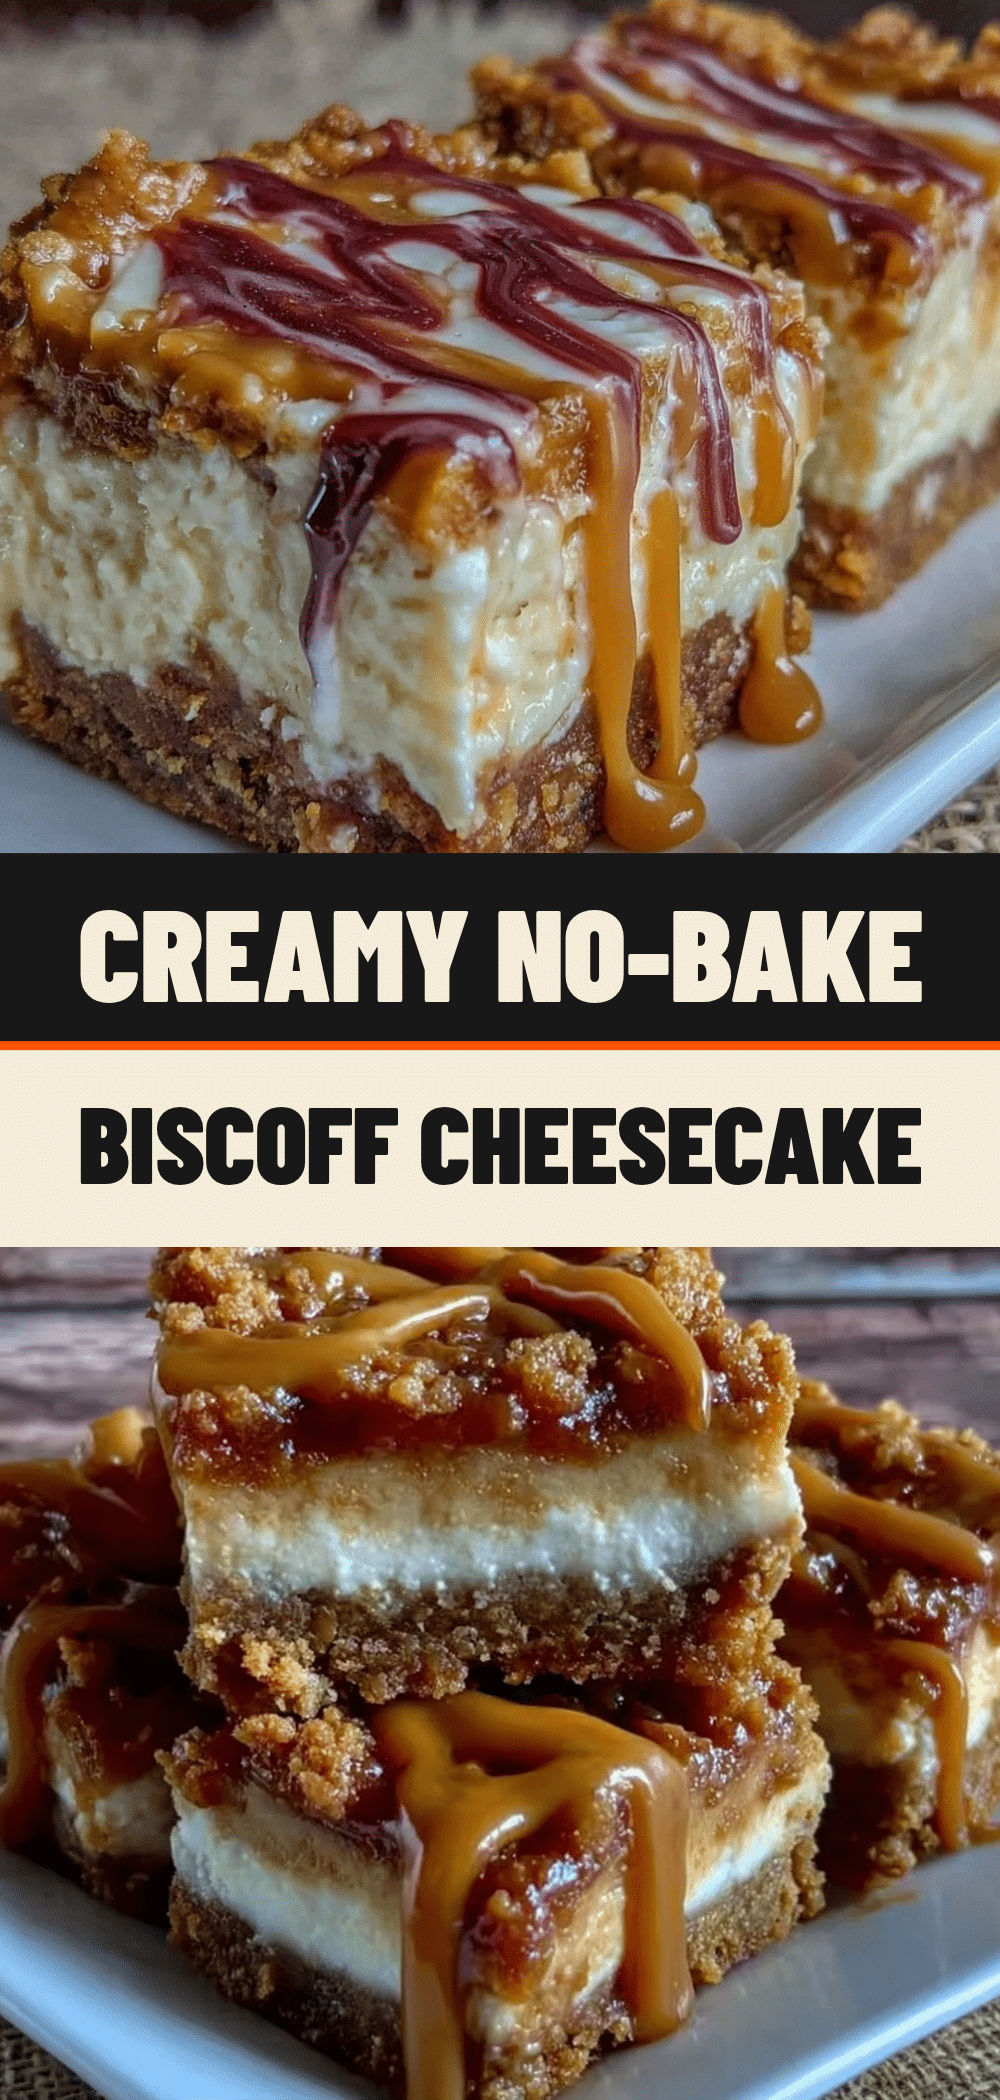
Biscoff Spread (1 cup / 280g) — This is the star of the show. I use the smooth version for the filling, but I keep a jar of the crunchy version for garnish. The smooth spread melts into the cream cheese seamlessly, creating that marbled effect. Measure it out; eyeballing it can throw off the sweetness balance.
Powdered Sugar (1/2 cup / 60g) — Just enough to sweeten the cream cheese without making it cloying. Since the Biscoff spread is already sweet, you don’t need much here. Sift it to avoid gritty chunks in your smooth filling.
Vanilla Extract (1 tsp / 5ml) — Pure vanilla, not imitation. It rounds out the cinnamon notes in the Biscoff. It’s a small ingredient, but it makes a big difference in depth of flavor.
Salted Butter for Topping (2 tbsp / 28g) — For the drizzle, you need a little extra butter to thin out the spread so it pours easily. Don’t skip this, or you’ll be scraping the jar with a knife.
Tools You’ll Need
You don’t need fancy equipment for this No-Bake Biscoff Cheesecake Bars meal prep. I keep it simple so I can clean up quickly and move on with my week.
9×9 Inch Square Pan — I use an 8-inch pan sometimes, but the bars get too thick and are hard to cut. A 9×9 pan gives you that perfect bar shape. Line it with parchment paper, leaving an overhang on the sides. This is the secret to getting the whole block out without smashing it.
Stand Mixer or Hand Mixer — You need to whip the cream cheese and sugar until it’s fluffy. Doing this by hand is possible, but it takes effort and arm strength. A mixer ensures there are no lumps and the texture is light.
Food Processor or Ziploc Bag + Rolling Pin — To crush the cookies. I use a food processor for speed, but if I’m being lazy, I put the cookies in a heavy-duty Ziploc bag and crush them with a rolling pin. It’s therapeutic, actually.
Offset Spatula — For spreading the filling evenly. A regular spatula works, but the offset makes it easier to get those sharp, clean edges.
How to Make No-Bake Biscoff Cheesecake Bars
Let’s get into the method. This process is about efficiency. I do everything in one go, then let the fridge do the heavy lifting.
Step 1: Prep the Pan and Crust (10 minutes)
Line your 9×9 inch pan with parchment paper, creating a sling. This is crucial for lifting the bars out later. In a bowl, combine the crushed Biscoff cookies with the melted butter. Mix until it looks like wet sand. Press this mixture firmly into the bottom of the pan. Use the bottom of a measuring cup to pack it down tight. If the crust is loose, the bars will crumble when you cut them. Place the pan in the fridge while you make the filling.
Step 2: Make the Cream Cheese Filling (5 minutes)
In a large bowl, beat the room-temperature cream cheese on medium-high speed until smooth and creamy, about 2 minutes. Add the powdered sugar and vanilla extract. Beat until combined. Now, add the 1 cup of Biscoff spread. Beat on low speed just until the spread is incorporated. Do not overmix once the spread is in, or you might incorporate too much air, which can affect the set. The mixture should be thick and glossy.
Step 3: Assemble the Bars (5 minutes)
Remove the pan from the fridge. Pour the cream cheese mixture over the crust. Use your offset spatula to spread it evenly. Take the remaining Biscoff spread (if you have extra, or reserve some for the top) and dollop it on top. Use a knife to swirl it into the cream cheese for that marbled look. If you’re doing a full drizzle, save that for after chilling.
Step 4: The Chill (4 hours minimum)
This is the hardest part. You have to wait. Cover the pan with plastic wrap. Refrigerate for at least 4 hours, but overnight is best. This allows the cream cheese to firm up and the flavors to meld. If you cut them too soon, you’ll get a messy, gooey result.
Step 5: Cut and Store (5 minutes)
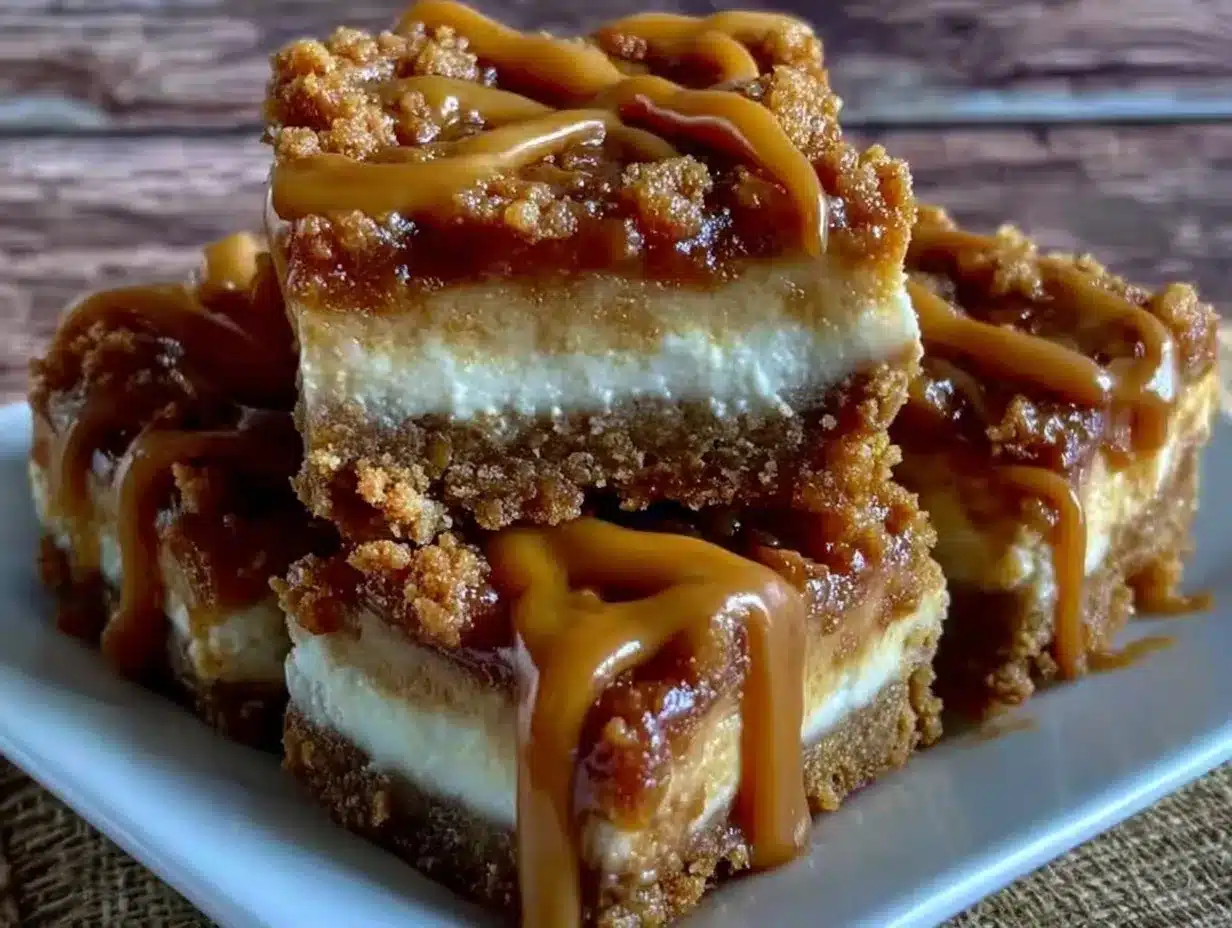
Lift the block out of the pan using the parchment sling. Place it on a cutting board. Use a sharp knife to cut into 12 or 16 squares. If you want a Biscoff drizzle, melt the remaining spread with the 2 tbsp of butter in the microwave for 30 seconds. Drizzle over the top. Cut again if needed. Now, you’re ready for meal prep.
Total active time: 25 minutes. Total chill time: 4+ hours.
Expert Tips for Meal Preppers
Here’s everything I learned from making these bars for weeks on end.
Room Temperature is Key
I cannot stress this enough. If your cream cheese is cold, you will have lumps. Lumps mean uneven texture. Take the cream cheese out of the fridge 30 minutes before you start. If you forget, cut it into cubes and let it sit for 10 minutes. It’s worth the wait.
Don’t Skip the Parchment Sling
I learned this the hard way. I tried to lift the bars out with just a spatula once. I smashed them. I cried. Now, I always use the parchment sling. It makes removal clean and effortless.
Label Your Containers
When you’re meal prepping, it’s easy to forget what day is what. Label your containers with the date. These bars last up to 5 days in the fridge, but if you make a double batch, you’ll freeze some. Labeling prevents confusion.
Keep Them Cold
Because these are no-bake and contain dairy, they need to stay refrigerated. If you’re taking them to work, use an insulated lunch bag with an ice pack. Don’t leave them in a hot car.
Recipe Variations for Your Weekly Menu
Once you’ve nailed the basic version, here’s how to mix it up.
Double Chocolate Biscoff
Add 2 tbsp of cocoa powder to the cream cheese mixture. It adds a rich chocolate note that pairs surprisingly well with the cinnamon.
Salted Caramel Drizzle
Instead of just Biscoff spread, mix equal parts caramel sauce and Biscoff spread for the topping. The salt cuts the sweetness perfectly.
Gluten-Free Option
Use gluten-free Biscoff cookies (they exist!) and ensure your cream cheese is certified GF. The rest of the ingredients are naturally gluten-free.
Dairy-Free Twist
Use vegan cream cheese and dairy-free butter. The texture will be slightly softer, so chill for a longer period. It’s still delicious, just different.
Serving & Storage
Serving
I serve these as a dessert after dinner, but I also pack them for afternoon snacks. They pair well with a hot coffee or a cold glass of milk. If you want to make it fancy, add a dollop of whipped cream on top right before eating.
Storage
Store the bars in an airtight container in the refrigerator for up to 5 days. Separate layers with parchment paper to prevent sticking. If you want to keep them longer, freeze them for up to 3 months. They thaw beautifully in the fridge overnight. I usually freeze half the batch so I have a backup for busy weeks.
Meal Prep Tip
Portion them out immediately after cutting. Put 2-3 bars in individual containers. This way, you don’t have to cut them at 10 PM when you’re tired. Just grab and go.
Nutrition Information
I’m not a nutritionist, but here’s the breakdown per bar (assuming 12 bars).
| Nutrient | Amount |
|---|---|
| Calories | 320 |
| Fat | 18g |
| Carbs | 38g |
| Fiber | 1g |
| Protein | 4g |
| Sodium | 210mg |
My Take: This is indulgent comfort food. It’s not a salad. But it’s better than buying a slice of cheesecake at a restaurant, and you know exactly what’s in it. Enjoy it as a treat, not as a daily staple.
Final Thoughts
Meal prepping your desserts doesn’t have to be complicated. This No-Bake Biscoff Cheesecake Bars meal prep plan is simple, delicious, and incredibly satisfying. It takes the stress out of your week and ensures you always have something sweet waiting for you. Give it a try this Sunday. You might just find, like I did, that it changes your entire week.
If you make this, drop a comment! I love hearing how it turns out in your kitchen. Happy cooking!
FAQs
Can I use crushed Biscoff cookies instead of spread in the filling?
Yes, but the texture will be different. The spread creates a smooth, creamy filling. If you use crushed cookies, you’ll get a chunkier texture. I recommend using the spread for the classic experience.
Why did my bars fall apart when I cut them?
They probably didn’t chill long enough. No-bake cheesecakes need time to set. If you cut them too soon, the cream cheese hasn’t firmed up. Chill for at least 4 hours, preferably overnight.
Can I freeze these bars?
Absolutely. They freeze very well. Wrap them individually in plastic wrap, then place them in a freezer bag. They’ll last up to 3 months. Thaw in the fridge before eating.
What if I don’t have a 9×9 pan?
You can use an 8×8 pan, but the bars will be thicker. You may need to adjust the cutting size. The recipe will still work, but the yield will be fewer bars.
Can I make this recipe gluten-free?
Yes, as long as you use gluten-free Biscoff cookies and ensure your other ingredients are certified gluten-free. The rest of the ingredients are naturally GF.
How do I store these for work?
Keep them in an airtight container in the fridge. If your office fridge is warm, use an insulated lunch bag with an ice pack to keep them safe.
Can I double this recipe?
Yes, but you’ll need a larger pan (like a 9×13). The baking/chilling time will remain the same. Just ensure the crust is packed down firmly to support the extra height.
Pin This Recipe!
No-Bake Biscoff Cheesecake Bars
- Total Time: 4 hours 25 minutes
- Yield: 12 servings 1x
Description
A convenient, no-bake dessert perfect for meal prepping. These creamy, crunchy bars require no oven and can be made ahead for grab-and-go convenience.
Ingredients
- 15 oz (425g) Lotus Biscoff spreadable cookies
- 6 tbsp (85g) unsalted butter, melted
- 16 oz (450g) full-fat cream cheese, room temperature
- 1 cup (280g) smooth Biscoff spread
- 1/2 cup (60g) powdered sugar, sifted
- 1 tsp vanilla extract
- 2 tbsp (28g) salted butter, for topping drizzle
Instructions
- Line a 9×9 inch square pan with parchment paper, creating an overhang on the sides for easy removal.
- Crush the Biscoff cookies into fine crumbs using a food processor or a rolling pin in a Ziploc bag.
- Combine the crushed cookies with the 6 tbsp melted butter until the mixture resembles wet sand.
- Press the cookie mixture firmly into the bottom of the prepared pan. Place in the fridge while making the filling.
- In a large bowl, beat the room-temperature cream cheese on medium-high speed until smooth and creamy (about 2 minutes).
- Add the powdered sugar and vanilla extract, beating until combined.
- Add the 1 cup of smooth Biscoff spread and beat on low speed just until incorporated. Do not overmix.
- Remove the pan from the fridge and pour the cream cheese mixture over the crust. Spread evenly with an offset spatula.
- Dollop remaining Biscoff spread on top and swirl with a knife for a marbled effect (optional).
- Cover the pan with plastic wrap and refrigerate for at least 4 hours, preferably overnight, until firm.
- Lift the block out of the pan using the parchment sling. Cut into 12 or 16 squares.
- For a drizzle, melt the 2 tbsp salted butter with remaining Biscoff spread in the microwave for 30 seconds. Drizzle over the bars.
Notes
Ensure cream cheese is at room temperature to avoid lumps. Do not substitute ginger snaps for Biscoff cookies as the flavor profile differs. Bars can be frozen for up to 3 months. For gluten-free option, use certified GF Biscoff cookies.
- Prep Time: 25 minutes
- Cook Time: 0 minutes
- Category: Dessert
- Cuisine: American
Nutrition
- Serving Size: 1 bar
- Calories: 320
- Sugar: 28
- Sodium: 210
- Fat: 18
- Saturated Fat: 10
- Carbohydrates: 38
- Fiber: 1
- Protein: 4
Keywords: no-bake, Biscoff, cheesecake bars, meal prep, dessert, cookie bars, Lotus Biscoff, make-ahead