Let’s be honest about takeout for a second. I love it. I really do. But there is that specific, heavy feeling I get at 8 PM on a Tuesday when I’ve ordered fried rice and sesame chicken, eaten half of it, and then spent the next hour staring at the remaining half in a greasy plastic container. It’s not just the calories. It’s the waste. It’s the fact that I ordered enough for four people when my kitchen only has space for one. And let’s not even talk about the rice. That sticky, carb-loaded bed of white rice that turns into a sad, rubbery mess by the next day.
That was my reality for years. I’d try to “eat healthy,” which usually meant ordering a salad and feeling hangry an hour later. Or I’d try to cook, end up with a giant pot of something, and spend the week eating leftovers that had lost all their flavor. I was stuck in a loop of guilt, waste, and carb coma. Then, about three years ago, I had an epiphany while staring at a head of cauliflower at the grocery store. What if I didn’t just swap the rice? What if I made the cauliflower *better* than the rice?
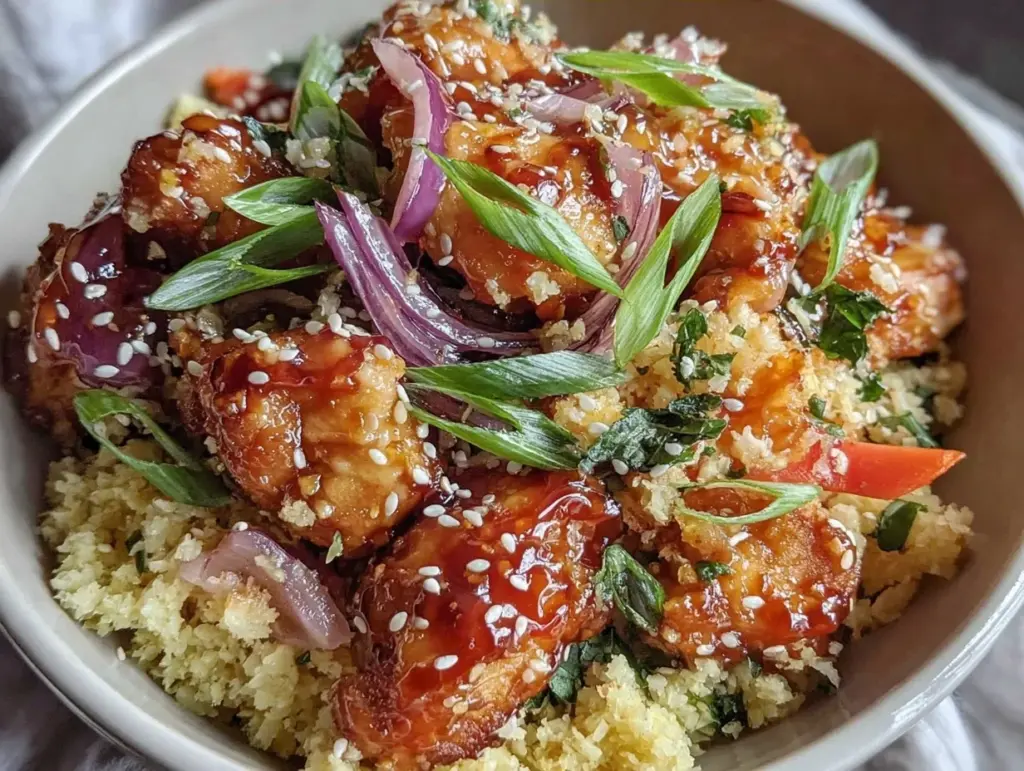
That experiment turned into this Low-Carb Cauliflower Fried Rice with Sesame Ginger Chicken. And I’m not saying that lightly. I have made this meal more times than I can count. It’s my go-to when I want something that feels like a cheat meal but actually fuels me. It’s the kind of dish that stops me from ordering UberEats before I even look at my phone. Plus, because it’s designed for one or two people, I never have to deal with the “what do I do with the leftovers” dilemma. It’s perfect as is, or I can pack it for lunch without it tasting like sad office food. If you’ve ever struggled with cooking small portions or staying on track with low-carb without sacrificing flavor, this is the recipe that finally makes sense.
Why You’ll Love This Recipe
I know what you’re thinking. “Cauliflower fried rice? Again?” Trust me, I had the same doubt. But this isn’t that mushy, watery version you might have tried at a sad buffet. This is crisp, savory, and packed with flavor. Here’s why this specific combination of crispy chicken and riced cauliflower has taken over my weeknight rotation:
- It’s Actually Satisfying — Most low-carb meals leave me hungry 20 minutes later. Not this one. The combination of high-protein chicken and the hearty texture of cauliflower keeps me full. I’ve paired this with a simple high-protein chicken and broccoli meal prep bowl on days when I need even more green volume, but honestly, this is complete on its own.
- Zero Waste Cooking — This recipe is designed for 1-2 servings. No giant pots, no half-used jars of oyster sauce sitting in the fridge for three weeks. You use what you need. It’s the antidote to the “cooking for four when you live alone” struggle.
- Takeout Speed, Better Taste — It takes about 20 minutes from start to finish. That’s faster than waiting for delivery. And because you control the sugar in the sauce, it tastes brighter and fresher than the greasy takeout version.
- Freezer-Friendly (In a Good Way) — I know I just said no waste, but sometimes life happens. This freezes beautifully in single-serving portions. I often double the batch just to freeze one portion for a busy weeknight when I don’t even want to turn on the stove.
- Gluten-Free Friendly — By using tamari instead of soy sauce, this is naturally gluten-free. It’s one of those rare meals that works for everyone at the table, whether they’re low-carb, gluten-free, or just trying to eat cleaner.
This is my answer to “I want comfort food but I don’t want to feel sluggish.” It’s reliable, it’s fast, and it tastes like a victory.
Ingredients You’ll Need
One of the best parts of this recipe is how simple the ingredient list is. You probably have most of this in your kitchen right now. I’m not asking for anything obscure. Here’s exactly what I use, and why it matters.
For the Chicken & Sauce
Chicken Breast (1 large breast, about 6-8 oz / 170-225g) — I prefer breast because it’s lean and takes on the sauce well. Thighs work too if you want more fat/flavor, but breast keeps it light. Slice it into thin, bite-sized strips. Uniform pieces mean even cooking.
Egg White (1 large / about 30g) — This is the secret to tender chicken. Coating the chicken in a little egg white before cooking creates a velvety texture that locks in juices. It’s a technique I learned from making healthy chicken fajita bowls, and it works wonders here too.
Cornstarch (1 teaspoon) — Just a dusting. This helps crisp up the chicken and thickens the sauce later. Don’t skip it, but don’t overdo it.
Low-Sodium Tamari (2 tablespoons) — I use tamari because it’s gluten-free and has a cleaner taste than regular soy sauce. If you’re not gluten-free, regular soy sauce works, but tamari is my go-to for this.
Sesame Oil (1 tablespoon) — Toasted sesame oil is non-negotiable. It’s potent. A little goes a long way. I keep a bottle in the fridge so it stays fresh longer.
Fresh Ginger (1 tablespoon, grated) — Yes, fresh. Grated ginger has a brightness that powder just can’t match. I buy fresh roots and grate them as I need them. It’s worth the extra 30 seconds.
Garlic (2 cloves, minced) — Don’t skimp. Garlic is the backbone of fried rice flavor. I mince it fine so it distributes evenly.
Hoisin Sauce (1 teaspoon) — This adds that sweet, savory depth. Use a good quality hoisin. If you’re strictly avoiding sugar, check the label, but a teaspoon won’t break your low-carb goals.
Sriracha or Chili Garlic Sauce (1 teaspoon, optional) — For a little kick. I love the heat, but skip it if you’re sensitive to spice.
For the Fried Rice
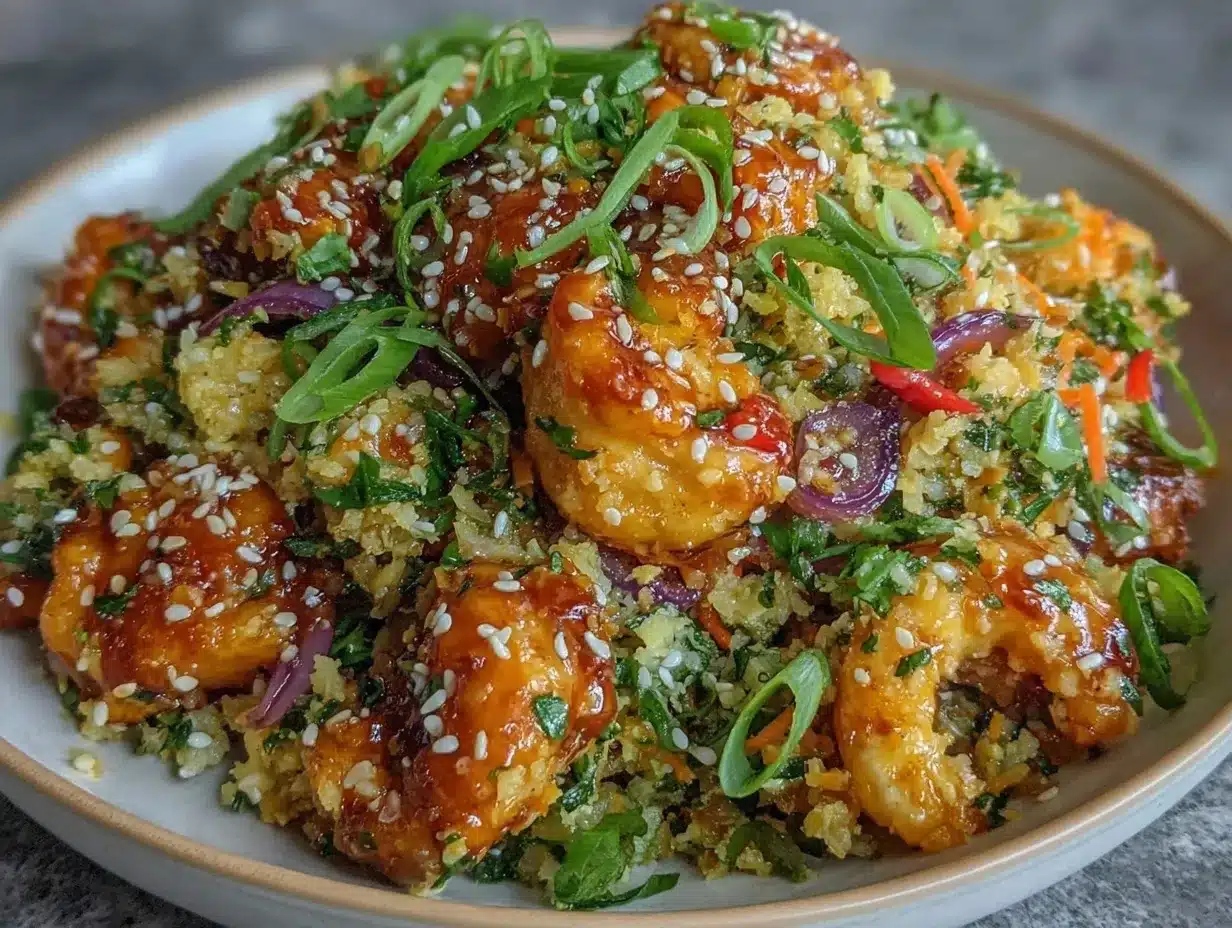
Cauliflower (1 medium head, about 4-5 cups riced / 400g) — You can buy pre-riced, but I prefer to do it myself. It’s cheaper and you control the texture. Pulse florets in a food processor until they look like rice grains. Don’t puree them!
Carrots (2 tablespoons, finely diced) — Small dice is key. You want little pops of sweetness, not big chunks. This adds color and crunch.
Green Onions (2 stalks, chopped) — I separate the whites and greens. Whites go in for cooking, greens go on top for garnish.
Egg (1 large) — Scrambled into the rice. I use a separate small pan for the egg so it doesn’t get lost in the cauliflower mix.
Avocado Oil or Sesame Oil (1 tablespoon total) — For cooking. I use avocado oil for high heat because it has a higher smoke point, then finish with a drizzle of sesame oil.
Optional Add-ins
Edamame (¼ cup) — Adds protein and a nice pop of green. I keep frozen edamame in the freezer for this.
Snap Peas (¼ cup, sliced) — For extra crunch. I add these in the last minute of cooking.
Cilantro (1 tablespoon, chopped) — Fresh cilantro at the end adds a bright, herbal note that cuts through the richness.
Equipment Needed
You don’t need fancy gear for this. Here’s what I actually use in my small kitchen:
- Small Skillet or Wok (10-12 inch) — I use a 12-inch non-stick skillet. It needs to be big enough to spread the cauliflower out so it steams and crisps instead of boiling in its own juice.
- Food Processor — For ricing the cauliflower. If you don’t have one, you can grate it by hand with a box grater, but it takes longer. A food processor is a game-changer for speed.
- Sharp Knife — For slicing the chicken and dicing the carrots. A dull knife makes uniform slicing impossible.
- Measuring Spoons — For the sauce. Precision matters here because the flavors are strong.
- Small Bowl — For mixing the sauce. Keep it ready before you start cooking.
- Spatula — A silicone spatula is best for scraping the pan and folding the egg.
Pro Tip: If you don’t have a food processor, buy pre-riced cauliflower. It’s slightly more expensive but saves time. Just make sure to squeeze out excess moisture with a towel before cooking. That’s the key to avoiding mushy rice.
How to Make It: Step-by-Step
Alright, let’s make this! I’m walking you through exactly how I do it, including the little tricks I’ve picked up to ensure your chicken is tender and your cauliflower has that perfect “fried” texture.
Step 1: Prep the Cauliflower (5 minutes)
If you’re using a whole head of cauliflower, cut it into florets. Pulse them in a food processor until they resemble rice grains. Check frequently—don’t over-process into mush. Transfer the riced cauliflower to a bowl. If you’re worried about moisture, spread it on a paper towel and pat it dry. Dry cauliflower = crispy fried rice. Wet cauliflower = soggy mess.
Step 2: Marinate the Chicken (5 minutes)
While the cauliflower preps, slice the chicken breast into thin, bite-sized strips. In a small bowl, whisk the egg white with the cornstarch and a pinch of salt. Toss the chicken strips in the mixture until coated. This “velveting” technique ensures the chicken stays tender and juicy. Set aside.
Step 3: Make the Sauce (2 minutes)
In a small bowl, whisk together the tamari, sesame oil, grated ginger, minced garlic, hoisin sauce, and sriracha (if using). Taste it. It should be salty, savory, and slightly sweet. Adjust to your preference. Set aside.
Step 4: Cook the Chicken (3-4 minutes)
Heat a large skillet or wok over medium-high heat. Add 1 teaspoon of avocado oil. Once the oil is shimmering, add the chicken strips in a single layer. Don’t crowd the pan! If you’re making a double batch, do it in two batches. Cook for 2-3 minutes until golden brown and cooked through. Remove the chicken to a clean plate. Don’t rinse the pan; those browned bits are flavor.
Step 5: Sauté the Veggies (2 minutes)
Add another teaspoon of oil to the same pan. Add the diced carrots and the white parts of the green onions. Sauté for 1-2 minutes until the carrots are tender-crisp. Then, add the riced cauliflower. Spread it out in the pan. Let it sit for a minute without stirring to get a slight char. Then toss and cook for 3-4 minutes until the cauliflower is tender but not mushy. This step is crucial for that fried rice texture.
Step 6: Scramble the Egg (2 minutes)
Push the cauliflower to the side of the pan. Crack the egg into the empty space. Scramble it quickly until just set. Chop it into small pieces with your spatula. Then, mix it into the cauliflower. This ensures you get egg in every bite.
Step 7: Combine and Finish (2 minutes)
Add the cooked chicken back to the pan. Pour the sauce over everything. Toss vigorously for 1-2 minutes until the sauce coats everything and thickens slightly. The sauce will bubble and glaze the ingredients. Taste and adjust salt or spice if needed. Remove from heat.
Step 8: Serve
Transfer to a bowl. Top with the green parts of the green onions, a sprinkle of sesame seeds (if you have them), and maybe a few slices of fresh jalapeño if you like heat. Eat immediately while it’s hot and crispy.
Total Time: About 20 minutes (5 minutes prep, 15 minutes cooking)
Expert Tips & Tricks
Here’s everything I’ve learned from making this dozens of times. These tips will save you from my mistakes.
Don’t Crowd the Pan
This is the #1 mistake. If you put too much cauliflower in the pan at once, it steams instead of fries. You want moisture to evaporate. If you’re cooking for two, use a large skillet. If you’re cooking for one, use a medium skillet but don’t fill it to the brim.
Pat the Cauliflower Dry
Cauliflower has a high water content. If it’s wet, your fried rice will be wet. After ricing it, spread it on paper towels and pat it dry. It’s an extra step, but it makes a huge difference in texture.
Use High Heat
Fried rice needs high heat. You want that “wok hei” (breath of the wok) flavor, even if you’re using a skillet. Keep the heat at medium-high throughout the cooking process. This ensures the cauliflower gets a slight char and doesn’t get soggy.
Velvet the Chicken
Coating the chicken in egg white and cornstarch isn’t just for show. It creates a protective barrier that keeps the chicken moist while it cooks at high heat. This is a technique used in Chinese restaurants, and it works wonders for home cooks.
Don’t Overcook the Sauce
The sauce thickens quickly. Once you add it to the pan, toss for just 1-2 minutes. If you cook it too long, it can become too sticky or burnt. You want a glossy glaze, not a syrup.
Variations & Substitutions
Once you’ve nailed the basic version, here’s how you can mix it up. I’ve tried all of these.
Shrimp Version
Swap the chicken for 6-8 oz of shrimp. Shrimp cooks faster, so add it in the last 2 minutes of the cooking process. It pairs beautifully with the ginger and garlic.
Veggie-Only
Skip the chicken and add an extra egg or a block of firm tofu. Press the tofu, cube it, and pan-fry it until crispy before adding it back at the end. This is a great way to use up leftover veggies.
Spicy Level-Up
Add more sriracha or a dash of chili crisp. Chili crisp adds texture and heat, and it’s become my favorite topping for everything lately.
Low-Carb Swap
If you’re strictly keto, make sure your hoisin sauce is low-sugar. Some brands add sugar, so check the label. You can also substitute hoisin with a mix of peanut butter and tamari for a different flavor profile.
Serving & Storage
How to Serve
I usually serve this straight from the skillet. It looks rustic and stays warm. But here are other ways I’ve enjoyed it:
- With a Side Salad — A simple green salad with rice vinegar dressing cuts through the richness.
- With Edamame — Steamed edamame with sea salt is a great side.
- With Miso Soup — A small bowl of miso soup makes it a complete meal.
Storage Instructions
Refrigerator: Store in an airtight container for up to 3 days. The cauliflower will soften slightly in the fridge, but it’s still good.
Reheating: Best method: Reheat in a skillet over medium heat with a splash of water. This restores the texture. Microwave works but can make the cauliflower mushy. If you microwave, do it in 30-second bursts and stir.
Freezing: This freezes well for up to 2 months. I portion it into single-serving containers. Thaw in the fridge overnight and reheat in a skillet. It’s not quite as crispy as fresh, but it’s still delicious.
Nutrition Information
I’m not a nutritionist, but here’s the breakdown if you’re tracking. This is per serving (1 large serving).
- Calories: 320
- Protein: 28g
- Carbs: 12g
- Fiber: 4g
- Sugar: 6g
- Fat: 18g
- Sodium: 680mg
What’s Good: High protein, moderate fat, low net carbs. The cauliflower adds fiber and nutrients without the carb load of rice.
What to Know: Sodium can be high depending on the tamari and hoisin you use. Use low-sodium versions if you’re watching salt.
Final Thoughts
So that’s my Low-Carb Cauliflower Fried Rice with Sesame Ginger Chicken! I’ve probably talked your ear off at this point, but when you make a recipe this often, you have a lot to say about it.
This has saved weeknight dinners more times than I can count. It’s my answer to “what’s for dinner” when I’m tired, don’t want takeout, and still want something that tastes really good. It’s the perfect balance of comfort and health. No waste, no guilt, just delicious food.
Make it yours! Try different add-ins, swap in your favorite vegetables, adjust the spice level. The best recipes are the ones you adapt to your tastes. If you make this, drop a comment and let me know what you think! I love hearing how recipes turn out in your kitchen.
Happy cooking! And I hope your kitchen smells half as good as mine does right now.
Frequently Asked Questions
Can I use frozen cauliflower rice?
Yes, but you need to thaw it and squeeze out as much moisture as possible. Frozen cauliflower has more water than fresh. If you don’t squeeze it, your fried rice will be soggy. I prefer fresh for texture, but frozen is a convenient backup.
Why did my cauliflower turn out mushy?
Usually, this happens because the pan was too crowded or the heat was too low. The cauliflower needs high heat and space to evaporate moisture. Also, don’t cover the pan while cooking. Let it steam and char.
Can I make this ahead for meal prep?
Absolutely. This is one of my favorite meal prep lunches. I portion it into containers and it keeps well in the fridge for 3 days. Reheat in a skillet for best texture.
Is this recipe gluten-free?
Yes, if you use tamari instead of soy sauce and check your hoisin sauce for gluten. Most hoisin sauces are naturally gluten-free, but some brands add wheat. Always check the label.
Can I use chicken thighs instead of breast?
Yes, chicken thighs are juicier and have more flavor. Just make sure to slice them thinly so they cook evenly. They pair well with the sesame ginger sauce.
How do I store leftovers?
Store in an airtight container in the fridge for up to 3 days. Reheat in a skillet with a splash of water to restore moisture and texture.
Can I double this recipe?
You can, but you’ll need to cook in batches. If you double it all at once, the pan will be too crowded, and the cauliflower will steam instead of fry. Cook the chicken and veggies in two batches for best results.
Pin This Recipe!
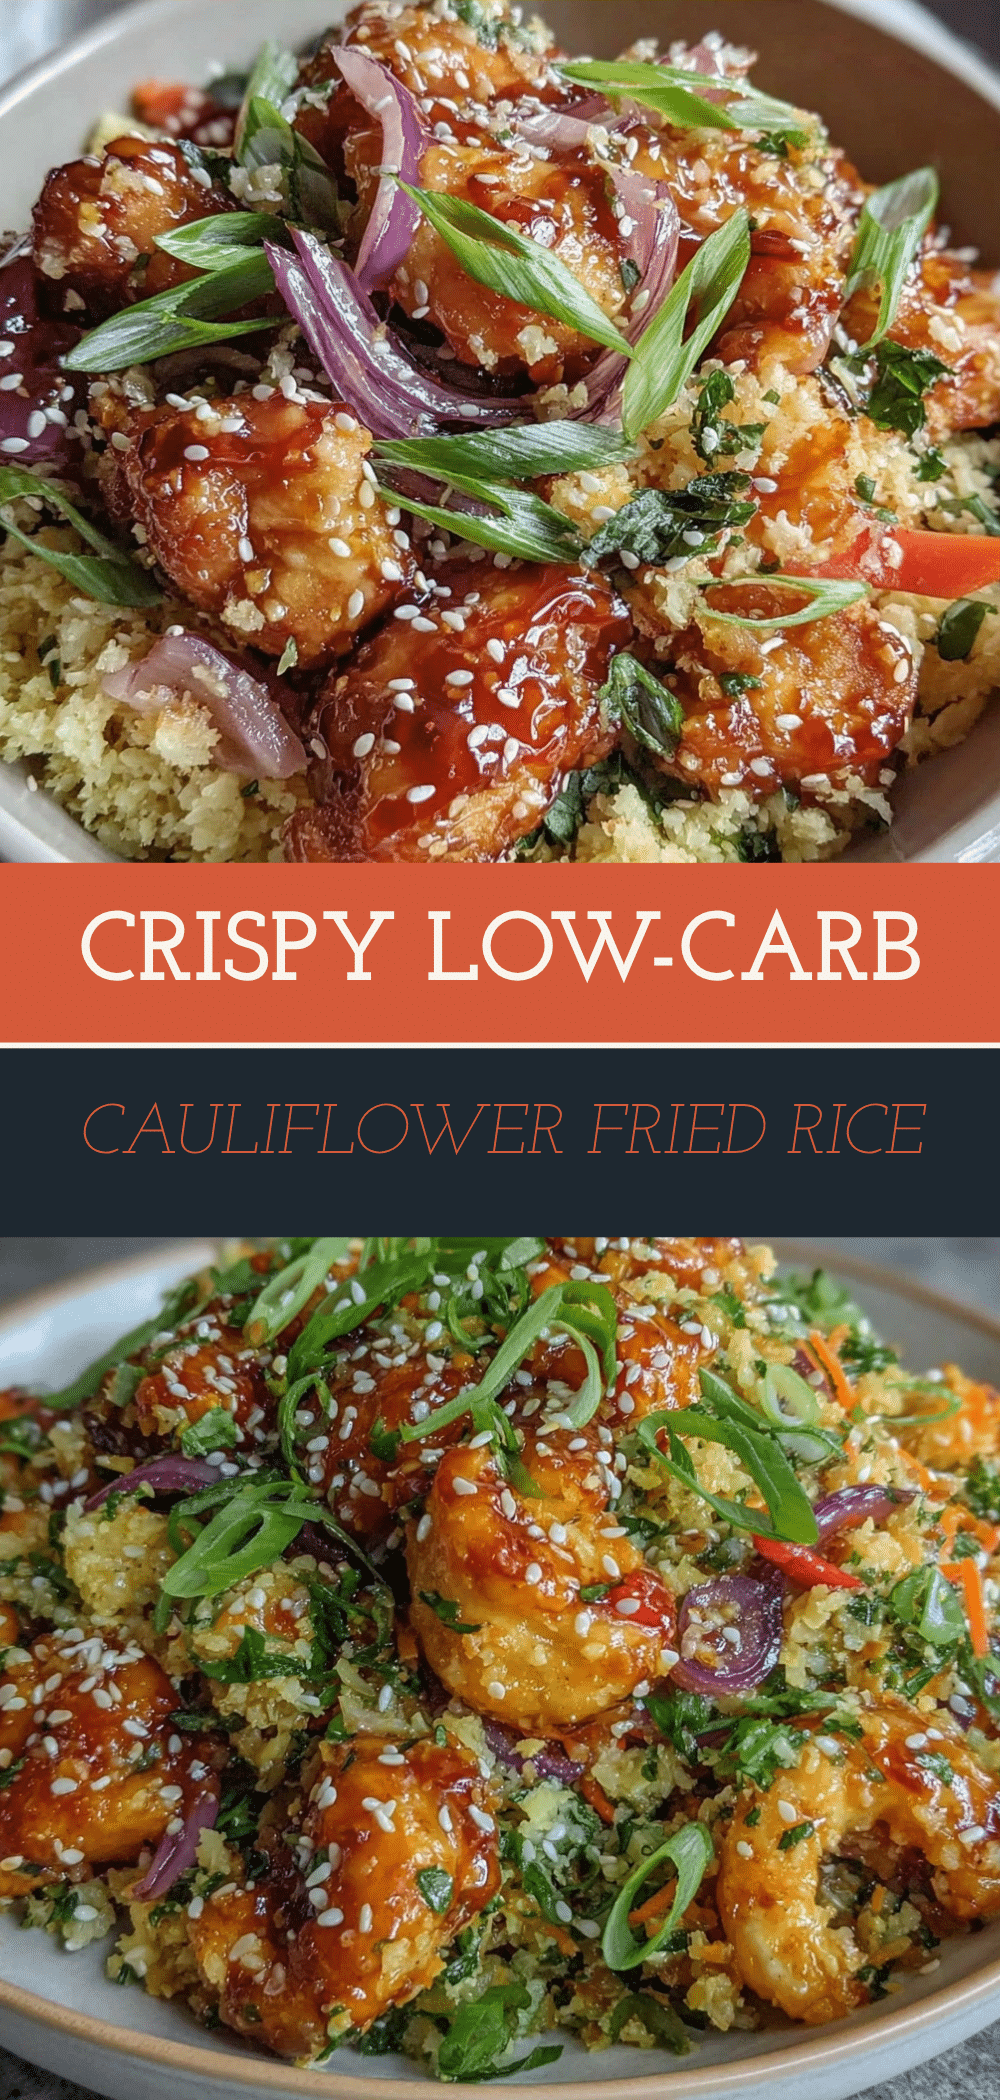
Low-Carb Cauliflower Fried Rice with Sesame Ginger Chicken
- Total Time: 20 minutes
- Yield: 1-2 servings 1x
Description
A quick, low-carb alternative to takeout featuring tender velvety chicken and crisp riced cauliflower in a savory sesame ginger sauce. Designed for 1-2 servings to minimize waste and maximize flavor.
Ingredients
- 1 large chicken breast (6–8 oz / 170-225g), sliced into thin strips
- 1 large egg white
- 1 teaspoon cornstarch
- Pinch of salt
- 2 tablespoons low-sodium tamari
- 1 tablespoon toasted sesame oil
- 1 tablespoon fresh ginger, grated
- 2 cloves garlic, minced
- 1 teaspoon hoisin sauce
- 1 teaspoon sriracha or chili garlic sauce (optional)
- 1 medium head cauliflower (about 4–5 cups riced / 400g)
- 2 tablespoons carrots, finely diced
- 2 stalks green onions, chopped (whites and greens separated)
- 1 large egg
- 1 tablespoon avocado oil (divided)
- Optional: ¼ cup edamame, ¼ cup snap peas, 1 tablespoon fresh cilantro, sesame seeds
Instructions
- Prep the cauliflower: Pulse florets in a food processor until they resemble rice grains. Spread on paper towels and pat dry to remove excess moisture.
- Marinate the chicken: Whisk egg white, cornstarch, and a pinch of salt. Toss chicken strips in the mixture until coated. Set aside.
- Make the sauce: In a small bowl, whisk together tamari, sesame oil, grated ginger, minced garlic, hoisin sauce, and sriracha. Set aside.
- Cook the chicken: Heat 1 teaspoon avocado oil in a large skillet over medium-high heat. Add chicken in a single layer and cook for 2-3 minutes until golden and cooked through. Remove to a plate.
- Sauté the veggies: Add another teaspoon of oil to the pan. Sauté diced carrots and white parts of green onions for 1-2 minutes. Add riced cauliflower, spread out, and cook for 3-4 minutes until tender but not mushy, allowing slight charring.
- Scramble the egg: Push cauliflower to the side. Scramble the egg in the empty space until just set, chop into small pieces, and mix into the cauliflower.
- Combine and finish: Return chicken to the pan. Pour sauce over everything and toss vigorously for 1-2 minutes until sauce thickens and coats ingredients.
- Serve: Transfer to a bowl and top with green parts of green onions, sesame seeds, and optional garnishes. Serve immediately.
Notes
Pat the cauliflower dry to avoid mushiness. Do not crowd the pan; cook in batches if doubling the recipe. Use high heat to achieve a ‘wok hei’ flavor and prevent steaming. If using frozen cauliflower rice, thaw and squeeze out excess moisture thoroughly.
- Prep Time: 5 minutes
- Cook Time: 15 minutes
- Category: Main Course
- Cuisine: Asian
Nutrition
- Serving Size: 1 large serving
- Calories: 320
- Sugar: 6
- Sodium: 680
- Fat: 18
- Saturated Fat: 3
- Carbohydrates: 12
- Fiber: 4
- Protein: 28
Keywords: low-carb, cauliflower fried rice, sesame ginger chicken, gluten-free, keto-friendly, quick dinner, takeout alternative, healthy eating