Last Friday night, I was supposed to be hosting a small dinner party. You know the type: three couples, a bottle of wine, and the expectation that everything will be elegant and refined. I had planned a nice roast chicken and some roasted vegetables. But then, my friend Sarah texted me. “Can you bring snacks? People are going to be hungry before the food arrives.” I stared at my half-prepped chicken, looked at my pantry, and realized I didn’t have time to make anything fancy. I didn’t even have time to go to the store.
So I did what any desperate but determined host does: I raided the freezer for frozen fries, opened a jar of cheese sauce I’d been meaning to use, and crumbled up some leftover bacon. I threw it all together on a baking sheet, slid it into the oven, and prayed.
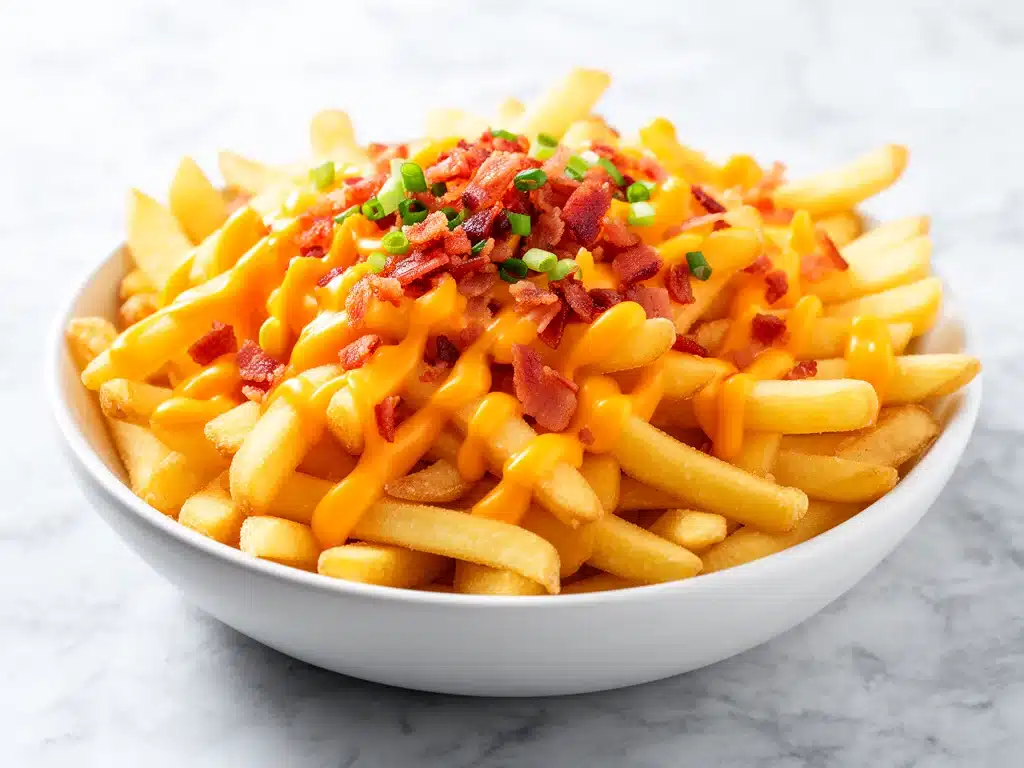
When I pulled that tray out, golden, bubbling, and smelling like pure indulgence, I knew I’d made a mistake. Not in cooking, but in planning. This Loaded Nacho Cheese Fries with Bacon was so good that we ate the entire tray before the roast chicken even came out of the oven. By the end of the night, the chicken was cold and untouched, but that cheese-drenched potato goodness was gone. And let me tell you, everyone kept asking for the recipe. Again and again.
That’s the thing about this dish. It’s not just food. It’s an experience. It’s messy, it’s loud, and it’s absolutely irresistible. I’ve made this Loaded Nacho Cheese Fries with Bacon at game day parties, movie nights, and even Sunday breakfasts (yes, breakfast, don’t judge me). Every single time, the result is the same: empty plates, sticky fingers, and people asking, “How did you make this?”
If you’re looking for a snack that stops conversations and starts debates about who gets the last fry, this is it. It’s easier than you think, cheaper than takeout, and infinitely better than anything from a bag. Let’s get into why this has become my go-to party hack and how you can make it in your own kitchen.
Why You’ll Love This Recipe
There are about a million reasons I keep making this, but let’s be real—you don’t need another complicated recipe that requires twelve ingredients and three hours of your life. Here’s why this Loaded Nacho Cheese Fries with Bacon has earned a permanent spot in my rotation:
- Stupid Simple — Seriously, if you can boil water and crumble bacon, you can make this. I’ve walked my teenage son through it over FaceTime while he was stuck at a friend’s house. He called me an hour later saying it was better than his mom’s cooking. High praise.
- Lightning Fast — 20 minutes from start to finish, and only 8 of those are active prep. I make this on weeknights when I get home at 7pm and don’t feel like cooking a “real” meal. It feels indulgent, but it’s actually low-effort.
- Crowd-Pleaser — I’ve served this to my vegetarian sister (she skips the bacon), my gluten-free neighbor (I use GF fries), and my I-only-eat-chicken dad (he ate the fries anyway). Everyone loves it. It’s the universal language of comfort.
- Makes Amazing Leftovers — Okay, I’m lying. There are rarely leftovers. But if there are, they’re good cold (I know, weird, but true). The cheese hardens into a crunchy shell that’s surprisingly tasty. Just microwave for 30 seconds if you want that gooey texture back.
- Budget-Smart — Feeds 4-6 people for under $10. That’s less than one appetizer plate at a bar. I buy frozen fries in bulk and make my own cheese sauce with basic ingredients. It’s cheap luxury.
This is my go-to when I need dinner to just work. No complicated techniques, no weird ingredients, just reliable, delicious food that makes everyone happy. And honestly? It’s the perfect excuse to eat for dinner without feeling guilty.
Ingredients You’ll Need
Here’s the best part: you probably have most of this already. This Loaded Nacho Cheese Fries with Bacon relies on simple, accessible ingredients. I’m particular about three things here, and I’ll tell you exactly why.
For the Base
French fries (2 pounds / 900g) — I use frozen straight-cut fries. Not the skinny shoestring ones (they break), not the waffle ones (too much surface area for cheese to slide off). Thick-cut or steak fries hold up best. I always use Ore-Ida Golden Crinkles because they stay crispy longer. You can make your own, but honestly, frozen is faster and consistent.
Bacon (8-10 slices / about 200g) — Thick-cut bacon is non-negotiable here. Thin bacon burns too fast and turns to dust. Thick bacon gives you those satisfying, chewy-crispy bits that add texture. I usually buy applewood smoked because it has a nice sweet smokiness that pairs with the cheese.
Cheddar cheese (2 cups / 200g, shredded) — Sharp cheddar is key. Mild cheddar is too bland for this. I shred my own from a block because pre-shredded cheese has anti-caking agents that prevent it from melting smoothly. Trust me, it makes a huge difference. A mix of sharp and mild cheddar works well if you want balance.
For the Cheese Sauce
Butter (2 tablespoons / 30g) — Unsalted is best so you can control the salt. This is the base of your roux, so don’t skimp.
All-purpose flour (2 tablespoons / 16g) — This thickens the sauce. Don’t use gluten-free flour unless you’re making a GF version (I’ll explain that in variations).
Milk (1 ½ cups / 360ml) — Whole milk is best for richness. 2% works too, but it’ll be thinner. Skim milk? Don’t even bother. You’re making loaded fries, not diet food.
Garlic powder (1 teaspoon) — Not fresh garlic. Fresh garlic burns in the sauce. Powder gives even flavor without hot spots.
Onion powder (½ teaspoon) — Adds depth. Again, powder, not fresh. Fresh onion bits in cheese sauce just look weird.
Hot sauce (1-2 teaspoons) — I use Cholula or Frank’s RedHot. It cuts through the richness. Don’t skip it. It’s not about heat; it’s about flavor balance.
Salt and black pepper — To taste. Remember, the bacon and cheese are already salty, so go easy.
For the Toppings
Green onions (2-3, sliced) — Adds a fresh, sharp crunch. Chives work too, but green onions look better and have more flavor.
Jalapeños (optional, sliced or diced) — For those who like heat. Fresh is best, but pickled works too. I usually put them on the side so non-spicy eaters can avoid them.
Sour cream (for drizzling) — Adds coolness and tang. Not everyone likes it, but it’s a classic topping.
Chili powder (for dusting) — Just a little sprinkle on top for color and extra flavor. Optional, but I always do it.
Equipment Needed
You don’t need fancy equipment for this. Here’s what I actually use:
Baking sheets (2 large) — I use two sheets so the fries have space. Crowded fries steam instead of crisp. Line them with parchment paper for easy cleanup. I’m obsessed with parchment paper. It’s like $5 for a roll and saves me from scrubbing pans.
Medium saucepan — For the cheese sauce. Any size that fits 2 cups of liquid works. I use a 2-quart pan.
Whisk — Essential for the roux. Lumps are the enemy. A small balloon whisk works best.
Large bowl — For tossing the fries with seasoning if you’re making them from scratch. Or just for holding the bacon while you crumble it.
Sharp knife and cutting board — For slicing green onions and jalapeños.
Grater — Box grater or microplane for the cheese. If you’re grating a whole block, a box grater is faster.
Parchment paper — Seriously, get some. Cleaning baked cheese off a pan is a nightmare. Parchment saves your sanity.
How to Make It: Step-by-Step
Alright, let’s make this! I’m walking you through exactly how I do it, including the little tricks I’ve picked up over years of making this Loaded Nacho Cheese Fries with Bacon.
Step 1: Prep the Bacon (10 minutes)
Start with the bacon. I usually bake it because it’s easier and less splattery. Preheat your oven to 400°F (200°C). Line a baking sheet with parchment paper or foil. Lay the bacon strips in a single layer, not touching. Bake for 12-15 minutes until crispy but not burnt. Let it cool on a paper towel for 2 minutes, then crumble it into bite-sized pieces. Don’t make it too tiny—it should have some texture. Set aside.
Step 2: Cook the Fries (20 minutes)
While the bacon cooks, get your fries ready. If using frozen fries, follow the package directions for baking. Usually, that’s 400°F for 20-25 minutes, flipping halfway through. The key is to get them crispy. If you’re making fresh fries, soak them in cold water for 30 minutes first, dry them thoroughly, and toss with oil and salt before baking. You want them golden and firm, not soggy. Once done, keep them hot in the oven at a low setting (200°F) while you make the sauce.
Step 3: Make the Cheese Sauce (10 minutes)
This is the heart of the dish. In your saucepan, melt the butter over medium heat. Once foaming, whisk in the flour. Cook this mixture (the roux) for 1-2 minutes, stirring constantly. It should smell nutty and turn slightly golden. Don’t let it burn.
Gradually pour in the milk, whisking constantly to prevent lumps. Keep whisking as the mixture thickens. This takes about 3-4 minutes. Once it coats the back of a spoon, add the garlic powder, onion powder, hot sauce, salt, and pepper. Whisk to combine.
Reduce heat to low. Add the shredded cheddar cheese a handful at a time, stirring until melted before adding more. This is crucial. If you dump it all in at once, it won’t melt evenly. Once all cheese is melted and the sauce is smooth, remove from heat. If it’s too thick, add a splash of milk. If it’s too thin, let it simmer for another minute.
Step 4: Assemble the Fries (5 minutes)
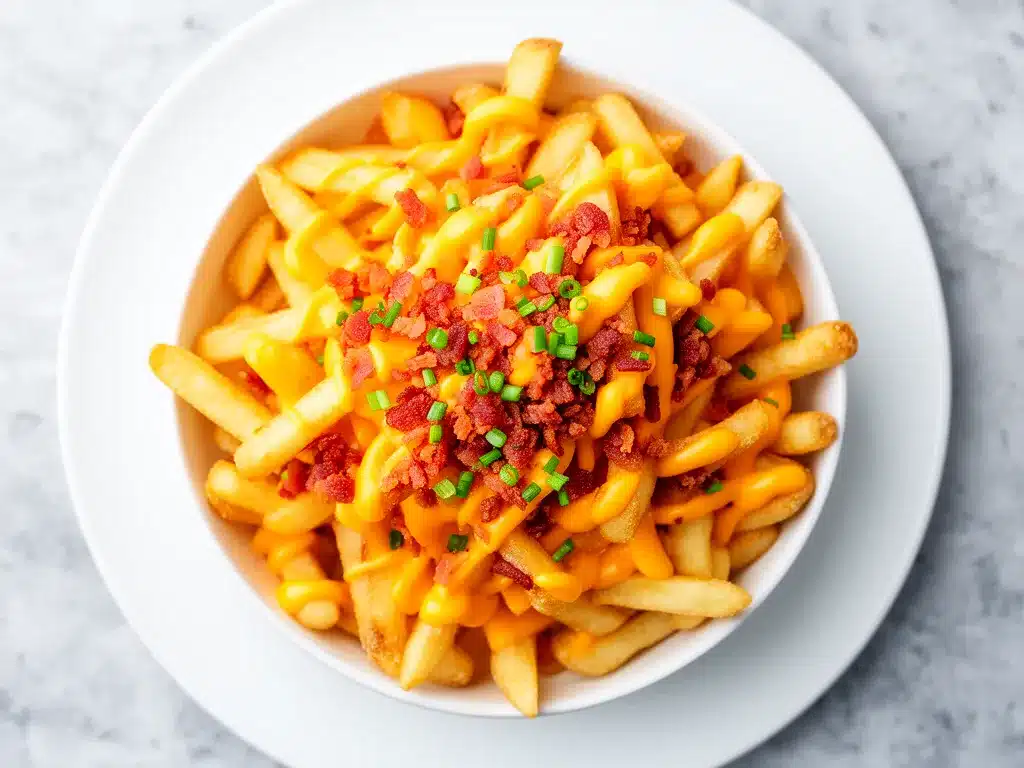
Spread the hot, crispy fries on your prepared baking sheets. Drizzle the cheese sauce evenly over the fries. You don’t need to cover every single fry, but get good coverage. Sprinkle the crumbled bacon over the top.
Put the tray back in the oven at 400°F for 3-5 minutes, just until the cheese is bubbly and slightly browned. Watch it closely—cheese burns fast.
Step 5: Garnish and Serve
Take the tray out. Immediately sprinkle with sliced green onions, jalapeños (if using), and a dusting of chili powder. Drizzle with sour cream if you’re feeling fancy. Serve immediately while hot and crispy. These fries wait for no one.
Total Time: About 30 minutes (10 minutes active, 20 minutes mostly hands-off)
Expert Tips & Tricks
Here’s everything I’ve learned from making this dozens of times. These tips will save you from my mistakes.
Don’t Skimp on Crispiness
The biggest mistake people make is using soggy fries. If your fries aren’t crispy, the cheese sauce will make them mushy. Bake them until they’re hard. If you’re using fresh fries, double-bake them: bake once to cook, let them cool, then bake again to crisp. It’s worth the extra time.
Keep the Sauce Warm
Cheese sauce hardens as it cools. Keep your saucepan on low heat or in a small slow cooker while you assemble the fries. If it starts to thicken too much, whisk in a splash of warm milk. Never microwave the sauce to fix it—it can separate.
Use a Whisk, Not a Spoon
I know, it’s extra work. But if you use a spoon to make the roux, you’ll get lumps. Lumps in cheese sauce are unacceptable. A whisk ensures a silky, smooth sauce. Your future self will thank you.
Batch Cooking for Parties
If you’re feeding a crowd, don’t make one giant tray. Make two smaller trays. It’s easier to manage, and the fries stay crispier. Also, keep the second tray in the oven while serving the first. Warm oven, cold fries are sad fries.
The Bacon Factor
Don’t use bacon bits from a jar. They’re dry and flavorless. Cook real bacon. If you’re short on time, cook the bacon in the microwave between paper towels for 4-5 minutes. It won’t be as crispy, but it’s better than nothing.
Variations & Substitutions
Once you’ve nailed the basic version, here’s how you can mix it up. I’ve tried all of these.
Vegetarian Version
Just skip the bacon. Add more cheese or swap in some sautéed mushrooms for texture. I add diced bell peppers and onions to the cheese sauce for extra flavor. It’s still amazing.
Spicy Jalapeño Version
Add diced jalapeños to the cheese sauce before adding the cheese. Use pepper jack cheese instead of cheddar. Top with more jalapeños. This is for the heat lovers in your life.
BBQ Bacon Version
Swap the cheese sauce for BBQ sauce (mix BBQ sauce with a little cream cheese to make it pourable). Top with bacon, cheddar, and green onions. This is a game-day favorite.
Breakfast Loaded Fries
Yes, this exists. Use hash browns instead of fries. Top with cheese sauce, bacon, scrambled eggs, and chives. I make this for lazy Sundays. It’s like a deconstructed breakfast burrito.
Gluten-Free
Use gluten-free frozen fries. For the cheese sauce, use gluten-free flour (like rice flour) or cornstarch. Everything else is naturally gluten-free. I’ve used Bob’s Red Mill GF flour blend and it works perfectly.
Dairy-Free
Use dairy-free butter and milk. For the cheese, use a high-quality dairy-free shreds (like Violife or Daiya). It won’t melt exactly the same, but it’s close. Top with nutritional yeast for extra flavor.
Protein Boost
Add cooked ground beef or turkey to the cheese sauce. Or top with pulled pork. I’ve even added shredded chicken for a “nacho chicken fries” vibe. It’s basically chicken fingers with cheese sauce.
Serving & Storage
How to Serve:
I usually serve these straight from the baking sheet at the dinner table—it looks rustic and stays warm. But here are other ways I’ve enjoyed them:
Side Dishes:
- Grilled burgers (obviously)
- Tacos (for a fusion night)
- Simple green salad (to cut the richness)
- Chicken wings (for a full party spread)
Toppings Bar:
When I have guests, I put out: extra bacon, jalapeños, sour cream, hot sauce, and fresh cilantro. Everyone customizes their bowl. It’s interactive and fun.
Wine Pairing:
Not a wine expert, but my wine-snob friend says a crisp IPA or a light Pinot Grigio works great with this. The carbonation cuts the fat.
Storage Instructions:
Refrigerator:
Store leftovers in an airtight container for up to 2 days. The fries will lose some crispiness, but the flavors meld together nicely.
Reheating:
Best method: Oven or toaster oven at 375°F for 5-7 minutes. This restores crispiness.
Microwave method: Heat for 30-60 seconds, but expect soggy fries. It’s fast, but not great.
Air fryer method: 350°F for 3-4 minutes. This is actually the best way to reheat them! Crispy again.
Freezing:
Don’t freeze the assembled fries. The cheese sauce separates and the fries get mushy. Freeze the cooked fries and cheese sauce separately. Reheat and assemble when ready.
Nutrition Information
I’m not a nutritionist, but here’s the breakdown if you’re tracking. Keep in mind, this is a rich, indulgent dish, so portions matter.
Per Serving (based on 6 servings, with sauce and toppings):
- Calories: 580
- Protein: 22g
- Carbs: 45g
- Fiber: 3g
- Sugar: 2g
- Fat: 35g
- Saturated Fat: 15g
- Cholesterol: 65mg
- Sodium: 620mg
- Calcium: 300mg
What’s Good:
- Decent protein from cheese and bacon
- Calcium from the cheese
- Can add vegetables (jalapeños, onions) to boost nutrition
What to Know:
- Higher in calories and fat from cheese and bacon
- Contains dairy and gluten
- High sodium (use low-sodium bacon and cheese to reduce)
My Take:
Look, this is comfort food with cheese and bacon. It’s not a diet recipe. It’s a party food. But it’s way better than takeout, costs less, and I know exactly what’s in it. When I want to make it lighter, I use less cheese, more veggies, and baked fries. But usually? I just eat a reasonable portion and enjoy it. Life’s too short to skip the cheese.
Final Thoughts
So that’s my go-to Loaded Nacho Cheese Fries with Bacon! I’ve probably talked your ear off at this point, but when you make a recipe this often, you have a lot to say about it.
This has saved weeknight dinners more times than I can count. It’s my answer to “what’s for dinner” when I’m tired, don’t want takeout, and still want something that tastes really good. My kids are happy, my husband’s happy, and I’m happy because I’m not stressed about cooking. Plus, it pairs perfectly with other easy snacks like ham and cheese pretzel roll-ups for a full spread.
Make it yours! Try different add-ins, swap in your favorite vegetables, adjust the spice level. The best recipes are the ones you adapt to your family’s tastes. And if you’re looking for something sweet to balance out all that savory goodness, these chewy banana oat breakfast cookies are a great next-day treat.
If you make this, drop a comment and let me know what you think! I love hearing how recipes turn out in your kitchen. And if something doesn’t work, tell me that too—I’m here to help troubleshoot. Happy cooking! And I hope your kitchen smells half as good as mine does right now.
Frequently Asked Questions
Can I use fresh fries instead of frozen?
Yes, but you need to prep them right. Cut potatoes into even sticks, soak them in cold water for 30 minutes to remove starch, dry them thoroughly, and toss with oil. Bake at 400°F, flipping halfway, until crispy. Fresh fries take longer and require more attention, but they taste amazing. Frozen is just easier.
Why did my cheese sauce separate?
This usually happens if the heat was too high. Cheese sauce needs gentle heat. If it’s already separated, whisk in a splash of warm milk or cream. It might not come back perfectly, but it’ll be better. Always add cheese off the heat or on very low heat.
Can I make this ahead for a party?
Sort of. You can prep the bacon and make the cheese sauce ahead. Store the sauce in the fridge and reheat gently. Cook the fries fresh right before serving. Assembled fries don’t hold well—they get soggy. So assemble right before serving for the best texture.
How do I keep the fries crispy?
The key is space. Don’t crowd the baking sheet. Use two sheets if needed. Bake at a high temperature (400°F+). And serve immediately. If you need to hold them, keep them in a warm oven (200°F) on a wire rack, not a plate. A wire rack allows air circulation.
Can I use a different type of cheese?
Cheddar is classic, but you can use Monterey Jack, Pepper Jack, or a Mexican blend. Avoid soft cheeses like brie—they won’t melt the same way. Harder cheeses melt better. A mix of cheddar and Monterey Jack gives a nice melt with good flavor.
Is there a way to make the cheese sauce less thick?
Yes, just add more milk, a tablespoon at a time, whisking until you reach your desired consistency. If it’s too thin, let it simmer longer to reduce. The sauce should coat the back of a spoon, not run like water.
Pin This Recipe!
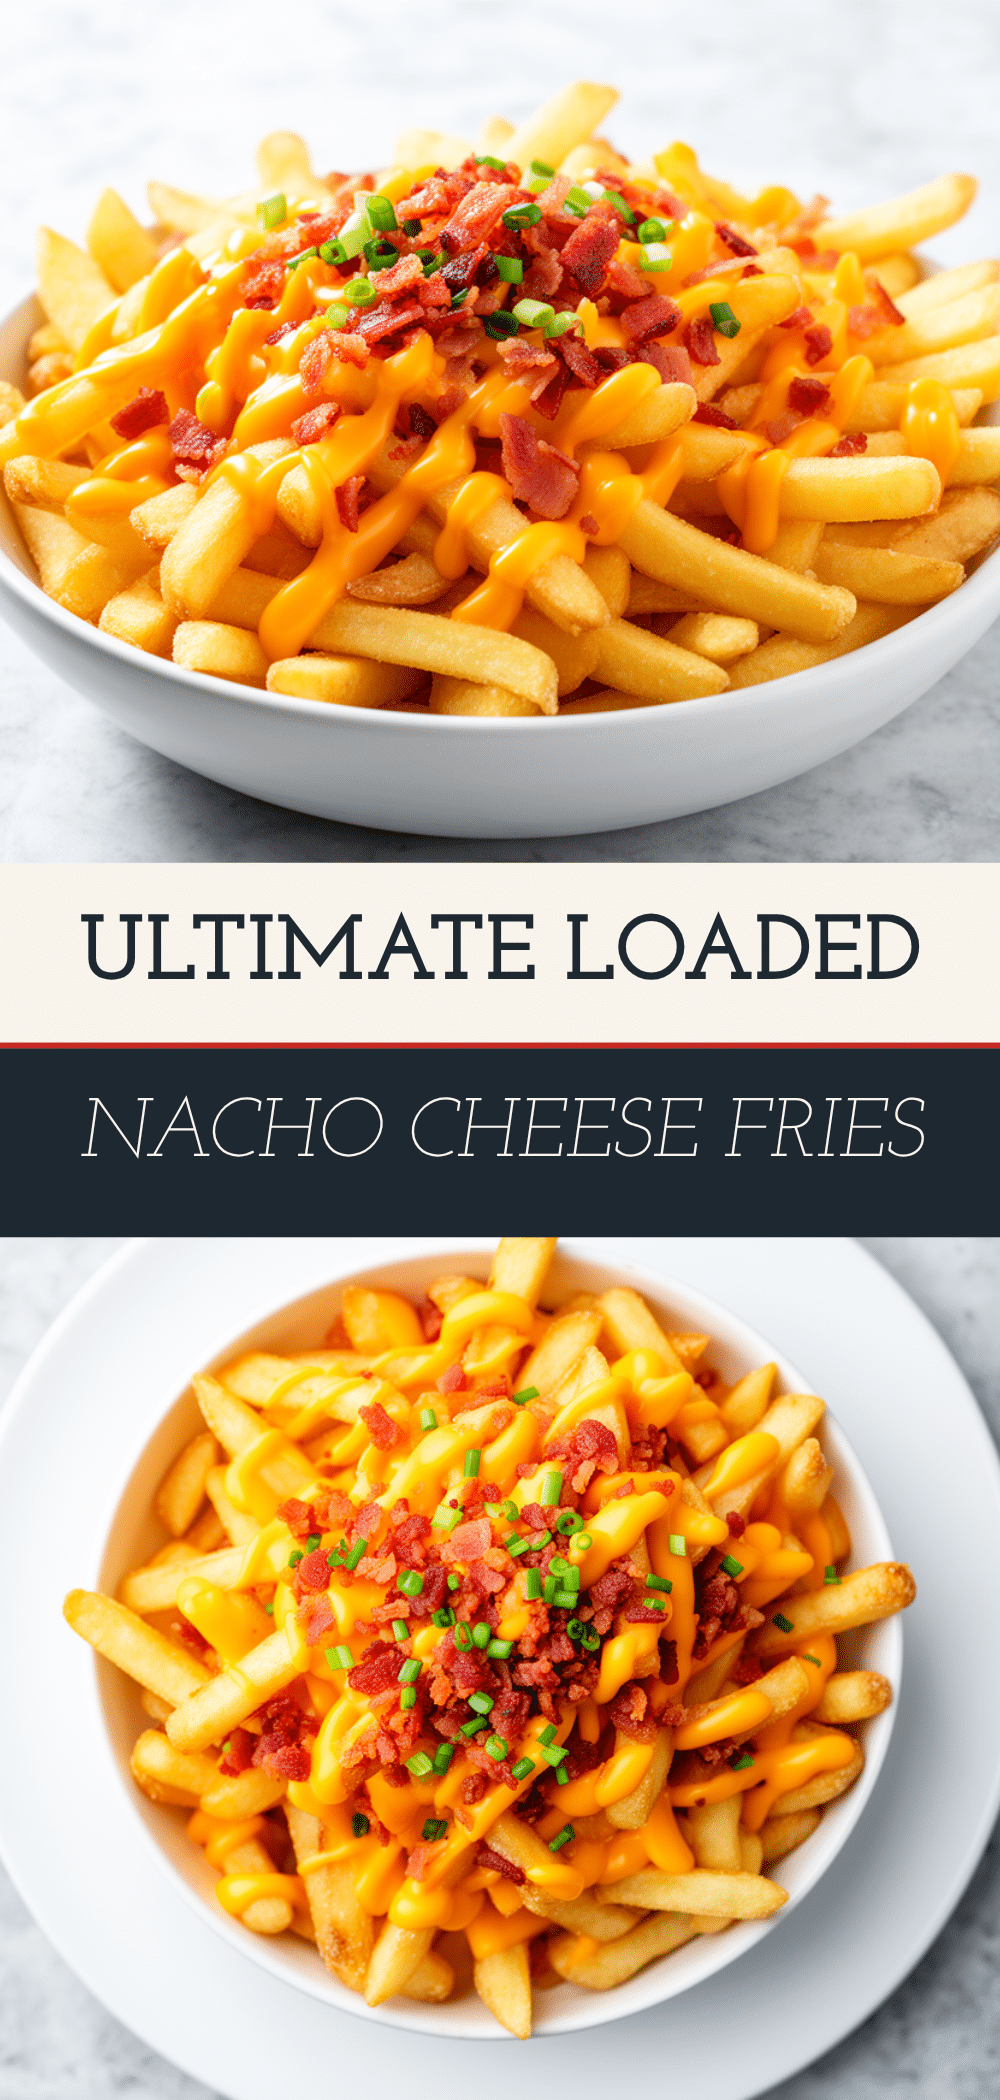

Loaded Nacho Cheese Fries with Bacon
- Total Time: 30 minutes
- Yield: 4-6 servings 1x
Description
A quick, indulgent party snack featuring crispy baked fries topped with homemade cheddar cheese sauce, crumbled bacon, and fresh garnishes. This easy-to-make dish is perfect for game days, movie nights, or weeknight dinners.
Ingredients
- 2 pounds (900g) frozen thick-cut or steak fries
- 8–10 slices (200g) thick-cut bacon
- 2 cups (200g) sharp cheddar cheese, shredded
- 2 tablespoons (30g) unsalted butter
- 2 tablespoons (16g) all-purpose flour
- 1 ½ cups (360ml) whole milk
- 1 teaspoon garlic powder
- ½ teaspoon onion powder
- 1–2 teaspoons hot sauce (e.g., Cholula or Frank’s RedHot)
- Salt and black pepper to taste
- 2–3 green onions, sliced
- Jalapeños, sliced or diced (optional)
- Sour cream for drizzling
- Chili powder for dusting
Instructions
- Preheat oven to 400°F (200°C). Line a baking sheet with parchment paper or foil.
- Lay bacon strips in a single layer on the baking sheet. Bake for 12-15 minutes until crispy but not burnt.
- Remove bacon, let cool on a paper towel for 2 minutes, then crumble into bite-sized pieces. Set aside.
- While bacon cooks, bake frozen fries according to package directions (usually 400°F for 20-25 minutes, flipping halfway) until crispy and golden. Keep hot in oven at 200°F if not serving immediately.
- In a medium saucepan over medium heat, melt butter. Whisk in flour and cook for 1-2 minutes until nutty and slightly golden.
- Gradually pour in milk, whisking constantly to prevent lumps. Cook for 3-4 minutes until mixture thickens and coats the back of a spoon.
- Stir in garlic powder, onion powder, hot sauce, salt, and pepper.
- Reduce heat to low. Add shredded cheddar cheese a handful at a time, stirring until melted before adding more. Remove from heat once smooth.
- Spread hot fries on prepared baking sheets. Drizzle cheese sauce evenly over fries.
- Sprinkle crumbled bacon over the top.
- Return to oven at 400°F for 3-5 minutes until cheese is bubbly and slightly browned.
- Remove from oven and immediately garnish with green onions, jalapeños, chili powder, and a drizzle of sour cream. Serve immediately.
Notes
For best results, use thick-cut frozen fries to prevent sogginess. Shred your own cheese to ensure smooth melting. Keep the cheese sauce warm on low heat while assembling. For leftovers, reheat in an air fryer or oven at 375°F to restore crispiness; avoid microwaving as it makes fries soggy. Do not freeze assembled fries.
- Prep Time: 10 minutes
- Cook Time: 20 minutes
- Category: Appetizer
- Cuisine: American
Nutrition
- Serving Size: Approximately 1/6 of
- Calories: 580
- Sugar: 2
- Sodium: 620
- Fat: 35
- Saturated Fat: 15
- Carbohydrates: 45
- Fiber: 3
- Protein: 22
Keywords: loaded fries, nacho cheese fries, bacon fries, party snack, easy dinner, comfort food, cheese sauce, game day food