I have a confession to make. I once spent forty-five minutes trying to make a “no-bake” cheesecake for a potluck, only to realize I’d forgotten to add the cream cheese to the mixture entirely. It was just whipped cream and lemon juice. A lemony, fluffy mess that collapsed under its own weight by dessert time. I’m not proud of that moment, but it taught me a hard lesson: when you want to impress people, you need structure. You need reliability. You need a dessert that doesn’t just taste good but looks like you spent hours in the kitchen (even if you didn’t).
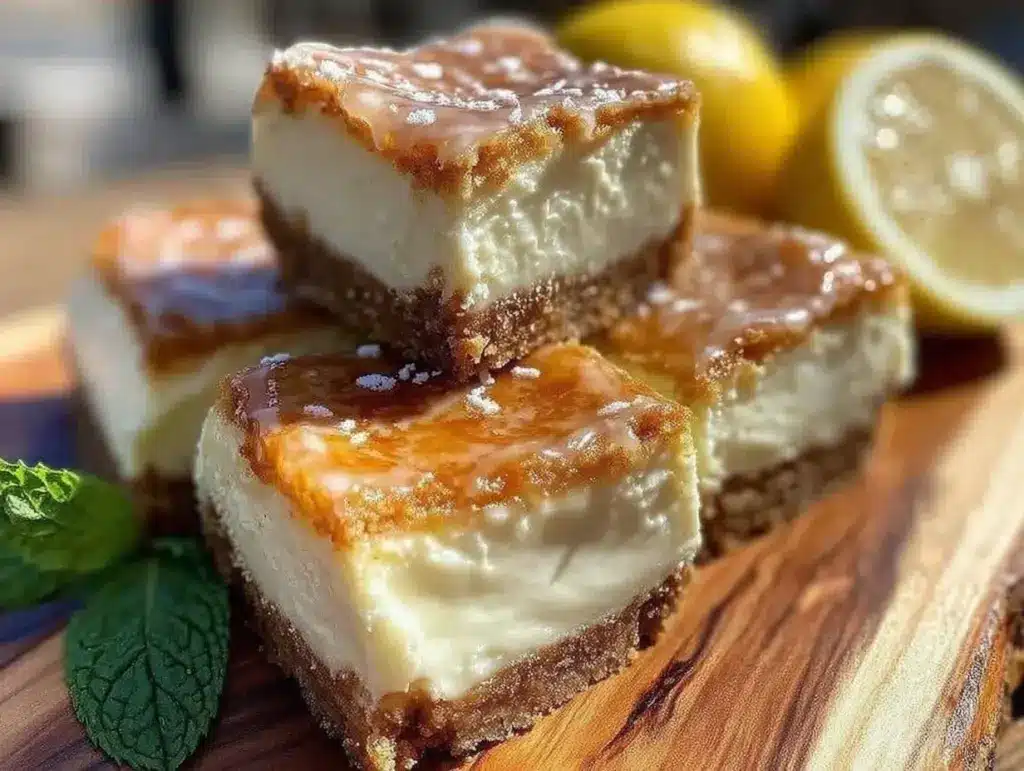
That’s why these lemon cheesecake bars with buttery graham crust have become my secret weapon for the last three years. I first made them for a friend’s bridal shower, and I honestly thought I’d have to buy extra store-bought treats to hide behind because my bars were going to be too good. Instead, I watched guests line up for seconds, asking me for the recipe before they’d even finished their coffee. That’s the power of a perfectly tangy, creamy bar.
I’ve tested this recipe at least a dozen times. I’ve tweaked the sugar, changed the graham cracker ratio, and even experimented with different lemon varieties. The version I’m sharing with you today is the gold standard. It’s the one that gets compliments. It’s the one that disappears first. It’s the lemon cheesecake bars with buttery graham crust that I now make for every dinner party, holiday gathering, and “I need a pick-me-up” Tuesday. If you’ve ever been intimidated by cheesecake, this is your gateway drug. It’s easier than a whole cake, easier to serve, and honestly? It tastes better.
Why You’ll Love This Recipe
There are a million dessert recipes out there, but this specific combo of tart lemon and rich cream cheese hits a different nerve. Here is why these bars are currently living in my oven:
- Zero Rolling Stress — Whole cheesecakes are high stakes. One crack, one water bath disaster, and your dinner party is ruined. Bars? You just dump it in a pan, bake it, and chill it. If it cracks, who cares? You’re cutting it into squares. It’s forgiving.
- Perfect Balance of Tang and Sweet — Most lemon desserts are too sweet. These have that sharp, bright kick from fresh lemon juice that cuts through the richness of the cream cheese. It’s not cloying. It’s refreshing. You can eat two without feeling like you need a nap.
- Buttery, Crumbly Crust — I’m serious about the crust. It’s not just graham crackers and sugar. It’s buttery, toasted, and actually crunchy. It provides the perfect textural contrast to the silky filling. If you skip the butter in the crust, you’re doing it wrong.
- Make-Ahead Hero — This is the ultimate hostess hack. You can make these two days in advance. In fact, they taste better the next day because the flavors have had time to meld. I make them on Sunday for Friday night dinner parties. No last-minute panic.
- Shareable and Portable — Need to bring something to a book club? These travel perfectly in a container. Need to serve a crowd at a BBQ? Cut them into squares, and everyone gets a piece without needing fancy serving utensils. Unlike my gooey butter cake, which is a bit messy to handle, these bars are clean, elegant, and easy to grab.
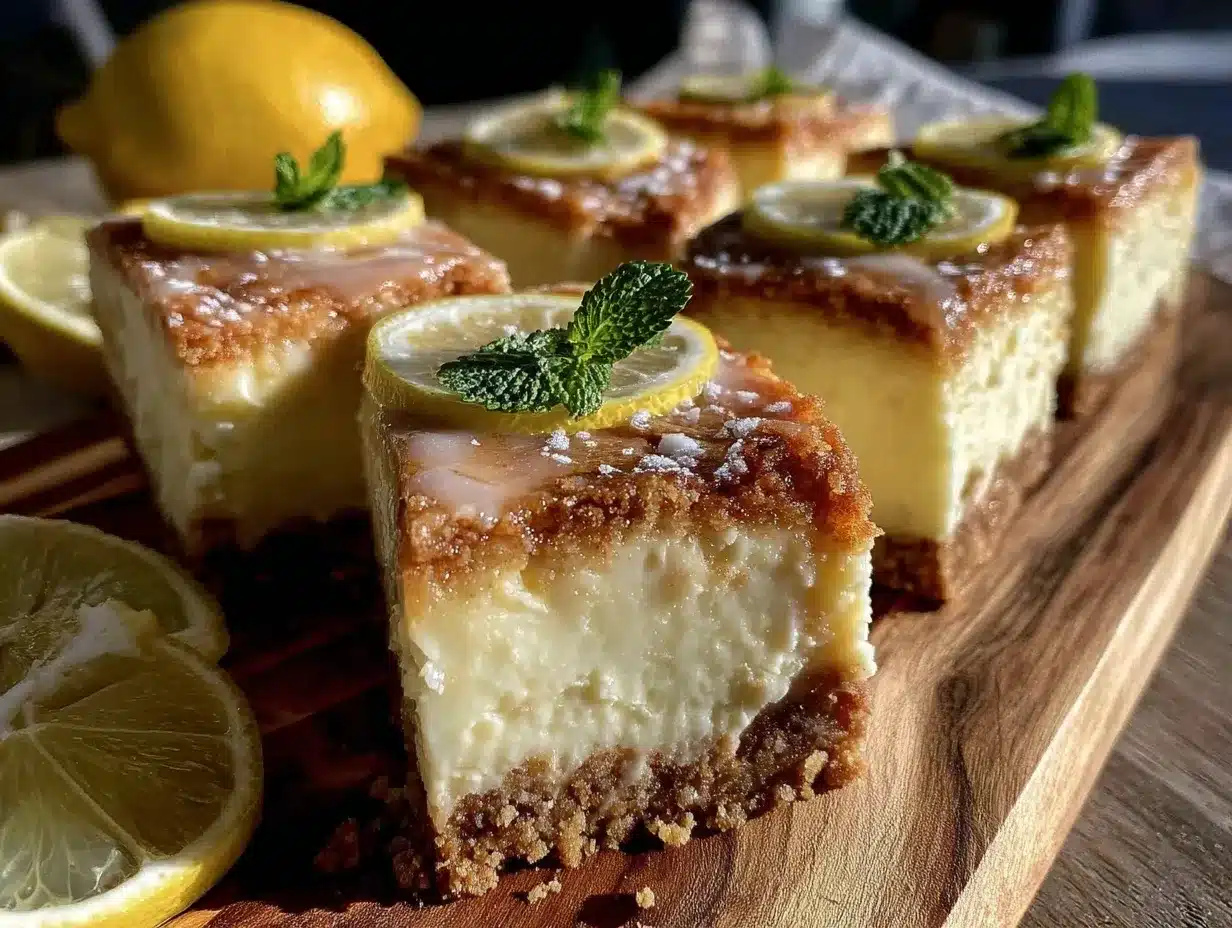
- Looks Fancy, Actually Simple — When you dust them with powdered sugar and add a lemon twist, they look like they came from a high-end bakery. But you made them in your home kitchen. That feeling of pride? Priceless.
I’ve served these to picky eaters and dessert snobs alike. The verdict is always the same: “Wow, these are amazing.” It’s my go-to when I want to treat myself or others to something that feels indulgent but isn’t overly complicated.
Ingredients You’ll Need
Don’t let the list scare you. Most of this is pantry staples. I’m particular about a few things here, though. If you cut corners on the quality, you’ll notice it in the final taste.
For the Buttery Graham Crust
Graham cracker crumbs (1 ½ cups / 150g) — You can buy pre-made crumbs, but honestly, crushing them yourself tastes better. I use a food processor or put them in a ziplock bag and smash them with a rolling pin. If you can’t find graham crackers, vanilla wafers work in a pinch, but graham has that distinct spiced flavor.
Unsalted butter (6 tablespoons / 85g, melted) — This is non-negotiable. Melted butter binds the crust and gives it that rich, shortbread-like texture. Don’t use margarine. Don’t use oil. Use real butter.
Granulated sugar (2 tablespoons / 25g) — Just enough to sweeten the crust without making it a candy shell. If you like a sweeter crust, bump it up to 3 tablespoons.
Pinch of salt — Enhances the flavor. Don’t skip it.
For the Lemon Cheesecake Filling
Full-fat cream cheese (24 ounces / 680g) — This is the star. Use the brick kind from the refrigerated section. Do not buy the tub “whipped” cream cheese; it has air and stabilizers that will ruin the texture. Let it sit on the counter for 30 minutes before you start. Cold cream cheese creates lumps, and nobody wants lumps in their cheesecake.
Granulated sugar (1 cup / 200g) — Standard white sugar works best here. It dissolves cleanly into the cream cheese.
Large eggs (3 large) — Room temperature eggs are crucial. Cold eggs can cause the batter to separate when you beat it. Take them out of the fridge early.
Sour cream (½ cup / 120g) — This adds tang and creaminess. It also helps prevent cracking. I use full-fat sour cream. Low-fat can make the texture slightly grainy.
Heavy cream (2 tablespoons / 30ml) — Just a splash to loosen the batter and make it extra silky. You can skip this if you’re out, but it helps.
Fresh lemon juice (½ cup / 120ml) — Yes, half a cup. That’s a lot of lemons (usually 4-5 large ones). Do not use bottled lemon juice. The flavor is flat and artificial. Fresh is the only way to get that bright, zesty kick.
Grated lemon zest (2 tablespoons) — This is where the intense lemon flavor lives. Use a microplane or fine grater. Only grate the yellow part! The white pith is bitter and will make your bars taste unpleasant.
Vanilla extract (1 teaspoon) — Adds depth and rounds out the sharp lemon flavor.
All-purpose flour (2 tablespoons / 15g) — This is the secret stabilizer. It helps the cheesecake set so it’s not jiggly in the middle. Don’t skip it, or you’ll end up with soup.
For the Topping (Optional but Recommended)
Powdered sugar (for dusting) — Adds elegance and a touch of sweetness.
Lemon slices or twists — For garnish. Makes it look professional.
Equipment Needed
You don’t need a fancy kitchen to make this. Here’s what I actually use:
9×13 inch baking pan — Standard size. Line it with parchment paper leaving overhangs on the long sides. This is your lifeline for lifting the bars out later. Grease the parchment too.
Food processor or ziplock bag + rolling pin — For crushing graham crackers. A food processor is faster and gives finer crumbs, which makes a smoother crust.
Mixing bowls — One large bowl for the filling. A medium one for the crust.
Electric mixer — Handheld or stand mixer. You need to beat the cream cheese until it’s completely smooth. Doing this by hand is possible but takes effort and arm strength. I recommend a mixer for best results.
Microplane or zester — For the lemon zest. If you don’t have one, a regular grater works, but be careful not to get the white pith.
Spatula — Silicone is best for scraping the bowl. You want to get every bit of that creamy filling.
Knife — For cutting the bars. A sharp chef’s knife or a pizza cutter works well.
How to Make It: Step-by-Step
Alright, let’s get baking! I’m walking you through exactly how I do it, including the little tricks I’ve picked up to ensure those bars are perfect.
Step 1: Prep Your Pan and Oven (5 minutes)
Preheat your oven to 325°F (160°C). This is a lower temperature than many cakes. Cheesecakes bake slowly and gently to avoid curdling or cracking. Line your 9×13 pan with parchment paper. I like to create an “X” shape with two strips of parchment so it covers the bottom and has handles on the sides. Spray it lightly with cooking spray.
Step 2: Make the Crust (5 minutes)
In a medium bowl, mix the graham cracker crumbs, melted butter, sugar, and salt. It should look like wet sand. If you pinch it together and it holds shape, you’ve added enough butter. Press this mixture firmly into the bottom of your prepared pan. Use the bottom of a measuring cup or a flat glass to pack it down tight. You want it even and compact. Bake this for 8-10 minutes until it smells toasted and golden. Remove from the oven and let it cool while you make the filling. Do not skip this pre-bake; it ensures the crust stays crunchy and doesn’t get soggy.
Step 3: Beat the Cream Cheese (3 minutes)
In a large bowl, add the room-temperature cream cheese and sugar. Beat on medium-high speed until completely smooth and creamy. This is the most important step. Scrape down the sides and bottom of the bowl. If there are lumps of cream cheese, they will stay there. You want a silky, white paste. This might take 2-3 minutes of beating.
Step 4: Add the Wet Ingredients (2 minutes)
Reduce the mixer speed to low. Add the sour cream, heavy cream, vanilla extract, lemon zest, and lemon juice. Mix just until combined. Don’t overmix at this stage. You want to incorporate the ingredients, not whip air into them yet.
Step 5: Incorporate Eggs and Flour (3 minutes)
Add the eggs one at a time, mixing on low speed just until the yolk disappears. Adding them one by one prevents breaking the emulsion. Finally, add the flour and mix on low until just incorporated. The batter should be thick, glossy, and pale yellow. If you overmix now, you’ll incorporate too much air, which can cause cracks later.
Step 6: Bake (40-50 minutes)
Pour the filling over the cooled crust. Smooth the top with a spatula. Place the pan in the center of the oven. Bake for 40-50 minutes. The edges should be set and slightly puffed, but the center should still have a slight jiggle when you shake the pan gently. It should look like jello, not like liquid batter. If the center is liquidy, give it 5 more minutes. If it’s firm and doesn’t jiggle at all, you might have overbaked it.
Step 7: Cool and Chill (4+ hours)
This is the hardest part. Turn off the oven and crack the door open. Let the bars sit in the cooling oven for 1 hour. This gradual cooling helps prevent cracking. After an hour, remove from the oven and let it cool completely on a wire rack (about 1-2 hours). Once cool, cover with plastic wrap and refrigerate for at least 4 hours, preferably overnight. Cold bars are much easier to cut cleanly.
Step 8: Cut and Serve
Lift the bars out of the pan using the parchment handles. Place on a cutting board. Use a sharp knife to cut into squares. For clean cuts, wipe the knife with a damp paper towel between each cut. Dust with powdered sugar and garnish with lemon zest or slices. Serve and enjoy.
Expert Tips & Tricks
Here’s everything I’ve learned from making these dozens of times. These tips will save you from my mistakes.
Room Temperature is Key
I cannot stress this enough. Cold cream cheese = lumpy cheesecake. Cold eggs = separated batter. Take your ingredients out 30-60 minutes before you start. If you forget, you can microwave the cream cheese bricks for 15-20 seconds at a time until they’re soft to the touch.
Don’t Overmix
Once you add the eggs, mix on low speed. Overmixing incorporates air bubbles, which expand in the oven and then collapse, causing cracks. We want dense, creamy, not fluffy and airy.
The Water Bath (Optional but Helpful)
If you’re worried about cracks, you can use a water bath. Place the 9×13 pan inside a larger roasting pan. Fill the roasting pan with hot water until it reaches halfway up the sides of the cheesecake pan. This creates steam and gentle heat. I usually skip it for bars because the edges help hold the structure, but if you’re a perfectionist, do it.
Sharp Knife for Clean Cuts
Cheesecake sticks to knives. Dip your knife in hot water and wipe it dry before every single cut. This ensures you get those neat, bakery-style squares. If you don’t do this, you’ll get mushy edges.
Patience Pays Off
I know you want to eat them now. But warm cheesecake is messy and doesn’t slice well. Let it chill for at least 4 hours. Overnight is best. The texture firms up, and the lemon flavor becomes more pronounced.
Variations & Substitutions
Once you’ve nailed the basic version, here’s how you can mix it up. I’ve tried all of these.
Berry Swirl
Add a swirl of raspberry or strawberry jam on top of the batter before baking. Use a knife to drag it through for a marble effect. It adds a beautiful color and extra fruit flavor.
Blueberry Lemon
Stir in 1 cup of fresh or frozen blueberries into the batter right before pouring it over the crust. The berries burst and create little pockets of juice. It’s like summer in a bar.
Chocolate Crust
Swap the graham cracker crumbs for crushed chocolate sandwich cookies (like Oreos, minus the filling). It makes a rich, chocolatey base that pairs well with the lemon. It’s a bit heavier but delicious.
Gluten-Free
Use gluten-free graham cracker crumbs (or crushed gluten-free vanilla wafers) and make sure your flour is GF. The rest of the ingredients are naturally gluten-free. It works perfectly.
Dairy-Free
This is trickier. Use vegan cream cheese blocks (like Kite Hill or Tofutti) and vegan butter for the crust. Replace sour cream with vegan coconut cream. The texture will be slightly different, but still tasty. I haven’t tested this extensively, so results may vary.
Key Lime Variation
Swap the lemon juice and zest for key lime juice and zest. It’s more floral and tropical. I love this version in the summer.
Serving & Storage
How to Serve:
I usually serve these chilled, straight from the fridge. They’re firm, clean, and refreshing. Pair them with a cup of hot tea or coffee. They’re also great with a dollop of whipped cream if you want to go all out. I often serve them at potlucks because they hold up well at room temperature for a few hours (though they taste best cold).
Side Dishes:
Since these are rich and tangy, they pair well with light, fresh sides if you’re serving a full meal. A simple green salad or some grilled fruit (like peaches or pineapple) works well.
Storage Instructions:
Refrigerator:
Store in an airtight container in the fridge for up to 5 days. The flavors actually get better after day 2. If you’re bringing them to a party, keep them in the pan and cover with foil or plastic wrap.
Freezer:
Yes, you can freeze these! Wrap the entire pan tightly in plastic wrap and then foil. Or, cut the bars and freeze them individually on a baking sheet, then transfer to a freezer bag. They’ll last for 2-3 months. Thaw in the fridge overnight. Note: The texture might be slightly softer after thawing, but the taste is still great.
Reheating:
You don’t need to reheat these. They are best served cold. If you accidentally left them out too long and they’re too warm, just pop them in the fridge for 30 minutes to firm up.
Nutrition Information
I’m not a nutritionist, but here’s the breakdown if you’re tracking. Keep in mind that these are rich, so a little goes a long way.
Per serving (based on 16 bars):
- Calories: 280
- Protein: 4g
- Carbs: 32g
- Fiber: 1g
- Sugar: 22g
- Fat: 15g
- Saturated Fat: 9g
- Cholesterol: 50mg
- Sodium: 180mg
What’s Good:
- It’s a contained portion. Bars are easier to ration than a whole cake.
- Real ingredients. No artificial flavors.
What to Know:
- High in sugar and saturated fat due to cream cheese and butter. This is a treat, not a health food.
- Contains dairy and gluten.
My Take:
Look, this is cheesecake. It’s supposed to be rich and sweet. Enjoy it as a special treat. When I want to make it lighter, I reduce the sugar in the crust and use half-fat cream cheese, but I have to admit, the full-fat version is just too good to resist.
Final Thoughts
So that’s my go-to lemon cheesecake bars with buttery graham crust! I’ve probably talked your ear off at this point, but when you make a recipe this often, you have a lot to say about it.
This has saved my social life more times than I can count. It’s my answer to “What should I bring?” when I’m invited to dinner, or “What should I bake?” when I need a weekend project. My friends are happy, my family is happy, and I’m happy because I’m not stressed about cooking something complicated.
Make it yours! Try different berry swirls, add a cookie crust, or just enjoy the classic lemon tang. The best recipes are the ones you adapt to your family’s tastes. But honestly? The classic version is a classic for a reason.
If you make this, drop a comment and let me know what you think! I love hearing how recipes turn out in your kitchen. And if something doesn’t work, tell me that too—I’m here to help troubleshoot.
Happy baking! And I hope your kitchen smells half as good as mine does right now.
Frequently Asked Questions
Can I use bottled lemon juice?
You can, but I strongly advise against it. Bottled lemon juice has preservatives and lacks the bright, fresh flavor of real lemons. The difference in taste is noticeable, especially in a dessert where lemon is the star. Fresh juice is worth the effort of squeezing 4-5 lemons.
Why did my cheesecake crack?
Cracking is usually caused by overmixing (too much air), overbaking (too much heat), or rapid temperature changes (taking it out of the oven too quickly). To prevent this, mix on low speed after adding eggs, bake until just set, and cool it slowly in the turned-off oven with the door cracked.
Can I make this in a springform pan?
Absolutely! You can use a 9-inch springform pan. The baking time will be similar, maybe 5-10 minutes longer since the layer is thicker. Just be careful when removing the ring; let it cool completely first to avoid cracks.
How long do these need to chill?
At least 4 hours. But overnight is best. Cheesecake needs time to set properly. If you cut it too soon, it will be mushy and fall apart. Patience is key!
Can I double this recipe?
Yes, but you’ll need a larger pan, like a 9×13 or even a 9×15 if you can find one. Or, you can make two 9-inch springform pans. Just keep an eye on the baking time, as thicker layers may need a few extra minutes.
What if I don’t have a food processor?
No problem! Put the graham crackers in a thick ziplock bag and crush them with a rolling pin, a meat mallet, or even a heavy can. It takes a bit more elbow grease, but it works just fine.
Can I substitute sour cream with yogurt?
Plain Greek yogurt works as a substitute for sour cream. It will make the cheesecake slightly tangier and lighter. Use full-fat Greek yogurt for the best texture. Avoid low-fat versions as they can make the batter watery.
Pin This Recipe!
Lemon Cheesecake Bars with Buttery Graham Crust
- Total Time: 4 hours 70 minutes
- Yield: 16 servings 1x
Description
These lemon cheesecake bars feature a buttery, toasted graham cracker crust and a tangy, creamy filling. They are easy to make, forgiving for beginners, and perfect for make-ahead entertaining.
Ingredients
- 1 ½ cups (150g) graham cracker crumbs
- 6 tablespoons (85g) unsalted butter, melted
- 2 tablespoons (25g) granulated sugar
- Pinch of salt
- 24 ounces (680g) full-fat cream cheese, room temperature
- 1 cup (200g) granulated sugar
- 3 large eggs, room temperature
- ½ cup (120g) full-fat sour cream
- 2 tablespoons (30ml) heavy cream
- ½ cup (120ml) fresh lemon juice
- 2 tablespoons grated lemon zest
- 1 teaspoon vanilla extract
- 2 tablespoons (15g) all-purpose flour
- Powdered sugar, for dusting (optional)
- Lemon slices or twists, for garnish (optional)
Instructions
- Preheat oven to 325°F (160°C). Line a 9×13 inch baking pan with parchment paper, leaving overhangs on the long sides, and grease lightly.
- In a medium bowl, mix graham cracker crumbs, melted butter, 2 tablespoons sugar, and salt until it resembles wet sand. Press firmly into the bottom of the prepared pan.
- Pre-bake the crust for 8-10 minutes until golden and toasted. Remove from oven and let cool.
- In a large bowl, beat the room-temperature cream cheese and 1 cup sugar on medium-high speed until completely smooth and creamy, about 2-3 minutes. Scrape down the sides and bottom of the bowl.
- Reduce mixer speed to low. Add sour cream, heavy cream, vanilla extract, lemon zest, and lemon juice. Mix just until combined.
- Add eggs one at a time, mixing on low speed just until the yolk disappears. Add flour and mix on low until just incorporated. Do not overmix.
- Pour the filling over the cooled crust and smooth the top.
- Bake for 40-50 minutes. The edges should be set and slightly puffed, but the center should still have a slight jiggle.
- Turn off the oven and crack the door open. Let the bars sit in the oven for 1 hour to cool gradually.
- Remove from oven and let cool completely on a wire rack (1-2 hours).
- Cover and refrigerate for at least 4 hours, preferably overnight.
- Lift bars out of the pan using parchment handles. Cut into squares using a sharp knife dipped in hot water between cuts. Dust with powdered sugar and garnish if desired.
Notes
Ensure all dairy ingredients (cream cheese, eggs, sour cream) are at room temperature to prevent lumps and separation. Do not overmix the batter after adding eggs to avoid incorporating air, which causes cracking. For clean cuts, wipe the knife with a damp paper towel or dip in hot water between each slice. These bars taste better the next day as flavors meld.
- Prep Time: 20 minutes
- Cook Time: 50 minutes
- Category: Dessert
- Cuisine: American
Nutrition
- Serving Size: 1 bar
- Calories: 280
- Sugar: 22
- Sodium: 180
- Fat: 15
- Saturated Fat: 9
- Carbohydrates: 32
- Fiber: 1
- Protein: 4
Keywords: lemon cheesecake bars, graham cracker crust, no-bake alternative, make-ahead dessert, tangy lemon dessert, crowd-pleaser