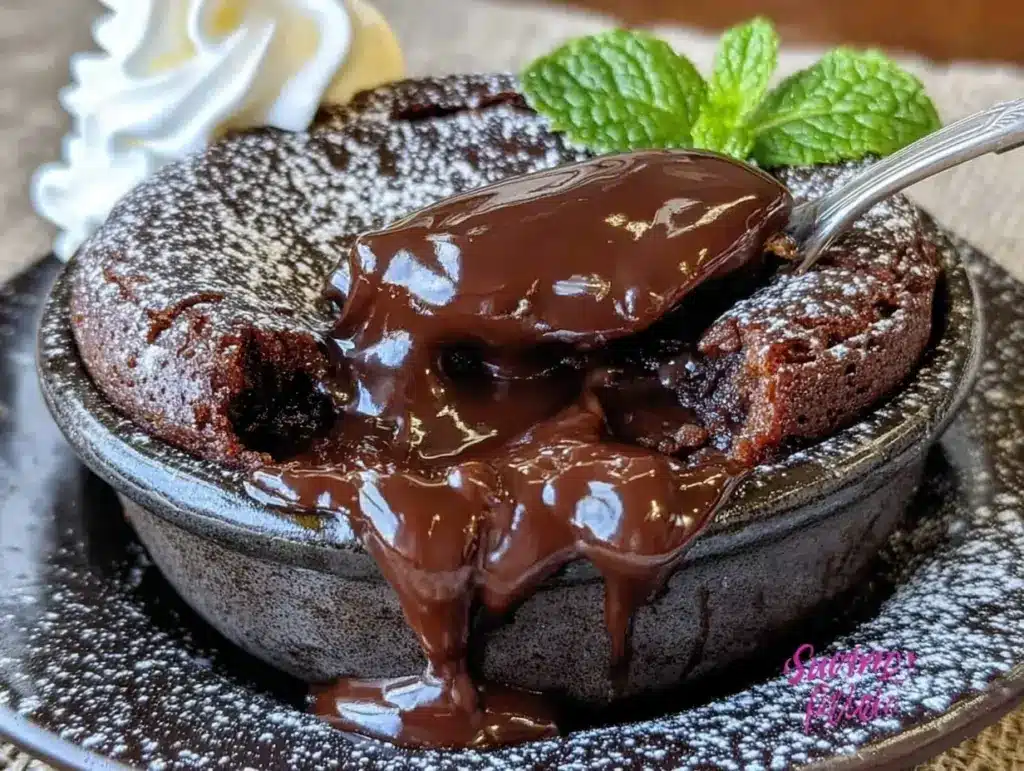
I still remember the exact moment I realized I had accidentally ruined a dinner party. It was two years ago, and I was trying to play host. I had planned a sophisticated three-course meal, complete with a wine pairing I’d spent an hour researching. But then, disaster struck. The dessert I had prepared—a fancy mousse—collapsed in the fridge. Just… collapsed. Into a sad, watery puddle.
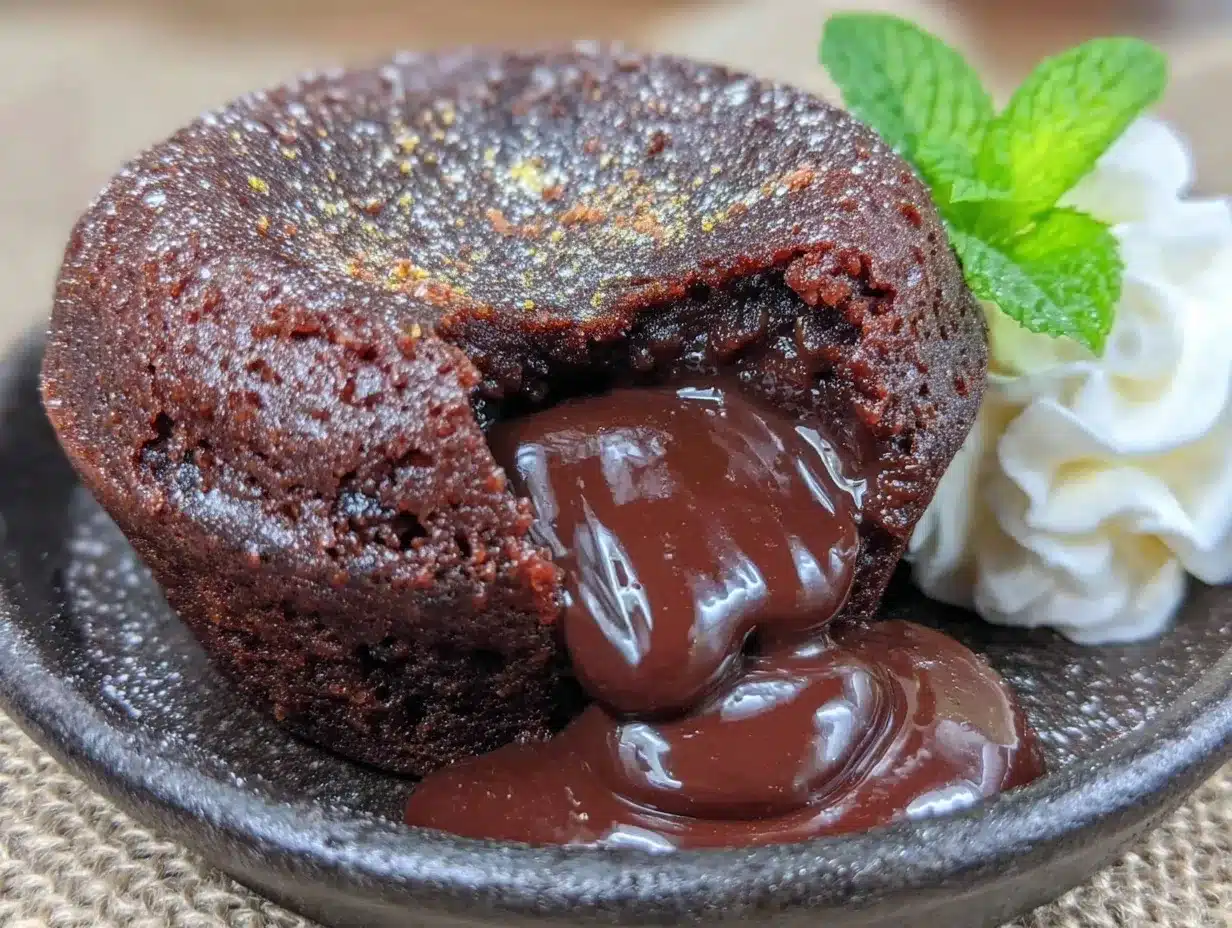
I panicked. I had thirty minutes before my guests would finish their savory course, and my kitchen looked like a war zone. In a moment of sheer desperation, I threw together the simplest thing I could think of: chocolate, butter, sugar, eggs. I baked it for a few minutes, pulled it out, and flipped it onto a plate, expecting a flat, dense brownie. Instead, when I cut into it, a river of warm, glossy chocolate oozed out. The room went silent. Then, one by one, everyone dug in. No one cared about the collapsed mousse. They only cared about that molten center.
That accidental disaster taught me something important: sometimes the best recipes aren’t the ones you plan, but the ones you trust. This chocolate lava cake recipe isn’t just a dessert; it’s a confidence booster. It’s the dish you make when you want to look like a professional pastry chef but only have twenty minutes to spare. And the best part? It’s nearly impossible to mess up, as long as you watch the clock.
I’ve made this chocolate lava cake for everything from casual Tuesday nights to formal anniversary dinners. It’s rich, it’s indulgent, and it feels incredibly special. If you’ve ever wanted to make those restaurant-quality desserts at home but were intimidated by the technique, this is your recipe. It’s simpler than you think, and the payoff is absolutely worth it.
Why You’ll Love This Recipe
There are about ten reasons I keep coming back to this chocolate lava cake, but here are the big ones that make it my absolute go-to for impressing people.
It Feels Like Magic — Seriously, there is nothing quite like the reaction when you cut into a cake and liquid chocolate pours out. It feels like a party trick, but it’s just chemistry. I’ve watched people’s eyes widen every single time. It’s the ultimate “wow” factor for any gathering.
Stupid Simple Ingredients — You don’t need fancy chocolate chips or exotic spices. This recipe relies on high-quality chocolate (yes, the real stuff) and basic pantry staples. If you can melt chocolate and whisk eggs, you can make this. I’ve taught my teenage niece to make this, and she nailed it the first time.
Lightning Fast — The active cooking time is less than fifteen minutes. The rest is just waiting for the oven. I can whip this up while my guests are still chatting in the living room. It’s the perfect stress-free dessert for hosting.
Rich and Decadent — This isn’t a light, airy sponge cake. This is a dense, fudgy, luxurious treat. It’s the kind of dessert that makes you close your eyes and sigh. It’s comfort food in its most elegant form.
Make-Ahead Friendly — Here’s a secret: you can prep these ramekins hours in advance and refrigerate them. Then, when your guests are ready, you just pop them in the oven. It makes hosting so much easier because you’re not stuck in the kitchen at the last minute.
This is my go-to when I want to treat myself or my loved ones to something truly special. No complicated techniques, no weird ingredients, just pure, unadulterated chocolate joy.
Ingredients You’ll Need
Here’s the best part: you probably have most of this already, except maybe the good chocolate. I’m particular about three ingredients here, and I’ll tell you exactly why.
High-Quality Semi-Sweet Chocolate (8 ounces / 225g) — This is the star of the show. Do not use chocolate chips; they have stabilizers that prevent them from melting smoothly. Use a bar of chocolate from the baking aisle. I love Guittard or Ghirardelli for this. The higher the cocoa content, the more intense the flavor. This chocolate is what gives the lava cake its deep, rich taste.
Unsalted Butter (½ cup / 115g) — Use real butter, not margarine. It adds richness and helps create that smooth, glossy texture. I prefer European-style butter if I can find it, but regular unsalted works perfectly fine. Room temperature makes it easier to mix.
Large Eggs (2 whole + 2 yolks) — Yes, extra yolks. This is the secret to the fudgy texture. The extra yolks add fat and richness, making the center creamier. Use large, fresh eggs. I’ve used small eggs before, and the ratio was off, so stick to large.
Sugar (½ cup / 100g) — Granulated white sugar is perfect here. It dissolves easily into the chocolate mixture. I’ve tried using brown sugar, but it adds a molasses flavor that clashes with the pure chocolate taste. Stick to white.
All-Purpose Flour (2 tablespoons / 15g) — Just a little bit. The flour provides structure so the cake doesn’t collapse entirely, but too much will make it cakey instead of fudgy. I sift mine to avoid lumps, but it’s not strictly necessary.
Cocoa Powder (1 tablespoon / 5g) — Unsweetened cocoa powder adds an extra layer of chocolate intensity. I use Dutch-processed cocoa for a darker color and smoother taste, but regular unsweetened works too.
Salt (¼ teaspoon) — A pinch of salt enhances the chocolate flavor. Don’t skip this. It makes the chocolate taste more like chocolate.
Vanilla Extract (1 teaspoon) — Pure vanilla extract, not imitation. It adds a warm, aromatic note that balances the bitterness of the chocolate.
For Dusting — Butter and cocoa powder (or powdered sugar) for the ramekins. I prefer cocoa powder because it doesn’t burn as easily as sugar, and it adds a nice texture.
Optional Garnish — Fresh raspberries, a dusting of powdered sugar, or a dollop of whipped cream. I usually go with fresh raspberries because the tartness cuts through the richness of the chocolate.
Equipment Needed
You don’t need fancy equipment for this. Here’s what I actually use.
6 Ramekins (4-6 ounce size) — These are essential. I use ceramic ramekins because they heat evenly. Glass works too, but ceramic gives a nicer crust. Make sure they’re the right size; if they’re too big, the lava cake won’t be tall enough.
Microwave-Safe Bowl — For melting the chocolate and butter. I use a large glass bowl because it’s easy to stir. A double boiler works too, but the microwave is faster and I’ve never had issues.
Mixing Bowls — One medium bowl for the egg mixture and one small bowl for the dry ingredients. I use stainless steel because they’re durable and easy to clean.
Whisk — A good wire whisk is key for incorporating air into the eggs. I have an old one from my first apartment that still works perfectly.
Spatula — A silicone spatula for scraping the chocolate mixture out of the bowl. You want to get every bit of it.
Baking Sheet — To hold the ramekins. It makes it easier to carry them to and from the oven. I use a rimmed baking sheet to catch any potential drips.
Timer — This is crucial. Lava cakes are all about timing. I use my phone timer because I can’t trust myself to remember.
How to Make It: Step-by-Step
Alright, let’s make this! I’m walking you through exactly how I do it, including the little tricks I’ve picked up.
Step 1: Prep Your Ramekins (5 minutes)
Preheat your oven to 425°F (220°C). This high heat is what creates the contrast between the cooked exterior and the raw interior. Butter the inside of each ramekin generously, then dust with cocoa powder. Tap out the excess. This prevents sticking and adds a nice finish. I’ve tried flour before, but it gets gummy. Cocoa powder is the way to go.
Step 2: Melt the Chocolate and Butter (2 minutes)
Chop your chocolate into small pieces. This helps it melt evenly. Place the chocolate and butter in a microwave-safe bowl. Microwave in 30-second intervals, stirring between each, until smooth. Do not overheat, or the chocolate will seize. If you don’t have a microwave, use a double boiler over low heat. Stir until glossy and smooth.
Step 3: Whisk the Eggs and Sugar (2 minutes)
In a separate bowl, whisk the whole eggs and egg yolks with the sugar. Whisk vigorously for about 2-3 minutes until the mixture is pale and slightly thickened. This incorporates air, which helps the cake rise. Don’t skip this step. It’s what gives the cake its structure.
Step 4: Combine the Mixtures (2 minutes)
Pour the melted chocolate mixture into the egg mixture. Stir gently with a spatula until just combined. Be careful not to overmix, or you’ll deflate the air you just whisked in. The mixture should be thick and glossy.
Step 5: Add Dry Ingredients (1 minute)
Sift the flour and cocoa powder into the chocolate mixture. Add the salt and vanilla. Fold gently until no streaks of flour remain. The batter will be thick. This is normal. If it’s too thin, your chocolate might have been too hot. If it’s too thick, it might be too cold. Aim for a consistency like thick cake batter.
Step 6: Fill the Ramekins (2 minutes)
Distribute the batter evenly among the prepared ramekins. Fill them almost to the top. I use a small ice cream scoop for even distribution. Smooth the tops with a spatula. If you’re making these ahead, cover them with plastic wrap and refrigerate for up to 24 hours. If baking immediately, proceed to the next step.
Step 7: Bake (12-14 minutes)
Place the ramekins on a baking sheet and put them in the preheated oven. Bake for 12-14 minutes. This is the most critical step. The edges should be set and firm to the touch, but the center should still feel soft and jiggly. If you bake them for 15 minutes, they’ll be fully cooked brownies. If you bake them for 10 minutes, they’ll be raw. 12-14 minutes is the sweet spot. I start checking at 12 minutes.
Step 8: Cool and Serve (1 minute)
Remove the ramekins from the oven and let them cool for exactly 1 minute. This allows the cake to set slightly so it doesn’t fall apart when you flip it. Then, run a knife around the edge to loosen. Place a small plate over the ramekin and flip it over quickly. Tap the bottom gently, and the cake should slide out. If it sticks, you didn’t butter it enough. Dust with powdered sugar or cocoa powder and serve immediately.
Total Time: About 25 minutes (5 minutes prep, 20 minutes baking)
Expert Tips & Tricks
Here’s everything I’ve learned from making this dozens of times. These tips will save you from my mistakes.
Watch the Clock
This is the #1 tip. Lava cakes are all about timing. I’ve ruined perfect cakes by being distracted. Set a timer and don’t move. The difference between a lava cake and a brownie is just two minutes.
Use a Thermometer
If you’re unsure, use an instant-read thermometer. The center should be around 160°F (71°C). If it’s cooler, keep baking. If it’s hotter, it’s done. This takes the guesswork out.
Don’t Overmix
Once you add the flour, mix gently. Overmixing develops gluten, which makes the cake tough instead of tender. You want a soft, fudgy texture, not a bread-like one.
Quality Matters
Good chocolate makes a huge difference. If you use cheap chocolate, the flavor will be flat. Invest in a good bar of semi-sweet or bittersweet chocolate. It’s worth the extra few dollars.
Room Temperature Eggs
Room temperature eggs whip better and incorporate more air. Take them out of the fridge 30 minutes before you start. If you forget, put them in a bowl of warm water for 5 minutes.
Common Mistakes (and how to avoid them):
Mistake: Cake falls apart when flipped
Fix: You didn’t let it cool long enough. Wait the full minute. Also, make sure you buttered the ramekins thoroughly.
Mistake: No lava center
Fix: You baked it too long. Next time, reduce the time by 1-2 minutes. Every oven is different, so pay attention.
Mistake: Cake is too dry
Fix: You used too much flour. Measure carefully, and consider spooning the flour into the cup instead of scooping.
Variations & Substitutions
Once you’ve nailed the basic version, here’s how you can mix it up. I’ve tried all of these.
White Chocolate Lava Cake
Replace the semi-sweet chocolate with white chocolate. The flavor is sweeter and milder. I love this version with a raspberry sauce drizzle on top.
Dark Chocolate Intensity
Use 70% dark chocolate for a more intense, bitter flavor. This is for serious chocolate lovers. I serve this with unsweetened whipped cream to balance the bitterness.
Espresso Lava Cake
Add 1 teaspoon of instant espresso powder to the dry ingredients. It enhances the chocolate flavor without making it taste like coffee. My husband’s favorite version.
Peanut Butter Lava Cake
Add a tablespoon of peanut butter to the center of each ramekin before adding the batter. When you cut into it, peanut butter oozes out with the chocolate. It’s like a Reese’s cup in cake form.
Gluten-Free
Replace the all-purpose flour with a gluten-free flour blend. The texture might be slightly denser, but it still works. I’ve used Bob’s Red Mill 1-to-1 blend with good results.
Vegan
Replace the eggs with flax eggs (1 tablespoon ground flaxseed + 3 tablespoons water per egg). Replace the butter with coconut oil. The texture will be different, but it’s still tasty. My vegan friend requested this version, and she was surprised by how good it was.
Other Proteins:
– Shrimp (add 1lb in step 4, cook 3-4 minutes) — Not applicable for dessert, but for savory variations, this could work.
Serving & Storage
I usually serve this straight from the plate at the dinner table—it looks rustic and stays warm. But here are other ways I’ve enjoyed it:
How to Serve:
I usually serve this straight from the skillet at the dinner table—it looks rustic and stays warm. But here are other ways I’ve enjoyed it:
Side Dishes:
– Fresh raspberries or strawberries (the tartness cuts the richness)
– A dollop of vanilla bean ice cream
– Whipped cream (lightly sweetened)
– A drizzle of salted caramel sauce
Toppings Bar:
When I have guests, I put out: fresh berries, powdered sugar, sea salt, and caramel sauce. Everyone customizes their bowl.
Wine Pairing:
Not a wine expert, but my wine-snob friend says Port or Cabernet Sauvignon works great with this. It’s bold and rich, just like the cake.
Refrigerator:
Store in an airtight container for up to 2 days. The texture will be firmer, but it’s still good. Reheat in the microwave for 10-15 seconds before serving.
Reheating:
Best method: Microwave for 10-15 seconds. Just enough to warm it through.
Microwave method: Heat in 5-second intervals, stirring between. Add a splash of milk if it’s too thick.
Never works: Trying to reheat in the oven. It will overcook and lose the lava center.
Freezing:
Honestly, this doesn’t freeze well because of the eggs. The texture becomes weird when thawed. Make it fresh or store in the fridge for up to 2 days.
Meal Prep:
Prep the batter and fill the ramekins up to 24 hours ahead. Refrigerate. When ready to serve, bake as directed. This is my favorite way to host because I’m not stressed at the last minute.
Pro tip: If leftovers are drying out, stir in a tablespoon of butter and a splash of milk when reheating. Brings back that creamy texture.
Nutrition Information
I’m not a nutritionist, but here’s the breakdown if you’re tracking.
Per Serving (based on 6 servings):
- Calories: 320
- Protein: 6g
- Carbs: 35g
- Fiber: 2g
- Sugar: 28g
- Fat: 18g
- Saturated Fat: 10g
- Cholesterol: 140mg
- Sodium: 120mg
- Calcium: 40mg
What’s Good:
– Decent protein from eggs
– Iron from the chocolate
– Can add berries to boost nutrition
– More filling than it looks
What to Know:
– Higher in calories from chocolate and butter
– Contains dairy and eggs
– Moderate sodium
My Take:
Look, this is dessert. It’s chocolate, butter, and sugar. It’s not a diet recipe. But it’s way better than store-bought, costs less, and I know exactly what’s in it. When I want to make it lighter, I use dark chocolate and reduce the sugar. But usually? I just eat one and enjoy it.
Dietary Notes:
– Contains: gluten, dairy, eggs
– Can be made: gluten-free, vegan (with modifications)
– Not suitable for: dairy-free (without modifications)
Final Thoughts
So that’s my go-to chocolate lava cake! I’ve probably talked your ear off at this point, but when you make a recipe this often, you have a lot to say about it.
This has saved dinner parties more times than I can count. It’s my answer to “what’s for dessert” when I want to impress but don’t want to stress. My guests are happy, my family’s happy, and I’m happy because I’m not stuck in the kitchen all night.
Make it yours! Try different add-ins, swap in your favorite chocolate, adjust the sweetness. The best recipes are the ones you adapt to your family’s tastes.
If you make this, drop a comment and let me know what you think! I love hearing how recipes turn out in your kitchen. And if something doesn’t work, tell me that too—I’m here to help troubleshoot.
Happy cooking! And I hope your kitchen smells half as good as mine does right now.
Frequently Asked Questions
Q: Can I use milk chocolate instead of semi-sweet?
A: You can, but the cake will be sweeter and less intense. Milk chocolate has more sugar and milk solids, which can affect the texture. If you use it, reduce the added sugar by 2 tablespoons. I prefer semi-sweet or bittersweet for a more sophisticated flavor.
Q: My cake came out fully cooked—what happened?
A: You likely baked it too long. Next time, reduce the baking time by 1-2 minutes. Remember, the edges should be set, but the center should still jiggle slightly. Every oven is different, so start checking at 12 minutes.
Q: Can I make these ahead for a dinner party?
A: Absolutely! Prep the batter and fill the ramekins up to 24 hours ahead. Cover with plastic wrap and refrigerate. When ready to serve, bake as directed. This is my favorite way to host because I’m not stressed at the last minute.
Q: Why did my cake stick to the ramekin?
A: You probably didn’t butter and dust the ramekins thoroughly enough. Make sure to coat every part of the inside, including the corners. Tap out the excess cocoa powder so you don’t have clumps.
Q: Can I use mini ramekins?
A: Yes, but reduce the baking time to 8-10 minutes. They will cook faster because they’re smaller. Keep a close eye on them.
Q: Can I freeze these?
A: It’s not recommended. The texture of the eggs can become weird when frozen and thawed. It’s best to make them fresh. If you must, freeze the unbaked batter in the ramekins, then bake from frozen, adding 2-3 minutes to the baking time.
Q: Can I double this recipe?
A: Yes, just double all the ingredients. Make sure you have enough ramekins. The baking time stays the same, but keep an eye on them because ovens can have hot spots.
Pin This Recipe!
Chocolate Lava Cake: Perfect Molten Fudge Center
- Total Time: 25 minutes
- Yield: 6 servings 1x
Description
A rich, indulgent dessert featuring a dense, fudgy exterior and a warm, glossy molten chocolate center. This recipe is simple to make, requires only basic pantry staples, and can be prepared in under 30 minutes.
Ingredients
- 8 ounces (225g) high-quality semi-sweet chocolate bar
- ½ cup (115g) unsalted butter, room temperature
- 2 large eggs
- 2 large egg yolks
- ½ cup (100g) granulated white sugar
- 2 tablespoons (15g) all-purpose flour
- 1 tablespoon (5g) unsweetened cocoa powder
- ¼ teaspoon salt
- 1 teaspoon pure vanilla extract
- Butter and cocoa powder for dusting ramekins
- Fresh raspberries or powdered sugar for garnish (optional)
Instructions
- Preheat oven to 425°F (220°C). Generously butter the inside of 6 ramekins (4-6 oz size) and dust with cocoa powder, tapping out excess.
- Chop chocolate into small pieces. Combine with butter in a microwave-safe bowl. Microwave in 30-second intervals, stirring between each, until smooth and glossy. Alternatively, use a double boiler.
- In a separate medium bowl, whisk whole eggs, egg yolks, and sugar vigorously for 2-3 minutes until pale and slightly thickened.
- Pour the melted chocolate mixture into the egg mixture. Stir gently with a spatula until just combined.
- Sift flour and cocoa powder into the chocolate mixture. Add salt and vanilla. Fold gently until no streaks of flour remain. The batter should be thick.
- Distribute batter evenly among prepared ramekins, filling almost to the top. Smooth tops with a spatula.
- Place ramekins on a baking sheet. Bake for 12-14 minutes until edges are set but the center is soft and jiggly.
- Remove from oven and let cool for exactly 1 minute. Run a knife around the edge, place a plate over the ramekin, and flip quickly. Tap gently to release. Serve immediately.
Notes
Timing is critical; bake for 12-14 minutes only. Overbaking results in a fully cooked brownie rather than a molten center. You can prep the batter and fill ramekins up to 24 hours in advance and refrigerate. If using mini ramekins, reduce baking time to 8-10 minutes. Ensure ramekins are thoroughly buttered and dusted to prevent sticking.
- Prep Time: 5 minutes
- Cook Time: 12-14 minutes
- Category: Dessert
- Cuisine: French
Nutrition
- Serving Size: 1 ramekin
- Calories: 320
- Sugar: 28
- Sodium: 120
- Fat: 18
- Saturated Fat: 10
- Carbohydrates: 35
- Fiber: 2
- Protein: 6
Keywords: chocolate lava cake, molten chocolate cake, dessert, baking, easy dessert, romantic dinner, chocolate dessert, fudgy cake