There is a specific kind of chaos that hits in August. It’s not just the back-to-school shopping or the early morning alarm clock adjustments. It’s the afternoon slump. You know the one. It’s 3:30 PM on a Tuesday in September, and your kid is staring at you with that hungry, slightly manic look that says, “I need sugar, now, or I will combust.”
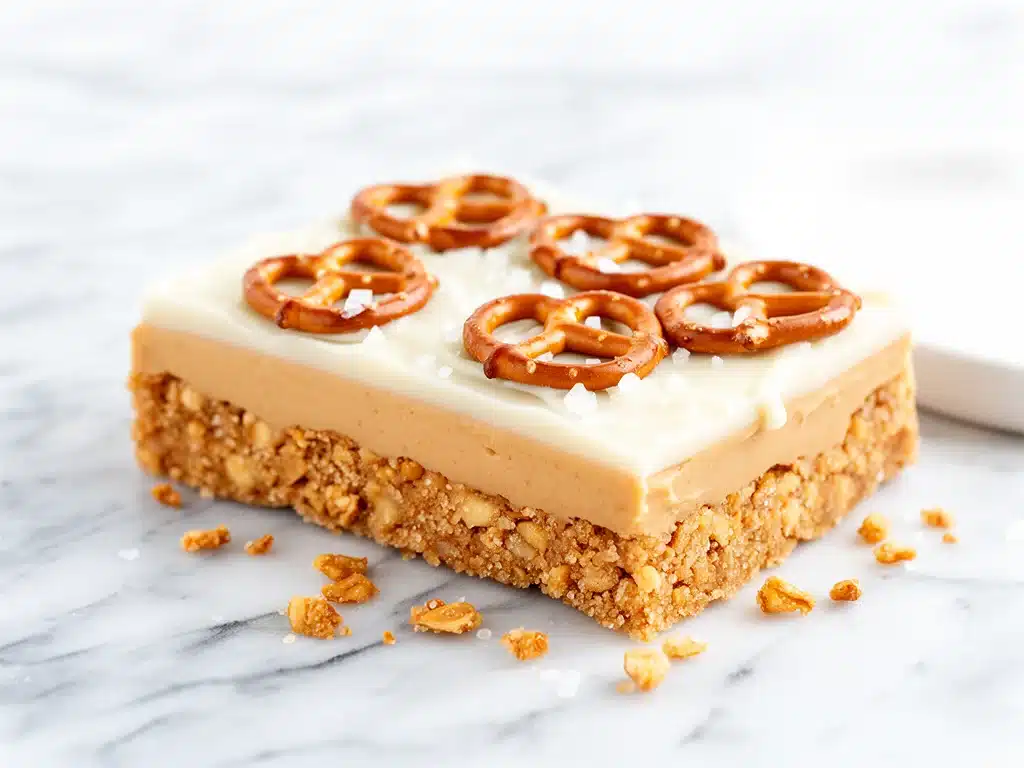
Before I had kids, I thought I could just say, “Have a piece of fruit.” Now I know that fruit is often met with a dramatic sigh and a request for something that tastes like a carnival ride. Enter these Back-to-School No-Bake Peanut Butter Pretzel Bars. They are the holy grail of afternoon snacks. They’re salty, they’re sweet, they’re crunchy, and best of all, they require zero oven time.
I discovered this recipe during the first week of school last year. I was running late to pick up my daughter, grabbed some pretzels and peanut butter from the pantry, and threw them together in a panic. I expected a mess. What I got was a box of bars that vanished in ten minutes, leaving my son begging for more. I’ve made these dozens of times since, tweaking the ratios until they were perfect. They’re sturdy enough for lunchboxes, sweet enough to satisfy a craving, and simple enough to make with a tired brain.
If you’re drowning in the back-to-school rush, trust me on this. You need these bars in your life. They’re not just a snack; they’re a peace treaty between you and your hungry little humans.
Why You’ll Love These No-Bake Bars
There are about a million reasons I keep making these Back-to-School No-Bake Peanut Butter Pretzel Bars, but here are the big ones that keep me coming back to the recipe every single month.
Stupid Simple — Seriously, if you can melt butter and stir, you can make these. There’s no baking, no temperature checking, and no waiting for dough to rise. I’ve made these while on a phone call with my mom. It’s that easy.
Lightning Fast — From start to fridge, it takes about 20 minutes. The hardest part is waiting for them to set. On busy weeknights, when I need a snack ready in five minutes flat, these are my lifesaver.
Pantry-Friendly — You probably have all the ingredients already. Pretzels, peanut butter, butter, sugar, and chocolate. I keep these stocked specifically for those “I need a snack now” moments.
Crowd-Pleaser — I’ve served these to picky eaters, kids with nut allergies (using sunflower seed butter), and adults who claim they “don’t like sweets.” Everyone loves them. The salt-to-sweet ratio is just right.
Lunchbox Ready — These hold up really well. They don’t get soggy or fall apart like some bars do. I pack them for my kids’ lunches, and they come back home mostly intact (though I suspect they trade them for chips).
Budget-Smart — This recipe feeds a family of four for under $10. That’s way cheaper than buying those fancy store-bought snack bars, and you know exactly what’s in them.
This is my go-to when I need dinner-side snacks to just work. No complicated techniques, no weird ingredients, just reliable, delicious food that makes everyone happy.
Ingredients You’ll Need
Here’s the best part: you probably have most of this already. This isn’t a recipe that requires a trip to three different specialty stores. It’s simple, honest ingredients that come together to make something magical.
For the Pretzel Base
Pretzel sticks (10 ounces / 280g) — I use standard thin pretzel sticks, not the thick twisty ones. They break easier and create a nicer crumble. Brands like Rold Gold or store brand work fine. Just make sure they’re fresh and crunchy, or they’ll be chewy.
Butter (1/2 cup / 115g, unsalted) — This binds everything together. I use unsalted so I can control the saltiness, since pretzels are already salty. If I’m in a rush, I use salted and just skip extra salt, but unsalted is better for balance.
Peanut butter (1 cup / 250g, creamy) — This is the star. I use regular creamy peanut butter like Jif or Skippy. Natural peanut butter can be too oily and doesn’t set as firmly. If you need nut-free, sunflower seed butter works, but the texture is slightly different.
Granulated sugar (1 cup / 200g) — This adds sweetness and helps the bars hold their shape. Brown sugar can be used for a chewier texture, but I prefer the clean sweetness of white sugar here.
For the Chocolate Topping
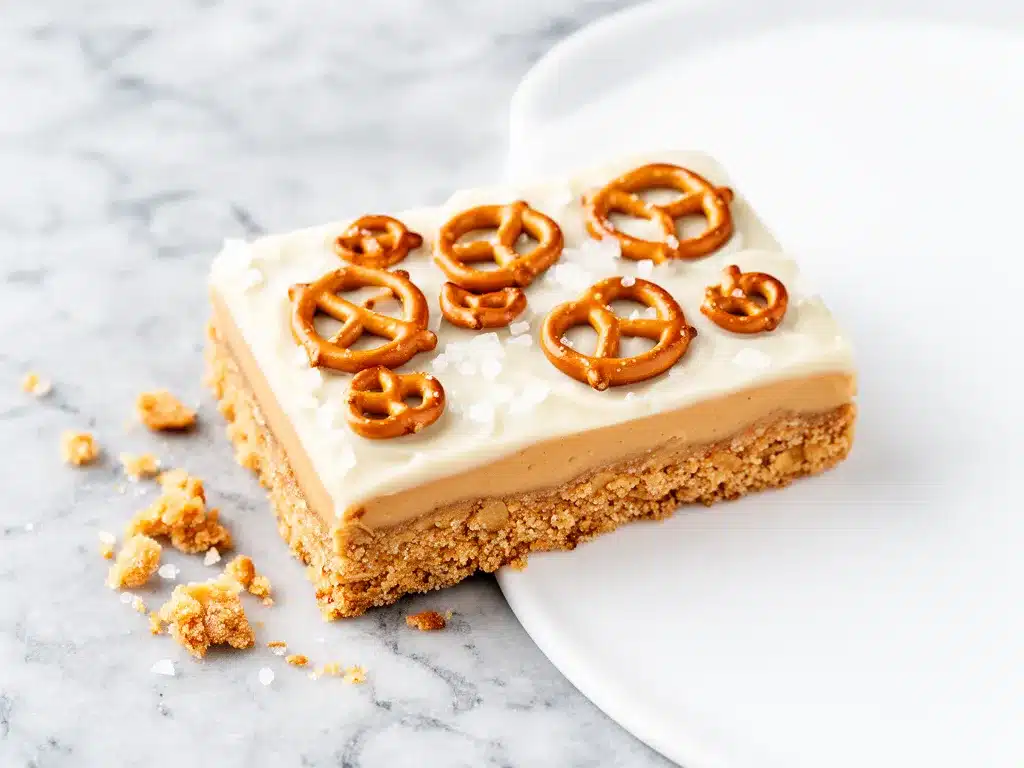
Chocolate chips (1 cup / 170g, semi-sweet) — I use semi-sweet because it balances the salt and sweetness. Milk chocolate is too sweet for my taste. Dark chocolate works if you want less sugar, but it might be too bitter for kids.
Butter (2 tablespoons / 30g) — Added to the chocolate to make it glossy and easier to spread. It’s a small detail that makes a big difference in texture.
Optional: Pretzel pieces (1/2 cup) — For extra crunch on top. I like to sprinkle some crushed pretzels over the chocolate before it sets. It looks fancy and adds another layer of crunch.
Sea salt flakes (optional) — A tiny sprinkle on top adds a professional touch. It’s not necessary, but it elevates the flavor profile.
Quick Tip: Don’t skip the butter in the chocolate layer. It prevents the chocolate from seizing up and makes it spread like a dream. I learned this the hard way with a lumpy, difficult-to-spread chocolate mess.
Equipment Needed
You don’t need fancy equipment for this. Here’s what I actually use.
Large mixing bowl — I use a 6-quart bowl. It needs to fit the pretzels and the peanut butter mixture comfortably. My plastic bowl from IKEA still works fine after years of use.
Spatula — A sturdy silicone spatula is essential for mixing the peanut butter and for spreading the chocolate. I prefer a wide one because it covers more surface area.
9×13 inch baking pan — This is the standard size for these bars. I line it with parchment paper for easy removal. Aluminum foil works too, but parchment is less sticky.
Medium saucepan — For melting the chocolate and butter. I use a small saucepan so the chocolate doesn’t burn. Non-stick is best here.
Microwave-safe bowl — If you prefer to melt chocolate in the microwave, a large microwave-safe bowl works. I heat it in 30-second intervals, stirring in between.
Parchment paper — This is non-negotiable. It makes cleanup a breeze and allows you to lift the bars out of the pan easily. I line the pan with a “sling” by leaving excess paper hanging over the sides.
Chef’s knife — For cutting the pretzels if they’re too long. I like them in small, bite-sized pieces. A sharp knife makes quick work of it.
Measuring cups and spoons — Pretty standard stuff. I use metal measuring cups for dry ingredients and liquid measuring cups for butter.
Optional: Food processor — If you have a lot of pretzels to crush, a food processor speeds things up. But I usually just crush them by hand with a rolling pin or the bottom of a glass.
How to Make It: Step-by-Step
Alright, let’s make these Back-to-School No-Bake Peanut Butter Pretzel Bars! I’m walking you through exactly how I do it, including the little tricks I’ve picked up.
Step 1: Prep Your Pan (2 minutes)
Line a 9×13 inch baking pan with parchment paper. Leave a little overhang on the sides so you can lift the bars out later. This is crucial for clean cuts and easy removal. I grease the parchment lightly with butter spray to ensure nothing sticks.
Step 2: Crush the Pretzels (5 minutes)
Place the pretzel sticks in a large zip-top bag or a food processor. Crush them into small, uneven pieces. I don’t want fine crumbs; I want chunks. This gives the bars texture. Aim for pieces about the size of a pea or smaller. If using a bag, use a rolling pin or the bottom of a heavy pan. Be careful not to over-crush them into dust.
Step 3: Mix the Peanut Butter Base (3 minutes)
In a large bowl, combine the crushed pretzels, peanut butter, melted butter, and sugar. Stir until everything is well combined and the mixture looks like wet sand. It should be sticky and hold together when pressed. If it’s too dry, add a tablespoon more peanut butter. If it’s too wet, add a few more pretzel crumbs.
Step 4: Press Into the Pan (5 minutes)
Transfer the mixture to the prepared pan. Use your hands or the back of a spoon to press it down firmly. I press it down really hard—this ensures the bars hold together when cut. If you don’t press firmly, they’ll fall apart. Aim for an even layer, about half an inch thick.
Step 5: Melt the Chocolate (2 minutes)
In a medium saucepan over low heat, combine the chocolate chips and 2 tablespoons of butter. Stir constantly until the chocolate is completely melted and smooth. If using a microwave, heat in 30-second intervals, stirring in between, until smooth. Be careful not to burn the chocolate. It should be glossy and pourable.
Step 6: Spread the Chocolate (3 minutes)
Pour the melted chocolate over the pretzel base. Use a spatula to spread it evenly to the edges. Don’t worry if it’s not perfect; it will set. If you want extra pretzel crunch, sprinkle crushed pretzels on top now. I like to add a tiny pinch of sea salt flakes for that fancy bakery look.
Step 7: Chill and Set (1 hour)
Place the pan in the refrigerator for at least 1 hour, or until the chocolate is completely set. This is the hardest part, I know. But if you cut them too soon, they’ll be messy. Patience pays off.
Step 8: Cut and Serve
Once set, lift the bars out of the pan using the parchment paper sling. Place on a cutting board and cut into squares or rectangles. I cut them into 12-16 bars, depending on how hungry your kids are. Serve immediately or store in an airtight container.
Total Time: About 20 minutes active, plus 1 hour chilling.
Built-in Troubleshooting:
- Bars are too crumbly: You didn’t press them down hard enough, or the peanut butter was too cold. Make sure to press firmly and use room temperature peanut butter.
- Chocolate is lumpy: It wasn’t melted enough, or it got wet. Make sure your bowl is completely dry, and stir until smooth.
- Bars are too sweet: Use semi-sweet or dark chocolate chips, and reduce the sugar by 2 tablespoons.
Expert Tips & Tricks
Here’s everything I’ve learned from making these dozens of times. These tips will save you from my mistakes.
Press Firmly
This is the #1 tip. If you don’t press the pretzel mixture down firmly, the bars will fall apart when you cut them. I use the bottom of a glass to press it down evenly. It’s satisfying and ensures a solid base.
Use Room Temperature Peanut Butter
Cold peanut butter is hard to mix. If your peanut butter is straight out of the fridge, let it sit for 15 minutes or microwave it for 10 seconds. It mixes much easier and creates a smoother base.
Don’t Over-Melt the Chocolate
Chocolate burns easily. If using a saucepan, keep the heat low. If using a microwave, short bursts are key. Over-melted chocolate can become grainy and difficult to spread.
Chill Before Cutting
I know it’s tempting to cut them right away, but let them chill for at least an hour. The chocolate needs to be fully set for clean cuts. If you rush this step, you’ll get messy edges and broken bars.
Customize the Crunch
Add mini M&Ms, chopped peanuts, or even a drizzle of caramel for extra flavor. I’ve tried adding a layer of caramel before the chocolate, and it’s amazing. But keep it simple for the classic version.
Common Mistakes (and how to avoid them):
- Mistake: Bars are too soft Fix: Chill them longer. The peanut butter base needs to firm up in the fridge.
- Mistake: Chocolate is too thick Fix: Add a teaspoon of coconut oil or extra butter to thin it out.
- Mistake: Pretzels are stale Fix: Always use fresh, crunchy pretzels. Stale pretzels make the bars chewy instead of crunchy.
Pro Tricks I’ve Learned:
- For Clean Cuts: Use a sharp knife and wipe it between cuts. This keeps the edges clean and prevents the chocolate from smearing.
- For Extra Flavor: Add a pinch of cinnamon to the peanut butter mixture. It adds a warm, cozy flavor that pairs well with the pretzels.
- For Better Texture: Toast the pretzels lightly in the oven for 5 minutes before crushing. This enhances their flavor and crunch.
Variations & Substitutions
Once you’ve nailed the basic version, here’s how you can mix it up. I’ve tried all of these.
Chocolate Pretzel Bars
Use chocolate pretzel sticks instead of plain. This doubles down on the chocolate flavor. My kids love this version, but it’s sweeter.
Butterscotch Bars
Replace the chocolate chips with butterscotch chips. This gives a butterscotch-pretzel combo that’s incredibly rich and delicious. I make this for fall.
White Chocolate Bars
Use white chocolate chips instead of semi-sweet. This is sweeter and milder. Great for kids who don’t like bitter chocolate.
Nut-Free Version
Use sunflower seed butter instead of peanut butter. This is perfect for schools with nut-free policies. The texture is slightly different, but it still works well.
Healthy-ish Version
Use dark chocolate chips and reduce the sugar by 1/4 cup. Add some chia seeds to the peanut butter mixture for extra fiber. It’s not a health food, but it’s slightly better.
Dietary Modifications:
- Gluten-Free: Use gluten-free pretzel sticks. Everything else is naturally gluten-free. I’ve used Schär gluten-free pretzels, and they work great.
- Nut-Free: Use sunflower seed butter or soy nut butter. Ensure all other ingredients are certified nut-free.
- Dairy-Free: Use dairy-free chocolate chips and coconut oil instead of butter. The texture will be slightly softer.
Related Recipes:
If you like these bars, you might also enjoy my Back-to-School Ham and Cheese Pretzel Roll-Ups for a savory option, or my Chewy Banana Oat Breakfast Cookies for a healthy morning treat.
Serving & Storage
These bars are incredibly versatile. Here’s how I serve and store them.
How to Serve:
I usually serve these straight from the fridge. They’re best cold because the chocolate is firm and the pretzels stay crunchy. I pack them in lunchboxes with a small napkin, as they can be a bit messy.
Side Dishes:
These are a snack on their own, but they pair well with milk or juice. I also serve them at parties alongside fruit and veggie trays for a sweet-savory balance.
Storage Instructions:
Refrigerator:
Store in an airtight container in the fridge for up to 2 weeks. The cold keeps the chocolate firm and the pretzels crunchy. I separate layers with parchment paper to prevent sticking.
Room Temperature:
You can store them at room temperature for up to 3 days, but the chocolate may soften in warm weather. If it’s hot outside, keep them in the fridge.
Freezing:
Yes, these freeze well! Place them in a single layer on a baking sheet to freeze, then transfer to a freezer bag. They’ll keep for up to 3 months. Thaw in the fridge before serving. I freeze extras so I always have a snack on hand.
Pro Tip: If the bars seem dry after freezing, let them sit at room temperature for 10 minutes before eating. This restores the texture.
Nutrition Information
I’m not a nutritionist, but here’s the breakdown if you’re tracking. Keep in mind that these are bars with chocolate and peanut butter, so they’re indulgent.
Per Bar (based on 12 servings):
- Calories: 280
- Protein: 6g
- Carbs: 32g
- Fiber: 2g
- Sugar: 20g
- Fat: 15g
- Saturated Fat: 6g
- Sodium: 250mg
What’s Good:
Decent protein from the peanut butter. The pretzels provide some carbohydrates for energy. You can reduce sugar by using dark chocolate.
What to Know:
Higher in calories and sugar due to the chocolate and peanut butter. Contains gluten and nuts (unless substituted). Moderate sodium from the pretzels.
My Take:
Look, these are a treat. They’re not a health food. But they’re way better than store-bought candy bars, and they’re fun to make with kids. When I want to make them lighter, I use dark chocolate and reduce the sugar. But usually? I just eat one or two and enjoy them.
Final Thoughts
So that’s my go-to Back-to-School No-Bake Peanut Butter Pretzel Bars! I’ve probably talked your ear off at this point, but when you make a recipe this often, you have a lot to say about it.
This has saved afternoon snacking more times than I can count. It’s my answer to “what’s for snack?” when I’m tired, don’t want to cook, and still want something that tastes really good. My kids are happy, I’m happy, and I’m happy because I’m not stressed about making something complicated.
Make it yours! Try different add-ins, swap in your favorite chocolate, or adjust the pretzel crunch. The best recipes are the ones you adapt to your family’s tastes.
If you make this, drop a comment and let me know what you think! I love hearing how recipes turn out in your kitchen. And if something doesn’t work, tell me that too—I’m here to help troubleshoot.
Happy snacking! And I hope your kitchen smells half as good as mine does right now.
Frequently Asked Questions
Q: Can I use crunchy peanut butter instead of creamy?
A: Yes, you can! Crunchy peanut butter will add more texture to the bars. I prefer creamy for a smoother base, but crunchy is great if you like extra crunch. Just make sure the pretzel pieces are small enough to balance it out.
Q: Why did my chocolate seize up?
A: Chocolate seizes when it gets wet. Make sure your bowl and utensils are completely dry. Also, don’t cover the melting chocolate with a lid, as condensation can drip in. If it seizes, add a teaspoon of warm water or oil and stir vigorously to smooth it out.
Q: Can I make these ahead for a party?
A: Absolutely! Make them 2-3 days ahead and store in the fridge. They actually taste better after a day or two because the flavors meld together. I make them the night before a party for the best results.
Q: Why did my bars fall apart when I cut them?
A: You probably didn’t press the pretzel mixture down firmly enough, or you didn’t chill them long enough. Press hard to compact the pretzels, and chill for at least 1 hour. If they’re still crumbly, add a bit more peanut butter to the mix next time.
Q: Can I use almond butter instead of peanut butter?
A: Yes, almond butter works well as a substitute. It has a slightly different flavor but the same texture. Just make sure it’s a smooth, spreadable almond butter, not a gritty natural one.
Q: How do I store these in a lunchbox?
A: Store them in a small airtight container or wrap them individually in wax paper. They hold up well in lunchboxes, but if it’s very hot, consider adding an ice pack to keep the chocolate firm.
Q: Can I double this recipe?
A: Yes, you can double it and use a 9×13 inch pan. Just make sure to press the mixture down firmly for an even layer. The chilling time remains the same.
Pin This Recipe!
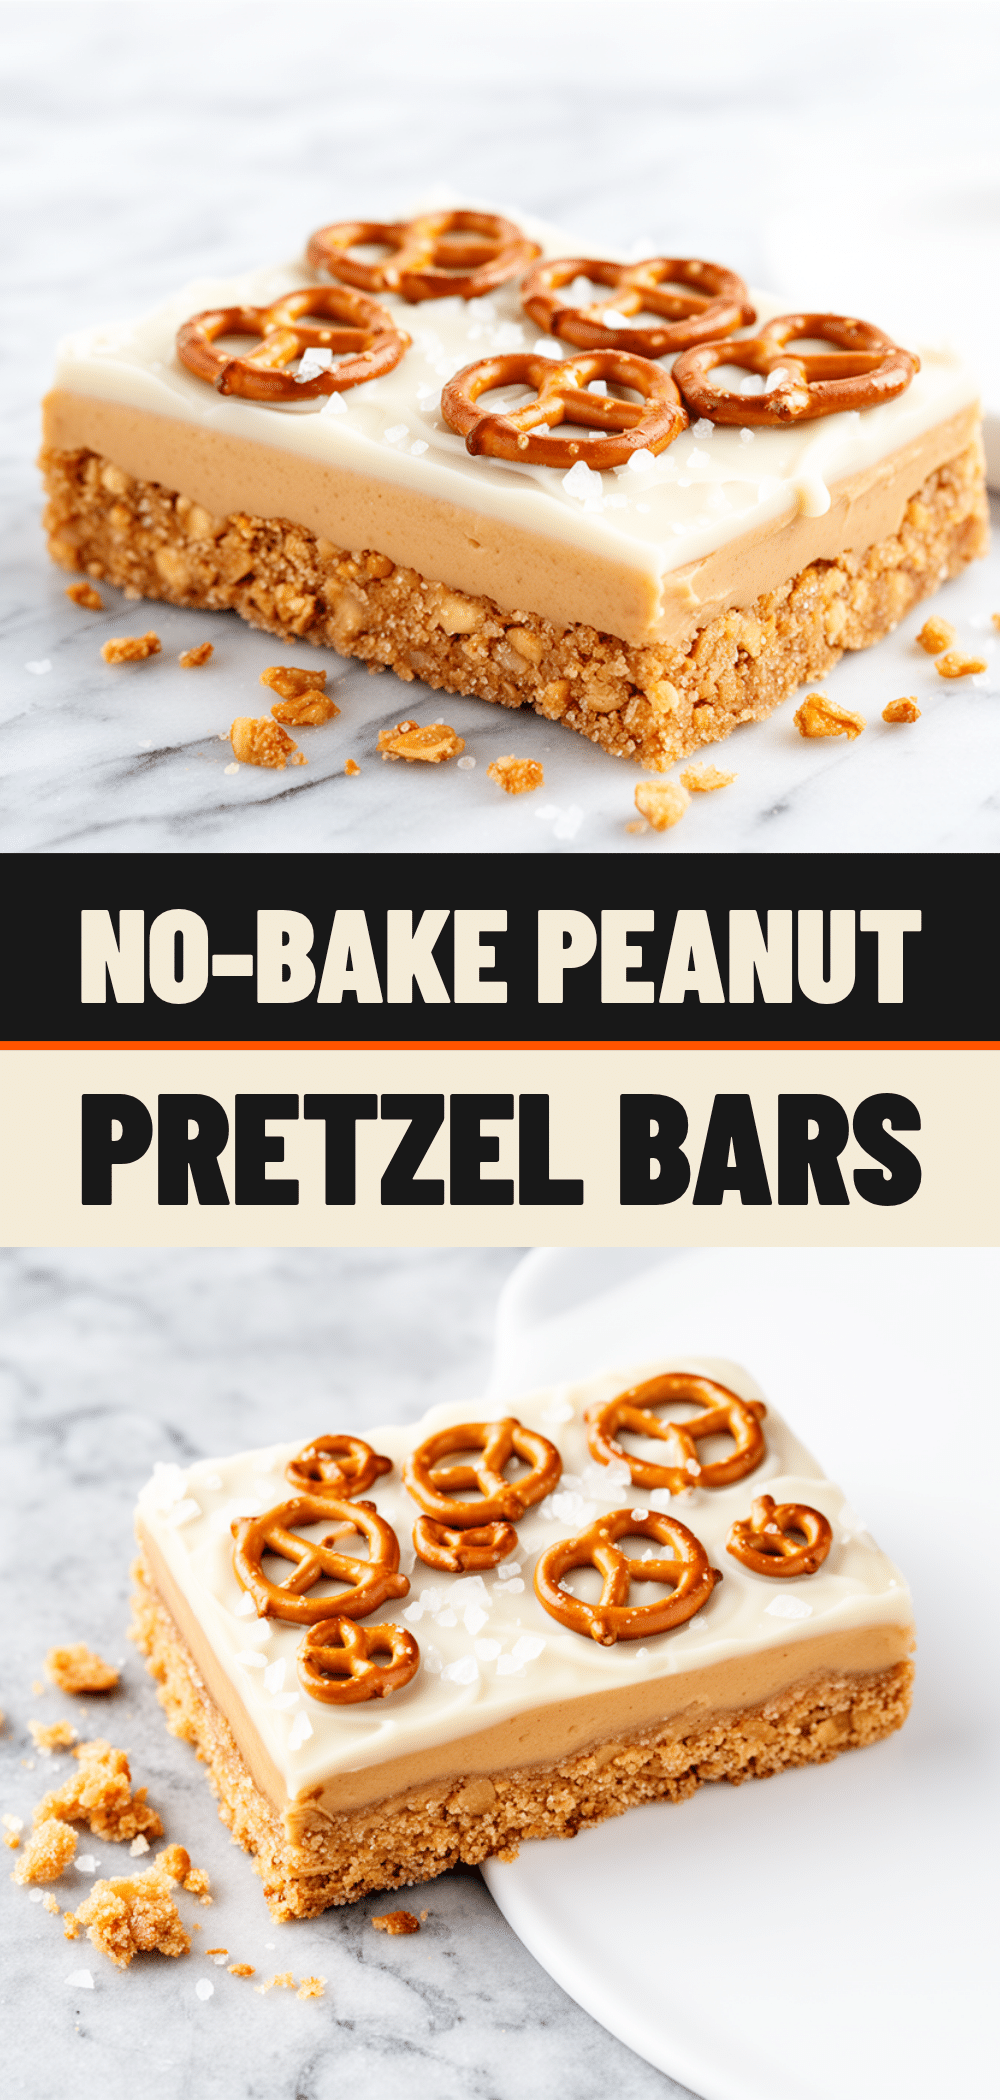
Back-to-School No-Bake Peanut Butter Pretzel Bars
- Total Time: 1 hour 20 minutes
- Yield: 12-16 servings 1x
Description
These salty, sweet, and crunchy no-bake bars are the perfect afternoon snack for busy school days. Made with pretzels, peanut butter, and chocolate, they are easy to make, lunchbox-friendly, and require zero oven time.
Ingredients
- 10 ounces (280g) pretzel sticks
- 1/2 cup (115g) unsalted butter, melted
- 1 cup (250g) creamy peanut butter
- 1 cup (200g) granulated sugar
- 1 cup (170g) semi-sweet chocolate chips
- 2 tablespoons butter
- 1/2 cup crushed pretzel pieces (optional)
- Sea salt flakes (optional)
Instructions
- Line a 9×13 inch baking pan with parchment paper, leaving an overhang on the sides for easy removal.
- Crush pretzel sticks into small, uneven pieces (about the size of a pea) using a rolling pin or food processor.
- In a large bowl, combine crushed pretzels, melted butter, peanut butter, and sugar. Stir until the mixture resembles wet sand and holds together when pressed.
- Press the mixture firmly and evenly into the prepared pan, aiming for a half-inch thick layer.
- In a medium saucepan over low heat (or in a microwave in 30-second intervals), melt chocolate chips and 2 tablespoons of butter until smooth and glossy.
- Pour the melted chocolate over the pretzel base and spread evenly to the edges. Sprinkle with optional crushed pretzels and sea salt flakes.
- Refrigerate for at least 1 hour, or until the chocolate is completely set.
- Lift the bars out of the pan using the parchment paper sling and cut into 12-16 squares or rectangles.
Notes
Press the pretzel mixture firmly to ensure bars hold together. Use room temperature peanut butter for easier mixing. Ensure all equipment is dry when melting chocolate to prevent seizing. For nut-free versions, substitute sunflower seed butter. For gluten-free, use gluten-free pretzels.
- Prep Time: 20 minutes
- Cook Time: 0 minutes
- Category: Dessert
- Cuisine: American
Nutrition
- Serving Size: 1 bar
- Calories: 280
- Sugar: 20
- Sodium: 250
- Fat: 15
- Saturated Fat: 6
- Carbohydrates: 32
- Fiber: 2
- Protein: 6
Keywords: no-bake, peanut butter, pretzel bars, back-to-school snacks, lunchbox snacks, easy dessert, salty sweet snack, kid-friendly snacks


