I have a confession to make. For years, I was the person who bought the grocery store cookies. You know the ones—the ones in the big plastic tub, slightly stale, with chocolate chips that taste like wax. I told myself I didn’t have time to bake. I told myself I wasn’t “a baker.” But honestly? I was just intimidated by recipes that required eight cups of flour, a stand mixer, and three hours of chilling dough.
Then came the Tuesday my kids demanded “real” chocolate chip cookies for their class party. It was 4 PM. I had zero time. I panicked. I raided my pantry and found three ingredients: flour, sugar, and chocolate chips. I threw them together, slapped them on a baking sheet, and prayed.
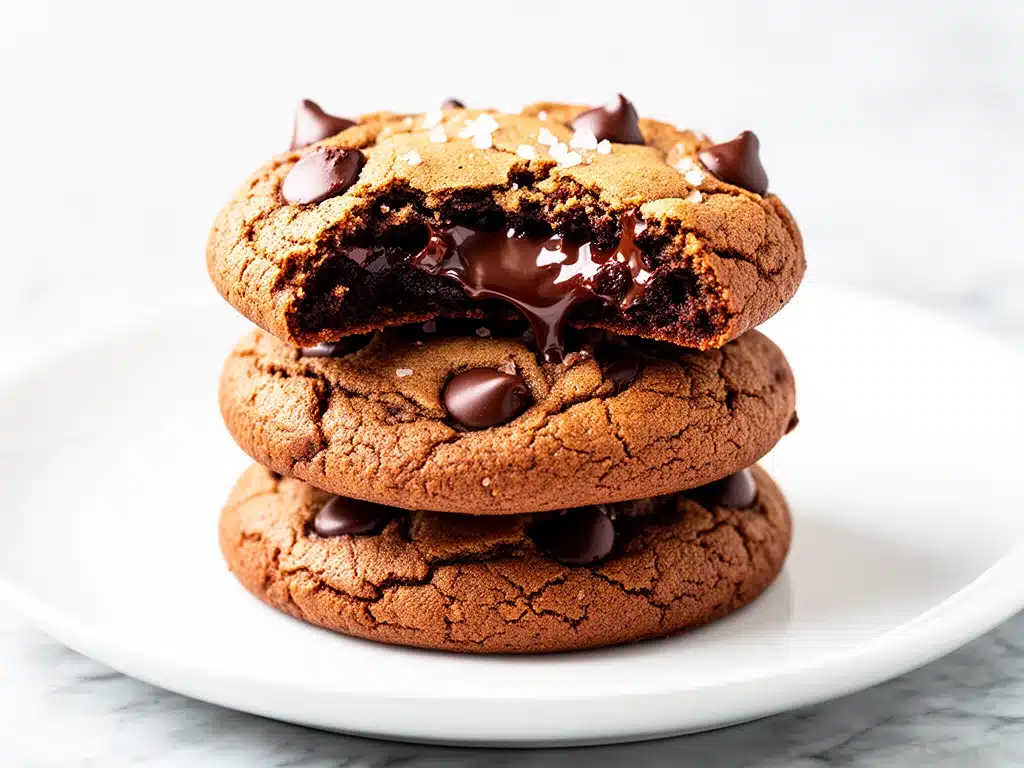
They came out chewy. Dark. Rich. The kind of cookies that crack slightly on top and stay soft in the middle. My kids ate four before I could even plate one. The next day, I got a text from my daughter’s teacher: “These were a hit! Can you share the recipe?”
That was the day I discovered that the best chewy double chocolate chip cookies don’t need a degree in pastry science. They need three ingredients, a willingness to trust your instincts, and maybe a little bit of butter (yes, butter counts as an ingredient, even if you think it’s just fat).
Since then, I’ve made this recipe dozens of times. It’s become my secret weapon for last-minute gatherings, my go-to for “I need comfort food” moments, and the reason my friends think I have my life together. Today, I’m sharing the exact method I use to get that perfect chew, that glossy crackly top, and that intense chocolate flavor that makes everyone ask for seconds. This isn’t just a recipe; it’s a lifesaver.
Why You’ll Love This 3-Ingredient Chewy Double Chocolate Chip Cookies Recipe
Let’s be real. Most cookie recipes are complicated. They call for brown butter, chilled dough, specialized flours, and techniques that feel like they belong in a restaurant kitchen. This chewy double chocolate chip cookies recipe is different. It’s simple. It’s fast. And it works every single time.
Here’s why this recipe has earned a permanent spot in my weekly rotation:
- Stupidly Simple — Seriously, if you can melt butter and mix ingredients, you can make this. I’ve walked my teenage son through it over FaceTime while he was at college. He nailed it on the first try.
- Lightning Fast — 15 minutes from start to finish. No chilling time. No waiting. I make these on weeknights when I get home exhausted and need a win. You can have warm cookies on the table before the pizza delivery guy arrives.
- Pantry-Friendly — You probably have all the ingredients already. Flour, sugar, chocolate chips, butter, eggs. Basic stuff. I keep these stocked specifically so I can make this on a whim when I need a sugar fix.
- Crowd-Pleaser — I’ve served these to picky eaters, chocolate snobs, and people who claim they “don’t like cookies.” Everyone loves them. The texture is what sells it—chewy, not crisp. Crispy cookies are fine, but chewy ones are addictive.
- Perfectly Portioned — These cookies are substantial. Two cookies satisfy a craving without leaving you feeling guilty (or overly stuffed). They’re rich enough to feel indulgent but simple enough to feel like a treat, not a meal.
- Make-Ahead Friendly — The dough freezes beautifully. I often make a batch, freeze the dough balls, and bake them fresh whenever I need a last-minute dessert. It’s like having homemade cookies on tap.
This is my go-to when I need dessert to just work. No complicated techniques, no weird ingredients, just reliable, delicious food that makes everyone happy. If you’re looking for a chewy double chocolate chip cookies recipe that actually delivers on the promise, this is it.
Ingredients You’ll Need
Here’s the best part: you probably have most of this already. I’m not asking you to go to three different stores. This recipe relies on high-quality basics, not exotic imports. The magic happens in the ratio and the technique, not in finding rare items.
For the Dough Base
Unsalted Butter (½ cup / 113g, melted and slightly cooled) — This is your flavor foundation. Use good quality butter. I prefer European-style butters for their higher fat content, which gives a richer taste. Melt it, but let it cool for 5 minutes so it doesn’t cook the eggs when you mix.
Granulated Sugar (½ cup / 100g) — Yes, granulated. Not brown. The granulated sugar helps create that thin, crackly top while keeping the inside chewy. Brown sugar adds moisture and chew, but for this specific texture, granulated is the secret weapon. It spreads less and stays tender.
Egg (1 large) — Room temperature is best. It emulsifies with the butter and sugar more easily. If you’re in a rush, just drop the egg in a bowl of warm water for 5 minutes.
Vanilla Extract (1 teaspoon) — Don’t skip this. It rounds out the chocolate flavor. Use real vanilla, not imitation. The difference is noticeable, especially in a recipe with so few ingredients.
All-Purpose Flour (1 ½ cups / 190g) — This is your structure. Spoon it into the measuring cup and level it off. Don’t scoop directly from the bag, or you’ll pack it down and get dry cookies. I use Gold Medal or King Arthur for consistent results.
Baking Powder (½ teaspoon) — Just a little bit to give them a slight lift without making them cakey. Too much baking powder makes them puffy and dry. We want chewy, not sponge-like.
Salt (½ teaspoon) — Essential. Salt enhances chocolate flavor. Without it, the cookies taste flat. Use fine sea salt or table salt.
For the Chocolate
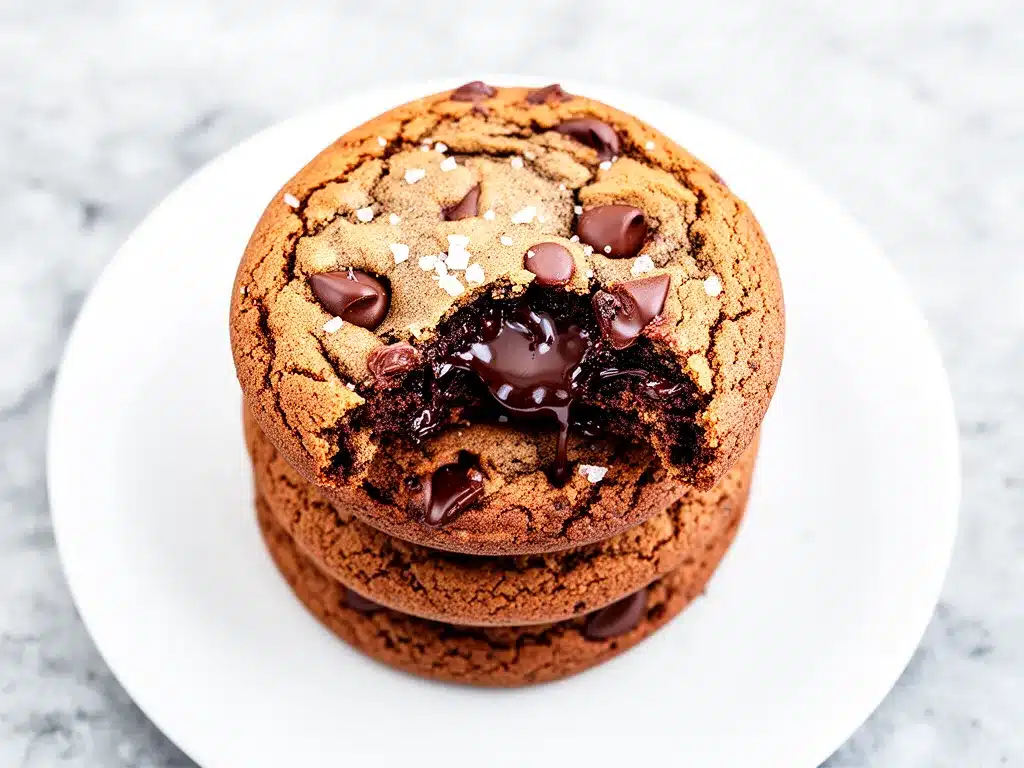
Chocolate Chips (1 cup / 170g) — I use semi-sweet chocolate chips. They balance the sweetness of the sugar. For extra chocolate flavor, I sometimes mix in ¼ cup of chocolate chunks. Chunks melt differently than chips, creating pockets of gooey chocolate.
Cocoa Powder (2 tablespoons / 10g) — This is what makes them “double” chocolate. It adds depth and intensity to the dough. Use unsweetened cocoa powder, not hot cocoa mix. I prefer Dutch-processed cocoa for its darker color and smoother flavor.
Optional: Extra Chocolate Chips — For those who love chocolate overload, sprinkle a few extra chips on top before baking. It looks professional and guarantees a chocolatey bite in every cookie.
Personal Tips
- Brand Recommendations: I always use Ghirardelli semi-sweet chips. They hold their shape well and have a rich flavor. For cocoa powder, Hershey’s Special Dark or Valrhona are excellent choices.
- Shopping Shortcuts: If you’re lazy, buy pre-melted butter (the kind in the little cups). It saves cleanup. But fresh melted butter tastes better.
- Substitutions: No cocoa powder? Skip it, but it won’t be “double” chocolate. No granulated sugar? You can use brown sugar, but the cookies will be cakier and less chewy.
- Storage: Flour and sugar keep indefinitely. Chocolate chips last for months. Butter should be fresh. Check expiration dates if you’ve had ingredients sitting for a while.
Common Questions
- Can I use dark chocolate chips? Yes, but they’re less sweet. You might want to add an extra tablespoon of sugar if you prefer sweeter cookies.
- Where do I find cocoa powder? In the baking aisle, next to the flour. Look for unsweetened cocoa powder, not hot chocolate mix.
- Can I make this ahead? Yes! The dough freezes well. See the storage section below.
Equipment Needed
You don’t need fancy equipment for this. Here’s what I actually use.
Microwave-safe bowl — For melting the butter. I use a glass Pyrex bowl. It’s easy to see the butter melting and doesn’t get too hot to touch.
Medium mixing bowl — A 3-quart bowl works perfectly. I use a ceramic bowl because it’s sturdy and doesn’t slide around.
Fork or whisk — For mixing the wet ingredients. A fork is faster for this small batch. You don’t need an electric mixer.
Spatula — For folding in the chocolate chips. A silicone spatula works best because it scrapes the bowl clean.
Baking sheets — I use two standard 13×18 inch sheets. Dark sheets bake faster than light ones. If you have dark sheets, reduce the baking time by 1-2 minutes.
Parchment paper — I never bake without it. Cleanup is instant, and cookies don’t stick. It also helps with even baking. I buy reusable parchment sheets for eco-friendliness.
Cooling rack — Optional but recommended. Cookies continue to cook on the hot sheet. Transferring them to a rack stops the cooking and keeps them chewy.
Measuring cups and spoons — Pretty standard stuff. Dollar store versions work fine. Accuracy matters here, so don’t eyeball the flour.
Ice cream scoop or cookie scoop — For uniform cookies. I use a small ice cream scoop (about 1.5 tablespoons). It ensures all cookies bake evenly and look professional.
Tool Tips
- Don’t have a cooling rack? Use the upside-down baking sheet. It works just as well.
- I’m obsessed with my silicone spatula — It’s like $5 and makes mixing so much easier. Get one with a stiff edge.
How to Make It: Step-by-Step
Alright, let’s make this! I’m walking you through exactly how I do it, including the little tricks I’ve picked up.
Step 1: Melt the Butter (2 minutes)
Melt the butter in a microwave-safe bowl. Microwave in 30-second intervals, stirring between each, until fully melted. Let it cool for 5 minutes. It should be warm, not hot. If it’s too hot, it will scramble the eggs. This step is crucial for the right texture.
Step 2: Mix Wet Ingredients (2 minutes)
In a medium bowl, whisk the melted butter, granulated sugar, egg, and vanilla extract together. Whisk vigorously for about 30 seconds. The mixture should look glossy and slightly thick. This emulsification is key for the chewy texture. Don’t rush this step.
Step 3: Add Dry Ingredients (1 minute)
Add the flour, baking powder, salt, and cocoa powder to the wet mixture. Fold gently with a spatula until just combined. Do not overmix. Overmixing develops gluten, which makes cookies tough. Stop mixing as soon as you no longer see dry flour. The dough will be thick and slightly sticky.
Step 4: Fold in Chocolate Chips (1 minute)
Stir in the chocolate chips. Reserve a few to sprinkle on top later. Fold until evenly distributed. The dough should be studded with chocolate. If it’s too dry, add a teaspoon of milk. If it’s too wet, add a tablespoon of flour.
Step 5: Scoop and Chill (Optional, 15 minutes)
Scoop the dough onto a parchment-lined baking sheet. Use a small ice cream scoop or two teaspoons. Roll into balls. For extra chew, chill the dough balls in the fridge for 15 minutes. This step is optional but recommended if you have time. Chilling solidifies the fat, which prevents excessive spreading.
Step 6: Bake (10-12 minutes)
Preheat your oven to 350°F (175°C). Bake the cookies for 10-12 minutes. They should look slightly underbaked in the center but set on the edges. The tops should have a slight crackle. Do not overbake. They will continue to cook on the hot sheet. Remove from the oven.
Step 7: Cool and Serve (5 minutes)
Let the cookies cool on the baking sheet for 5 minutes. Then transfer to a wire rack to cool completely. Sprinkle reserved chocolate chips on top while they’re warm. They’ll melt slightly and look beautiful. Serve warm or at room temperature.
Total Time: About 25 minutes (5 minutes prep, 10 minutes bake, 10 minutes cool)
Built-in Troubleshooting
- Dough too sticky? Add a tablespoon of flour. Chill for 15 minutes.
- Cookies too flat? You might have used melted butter that was too hot, or you didn’t chill the dough. Chill next time.
- Cookies too dry? You overbaked them. Take them out when they look slightly underdone. They’ll finish cooking on the sheet.
Visual/Sensory Cues
- Dough: Should be thick, glossy, and studded with chocolate. Not runny.
- Baking: Edges should be set, centers soft. Tops should crackle slightly.
- Finished: Chewy, rich, and intensely chocolatey. Not crisp or cakey.
Expert Tips & Tricks
Here’s everything I’ve learned from making this dozens of times. These tips will save you from my mistakes.
The Game-Changers
Don’t Overbake
This is the #1 tip. Underbaked cookies are chewy. Overbaked cookies are crisp. Take them out when they look slightly underdone. They will continue to cook on the hot sheet. I learned this the hard way with a batch of crisp cookies that tasted like cardboard.
Use Room Temperature Ingredients
Room temperature butter and egg emulsify better. This creates a smoother dough and more even baking. If you forget, microwave the butter briefly and drop the egg in warm water.
Chill the Dough
Chilling for 15 minutes (or up to 24 hours) solidifies the fat. This prevents excessive spreading and concentrates the flavor. I often make the dough the night before and bake it fresh in the morning.
Measure Flour Correctly
Spoon flour into the measuring cup and level it off. Scooping packs it down, leading to dry cookies. I’ve made this mistake before and ended up with rock-hard cookies. Don’t let that be you.
Common Mistakes (and how to avoid them)
Mistake: Cookies spread too much
Fix: Chill the dough. Use melted butter that has cooled. Make sure your baking sheet isn’t too warm.
Mistake: Cookies are cakey
Fix: You used too much flour or overmixed. Measure carefully and fold gently. Also, ensure you’re using granulated sugar, not brown sugar.
Mistake: Cookies are flat
Fix: Your butter might have been too warm. Chill the dough before baking. Also, make sure your baking powder is fresh.
Pro Tricks I’ve Learned
For Extra Chocolate Flavor
Add a tablespoon of espresso powder to the dry ingredients. It enhances the chocolate flavor without making the cookies taste like coffee. I add this to all my chocolate recipes.
For Perfectly Round Cookies
Roll the dough balls between your palms before baking. This creates a smooth surface that bakes into a perfect circle. It’s a small step that makes a big visual difference.
For Restaurant-Quality Finish
Sprinkle flaky sea salt on top after baking. The salt crystals add a nice crunch and enhance the sweetness. It’s a professional touch that’s easy to achieve.
Make-Ahead Strategy
Make the dough ahead and store in the fridge for up to 3 days. Or freeze the dough balls for up to 3 months. Bake straight from frozen, adding 1-2 minutes to the bake time. This is my favorite trick for busy weeks.
Variations & Substitutions
Once you’ve nailed the basic version, here’s how you can mix it up. I’ve tried all of these.
Tested Variations
White Chocolate Chip Version
Swap semi-sweet chips for white chocolate chips. Add ½ teaspoon of almond extract for a fancy twist. My kids love this version—it’s sweeter and milder.
Red Velvet
Add 1 tablespoon of cocoa powder and ½ teaspoon of red food coloring to the dough. Use white chocolate chips. It’s festive and fun for holidays. I make this for Valentine’s Day.
Peanut Butter
Add 2 tablespoons of peanut butter to the wet ingredients. Use chocolate chips as usual. The combo is classic and delicious. My husband prefers this version.
Macadamia Nut
Add ½ cup of chopped macadamia nuts. Use white chocolate chips. It’s tropical and luxurious. I make this for special occasions.
Mini Chocolate Chips
Use mini chocolate chips instead of regular chips. They distribute more evenly and create more chocolatey bites. I use these for smaller, bite-sized cookies.
Dietary Modifications
Gluten-Free
Use a 1:1 gluten-free flour blend. Everything else is naturally gluten-free. I’ve used Bob’s Red Mill and it works great. The texture is slightly different but still chewy.
Dairy-Free
Replace butter with dairy-free butter sticks (like Miyoko’s or Earth Balance). Use dairy-free chocolate chips. It’s not quite the same, but it works. My lactose-intolerant friend requests this version.
Vegan
Replace butter with coconut oil (solid). Replace egg with a flax egg (1 tablespoon ground flax + 3 tablespoons water). Use dairy-free chocolate chips. It’s different but still tasty. I make this for vegan friends.
Different Flavors:
- Mint Chocolate: Add ½ teaspoon peppermint extract and use dark chocolate chips.
- Orange Chocolate: Add zest of 1 orange and use dark chocolate chips.
- Caramel Swirl: Add a small piece of caramel to the center of each cookie before baking.
- Sea Salt Caramel: Drizzle caramel on top after baking and sprinkle with sea salt.
Serving & Storage
How to Serve:
“I usually serve these warm, straight from the oven. They’re best eaten with a glass of cold milk. But here are other ways I’ve enjoyed them:
Side Dishes
- Cold milk (obviously)
- Coffee or hot chocolate
- Ice cream (vanilla or chocolate)
- Fresh berries (to cut the sweetness)
Toppings Bar:
When I have guests, I put out: extra chocolate chips, sea salt, caramel drizzle, whipped cream. Everyone customizes their cookie.
Storage Instructions
Refrigerator:
Store in an airtight container for up to 1 week. They stay chewy if stored properly. I layer them with parchment paper to prevent sticking.
Freezing:
Yes, these freeze well! Freeze the dough balls on a baking sheet, then transfer to a freezer bag. Bake straight from frozen, adding 1-2 minutes to the bake time. Or freeze baked cookies for up to 3 months. Thaw at room temperature.
Reheating:
Best method: Microwave for 10-15 seconds. It makes them warm and gooey. Oven method: 350°F for 5 minutes. Never store in the fridge if you want them chewy—they’ll harden. Ask me how I know.
Pro tip: If leftovers are drying out, add a slice of bread to the container. The cookies will absorb the moisture and stay soft. It’s a classic baker’s trick.
Nutrition Information
I’m not a nutritionist, but here’s the breakdown if you’re tracking.
| Per Cookie (makes 12 cookies) | Amount |
|---|---|
| Calories | 180 |
| Protein | 2g |
| Carbs | 22g |
| Fiber | 1g |
| Sugar | 14g |
| Fat | 10g |
| Saturated Fat | 6g |
| Cholesterol | 25mg |
| Sodium | 120mg |
What’s Good:
– Reasonable calorie count for a treat
– Satisfies sweet cravings
– Easy to portion control
What to Know:
– Higher in sugar and fat due to chocolate and butter
– Contains dairy and gluten
– Moderate sodium
My Take:
“Look, these are cookies. They’re meant to be enjoyed. They’re not a diet food. But they’re way better than store-bought, and you control the ingredients. When I want to make them lighter, I reduce the sugar slightly and add more chocolate chips. But usually? I just enjoy one or two and savor them.”
Final Thoughts
So that’s my go-to chewy double chocolate chip cookies recipe! I’ve probably talked your ear off at this point, but when you make a recipe this often, you have a lot to say about it.
This has saved weeknight desserts more times than I can count. It’s my answer to “what’s for dessert?” when I’m tired, don’t want to go out, and still want something that tastes really good. My kids are happy, my husband’s happy, and I’m happy because I’m not stressed about baking.
Make it yours! Try different add-ins, swap in your favorite chocolate, adjust the sugar. The best recipes are the ones you adapt to your family’s tastes. If you’re looking for more easy, reliable recipes, check out my chewy banana oat breakfast cookies for a healthier option, or my back-to-school ham and cheese pretzel roll-ups for a quick lunch idea.
If you make this, drop a comment and let me know what you think! I love hearing how recipes turn out in your kitchen. And if something doesn’t work, tell me that too—I’m here to help troubleshoot.
Happy baking! And I hope your kitchen smells half as good as mine does right now.
Frequently Asked Questions
Q: Can I use brown sugar instead of granulated sugar?
A: You can, but the cookies will be cakier and less chewy. Brown sugar adds moisture, which leads to a softer, cake-like texture. For that specific chewy, crackly top, granulated sugar is the key. If you must use brown sugar, reduce the amount slightly and chill the dough longer.
Q: Why did my cookies spread too much?
A: Usually means your butter was too warm when you mixed it, or you didn’t chill the dough. Melted butter should be cooled to room temperature before adding to the sugar. Also, ensure your baking sheet isn’t too hot. Chilling the dough for 15-30 minutes helps solidify the fat and prevent spreading.
Q: Can I make this ahead for a party?
A: Absolutely. Make the dough and freeze the balls. Bake them fresh the day of the party. They taste just as good as fresh-baked. I often make the dough a week ahead and bake in batches. It’s a great way to manage time.
Q: Why did my cookies turn out cakey?
A: You likely overmixed the dough, which developed gluten. Or you used too much flour. Measure the flour correctly (spoon and level). Also, ensure you’re using granulated sugar, not brown sugar, for chewy cookies. Overbaking can also make them cakey.
Q: Can I use dark chocolate chips?
A: Yes, but they’re less sweet. You might want to add an extra tablespoon of sugar if you prefer sweeter cookies. Dark chocolate chips also melt differently, creating gooey pockets. I recommend using a mix of semi-sweet and dark chocolate for balance.
Q: How do I store leftovers?
A: Store in an airtight container at room temperature for up to 1 week. Do not refrigerate, as it will harden the cookies. If they start to dry out, add a slice of bread to the container. The cookies will absorb the moisture and stay soft.
Q: Can I freeze the dough?
A: Yes! Scoop the dough into balls and freeze on a baking sheet. Once frozen, transfer to a freezer bag. Bake straight from frozen, adding 1-2 minutes to the bake time. The dough freezes well for up to 3 months.
Pin This Recipe!
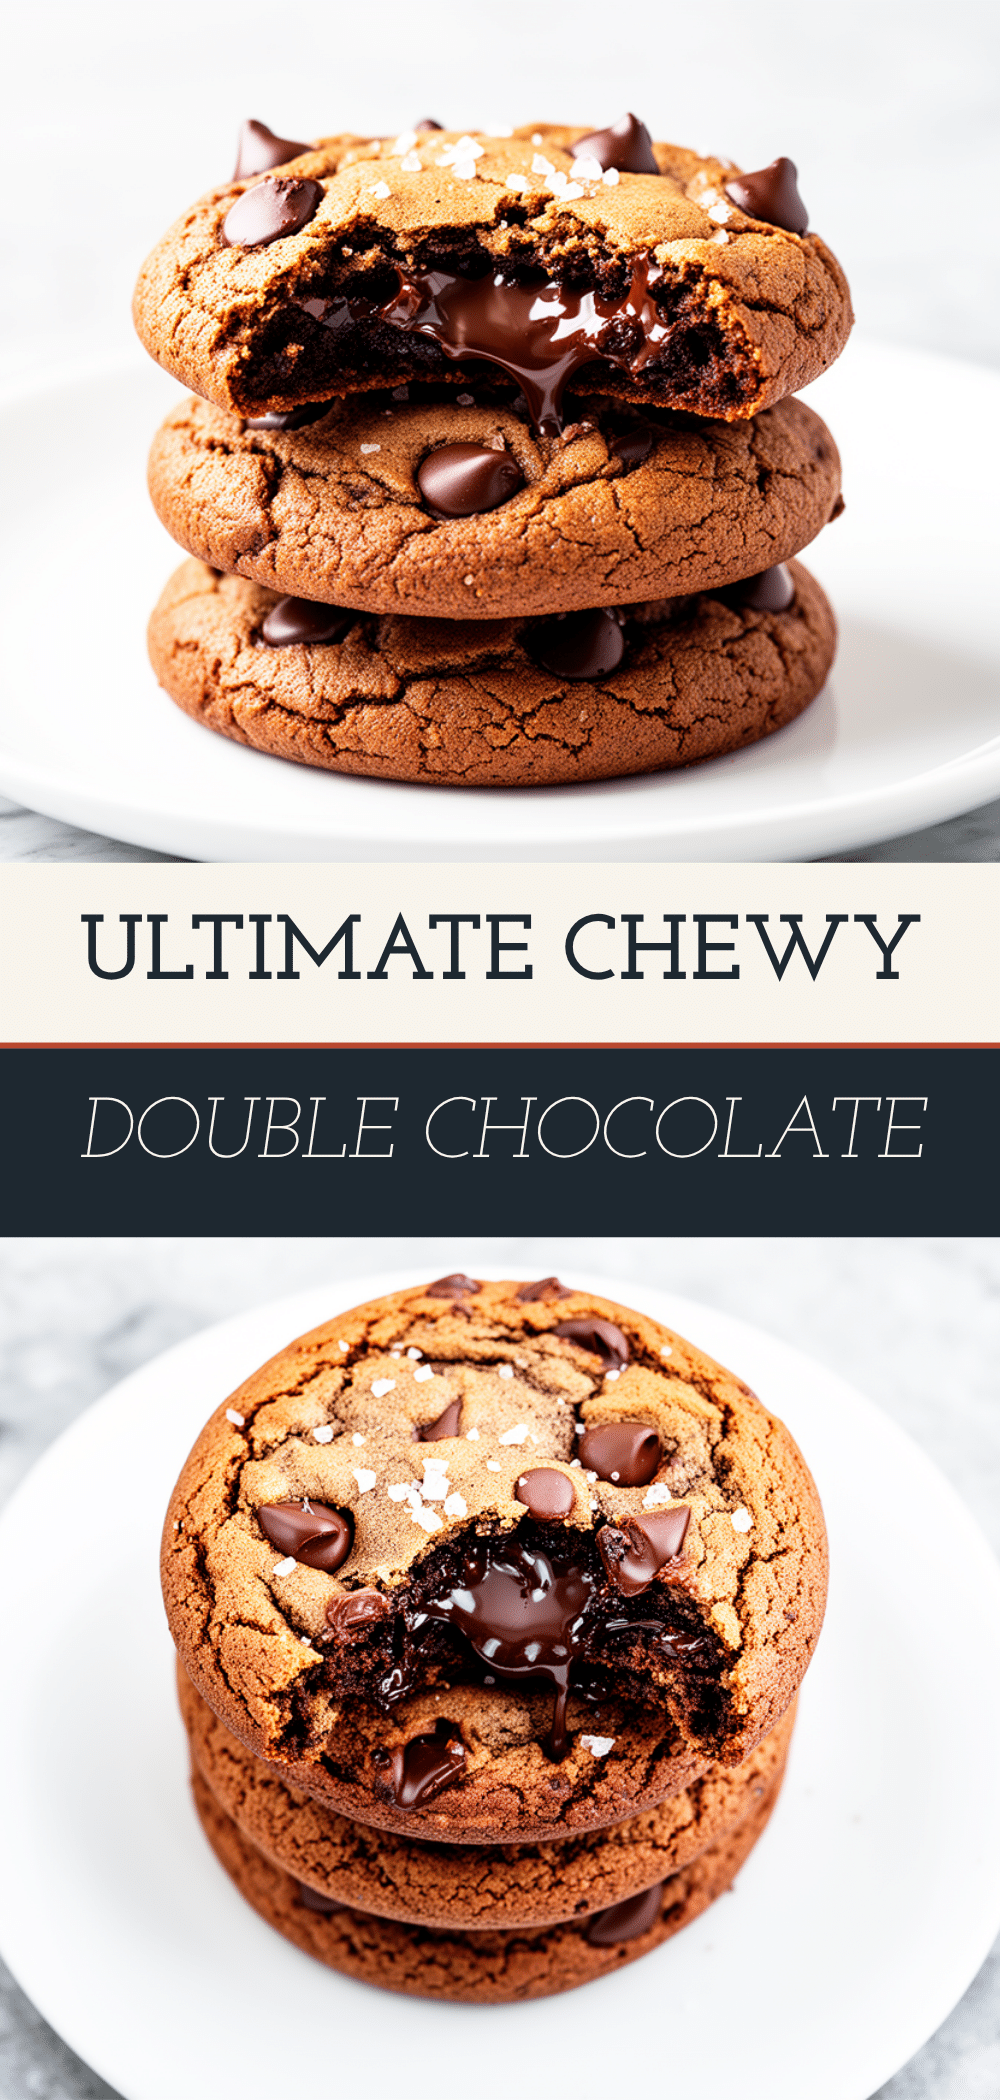
Chewy Double Chocolate Chip Cookies: Best 3-Ingredient Recipe
- Total Time: 25 minutes
- Yield: 12 cookies 1x
Description
A simple, fast, and reliable recipe for chewy double chocolate chip cookies using basic pantry ingredients. These cookies feature a crackly top, soft center, and intense chocolate flavor, ready in under 30 minutes.
Ingredients
- 1/2 cup (113g) unsalted butter, melted and slightly cooled
- 1/2 cup (100g) granulated sugar
- 1 large egg, room temperature
- 1 teaspoon vanilla extract
- 1 1/2 cups (190g) all-purpose flour
- 1/2 teaspoon baking powder
- 1/2 teaspoon salt
- 1 cup (170g) semi-sweet chocolate chips
- 2 tablespoons (10g) unsweetened cocoa powder
Instructions
- Melt the butter in a microwave-safe bowl in 30-second intervals, stirring between each, until fully melted. Let it cool for 5 minutes so it is warm but not hot.
- In a medium mixing bowl, whisk the melted butter, granulated sugar, egg, and vanilla extract vigorously for about 30 seconds until the mixture is glossy and slightly thick.
- Add the flour, baking powder, salt, and cocoa powder to the wet mixture. Fold gently with a spatula until just combined. Do not overmix.
- Stir in the chocolate chips, reserving a few for topping. Fold until evenly distributed.
- Scoop the dough onto a parchment-lined baking sheet using a small ice cream scoop or two teaspoons. Roll into balls. For extra chew, chill the dough balls in the fridge for 15 minutes (optional).
- Preheat oven to 350°F (175°C). Bake the cookies for 10-12 minutes. They should look slightly underbaked in the center but set on the edges.
- Remove from the oven and let the cookies cool on the baking sheet for 5 minutes. Transfer to a wire rack to cool completely. Sprinkle reserved chocolate chips on top while warm.
Notes
Do not overbake; cookies will continue to cook on the hot sheet. Spoon flour into measuring cup and level off for accurate measurement. Dough can be frozen for up to 3 months. Store baked cookies in an airtight container at room temperature for up to 1 week. Do not refrigerate as it will harden the cookies.
- Prep Time: 10 minutes
- Cook Time: 10-12 minutes
- Category: Dessert
- Cuisine: American
Nutrition
- Serving Size: 1 cookie
- Calories: 180
- Sugar: 14
- Sodium: 120
- Fat: 10
- Saturated Fat: 6
- Carbohydrates: 22
- Fiber: 1
- Protein: 2
Keywords: chewy double chocolate chip cookies, 3 ingredient cookies, easy chocolate chip cookies, quick dessert, homemade cookies, double chocolate cookies


