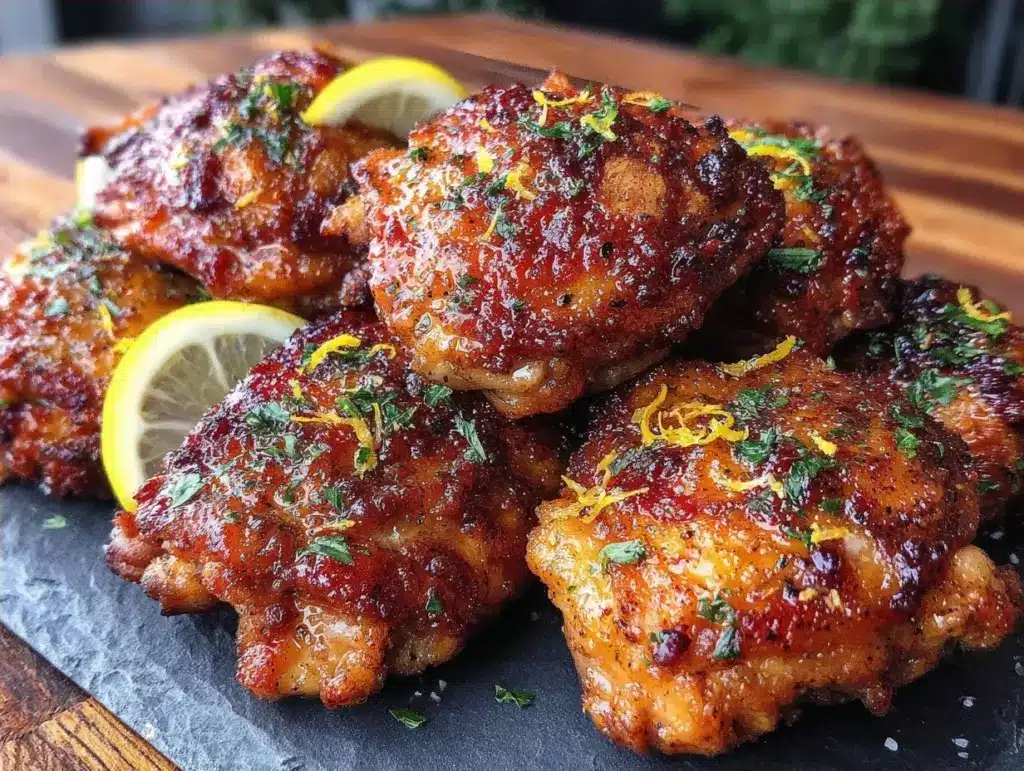
There is a specific kind of magic that happens when you hand a toddler a bowl of flour and say, “You do the sprinkling.” The kitchen goes quiet for exactly four seconds—the “hold your breath” seconds—before chaos erupts in the most delightful way. Flour dusts the counter, a sneeze escapes, and suddenly, the dinner prep has turned into a game. That’s the moment I live for. It’s messy, it’s loud, and it’s the only way I’m getting my kids to eat vegetables (or in this case, chicken thighs).
Last weekend, I was staring at a package of chicken thighs, knowing I needed a dinner that would feed my family but also keep the little ones engaged so I didn’t lose my mind. Oven baking? Too slow, and they’d wander off. Deep frying? Absolutely not, too dangerous with two kids underfoot. That’s when I remembered my air fryer. I’ve made these extra-crispy air fryer chicken thighs dozens of times, but this batch was different. This was the batch where my six-year-old, Leo, insisted on being the “seasoning captain,” and my four-year-old, Mia, got to be the “flipper” (under supervision, of course).
By the time the timer beeped, the kitchen smelled like a high-end restaurant, and the kids were practically vibrating with pride because they had helped make it. These aren’t just crispy chicken thighs; they are a bonding experience. If you’ve been struggling to find a way to get your kids involved in the kitchen without creating a disaster zone, this recipe is your answer. It’s safe, it’s simple, and the result? Well, let’s just say the crunch alone is worth the flour on the floor.
Why You’ll Love This Kid-Friendly Chicken Recipe
I’ve spent years trying to find recipes that bridge the gap between “adult dinner” and “kid participation,” and this air fryer chicken hits the sweet spot every single time. It’s not just about the food (though the food is fantastic). It’s about the process. Here’s why this recipe has earned a permanent spot in our weekly rotation:
- The “Dip and Roll” Factor — This is the big one. The method involves dipping the chicken in egg and then rolling it in the seasoning mix. Kids love tactile activities. It’s basically edible playdough, but with better rewards. My kids spend about ten minutes just playing with the coating, and they don’t even realize they’re learning about textures and mixing.
- Set It and Forget It (Mostly) — Once the chicken is prepped, the air fryer does the heavy lifting. You don’t need to stand over a hot stove, which means you can actually supervise the kids or help them with their homework while the chicken crisps up. It’s about ten minutes of active work and thirty minutes of hands-off cooking.
- Safety First — No splattering oil, no open flames, no sharp knives required for the kids. The air fryer basket is easy for small hands to help load (with help from an adult, obviously), and the machine stays cool on the outside. It’s the perfect tool for teaching independence in the kitchen.
- Crispy Without the Grease — We’re all trying to make slightly healthier choices, right? These thighs get that fried chicken crunch using a fraction of the oil. It feels like a treat, but it’s actually a pretty solid weeknight meal. Plus, the kids love the crunch sound—listen to them go “crunch crunch crunch” while they eat. It’s hilarious.
- Customizable Seasonings — Because the coating is separate, you can let each kid choose their flavor. One might want classic salt and pepper, another might want a little paprika for color, and someone else might want to add some garlic powder. It gives them ownership over their dinner, which somehow makes them eat more of it.
This recipe has saved me from the “I’m bored” complaints more times than I can count. It turns dinner prep into a shared mission. And honestly? The chicken is just so good that even my pickiest eater asks for seconds. It’s a win-win.
Ingredients You’ll Need
Here’s the best part: you probably have most of these ingredients already. The beauty of this recipe is that it relies on pantry staples, so you don’t need a special trip to the grocery store. I’m particular about three things here—the quality of the chicken, the type of flour, and the seasoning blend—and I’ll tell you exactly why.
For the Chicken Base
Chicken thighs, boneless and skinless (2 pounds / 900g) — I always use boneless, skinless thighs for this. They stay juicier than breasts, which is crucial when you’re cooking for kids who might not eat the chicken immediately. If you use breasts, they can dry out. Thighs are forgiving. Look for pieces that are relatively uniform in size so they cook evenly. If they’re huge, cut them in half.
Large eggs (2 large) — These act as the glue for the coating. I crack them into a shallow bowl. If you’re having little ones help, use room temperature eggs if possible—they’re easier to whisk. But honestly, cold eggs work fine too. Don’t skip the whisking! You want the egg fully beaten before the chicken touches it.
For the Crispy Coating
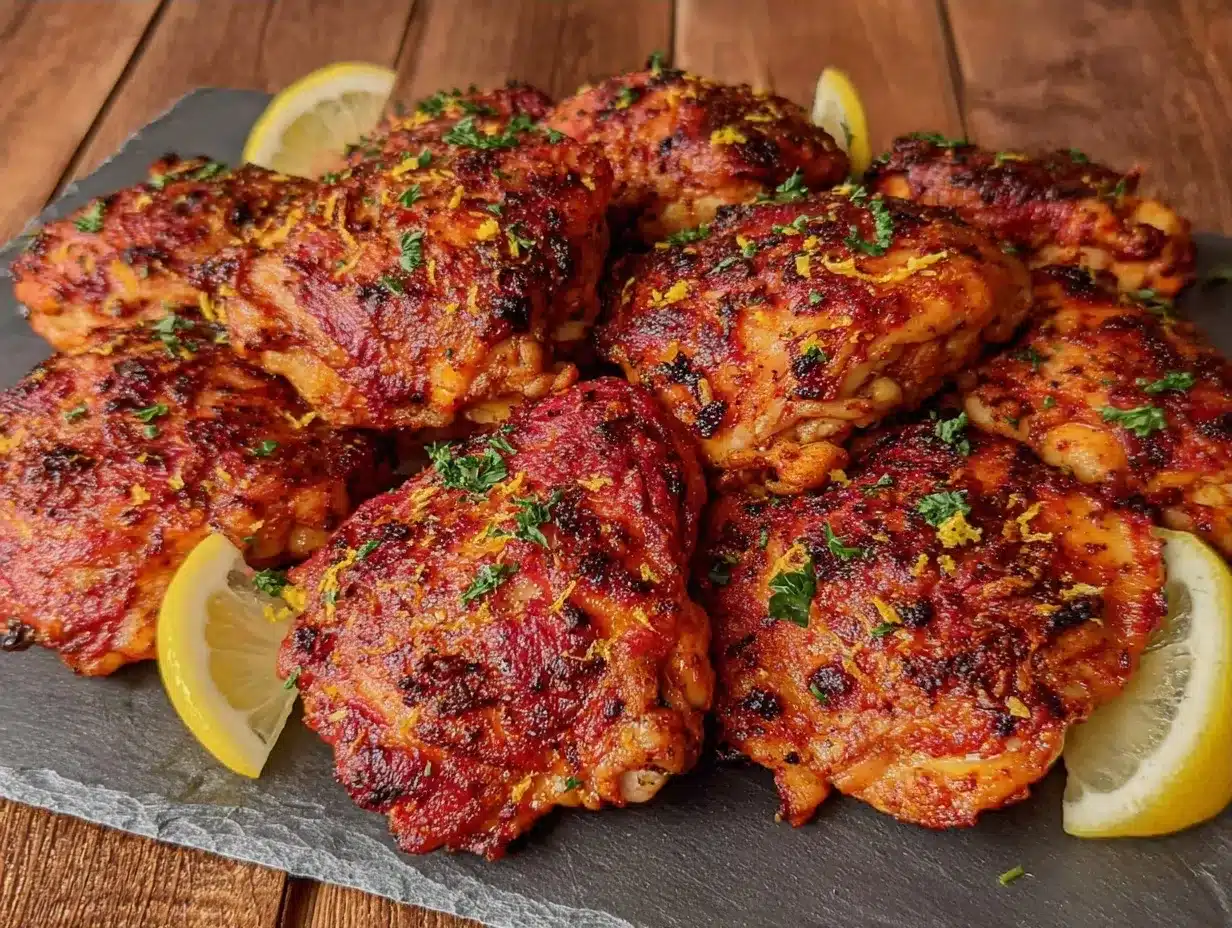
All-purpose flour (1 cup / 120g) — This is the base of the crunch. I use regular all-purpose flour. Some people try almond flour, but it doesn’t get the same crispy texture in the air fryer. The flour creates a barrier that seals in the moisture and crisps up beautifully. Make sure it’s sifted if it’s clumpy—nobody likes a flour lump in their crunch.
Garlic powder (1 teaspoon) — This adds a savory depth that kids usually love. It’s milder than fresh garlic, which is perfect for little palates. I use the jarred kind because it’s convenient, but if you have fresh garlic you’re willing to mince, that works too. Just know it will be a stronger flavor.
Onion powder (1 teaspoon) — Complements the garlic perfectly. It adds a subtle sweetness that balances the savory notes. If you’re sensitive to onion powder, you can skip it, but I highly recommend keeping it in. It’s a flavor booster that you won’t even taste as “onion.”
Paprika (1 teaspoon) — This is for color and a hint of smokiness. I use regular sweet paprika, not hot. It turns that flour mixture a gorgeous golden-orange color, which makes the chicken look way more appetizing to kids. If you want a little kick, swap half for cayenne, but start mild.
Salt (1 teaspoon) — Don’t skimp on the salt! It enhances all the other flavors. I use kosher salt because it’s easier to measure. If you use table salt, you might want to reduce the amount slightly.
Black pepper (½ teaspoon) — Freshly cracked is best, but pre-ground works in a pinch. It adds a little heat and complexity.
Oil (1 tablespoon) — I use olive oil or avocado oil. You don’t need much—just enough to brush on the chicken before it goes into the air fryer. This helps the coating brown and crisp up. Spray oil works too, but I find brushing it gives more even coverage.
Optional Add-Ins for Flavor
Dried parsley (1 teaspoon) — For a pop of green color. Kids notice color, and green makes the chicken look “fresher.” It’s subtle, but it helps.
Cayenne pepper (¼ teaspoon) — Only if your kids like spice. I keep this separate so I can add it to my portion if I want a kick, but leave it out for the kids.
Equipment Needed
You don’t need fancy equipment for this. Here’s what I actually use, and what you can substitute if you don’t have it.
Air Fryer — Obviously, this is the star of the show. I use a 5.8-quart basket style. If you have a smaller one, you might need to cook in batches. Don’t overcrowd the basket! The chicken needs space for air to circulate. If it’s packed tight, it’ll steam instead of crisp. I’ve learned this the hard way with a sad, soggy batch of chicken.
Shallow Bowls — You’ll need two shallow bowls. One for the egg wash, one for the flour mixture. I use pie dishes or wide salad bowls. Tall bowls are annoying for dipping. Wide bowls let the kids easily roll the chicken around.
Whisk — For beating the eggs. A fork works, but a whisk is faster and ensures no egg whites are left stringy.
Tongs — For flipping the chicken in the air fryer. Metal tongs are best because they’re sturdy. If you’re using plastic tongs, make sure they’re heat-resistant. I use tongs to handle the chicken so I don’t touch it with my hands (hygiene!).
Paper Towels — To pat the chicken dry before seasoning. This step is crucial. Wet chicken doesn’t get crispy. I always pat it dry, even if I think it’s dry. Trust me.
Baking Sheet (Optional) — I like to place the coated chicken on a baking sheet before putting it in the air fryer basket. It makes transferring easier and keeps my counter clean. If you don’t have one, just use a plate.
Pastry Brush or Spray Bottle — For applying the oil. I use a silicone pastry brush because it’s easy to clean. A spray bottle works too, but you might use more oil than necessary.
How to Make It: Step-by-Step
Alright, let’s make this! I’m walking you through exactly how I do it, including the little tricks I’ve picked up to make it kid-friendly and successful.
Step 1: Prep the Chicken (5 minutes)
Start by patting the chicken thighs dry with paper towels. This is the most important step for crispiness. Moisture is the enemy of crunch. Lay the chicken out on a clean surface or plate. If the pieces are very large, cut them in half so they’re roughly the same size. Uniform pieces cook evenly, which means no undercooked or overcooked bits.
Kid Task: Let your kids help pat the chicken dry. They can use the paper towels to “clean” the chicken. It’s a simple task that gets them involved and teaches them about food safety (removing excess moisture).
Step 2: Set Up the Dipping Station (5 minutes)
Set up your two shallow bowls. In the first bowl, crack the eggs and whisk them until they’re smooth and yellow. In the second bowl, mix the flour, garlic powder, onion powder, paprika, salt, and pepper. Whisk the flour mixture too, so there are no lumps of seasoning.
Kid Task: This is the best part. Let your kids whisk the eggs. They’ll love the bright yellow color. Then, let them “sprinkle” the seasonings into the flour. Ask them to guess how much salt or paprika to add. It’s a great way to teach them about measuring and flavor. Just supervise to make sure they don’t dump the whole jar in!
Step 3: Dip and Roll (10 minutes)
Take a piece of chicken and dip it into the egg wash, making sure it’s fully coated. Let any excess egg drip off. Then, place it into the flour mixture. Roll it around, pressing the flour onto the chicken so it sticks. You want a good, even coating. It doesn’t need to be thick, just enough to create that crispy shell.
Kid Task: Let your kids do the dipping and rolling. It’s messy, but it’s fun. They’ll get flour on their hands, and that’s okay. Just have a damp cloth nearby. Encourage them to press the flour on firmly. It’s like making little chicken nuggets, but fancier.
Step 4: Preheat the Air Fryer (3 minutes)
While the chicken is being coated, preheat your air fryer to 375°F (190°C). Most air fryers take about 3 minutes to preheat. If yours doesn’t have a preheat setting, just run it empty for 3 minutes at 375°F. This ensures the chicken starts cooking immediately and gets crispy.
Kid Task: Kids can help press the buttons on the air fryer. Let them set the temperature and time. It gives them a sense of control and anticipation.
Step 5: Cook the Chicken (15-18 minutes)
Lightly brush or spray the air fryer basket with oil. Place the coated chicken pieces in the basket in a single layer. Do not overlap them! If you have too much chicken, cook in batches. Overcrowding leads to steaming, not crisping. Brush the tops of the chicken with a little more oil.
Cook for 15-18 minutes, flipping the chicken halfway through. Flip them at the 8-minute mark. Use tongs to turn them over so the other side gets crispy. The chicken is done when the internal temperature reaches 165°F (74°C) and the coating is golden brown and crispy.
Kid Task: Let your kids help place the chicken in the basket. They can count the pieces as they go. When it’s time to flip, an adult should do the flipping, but kids can watch and cheer when the chicken turns golden. They’ll love seeing the color change.
Step 6: Rest and Serve (5 minutes)
Once the chicken is done, transfer it to a plate and let it rest for 5 minutes. This allows the juices to redistribute, keeping the chicken moist. While it rests, you can wipe down the counter and help your kids wash their hands. Then, serve the chicken hot.
Kid Task: Let your kids help arrange the chicken on the serving plate. They can garnish it with parsley if you’re using it. Then, they can help set the table or call the family to dinner.
Expert Tips & Tricks
Here’s everything I’ve learned from making this dozens of times. These tips will save you from my mistakes and ensure your chicken is extra crispy every time.
- Don’t Skip the Pat Dry Step — I know it seems tedious, but wet chicken = soggy chicken. Pat it dry, then pat it dry again. I’ve made the mistake of skipping this, and the result was disappointing. Don’t be me.
- Use a Thermometer — Chicken thighs can look done but still be undercooked in the center. A meat thermometer is your best friend. Insert it into the thickest part of the thigh. If it reads 165°F, you’re good. If not, give it another 2-3 minutes.
- Don’t Overcrowd the Basket — Air needs to circulate around the chicken. If the pieces are touching, they’ll steam. Cook in batches if necessary. It’s worth the extra time for the crispiness.
- Flip Halfway — This ensures even cooking and crispiness on both sides. If you don’t flip, one side will be soggy. Set a timer for the flip so you don’t forget.
- Let It Rest — Resting the chicken for 5 minutes after cooking keeps it juicy. If you cut into it immediately, the juices run out, and the chicken dries up. Patience pays off.
- Customize the Seasoning — If your kids are picky, let them choose their seasoning. One might want extra paprika for color, another might want more garlic powder. It’s a great way to get them excited about their dinner.
Also, if you’re looking for other ways to involve your kids in the kitchen, check out my high-protein chicken and broccoli meal prep bowl. It’s another great recipe for family involvement!
Variations & Substitutions
Once you’ve nailed the basic version, here’s how you can mix it up. I’ve tried all of these, and they’re all winners.
- Spicy Version — Add cayenne pepper or red pepper flakes to the flour mixture. Start with ¼ teaspoon and adjust to taste. My husband loves it spicy, so I add a pinch to my portion.
- Herb-Crusted — Add dried oregano, thyme, or rosemary to the flour mixture. It adds a nice aromatic flavor that pairs well with the garlic and onion.
- Gluten-Free — Use gluten-free flour instead of all-purpose flour. It works just as well, though the texture might be slightly different. I’ve used Bob’s Red Mill gluten-free flour, and it’s great.
- Dairy-Free — This recipe is naturally dairy-free, so no changes needed! Just make sure your seasonings don’t contain hidden dairy (some pre-mixed seasonings do).
- Veggie Side — Serve with roasted broccoli or green beans. I often make sheet pan dinners like this to get veggies in the oven at the same time as the chicken. It’s a complete meal in one pan.
Serving & Storage
How to Serve
I usually serve this straight from the air fryer basket onto a platter. It looks rustic and stays warm. But here are other ways I’ve enjoyed it:
- With Mashed Potatoes — Classic comfort food. The crispy chicken over creamy mashed potatoes is heaven.
- With Roasted Vegetables — Broccoli, carrots, or asparagus. Roast them in the oven while the chicken cooks.
- With Rice — Steamed rice or fried rice. The crispy chicken pairs well with simple rice.
- As a Salad Topper — Chop the chicken and put it over a green salad. It’s a lighter option.
Storage Instructions
Refrigerator: Store leftovers in an airtight container for up to 3 days. The chicken will stay moist if stored properly.
Reheating: The best way to reheat is in the air fryer. Place the chicken in the basket at 375°F for 3-4 minutes. It will regain its crispiness. Avoid the microwave, as it will make the coating soggy.
Freezing: You can freeze the cooked chicken for up to 3 months. Let it cool completely, then store in a freezer-safe bag. Thaw in the fridge overnight and reheat in the air fryer.
Nutrition Information
I’m not a nutritionist, but here’s the breakdown if you’re tracking. Per serving (based on 4 servings):
- Calories: 320
- Protein: 30g
- Carbs: 15g
- Fiber: 1g
- Sugar: 1g
- Fat: 18g
- Saturated Fat: 4g
- Cholesterol: 120mg
- Sodium: 450mg
Look, this is comfort food. It’s not a diet recipe. But it’s way better than takeout, costs less, and I know exactly what’s in it. When I want to make it lighter, I use less oil and skip the salt. But usually? I just eat a reasonable portion and enjoy it.
Final Thoughts
So that’s my go-to extra-crispy air fryer chicken thighs! I’ve probably talked your ear off at this point, but when you make a recipe this often, you have a lot to say about it. This has saved weeknight dinners more times than I can count. It’s my answer to “what’s for dinner” when I’m tired, don’t want takeout, and still want something that tastes really good. My kids are happy, my husband’s happy, and I’m happy because I’m not stressed about cooking.
Make it yours! Try different add-ins, swap in your favorite vegetables, adjust the garlic (though more is always better in my opinion). The best recipes are the ones you adapt to your family’s tastes. If you make this, drop a comment and let me know what you think! I love hearing how recipes turn out in your kitchen. And if something doesn’t work, tell me that too—I’m here to help troubleshoot.
Happy cooking! And I hope your kitchen smells half as good as mine does right now.
Frequently Asked Questions
Can I use chicken breasts instead of thighs?
You can, but thighs are juicier and more forgiving. Breasts can dry out quickly in the air fryer. If you use breasts, reduce the cooking time by 2-3 minutes and check the temperature frequently. I stick with thighs for this reason.
Why did my chicken come out soggy?
Usually, this means the chicken was too wet before coating, or the basket was overcrowded. Make sure to pat the chicken dry and don’t overlap the pieces. Also, ensure your air fryer is preheated.
Can I make this ahead for a dinner party?
You can prep the chicken ahead and store it in the fridge. Just coat it right before cooking. If you cook it ahead, reheat it in the air fryer to regain crispiness. It won’t be quite as good as fresh, but it’s close.
Can I use panko breadcrumbs instead of flour?
You can, but the texture will be different. Panko is crunchier but might not stick as well. I’ve tried it, and it works, but flour gives a more even, crispy coating. If you use panko, press it firmly onto the chicken.
How do I know when the chicken is done?
Use a meat thermometer. Insert it into the thickest part of the thigh. If it reads 165°F, it’s done. The coating should also be golden brown and crispy.
Can I double this recipe?
Absolutely! Double everything and cook in batches. Don’t overcrowd the basket. I do this when I’m meal-prepping or feeding a crowd. Just make sure your air fryer is big enough.
Pin This Recipe!


Extra-Crispy Air Fryer Chicken Thighs: Kid-Friendly Recipe
- Total Time: 38 minutes
- Yield: 4 servings 1x
Description
A simple, kid-friendly air fryer chicken thigh recipe that involves children in the prep process through dipping and rolling, resulting in extra-crispy, juicy chicken without the grease of deep frying.
Ingredients
- 2 pounds boneless, skinless chicken thighs
- 2 large eggs
- 1 cup all-purpose flour
- 1 teaspoon garlic powder
- 1 teaspoon onion powder
- 1 teaspoon paprika
- 1 teaspoon salt
- 1/2 teaspoon black pepper
- 1 tablespoon olive oil or avocado oil
- 1 teaspoon dried parsley (optional)
- 1/4 teaspoon cayenne pepper (optional)
Instructions
- Pat the chicken thighs dry with paper towels to remove excess moisture. If pieces are large, cut them in half to ensure uniform size.
- Set up two shallow bowls. In the first, whisk the eggs until smooth. In the second, mix the flour, garlic powder, onion powder, paprika, salt, and pepper.
- Dip each piece of chicken into the egg wash, allowing excess to drip off, then roll it in the flour mixture, pressing firmly to coat evenly.
- Preheat the air fryer to 375°F (190°C) for about 3 minutes.
- Lightly brush or spray the air fryer basket with oil. Place chicken pieces in a single layer without overlapping. Brush tops with a little more oil.
- Cook for 15-18 minutes, flipping the chicken halfway through (at the 8-minute mark).
- Chicken is done when the internal temperature reaches 165°F (74°C) and the coating is golden brown and crispy.
- Transfer chicken to a plate and let rest for 5 minutes before serving.
Notes
Patting the chicken dry is crucial for crispiness. Do not overcrowd the air fryer basket; cook in batches if necessary. Let the chicken rest for 5 minutes after cooking to keep it juicy. For a spicy version, add cayenne pepper to the flour mixture.
- Prep Time: 20 minutes
- Cook Time: 18 minutes
- Category: Main Course
- Cuisine: American
Nutrition
- Serving Size: 1 serving (approx. 1
- Calories: 320
- Sugar: 1
- Sodium: 450
- Fat: 18
- Saturated Fat: 4
- Carbohydrates: 15
- Fiber: 1
- Protein: 30
Keywords: air fryer chicken, kid-friendly recipes, crispy chicken thighs, healthy dinner, family cooking, air fryer recipes, easy chicken dinner