I still remember the morning I almost gave up on “healthy” breakfasts entirely. It was a Tuesday, the kind where the alarm goes off at 6:00 AM, the coffee hasn’t kicked in, and my three kids are already arguing over who gets the blue cup. I needed something fast, something that wouldn’t leave them hangry by 10:00 AM, and definitely something that didn’t involve me scrubbing a greasy pan for twenty minutes while trying to stay awake.
I had just bought a tub of cottage cheese on a whim, thinking I’d use it in a lasagna later. Instead, I dumped it in the blender with some eggs, oats, and a banana, hit puree, and hoped for the best. What came out of the skillet wasn’t just edible—it was fluffy. It was golden. It was the kind of pancake my picky seven-year-old actually asked for seconds of. And the best part? He had no idea it was packed with protein and hidden veggies.
That accidental Tuesday morning birthed my obsession with Fluffy Cottage Cheese Protein Pancakes. I’ve made these at least fifty times since then. I’ve tested them with almond flour, with whole wheat, with just eggs, and with protein powder. I’ve burned a few batches (don’t judge me, early mornings are tough). But I finally nailed the ratio that gives you that cake-like fluffiness without the rubbery texture that usually plagues high-protein breakfasts.
This isn’t just a diet food. This is a family staple. It’s the reason I don’t stress about breakfast anymore. It’s 5 ingredients, 10 minutes, and results in a stack of pancakes that taste like a treat but fuel you like a powerhouse meal. If you’ve been searching for a way to get more protein into your morning without sacrificing taste or texture, you’re going to love this.
Why You’ll Love This Recipe
Let’s be real: most “healthy” pancakes are dry, dense, or taste like you’re eating a protein bar disguised as breakfast. These Fluffy Cottage Cheese Protein Pancakes break that mold completely. Here’s why they’ve earned a permanent spot in our weekly rotation:
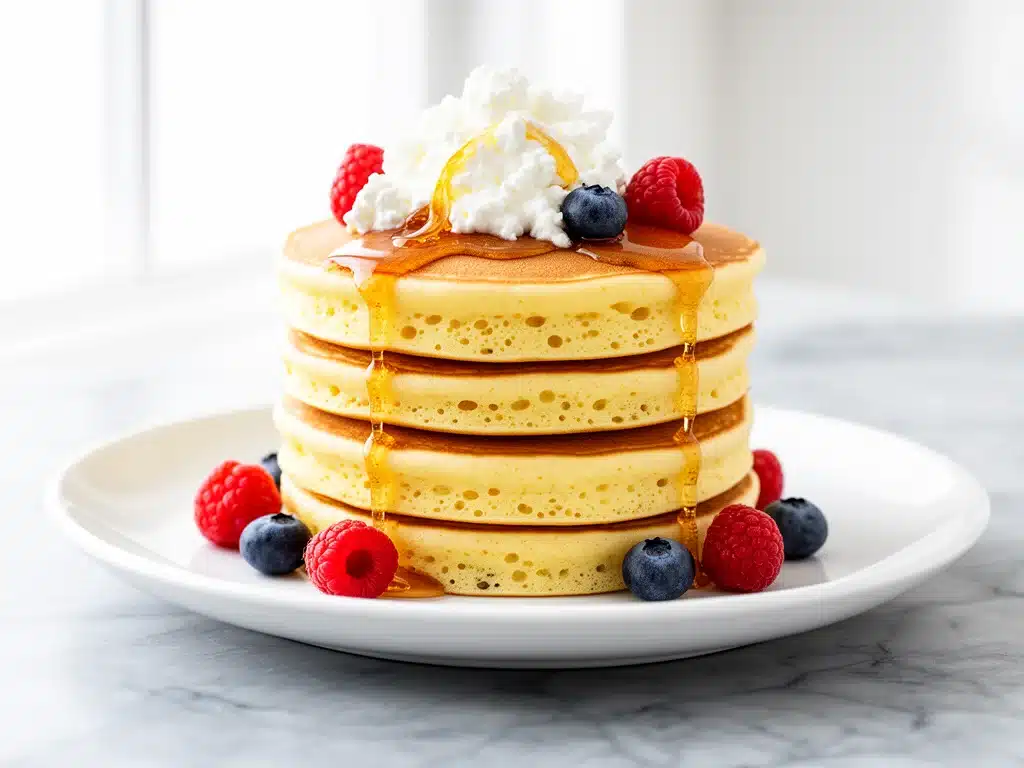
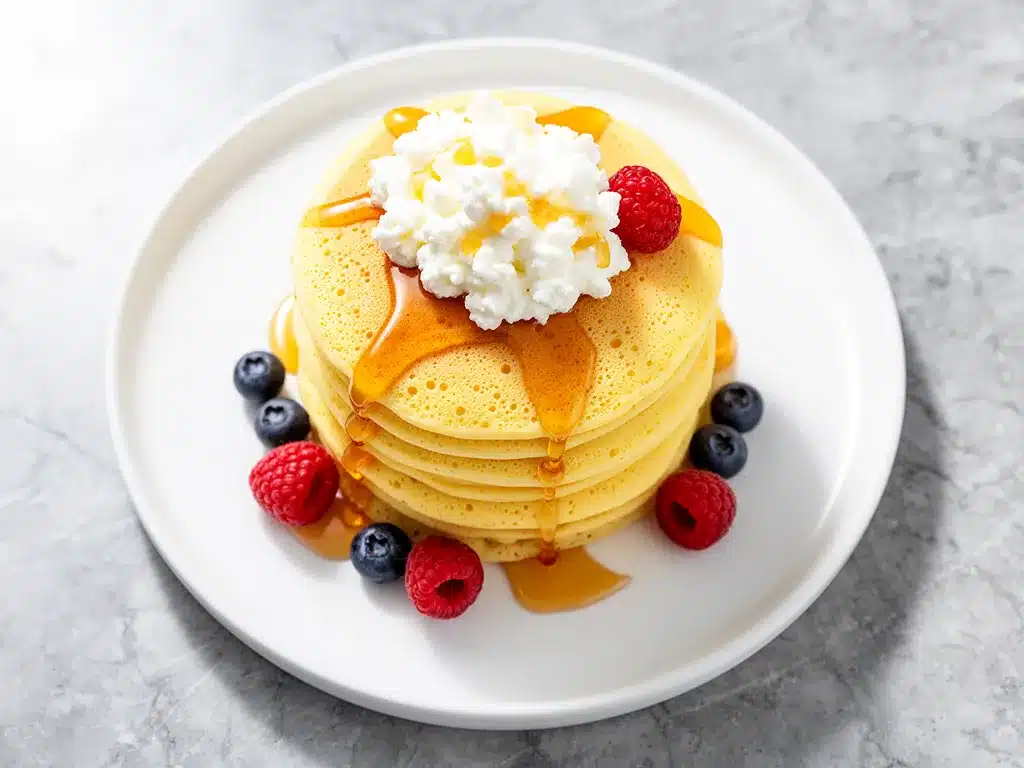
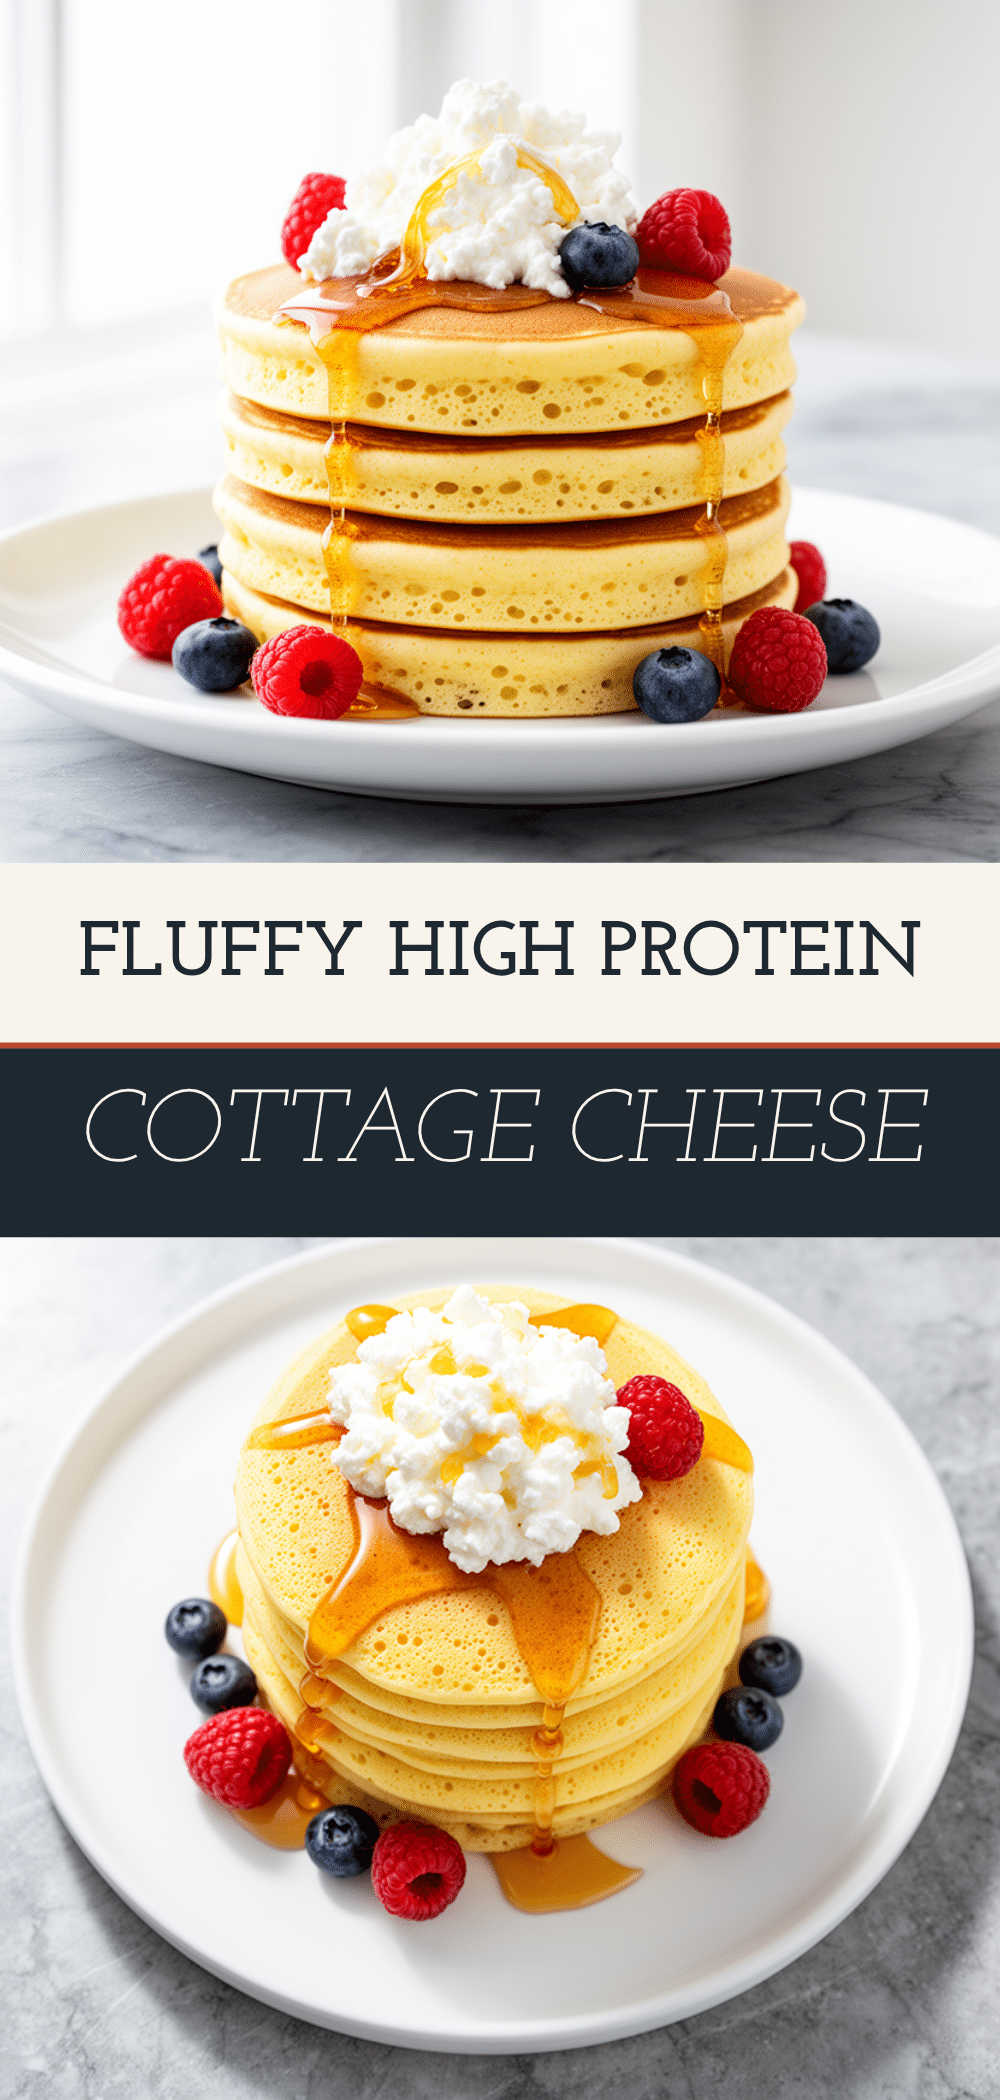
- They’re Actually Fluffy — I’m not talking about flat, rubbery discs. These rise. They have air pockets. They have that tender crumb you expect from a classic buttermilk pancake. The secret? Blending the cottage cheese creates a smooth batter that cooks up light and airy, not heavy.
- 5 Ingredients, Zero Fuss — You don’t need a pantry full of obscure superfoods. You need cottage cheese, eggs, oats (or oat flour), a sweetener, and a banana. That’s it. If you can throw these in a blender, you can make this recipe. It’s perfect for lazy Sundays or rushed school mornings.
- Protein-Packed Energy — A typical pancake gives you a sugar crash. These give you sustained energy. With roughly 20-25 grams of protein per serving (depending on your cottage cheese brand), they keep my kids full until lunch. No mid-morning grazing, no hangry meltdowns.
- Kid-Approved Taste — The banana and a touch of maple syrup mask the “eggy” taste that sometimes comes with high-protein recipes. My kids think they’re getting a special treat. I know they’re getting a nutrient-dense start to their day. Win-win.
- Meal Prep Friendly — These freeze beautifully. I make a double batch on Sunday, freeze them in a single layer, and then grab two or three in the morning. They reheat in the toaster in 60 seconds and are still soft and warm. It’s a game-changer for busy weeks.
This recipe saved our mornings. It turned breakfast from a battle into a happy moment. And once you try them, I think your family will crave them too.
Ingredients You’ll Need
Here’s the magic list. I’m keeping this simple because that’s the beauty of these Fluffy Cottage Cheese Protein Pancakes. You likely have everything in your kitchen right now.
The Base
Cottage Cheese (1 cup / 225g) — This is the star. Use full-fat for the richest, fluffiest texture. Low-fat works, but the pancakes will be slightly less tender. Blend it until completely smooth; you shouldn’t see any curds in the final batter. I love brand like Good Culture or Daisy, but any smooth brand works.
Eggs (2 large) — These provide structure and help the pancakes set. Room temperature eggs blend more evenly, but cold ones work fine if you’re in a rush. Don’t skip them—they’re what holds this together without gluten.
Old-Fashioned Oats (½ cup / 40g) — I use rolled oats, not quick oats. Quick oats can make the batter too mushy. If you’re gluten-free, make sure your oats are certified GF. You’ll blend these into flour, so the texture of the raw oat matters less than you’d think, but rolled oats give the best result.
The Flavor & Sweetness
Ripe Banana (1 medium) — This adds natural sweetness and moisture. The riper the banana (lots of brown spots), the sweeter the pancakes will be. If you’re not a banana fan, you can swap this for ¼ cup of unsweetened applesauce, but the banana really helps with the fluffiness.
Maple Syrup (1 tablespoon) — Just a little bit to sweeten the batter itself. You can use honey or agave if you prefer, but maple syrup adds a nice depth of flavor. Save the good stuff for topping!
The Leavening & Seasoning
Baking Powder (1 teaspoon) — This is crucial for the rise. Make sure yours isn’t expired! I keep a fresh tin in my pantry specifically for baking. Old baking powder = flat pancakes.
Vanilla Extract (1 teaspoon) — Pure vanilla, not imitation. It rounds out the flavors and makes the pancakes taste like a dessert rather than a health food.
Salt (a pinch) — Never skip the salt. It enhances the sweetness and balances the savory notes from the cheese. It’s the secret ingredient that makes everything taste “complete.”
Optional Add-ins:
I sometimes add a scoop of vanilla protein powder for an extra protein boost (reduce oats to ¼ cup if you do this). You can also fold in a handful of blueberries or chocolate chips after mixing, but keep it simple for the base recipe.
Equipment Needed
You don’t need anything fancy. In fact, the fewer tools, the better. Here’s what I actually use:
Blender — I use a standard countertop blender. A high-speed one like a Vitamix works great, but a regular blender works perfectly fine. You just need to blend long enough to get it silky smooth. An immersion blender works too, but you might need to scrape the sides more often.
Non-Stick Skillet or Griddle — A 10-inch non-stick skillet is my go-to. It heats evenly and nothing sticks. If you’re making a big batch, a flat electric griddle is faster. Avoid cast iron unless you’re very experienced with temperature control—it can be tricky to get the perfect golden brown without burning.
Spatula — A thin, flexible silicone spatula is best for flipping. It slides under the delicate pancakes easily.
Mixing Bowl (Optional) — I usually blend directly in the blender jar and then pour into a bowl with a spout. It makes pouring the batter into the pan much mess-free. If you skip this, just pour carefully from the blender.
Measuring Cups and Spoons — Standard stuff. Precision helps with the baking powder ratio, so don’t eyeball it too much.
How to Make It: Step-by-Step
Alright, let’s make these Fluffy Cottage Cheese Protein Pancakes. It’s incredibly simple, but there are a few tricks to ensure they don’t turn out flat or rubbery.
Step 1: Blend the Batter (2 minutes)
Add the cottage cheese, eggs, oats, banana, maple syrup, vanilla, baking powder, and salt to your blender. Blend on high for about 45-60 seconds. You want a completely smooth, pourable batter. There should be no visible oat chunks or cottage cheese curds left. If you’re using a weaker blender, you might need to scrape down the sides and blend again. The batter should look like thick pancake batter, not a smoothie.
Step 2: Rest the Batter (5 minutes)
This is the step most people skip, but it’s vital. Let the batter sit in the bowl for 5 minutes. The oats need time to absorb the liquid. If you cook immediately, the oats will stay crunchy and the pancakes will be dense. After 5 minutes, the batter will thicken slightly. If it’s too thick to pour, add a splash of milk (dairy or non-dairy) to thin it out.
Step 3: Heat the Pan (2 minutes)
Heat your non-stick skillet over medium-low heat. This is key. High heat will burn the outside before the inside cooks. I test the heat by sprinkling a few drops of water on the pan—if they sizzle and evaporate quickly, it’s ready. Lightly grease the pan with butter or coconut oil. You don’t need much; just a thin coating.
Step 4: Pour and Cook (3-4 minutes per batch)
Pour about ¼ cup of batter for each pancake. Don’t crowd the pan. Cook for 2-3 minutes. Look for bubbles forming on the surface and popping. The edges should look set and matte, not shiny and wet. This is your signal that it’s time to flip. If the bubbles don’t form, give it another 30 seconds.
Step 5: Flip and Finish (1-2 minutes)
Flip the pancake gently. The second side cooks much faster—about 1-2 minutes. You’re looking for a golden brown color. If they’re browning too fast, lower the heat. Remove from the pan and keep warm in a 200°F (95°C) oven while you cook the rest.
Step 6: Serve
Serve immediately with fresh fruit, a drizzle of maple syrup, or a dollop of Greek yogurt. These are best fresh, but leftovers are great too.
Total Time: About 15 minutes (5 minutes prep, 10 minutes cook time)
Expert Tips & Tricks
Here’s everything I’ve learned from making these dozens of times. These tips will save you from my early mistakes.
Blend Until Silky
I can’t stress this enough. If you can feel curds in your batter, your pancakes will be lumpy. Blend for a full minute if you have to. The cottage cheese needs to emulsify with the eggs to create that fluffy texture.
Control the Heat
Medium-low is your friend. I know it’s tempting to crank it up to cook faster, but these pancakes are delicate. High heat leads to burnt bottoms and raw centers. If you’re unsure, start lower and increase slightly if they’re not cooking through.
Don’t Overmix
Once you’ve blended, don’t stir the batter excessively. Overmixing can develop the oats’ starch and make the pancakes gummy. Just pour and go.
Use the Right Spoon
Use a ¼ cup measuring cup to portion your batter. This ensures uniform pancakes that cook evenly. Eyeballing leads to small ones that burn and large ones that don’t cook through.
Keep Them Warm
Place finished pancakes on a wire rack in a low oven (200°F) while you cook the rest. This keeps them warm without steaming them (which makes them soggy) or putting them on a plate where they trap steam and get mushy.
Variations & Substitutions
Once you’ve nailed the basic version, here’s how you can mix it up. I’ve tried all of these.
Protein Power Version
Add 1 scoop of vanilla or unflavored whey/casein protein powder. Reduce the oats to ¼ cup to compensate for the added dryness. Add an extra splash of milk if the batter gets too thick. This bumps the protein up to 30g+ per serving.
Banana-Free Version
If you don’t like banana, use ¼ cup unsweetened applesauce or 2 tablespoons of honey/maple syrup. You’ll lose a bit of moisture, so add a splash more milk.
Blueberry Lemon
Fold in ½ cup fresh or frozen blueberries and the zest of one lemon into the batter. Bright, fresh, and delicious.
Chocolate Chip
Add ¼ cup mini chocolate chips. My kids go crazy for these. Use dark chocolate chips for less sugar.
Dietary Modifications
Gluten-Free: Use certified gluten-free oats. Everything else is naturally GF.
Dairy-Free: Use dairy-free cottage cheese (like almond or soy-based) and maple syrup. Note: The texture might be slightly less fluffy, but still tasty.
Egg-Free: This is tricky because eggs provide structure. You can try using flax eggs (1 tbsp ground flax + 3 tbsp water per egg), but the pancakes will be more delicate and harder to flip. I recommend using them for a “pancake bowl” with toppings rather than flipping them.
Serving & Storage
These Fluffy Cottage Cheese Protein Pancakes are versatile and great for any occasion.
How to Serve
I serve these with a medley of fresh berries, a drizzle of pure maple syrup, and a dollop of Greek yogurt. For a savory twist, top with avocado slices and a fried egg. They’re great for breakfast, brunch, or even a post-workout snack.
Storage Instructions
Refrigerator: Store leftovers in an airtight container for up to 3 days. They’ll firm up in the fridge, so reheating is necessary.
Freezing: These freeze exceptionally well. Let them cool completely, then lay them in a single layer on a baking sheet to flash freeze for 1 hour. Once frozen, transfer to a freezer bag. They’ll last for up to 2 months. Reheat in a toaster or oven for best texture.
Reheating: Microwave for 30-60 seconds (they can get rubbery if overdone). Toaster or oven (350°F for 5-10 minutes) is best for restoring that fluffy texture.
Nutrition Information
I’m not a nutritionist, but here’s the breakdown if you’re tracking. This is per serving (based on 4 pancakes made from the full recipe).
Per Serving:
- Calories: 280
- Protein: 22g
- Carbs: 32g
- Fiber: 3g
- Sugar: 12g (natural from banana and maple syrup)
- Fat: 8g
- Sodium: 250mg
These are nutrient-dense and filling. The protein content helps stabilize blood sugar, making them a great start to the day. If you add protein powder, adjust accordingly.
Final Thoughts
So that’s my secret to fluffy, high-protein pancakes that the whole family loves. I’ve probably talked your ear off at this point, but when you find a recipe that solves a daily problem (like breakfast stress), you want to share it.
These Fluffy Cottage Cheese Protein Pancakes have saved our mornings. They’re easy, nutritious, and genuinely delicious. Make them yours! Try different toppings, swap in different fruits, or add a scoop of protein powder. The best recipes are the ones you adapt to your family’s tastes.
If you make this, drop a comment and let me know what you think! I love hearing how recipes turn out in your kitchen. And if something doesn’t work, tell me that too—I’m here to help troubleshoot.
Happy cooking! And I hope your kitchen smells half as good as mine does right now.
Frequently Asked Questions
Can I use protein powder instead of cottage cheese?
Not directly. Cottage cheese provides moisture and structure. Protein powder is dry. If you want to add protein powder, add it to the cottage cheese batter, not as a replacement. Replacing cottage cheese with just protein powder will result in dry, crumbly pancakes.
Why are my pancakes dense or rubbery?
This usually happens for two reasons: 1) You didn’t blend the cottage cheese long enough, leaving curds that don’t emulsify. 2) You cooked them on too high heat, causing the outside to set before the inside could rise. Blend longer and cook on medium-low.
Can I make these ahead for meal prep?
Yes! These are excellent for meal prep. Make a batch on Sunday, freeze them individually, and reheat in the toaster during the week. They hold up much better than regular pancakes in the freezer.
Do I have to use oats?
You can use almond flour or oat flour as a substitute. If using almond flour, reduce the amount slightly as it’s denser. If using pre-made oat flour, you can use the same amount. The texture will be slightly different but still delicious.
How do I keep them from sticking?
Make sure your pan is properly heated and lightly greased. If you’re using a non-stick pan, you shouldn’t need much butter. If they’re still sticking, your pan might be too cool. Let it heat up a bit more before pouring the batter.
Can I freeze the batter?
No. The baking powder will lose its effectiveness once mixed with the wet ingredients. It’s best to make the batter fresh and cook immediately. The cooked pancakes freeze well, but the raw batter does not.
Pin This Recipe!
Fluffy Cottage Cheese Protein Pancakes
- Total Time: 15 minutes
- Yield: 4 servings 1x
Description
A simple, 5-ingredient breakfast recipe that blends cottage cheese, eggs, oats, banana, and maple syrup to create high-protein, fluffy pancakes that are kid-approved and meal-prep friendly.
Ingredients
- 1 cup (225g) cottage cheese (full-fat recommended)
- 2 large eggs
- ½ cup (40g) old-fashioned rolled oats
- 1 medium ripe banana
- 1 tablespoon maple syrup
- 1 teaspoon baking powder
- 1 teaspoon vanilla extract
- 1 pinch salt
- Butter or coconut oil for greasing the pan
Instructions
- Add cottage cheese, eggs, oats, banana, maple syrup, vanilla, baking powder, and salt to a blender.
- Blend on high for 45-60 seconds until the batter is completely smooth with no visible curds or oat chunks.
- Let the batter rest in the bowl for 5 minutes to allow the oats to absorb liquid and thicken slightly. Add a splash of milk if too thick.
- Heat a non-stick skillet or griddle over medium-low heat and lightly grease with butter or oil.
- Pour about ¼ cup of batter per pancake into the pan. Cook for 2-3 minutes until bubbles form on the surface and edges look set.
- Flip gently and cook for another 1-2 minutes until golden brown.
- Transfer finished pancakes to a wire rack in a 200°F (95°C) oven to keep warm while cooking the rest.
- Serve immediately with fresh fruit, maple syrup, or Greek yogurt.
Notes
Blend the cottage cheese until completely smooth to ensure fluffiness. Cook on medium-low heat to prevent burning the outside before the inside is done. These pancakes freeze well; flash freeze on a baking sheet before storing in a freezer bag for up to 2 months.
- Prep Time: 5 minutes
- Cook Time: 10 minutes
- Category: Breakfast
- Cuisine: American
Nutrition
- Serving Size: 4 pancakes
- Calories: 280
- Sugar: 12
- Sodium: 250
- Fat: 8
- Saturated Fat: 3
- Carbohydrates: 32
- Fiber: 3
- Protein: 22
Keywords: cottage cheese pancakes, protein pancakes, healthy breakfast, gluten-free option, meal prep, family favorite, fluffy pancakes, high protein