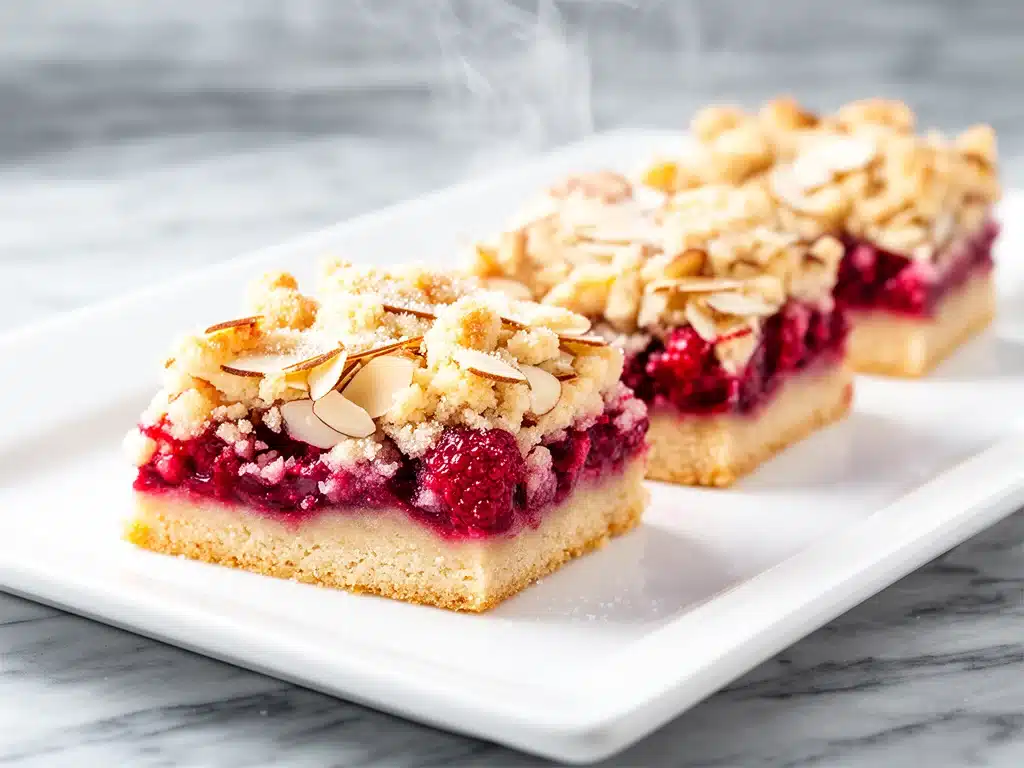
It was 7:00 AM on a Saturday, and the house was quiet in that specific, heavy way it only gets when everyone else is still asleep. I was standing in my kitchen, staring into the pantry like it held the secrets to the universe, trying to decide what to make for breakfast. Usually, this is the moment where I grab the coffee maker and call it a morning. But this Saturday, I had a surplus of fresh raspberries—my neighbor had just handed me a pint from her backyard bush—and a half-empty bag of sliced almonds that needed to be used before they went rancid.
I wasn’t planning to bake. I was planning to survive the day. But then I remembered a crumble recipe my aunt used to make, one that involved way too much butter and not enough patience. I decided to tweak it. I wanted something portable. Something that wouldn’t get messy in the car seat or the backseat of my minivan. Something that tasted like a fancy coffee shop treat but could be thrown together in 20 minutes while the coffee brewed.
That morning, I threw together Raspberry Almond Crumble Bars. I didn’t measure the almond extract at first. I just guessed. And when I took that first bite, still warm from the oven, with the tart juice of the raspberries cutting through the sweet, buttery crunch of the topping, I knew I had struck gold. These bars are sticky, tangy, and incredibly addictive. I’ve made them at least fifteen times since that Saturday morning, tweaking the ratio of almond to raspberry until it was perfect.
They are the ultimate weekend baking project. Not because they’re complicated—because they’re not. But because they fill the house with a smell that makes everyone wake up and ask what’s cooking. They are my answer to “what if we don’t have time for pancakes but we still want something special?” If you’re looking for easy weekend breakfast ideas that don’t involve a flipping pan, these bars are about to become your new best friend. Let me show you how to make them.
Why You’ll Love These Raspberry Almond Crumble Bars
Look, I’m a busy parent with a full-time job and a laundry pile that grows faster than I can fold it. I don’t have time for complex desserts that require a stand mixer and three hours of chilling. These bars fit into my life perfectly. Here’s why they’ve earned a permanent spot in my weekend rotation:
One-Bowl Simplicity — Seriously. I mix the crust, the filling, and the topping in the same bowl. Well, okay, I use the same bowl for the crust and topping, and a separate small one for the jam layer, but you get my point. Minimal cleanup means more time relaxing. I’ve made these while my toddler played with blocks nearby, and I didn’t miss a beat.
The Perfect Tart-Sweet Balance — Most crumbles are just sugar and fruit. These have the sharp, bright punch of fresh raspberries balanced by the nutty, rich flavor of almonds. It’s not cloying. It’s sophisticated but tastes like comfort food. My husband, who claims he “doesn’t like sweet breakfast foods,” asks for seconds of these.
Make-Ahead Magic — I bake them Friday night. They cool completely. I cover them with plastic wrap and leave them on the counter. By Saturday morning, they’re ready to grab. They actually taste better after sitting for a few hours because the flavors meld together. It’s the ultimate meal prep win for desserts.
Portable and Mess-Free — Unlike a slice of pie or a bowl of oatmeal, these bars don’t require a fork. They’re sturdy enough to be packed in a lunchbox or thrown in a bag for a road trip. I cut them into neat squares, and they hold up for days. No soggy bottoms, no falling apart.
Budget-Friendly — Raspberries can be pricey, but you don’t need a lot for the filling. The base is just flour, butter, sugar, and almonds—ingredients I already keep stocked. It’s cheaper than buying a box of pastries at the grocery store and infinitely fresher.
This is my go-to when I want to feel like a talented baker without actually having to be one. No fancy techniques, no weird ingredients you have to hunt down at 9 PM on a Friday. Just reliable, delicious food that makes the weekend feel a little more special.
Ingredients You’ll Need
Here’s the best part: you probably have most of this already in your pantry. This isn’t a recipe that requires a special trip to the store. I’m particular about two things here—the quality of the butter and the freshness of the almonds—and I’ll tell you exactly why.
For the Crust and Topping:
Unsalted Butter (1 cup / 225g, cold and cubed) — This is non-negotiable. I use high-quality European-style butter if I can find it, but standard unsalted works fine. The key is that it must be cold. Cold butter creates those flaky, crumbly bits. If you melt it, you get a cookie, not a crumble. I cube it straight from the fridge.
All-Purpose Flour (2 cups / 250g) — The standard stuff. I don’t bother with cake flour or bread flour here. All-purpose gives the perfect structure—crisp on the outside, tender on the inside.
Granulated Sugar (½ cup / 100g) — Just regular white sugar. It provides sweetness and helps the topping caramelize slightly in the oven.
Sliced Almonds (1 cup / 100g) — This is where the magic happens. Use raw, sliced almonds. Toasting them lightly in a dry pan for 3 minutes before adding them to the mix adds a deep, nutty aroma. I always toast mine. It’s an extra minute that pays off tenfold.
Almond Extract (1 teaspoon) — Do not skip this. It amplifies the almond flavor without making it taste like marzipan. A little goes a long way. If you don’t have almond extract, you can skip it, but the bars will be less complex.
Salt (½ teaspoon) — Just a pinch to balance the sweetness. Don’t underestimate salt.
For the Filling:
Fresh Raspberries (3 cups / about 350g) — Fresh is best. They have that bright, juicy pop. Frozen raspberries work in a pinch, but they release a lot of water and can make the bars soggy. If you use frozen, thaw them and drain the liquid first. I prefer fresh for this recipe.
Granulated Sugar (2 tablespoons / 25g) — To sweeten the berries just enough. Raspberries are tart, so they need a little help.
Cornstarch (1 tablespoon) — This is the thickener. It prevents the bars from becoming a raspberry soup. It binds the juices as they cook.
Lemon Juice (1 teaspoon) — Just a splash. It brightens up the raspberry flavor and cuts the richness of the butter. It’s a chef’s trick that makes a huge difference.
Optional Garnish: Powdered sugar for dusting. I love a light dusting right before serving. It looks fancy and adds a tiny bit of extra sweetness.
Pro Tip: I keep a bag of sliced almonds in the pantry specifically for this. I buy them in bulk and store them in the fridge to keep them fresh. It saves me the hassle of buying a small bag every time I crave these bars.
Equipment Needed
You don’t need fancy equipment for this. Here’s what I actually use in my home kitchen.
8×8 Inch Baking Pan — This is the perfect size. It gives you enough depth for the layers but not so much that the bars are towering. Line it with parchment paper for easy removal. I use the “overhang” method, leaving extra paper on the sides so I can lift the whole block out of the pan once it’s cooled.
Mixing Bowls — Two medium bowls. One for the crust mixture, one for tossing the berries. I like having separate bowls so I don’t have to wash in between steps.
Fork or Pastry Cutter — To cut the butter into the flour. I use a fork because it’s faster than a pastry cutter for this amount, and I don’t mind if the crumbles are a bit rustic. They’re supposed to look homemade.
Measuring Cups and Spoons — Standard stuff. Dollar store versions work fine for dry ingredients.
Spatula — For spreading the berry mixture. A silicone spatula is best because it scrapes the bowl clean.
Wire Cooling Rack — Essential. Letting the bars cool completely in the pan is a mistake. They’ll steam and get soggy. I transfer them to a rack to cool. It takes patience, but the texture is worth it.
Sharp Knife — For cutting the bars. I use a chef’s knife. Clean cuts are easier if you wipe the knife between cuts, especially since the filling is sticky.
How to Make It: Step-by-Step
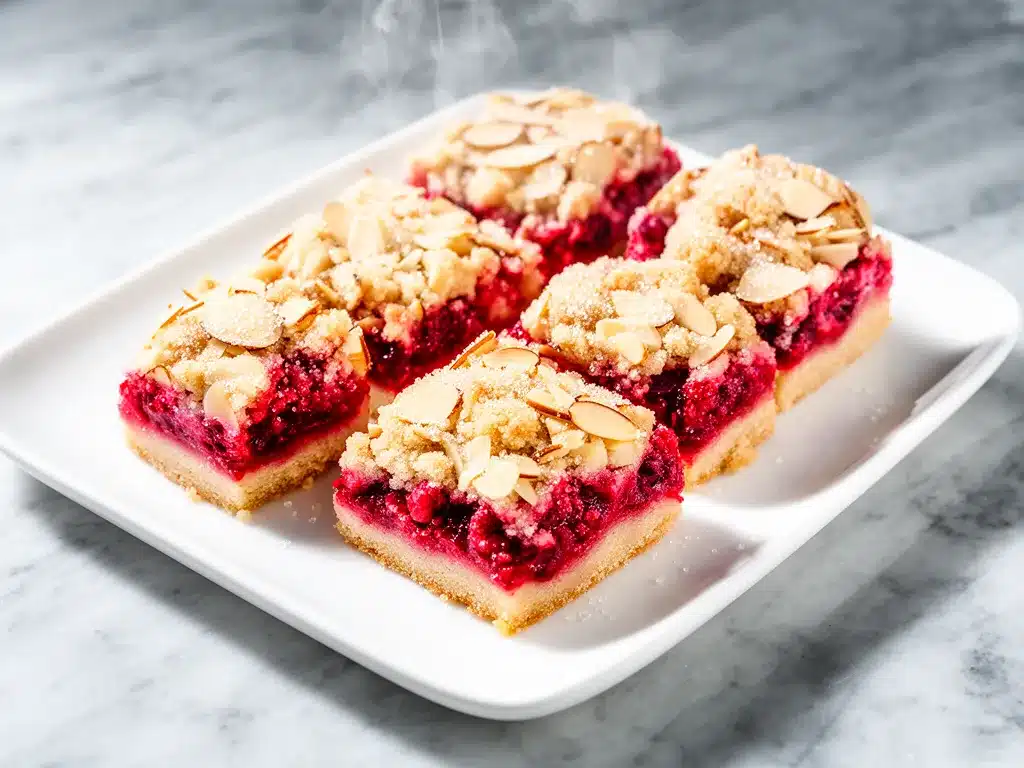
Alright, let’s make these! I’m walking you through exactly how I do it, including the little tricks I’ve picked up over the years. This is straightforward, but there are a few key moments to watch.
Step 1: Prep Your Pan and Oven (5 minutes)
Preheat your oven to 350°F (175°C). This needs to be hot enough to crisp the almonds and bake the crust, but not so hot that it burns the sugar. Line your 8×8 inch baking pan with parchment paper. I like to leave a little overhang on the long sides—it’s like a handle for lifting the bars out later. Grease the parchment lightly with butter or cooking spray.
Step 2: Make the Crumb Topping (5 minutes)
In a medium bowl, combine the flour, sugar, salt, and toasted sliced almonds. Toss them together with a fork. Add the cold, cubed butter. Use your fork or a pastry cutter to work the butter into the flour mixture. You’re looking for a coarse, sandy texture with some pea-sized chunks of butter remaining. Don’t overmix! If it becomes a solid dough ball, you’ve worked it too much. Those chunks of butter are what create the flaky, crumbly texture.
Step 3: Press the Base Layer (2 minutes)
Take about two-thirds of the crumb mixture. Press it firmly and evenly into the bottom of your prepared pan. Use the bottom of a measuring cup or your fingers to pack it down tight. This is your crust. It needs to be solid so it doesn’t fall apart when you cut the bars. Set the remaining one-third of the crumb mixture aside in a bowl. This will be your topping.
Step 4: Prepare the Raspberry Filling (3 minutes)
In a separate bowl, gently toss the fresh raspberries with the 2 tablespoons of sugar, cornstarch, and lemon juice. Be gentle! You don’t want to crush the berries. Just coat them evenly. The cornstarch will thicken the juices as they cook, and the lemon juice will keep the flavor bright.
Step 5: Assemble the Bars (2 minutes)
Pour the raspberry mixture over the pressed crust in the pan. Spread it out evenly with a spatula. Then, take the reserved one-third of the crumb mixture and sprinkle it generously over the top. Don’t worry about making it perfectly even. Rustic is good. The berries will bubble up through the crumbs, and that’s part of the charm.
Step 6: Bake Until Golden (35-40 minutes)
Place the pan in the preheated oven. Bake for 35-40 minutes. You’ll know it’s done when the topping is golden brown and the raspberry filling is bubbling vigorously around the edges. If the edges start to get too dark, you can tent the pan with foil for the last 10 minutes. I usually check at 35 minutes. The smell will be incredible—nutty, sweet, and fruity.
Step 7: Cool Completely (1 hour)
This is the hardest part. Remove the pan from the oven and place it on a wire cooling rack. Let it cool completely in the pan. At least one hour. If you cut it while it’s warm, it will be a mess. The filling needs to set. I usually let it cool for two hours if I can wait that long. Once cooled, lift the bars out of the pan using the parchment paper overhang, place them on a cutting board, and slice into squares.
Total Time: About 1 hour 15 minutes (including cooling). Active time is only 15 minutes.
Expert Tips & Tricks
Here’s everything I’ve learned from making these dozens of times. These tips will save you from my mistakes.
Toast Your Almonds
I cannot stress this enough. Raw almonds are fine, but toasted almonds have a depth of flavor that raw ones just don’t have. Put them in a dry skillet over medium heat for 3-4 minutes, shaking the pan frequently, until they smell nutty and look slightly darker. Let them cool before adding to the flour. It’s a tiny step that makes the bars taste expensive.
Keep the Butter Cold
If your butter is too soft, the crumble will spread into a flat, cake-like layer instead of staying crumbly. Cube the butter and put it back in the fridge for 10 minutes before mixing if it’s looking soft. Cold butter = flaky crumbs. Warm butter = sad cookie.
Don’t Skip the Cornstarch
Raspberries release a lot of water. If you don’t use cornstarch, your bars will be a juicy mess that slides off the fork. The cornstarch binds the juices and creates a jam-like consistency that holds the bar together.
Cool Completely
I know you want to eat them now. I do too. But if you cut them warm, they will crumble apart. The structure needs time to set. If you’re impatient, chill them in the fridge for 30 minutes after cooling to room temperature. It helps them firm up faster.
Use Parchment Paper
I’ve tried greasing the pan without parchment, and it’s a nightmare. The sugar caramelizes and sticks. Parchment paper makes cleanup a breeze and allows you to lift the whole block out for clean cutting.
Variations & Substitutions
Once you’ve nailed the basic version, here’s how you can mix it up. I’ve tried all of these, and they all work.
Blueberry Lemon Version
Swap raspberries for blueberries and add 1 tablespoon of lemon zest to the sugar. It’s a classic combination that tastes like summer. The blueberries are less juicy than raspberries, so you might need an extra teaspoon of cornstarch.
Strawberry Basil
Use fresh strawberries (halved) and add 1 tablespoon of chopped fresh basil to the filling. It sounds weird, but the basil adds a peppery, savory note that pairs beautifully with strawberries. It’s surprisingly sophisticated.
Gluten-Free Option
Use a 1:1 gluten-free flour blend instead of all-purpose flour. The texture will be slightly more tender, but it works great. I’ve used Bob’s Red Mill and King Arthur, and both work well.
Dairy-Free Version
Replace the butter with a high-quality vegan butter stick (like Miyoko’s or Earth Balance). Make sure it’s cold and cubed just like regular butter. The flavor is very similar, and the texture holds up.
Nut-Free Alternative
If you have nut allergies, simply omit the sliced almonds and add ¼ cup of rolled oats to the crumb mixture. It adds a nice chewy texture and keeps the crumble substantial. You can also add a teaspoon of vanilla extract for extra flavor.
Double Batch
I often double this recipe to freeze bars for later. Just use a 9×13 inch pan and double the ingredients. The baking time stays roughly the same, but keep an eye on it. They freeze beautifully for up to 3 months.
Serving & Storage
How to serve these bars to make them look as good as they taste.
How to Serve:
I serve these at room temperature. They don’t need to be warm. They look best dusted lightly with powdered sugar right before serving. It adds a touch of elegance that makes them perfect for brunch or a coffee date. I pair them with a strong cup of black coffee or a latte. They also go well with simple lunch ideas if you’re packing them for work.
Side Dishes:
These bars are sweet enough on their own, but if you want a savory contrast, serve them with a side of scrambled eggs or bacon. Or keep it simple with a green salad. They’re versatile.
Storage Instructions:
Room Temperature: Store in an airtight container at room temperature for up to 3 days. They stay fresh and moist.
Refrigerator: Store in the fridge for up to 5 days. The texture will firm up, but they’ll still be delicious. Let them come to room temperature before eating for the best texture.
Freezer: These freeze really well. Place them in a single layer on a baking sheet to freeze, then transfer to a freezer bag. They last up to 3 months. Thaw at room temperature.
Reheating:
You don’t need to reheat these, but if you want them warm, microwave a bar for 15-20 seconds. It softens the filling and makes the almonds extra fragrant. Don’t overheat, or the butter will separate.
Nutrition Information
I’m not a nutritionist, but here’s the breakdown if you’re tracking. Keep in mind that these are treat bars, so they’re indulgent.
Per Bar (based on 16 bars):
- Calories: 220
- Protein: 3g
- Carbs: 28g
- Fiber: 2g
- Sugar: 14g
- Fat: 12g
- Saturated Fat: 7g
- Cholesterol: 30mg
- Sodium: 80mg
What’s Good:
The almonds provide some healthy fats and protein. The raspberries add antioxidants and fiber. It’s a balanced treat in moderation.
What to Know:
Higher in sugar and saturated fat from the butter and sugar. If you’re watching your intake, stick to one bar. It’s a weekend treat, not a daily staple.
My Take:
Look, this is a dessert. It’s butter, sugar, and fruit. It’s not a health food. But it’s way better than buying processed bars from the store, and I know exactly what’s in it. When I make these, I enjoy one or two with my coffee and call it a day. Balance is key.
Final Thoughts
So that’s my go-to Raspberry Almond Crumble Bars! I’ve probably talked your ear off at this point, but when you make a recipe this often, you have a lot to say about it. These bars have saved my weekends. They’re my answer to “I want something sweet but I don’t want to spend all day baking.” They’re fast, they’re delicious, and they make my house smell amazing.
My kids love them, my husband loves them, and even my picky friend who claims she “doesn’t like desserts” asks for the recipe. That’s high praise.
Make it yours! Try different berries, swap the almonds for pecans, or add a splash of vanilla. The best recipes are the ones you adapt to your family’s tastes. If you make these, drop a comment and let me know how they turned out! I love hearing how recipes turn out in your kitchen. And if something doesn’t work, tell me that too—I’m here to help troubleshoot.
Happy baking! And I hope your kitchen smells half as good as mine does right now.
Frequently Asked Questions
Can I use frozen raspberries instead of fresh?
You can, but there are some important steps. Frozen raspberries release a lot of water as they thaw. If you use them straight from the freezer, your bars will be soggy. Thaw them first, then drain the liquid in a colander. You might even want to pat them dry with a paper towel. Also, increase the cornstarch by 1 teaspoon to account for the extra moisture. Fresh is still better for texture, but frozen works in a pinch.
Why did my bars turn out mushy?
This usually happens for two reasons. First, you didn’t let them cool completely. The filling needs time to set. If you cut them warm, they’ll be mushy. Second, you might have under-measured the cornstarch. Raspberries are very juicy. Make sure you’re using the full tablespoon of cornstarch. If your bars are already mushy, you can try refrigerating them for a few hours to help them firm up, but prevention is better than cure.
Can I make these ahead of time?
Absolutely. In fact, they taste better the next day. I recommend baking them on Friday night, letting them cool completely, and storing them in an airtight container on the counter. By Saturday morning, they’re ready to grab. They also freeze well for up to 3 months, so you can make a double batch and save some for later.
Can I use other nuts instead of almonds?
Yes! Pecans, walnuts, or hazelnuts all work beautifully. Pecans add a buttery, rich flavor that pairs well with raspberries. Walnuts add a nice crunch. Just toast them lightly before adding to the crumble mix for the best flavor. If you’re nut-free, use oats as suggested in the variations section.
How do I store leftover bars?
Store them in an airtight container at room temperature for up to 3 days. If your kitchen is very hot or humid, store them in the fridge. They’ll last up to 5 days in the fridge. Let them come to room temperature before eating for the best texture. They also freeze well for up to 3 months.
Can I double this recipe?
Yes, you can double it. Use a 9×13 inch baking pan instead of an 8×8. The baking time will be roughly the same, but keep an eye on it. The center might take a few minutes longer to set. You can also freeze the extra bars for later.
Pin This Recipe!
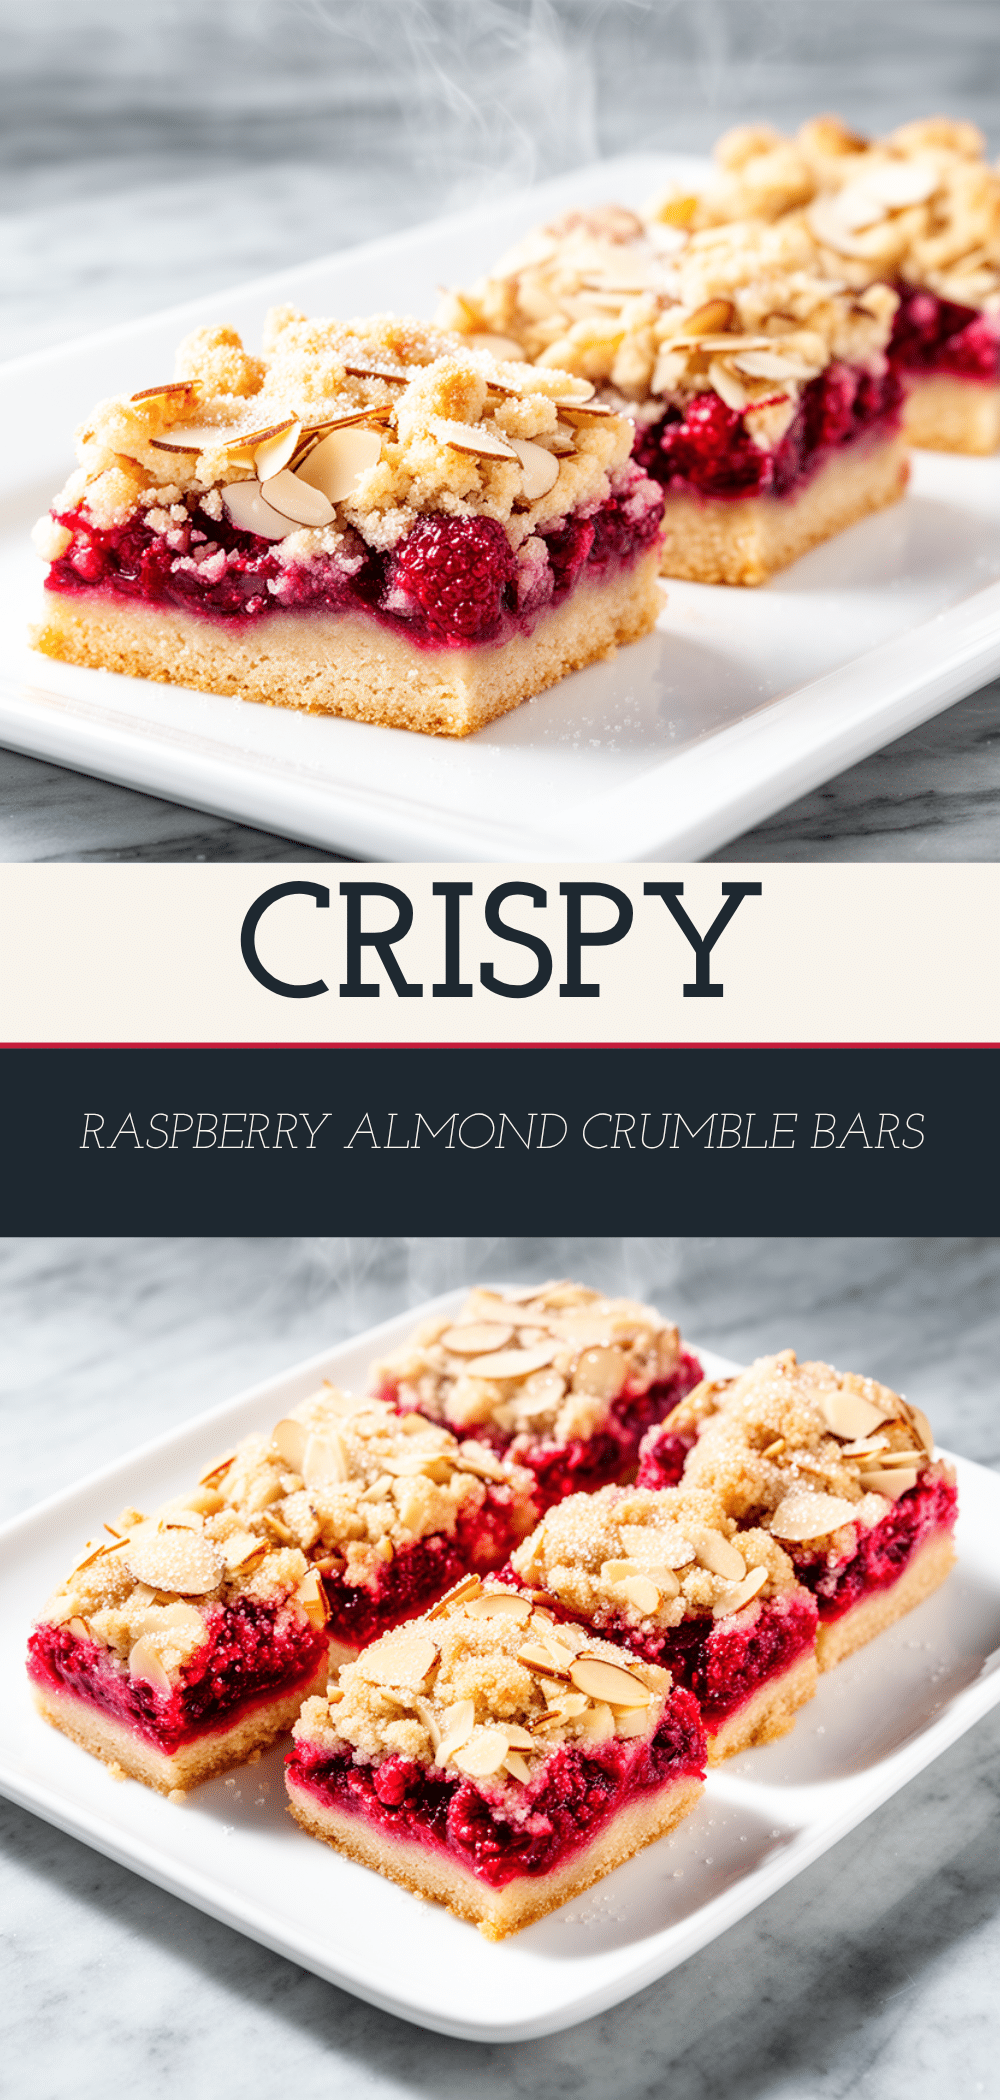
Raspberry Almond Crumble Bars: Easy Weekend Treat
- Total Time: 1 hour 15 minutes
- Yield: 16 servings 1x
Description
These sticky, tangy, and incredibly addictive Raspberry Almond Crumble Bars are the ultimate weekend baking project. With a buttery almond crust, a tart raspberry filling, and a crumbly topping, they are easy to make in one bowl and perfect for meal prep.
Ingredients
- 1 cup (225g) unsalted butter, cold and cubed
- 2 cups (250g) all-purpose flour
- 1/2 cup (100g) granulated sugar
- 1 cup (100g) sliced almonds, toasted
- 1 teaspoon almond extract
- 1/2 teaspoon salt
- 3 cups (about 350g) fresh raspberries
- 2 tablespoons (25g) granulated sugar
- 1 tablespoon cornstarch
- 1 teaspoon lemon juice
- Powdered sugar for dusting (optional)
Instructions
- Preheat oven to 350°F (175°C). Line an 8×8 inch baking pan with parchment paper, leaving an overhang on the long sides, and grease lightly.
- In a medium bowl, combine flour, 1/2 cup sugar, salt, and toasted sliced almonds. Add cold cubed butter and work it in with a fork or pastry cutter until the mixture resembles coarse sand with pea-sized butter chunks.
- Press two-thirds of the crumb mixture firmly into the bottom of the prepared pan to form the crust. Set the remaining one-third aside for the topping.
- In a separate bowl, gently toss raspberries with 2 tablespoons sugar, cornstarch, and lemon juice until evenly coated.
- Pour the raspberry mixture over the crust and spread evenly. Sprinkle the reserved crumb mixture generously over the top.
- Bake for 35-40 minutes, or until the topping is golden brown and the filling is bubbling. Tent with foil if edges get too dark.
- Cool completely in the pan on a wire rack for at least one hour (or up to two hours) to allow the filling to set.
- Lift bars out using parchment overhang, place on a cutting board, and slice into squares. Dust with powdered sugar before serving if desired.
Notes
Toast almonds lightly in a dry pan for 3-4 minutes before adding to the mix for deeper flavor. Keep butter cold to ensure flaky crumbs. Do not skip cornstarch as raspberries release significant water. Cool completely before cutting to prevent mushiness. Can be stored at room temperature for 3 days, in the fridge for 5 days, or frozen for 3 months.
- Prep Time: 15 minutes
- Cook Time: 40 minutes
- Category: Dessert
- Cuisine: American
Nutrition
- Serving Size: 1 bar
- Calories: 220
- Sugar: 14
- Sodium: 80
- Fat: 12
- Saturated Fat: 7
- Carbohydrates: 28
- Fiber: 2
- Protein: 3
Keywords: raspberry almond crumble bars, weekend baking, easy dessert, make-ahead breakfast, gluten-free option, dairy-free option, fruit bars, crumble recipe