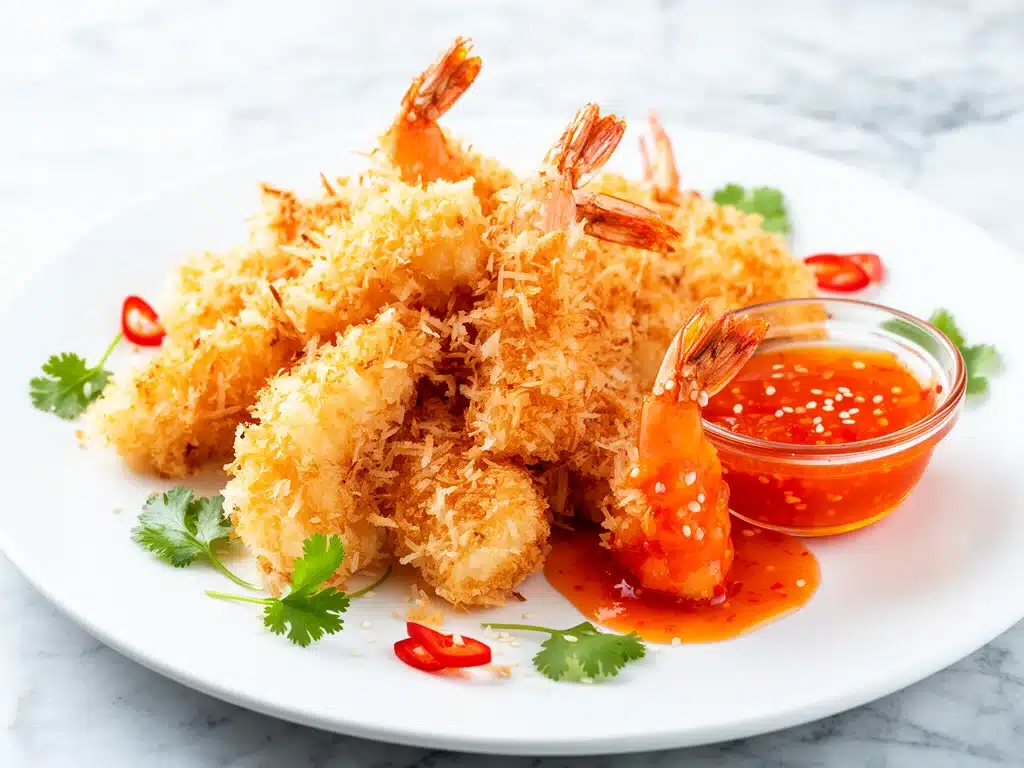
I have a confession to make. For years, I was the person who would see a menu at a Chinese restaurant, spot the “Crispy Coconut Shrimp” listing, and immediately order it. You know the type—the golden, crunchy mound that promises sweet, savory perfection. I’d bring it home, eat half before dinner, and feel like I was living my best life. But then I’d look at the bill, look at the empty takeout container, and feel that familiar pang of regret. It was good, sure. But it was also expensive, greasy, and honestly? Not that impressive.
Last summer, I was hosting a small get-together and decided I wanted to make something “fancy” but easy. I went down the takeout route again, thinking I’d just grab a side. When the box arrived, the shrimp were soggy. The coconut had turned into a sad, oily mat. The sweet chili sauce was just… sugar water. I stared at it for a full minute, feeling cheated. That night, I cleaned out my freezer, found some frozen shrimp, and decided to try making them in my air fryer. I wasn’t expecting much. I just wanted to see if I could get them crispy without frying them in a pot of oil.
I was wrong. They were incredible. Crispier than takeout. Sweeter. Better. The air fryer did something magical to the coconut flakes, toasting them to a perfect golden brown while keeping the shrimp juicy inside. I made that crispy air fryer coconut shrimp recipe three times in one week. My friends thought I was insane. My husband thought I was finally learning how to cook. And honestly? I think I just finally found my favorite way to cook shrimp.
This isn’t just about saving money, though it definitely does that. It’s about control. It’s about knowing exactly what’s going into your food. It’s about that crunch that sounds like music when you bite into it. If you’re tired of soggy takeout and want a snack or appetizer that actually impresses people, this is the recipe. I’ve tested it, tweaked it, and perfected it so you don’t have to. Let’s get into why this is the best homemade version you’ll ever make.
Why You’ll Love This Recipe
There are a dozen reasons I keep making this crispy air fryer coconut shrimp for everyone from my picky teenage son to my foodie neighbors, but here are the big ones that keep me coming back to the kitchen.
- Actually Crispy — Seriously, if you’ve tried baking shrimp in the oven, you know the struggle. They get dry or they stay soft. The air fryer circulates hot air around the shrimp, crisping the coconut coating without needing a deep fryer. It’s crunchy, not chewy. I’ve made this for parties where people lined up for seconds because they couldn’t believe it wasn’t fried.
- Lightning Fast — From freezer to plate in about 15 minutes. The shrimp cook in 8-10 minutes while you whip up the sauce. I make this on weeknights when I get home late and want something that feels special but doesn’t take all evening. It’s faster than waiting for a delivery driver.
- Pantry-Friendly — You probably have most of this already. Shrimp, coconut flakes, flour, eggs, breadcrumbs. The sauce uses pantry staples like ketchup, soy sauce, and honey. I don’t even need to go to the store for this one half the time.
- Less Mess, Less Grease — No splattering oil. No pot of hot grease to dispose of. Just a quick spray of oil and you’re done. Cleanup takes two minutes because it’s mostly just bowls and a single air fryer basket. I love that I don’t smell like fried food for three days after.
- Crowd-Pleaser — I’ve served this to my vegetarian sister (she swaps the shrimp for cauliflower, though she admits the shrimp version is better), my gluten-free neighbor (I use GF panko), and my dad who thinks shrimp is “fancy.” Everyone loves it. It’s the ultimate appetizer.
- Budget-Smart — Feeds 4-6 people as an appetizer for under $20. That’s less than one large pizza delivery. When you buy frozen shrimp in bulk, this is incredibly cheap per serving.
This is my go-to when I need dinner to just work. No complicated techniques, no weird ingredients, just reliable, delicious food that makes everyone happy. It’s the kind of recipe that turns a boring Tuesday into a celebration.
Ingredients You’ll Need
Here’s the best part: you probably have most of this already. This crispy air fryer coconut shrimp relies on simple, accessible ingredients. I’m particular about a few things here, and I’ll tell you exactly why.
For the Shrimp Coating
Large shrimp (21-25 count) (1.5 lbs / 680g, peeled and deveined) — This size is crucial. Smaller shrimp cook too fast and get rubbery. Larger shrimp stay juicy. I buy frozen wild-caught shrimp and thaw them in cold water. Fresh is great, but frozen is often better quality if you catch it right after fishing. Pat them very dry with paper towels. Wet shrimp = soggy coating. This is non-negotiable.
All-purpose flour (1 cup / 120g) — This is the base layer. It helps the egg stick to the shrimp. I use a shallow bowl for this. If you’re gluten-free, swap this for a 1:1 gluten-free flour blend. It works perfectly.
Eggs (2 large, beaten) — The glue. I beat them with a fork until smooth. You can use egg whites if you want to cut calories, but whole eggs give a richer coating. Don’t skip the beating—lumpy egg whites won’t coat evenly.
Unsweetened shredded coconut (2 cups / 140g) — Use sweetened or unsweetened? I prefer unsweetened because the sweet chili sauce adds all the sugar you need. Sweetened coconut can burn in the air fryer if you’re not careful. Look for fine shreds, not large flakes, so it sticks better. Bob’s Red Mill is my go-to brand.
Panko breadcrumbs (1 cup / 60g) — This is the secret weapon. Panko creates that shatteringly crisp texture. Regular breadcrumbs are too dense. I mix the panko with the coconut flakes. It adds structure and crunch. If you can’t find panko, regular breadcrumbs work, but the texture won’t be as good.
Garlic powder (1 teaspoon) — Just a hint of garlic in the coating. It enhances the shrimp flavor without overpowering it. Don’t use fresh garlic here—it’ll burn.
Salt and black pepper (to taste) — Season the flour and the panko mixture. Don’t forget this step!
For the Sweet Chili Sauce
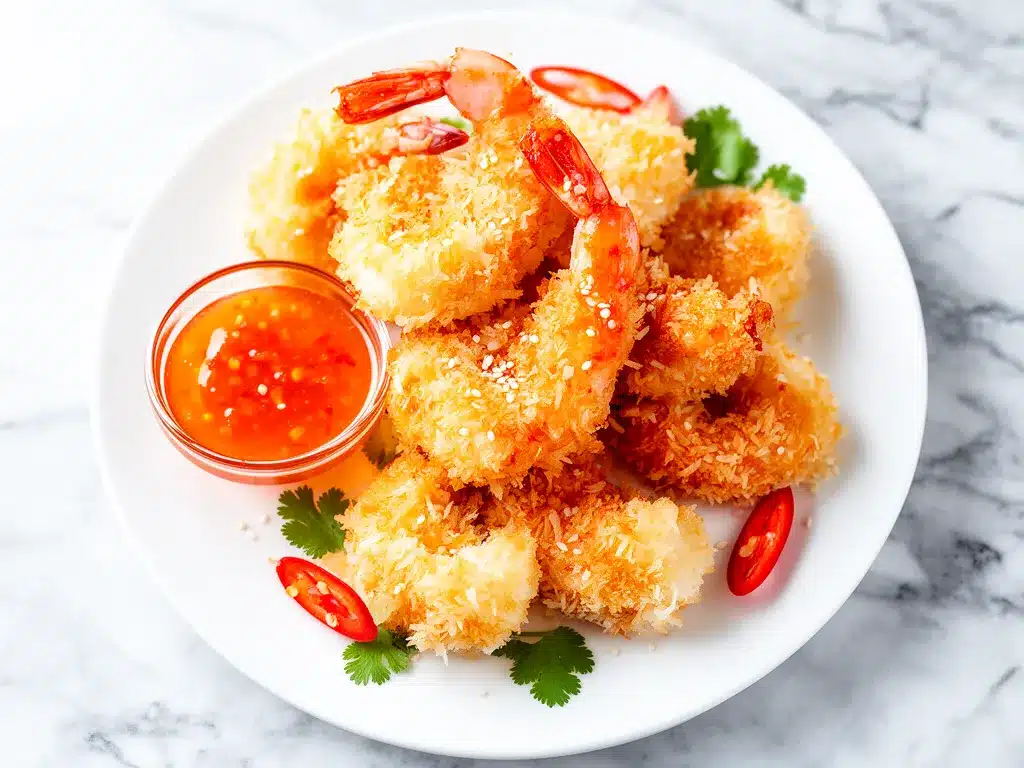
Ketchup (½ cup / 120g) — The base. I use Heinz because it has the right balance of sweet and tang. Some people use tomato sauce, but ketchup gives it that classic takeout flavor.
Honey (¼ cup / 60g) — Adds natural sweetness and viscosity. Maple syrup works in a pinch, but honey tastes more authentic here.
Rice vinegar (2 tablespoons) — Provides the tang that cuts through the sweetness. White vinegar works, but rice vinegar is milder and more traditional.
Soy sauce (1 tablespoon) — Adds umami and saltiness. It balances the sugar. Tamari for gluten-free.
Sriracha or chili garlic sauce (1-2 teaspoons) — Adjust based on your heat tolerance. I use 1 teaspoon for mild heat. If you like it spicy, go with 2 teaspoons or add a dash of red pepper flakes.
Water (2-3 tablespoons) — Thins the sauce to a dip-able consistency. Start with 2 tablespoons and add more if needed.
Minced garlic (1 clove) — Fresh garlic in the sauce adds a punch that powdered garlic can’t match. Grate it or mince it finely.
Optional Add-ins
Red bell pepper (1 tablespoon, diced) — Adds a tiny bit of crunch and color.
Fresh cilantro (1 tablespoon, chopped) — Garnish for freshness.
Equipment Needed
You don’t need fancy equipment for this. Here’s what I actually use.
Air Fryer — Obviously. I use a 5.8-quart basket style. It fits 8-10 shrimp per batch comfortably. If you have a smaller air fryer, you might need to cook in two batches. Don’t overcrowd the basket, or they’ll steam instead of crisp.
Three Shallow Bowls — For the dredging station. One for flour, one for egg, one for the coconut-panko mix. I use pie dishes or shallow cereal bowls. They’re wide enough to roll the shrimp easily.
Paper Towels — For drying the shrimp. Seriously, have a stack ready. Wet shrimp are the enemy.
Pastry Brush or Spray Bottle — To lightly oil the shrimp before air frying. I use an olive oil spray bottle because it’s even and light. A pastry brush works too, but you might use too much oil.
Small Saucepan — For making the sweet chili sauce. Or a microwave-safe bowl if you’re in a hurry. I prefer the saucepan for better flavor development.
Tongs — For flipping the shrimp in the air fryer. Metal tongs work best. Forks can pierce the shrimp and lose the coating.
Instant-Read Thermometer — Optional but helpful. Shrimp are done at 120°F (49°C). I check one to make sure I’m not overcooking them.
Whisk — For mixing the sauce. A small whisk makes it easy to dissolve the honey and soy sauce.
How to Make It: Step-by-Step
Alright, let’s make this! I’m walking you through exactly how I do it, including the little tricks I’ve picked up.
Step 1: Prep the Shrimp (5-8 minutes)
If you’re using frozen shrimp, thaw them in a bowl of cold water for 15-20 minutes. Do not use hot water—it starts cooking them. Once thawed, peel and devein them if they aren’t already. Then, the most important step: pat them completely dry with paper towels. I mean completely. If they’re slick, the coating won’t stick. I usually use two layers of paper towels and press hard. Set them on a clean plate.
Step 2: Set Up Your Dredging Station (3 minutes)
Get out three shallow bowls. In the first, mix the flour with half the garlic powder, salt, and pepper. In the second, beat the eggs with a splash of water (makes it thinner and easier to coat). In the third, mix the shredded coconut, panko breadcrumbs, remaining garlic powder, salt, and pepper. Whisk these dry ingredients together so the coconut is evenly distributed. This step is crucial for consistent coating.
Step 3: Coat the Shrimp (5-8 minutes)
Take a shrimp and dredge it in the flour mixture, shaking off any excess. Dip it into the egg wash, letting the excess drip off. Then, press it into the coconut-panko mixture. Use your fingers to press the coating firmly onto the shrimp. Make sure the ends are covered too. I usually roll it gently to ensure it sticks. Place the coated shrimp on a clean plate. Repeat with all shrimp. If your coating feels loose, you didn’t press hard enough, or the shrimp were too wet.
Step 4: Air Fry the Shrimp (8-10 minutes)
Preheat your air fryer to 390°F (200°C) for 3 minutes. This helps the coating set immediately. Lightly spray the basket with oil. Arrange the shrimp in a single layer in the basket. Do not overlap them! They need space for air to circulate. I cook 8-10 shrimp at a time. Spray the tops of the shrimp lightly with oil. This helps the coconut brown. Cook for 4 minutes, then flip the shrimp. Spray the other side with oil. Cook for another 4-6 minutes until golden brown and cooked through. The shrimp should be opaque and pink. Total time is about 8-10 minutes depending on your air fryer model.
Step 5: Make the Sweet Chili Sauce (5 minutes)
While the shrimp cook, make the sauce. In a small saucepan over medium heat, combine the ketchup, honey, rice vinegar, soy sauce, sriracha, minced garlic, and 2 tablespoons of water. Whisk until smooth. Bring to a gentle simmer. Cook for 2-3 minutes until slightly thickened. Taste and adjust. Want it sweeter? Add more honey. Spicier? Add more sriracha. Thinner? Add a splash more water. Remove from heat and set aside.
Step 6: Serve
Transfer the hot shrimp to a serving platter. Serve immediately with the warm sweet chili sauce on the side. I like to garnish with a sprinkle of chopped cilantro or a squeeze of lime juice for brightness. Eat them while they’re hot and crispy. They won’t stay crispy if they sit in a closed container.
Total Time: About 25 minutes (10 minutes prep, 15 minutes cooking)
Expert Tips & Tricks
Here’s everything I’ve learned from making this dozens of times. These tips will save you from my mistakes.
Don’t Skip the Drying Step
I cannot stress this enough. Wet shrimp = soggy coating. I’ve made this mistake twice, and the results were disappointing. Pat them dry, then pat them dry again. If you’re in a rush, let them air dry on a rack for 10 minutes. It makes a huge difference.
Press the Coating Firmly
When you roll the shrimp in the coconut-panko mix, press down. Use your fingers to pack it on. If the coating is loose, it’ll fall off in the air fryer. I usually roll it once, press, roll again, and press. It should feel like a little coconut burrito.
Don’t Overcrowd the Basket
This is the golden rule of air frying. If you stack the shrimp, they’ll steam. Steam is the enemy of crispiness. Cook in batches. It’s annoying, but worth it. The last batch is usually the crispiest because the basket is hot.
Spray Oil Liberally
Coconut doesn’t brown well without oil. I use an olive oil spray and coat both sides of the shrimp. If you don’t have a spray bottle, brush with oil. But spray is more even. This gives you that golden, toasted look.
Flip Midway
Flip the shrimp halfway through cooking. This ensures even browning. If you don’t flip, one side will be dark and the other pale. I use tongs to gently turn them.
Sauce Consistency
The sauce thickens as it cools. If it’s too thick when you serve it, add a teaspoon of water. If it’s too thin, simmer it longer. I like it thick enough to coat the back of a spoon.
Variations & Substitutions
Once you’ve nailed the basic version, here’s how you can mix it up. I’ve tried all of these.
Gluten-Free Version
Swap the all-purpose flour for gluten-free flour. Swap the panko for gluten-free panko or crushed cornflakes. Cornflakes give a great crunch. Everything else is naturally gluten-free. My gluten-free friend loves this version.
Spicy Kick
Add 1 teaspoon of cayenne pepper to the coating. Or use chili garlic sauce in the sauce instead of sriracha. For extra heat, serve with a side of wasabi mayo.
Veggie Option
Use large mushroom caps or cauliflower florets instead of shrimp. Coat them the same way. Cook at 375°F for 12-15 minutes. They absorb the sauce beautifully. This is great for my vegetarian guests.
Different Sauces
Try a mango chili sauce for tropical flavor. Or a peanut dipping sauce for a Thai vibe. Or just plain mustard for a classic twist. The coconut shrimp pairs well with many sauces.
Coconut Types
Use sweetened coconut if you like it sweeter. Just watch the browning—it burns faster. Toasted coconut flakes add a nuttier flavor. I sometimes mix sweetened and unsweetened for balance.
Shrimp Size
Use jumbo shrimp (16-20 count) for a more substantial bite. They take 2 minutes longer to cook. Use small shrimp (41-50 count) for appetizers—they cook in 6-8 minutes.
Serving & Storage
How to Serve
I usually serve this straight from the air fryer basket on a platter—it looks rustic and stays warm. But here are other ways I’ve enjoyed it:
- With Rice — Serve over jasmine rice for a full meal. The sauce soaks into the rice perfectly.
- In Lettuce Cups — Place a shrimp in a butter lettuce leaf with some sauce and veggies for a low-carb option.
- With Noodles — Toss with stir-fried noodles for a seafood lo mein vibe.
- As a Snack — Just the shrimp and sauce, with a cold beer or sparkling water.
Side Dishes
- Steamed broccoli
- Coleslaw (vinegar-based, not creamy)
- Edamame
- Asian-style cucumber salad
Storage Instructions
Refrigerator: Store leftover shrimp in an airtight container for up to 2 days. The coating will soften, which is sad. Store the sauce separately in a jar for up to 1 week.
Reheating: Best method: Air fryer at 375°F for 3-4 minutes. This restores crispiness. Oven at 400°F for 5-7 minutes also works. Microwave? Don’t. It makes them rubbery and soggy. Ask me how I know. I’ve ruined leftovers by microwaving them.
Freezing: You can freeze uncooked, coated shrimp on a baking sheet, then transfer to a bag. Cook from frozen, adding 2-3 minutes to the cook time. Do not freeze cooked shrimp—the texture suffers.
Meal Prep: Make the sauce ahead. Coat the shrimp and refrigerate for up to 24 hours before cooking. This saves time on busy nights.
Nutrition Information
I’m not a nutritionist, but here’s the breakdown if you’re tracking. This is per serving (based on 4 servings as an appetizer with sauce).
| Nutrient | Amount |
|---|---|
| Calories | 280 |
| Protein | 18g |
| Carbs | 25g |
| Fiber | 2g |
| Sugar | 12g |
| Fat | 12g |
| Saturated Fat | 8g |
| Cholesterol | 120mg |
| Sodium | 450mg |
What’s Good: High protein from the shrimp. Coconut provides healthy fats. The sauce is relatively low-cal compared to deep-fried versions.
What to Know: Higher in carbs from the coating and sauce. Contains dairy (if using butter in sauce, though I don’t). Moderate sodium. Adjust sauce to control sugar and salt.
My Take: Look, this is a treat. It’s not a diet food. But it’s way better than takeout, costs less, and I know exactly what’s in it. When I want to make it lighter, I use less panko and more coconut, and reduce the honey in the sauce. But usually? I just enjoy it and move on with my day.
Final Thoughts
So that’s my go-to crispy air fryer coconut shrimp! I’ve probably talked your ear off at this point, but when you make a recipe this often, you have a lot to say about it.
This has saved weeknight dinners more times than I can count. It’s my answer to “what’s for dinner” when I’m tired, don’t want takeout, and still want something that tastes really good. My kids are happy, my husband’s happy, and I’m happy because I’m not stressed about cooking. Plus, it’s a great way to use up frozen shrimp before they go bad.
Make it yours! Try different add-ins, swap in your favorite vegetables, adjust the garlic (though more is always better in my opinion). The best recipes are the ones you adapt to your family’s tastes. If you want something crunchy, sweet, and savory, this is it.
If you make this, drop a comment and let me know what you think! I love hearing how recipes turn out in your kitchen. And if something doesn’t work, tell me that too—I’m here to help troubleshoot. Happy cooking! And I hope your kitchen smells half as good as mine does right now.
Frequently Asked Questions
Can I use fresh shrimp instead of frozen?
Yes, absolutely. Just make sure they’re peeled and deveined. Fresh shrimp cook slightly faster, so check them at 6 minutes. The drying step is even more important with fresh shrimp because they’re often wetter. I prefer frozen because they’re usually flash-frozen at peak freshness, but fresh works great too.
Why did my coconut burn in the air fryer?
Coconut burns easily because of its high fat content. If your air fryer runs hot, lower the temperature to 375°F (190°C). Also, make sure you’re spraying them with oil lightly, not drenching them. And watch them closely during the last 2 minutes. I’ve lost a batch to burnt coconut before—it happens to the best of us. If it’s browning too fast, cover it loosely with foil.
Can I make this ahead for a party?
You can prep them ahead. Coat the shrimp and store them on a baking sheet in the fridge for up to 24 hours. Cook them right before serving. The sauce can be made 3 days ahead. Just reheat the sauce gently and cook the shrimp fresh. They won’t stay crispy if you cook them hours in advance.
Why did my coating fall off?
Usually, this means the shrimp were too wet, or you didn’t press the coating on firmly enough. Make sure you pat them dry, dredge in flour first, dip in egg, and then press the coconut mix on hard. If the coating is loose, it’ll fall off in the air fryer. Also, don’t overcrowd the basket—shrimp bumping into each other can dislodge the coating.
Can I use regular breadcrumbs instead of panko?
You can, but the texture won’t be as crispy. Panko has larger, flakier crumbs that create more air pockets and crunch. Regular breadcrumbs are denser and can make the coating feel heavy. If you only have regular breadcrumbs, toast them in a dry pan first to crisp them up. But panko is worth buying.
How do I reheat leftovers without them getting soggy?
Never use the microwave. Use the air fryer at 375°F for 3-4 minutes. This restores the crispiness. An oven at 400°F for 5-7 minutes also works. If you must use the microwave, do it for 30 seconds max, but expect a softer texture. The air fryer is the only way to truly revive them.
Can I double this recipe?
Absolutely! Double the ingredients. Just make sure you cook in batches. Don’t try to fit 2 pounds of shrimp in one basket. The air fryer needs space. I usually cook two batches back-to-back. It takes a little longer, but the results are worth it.
Pin This Recipe!
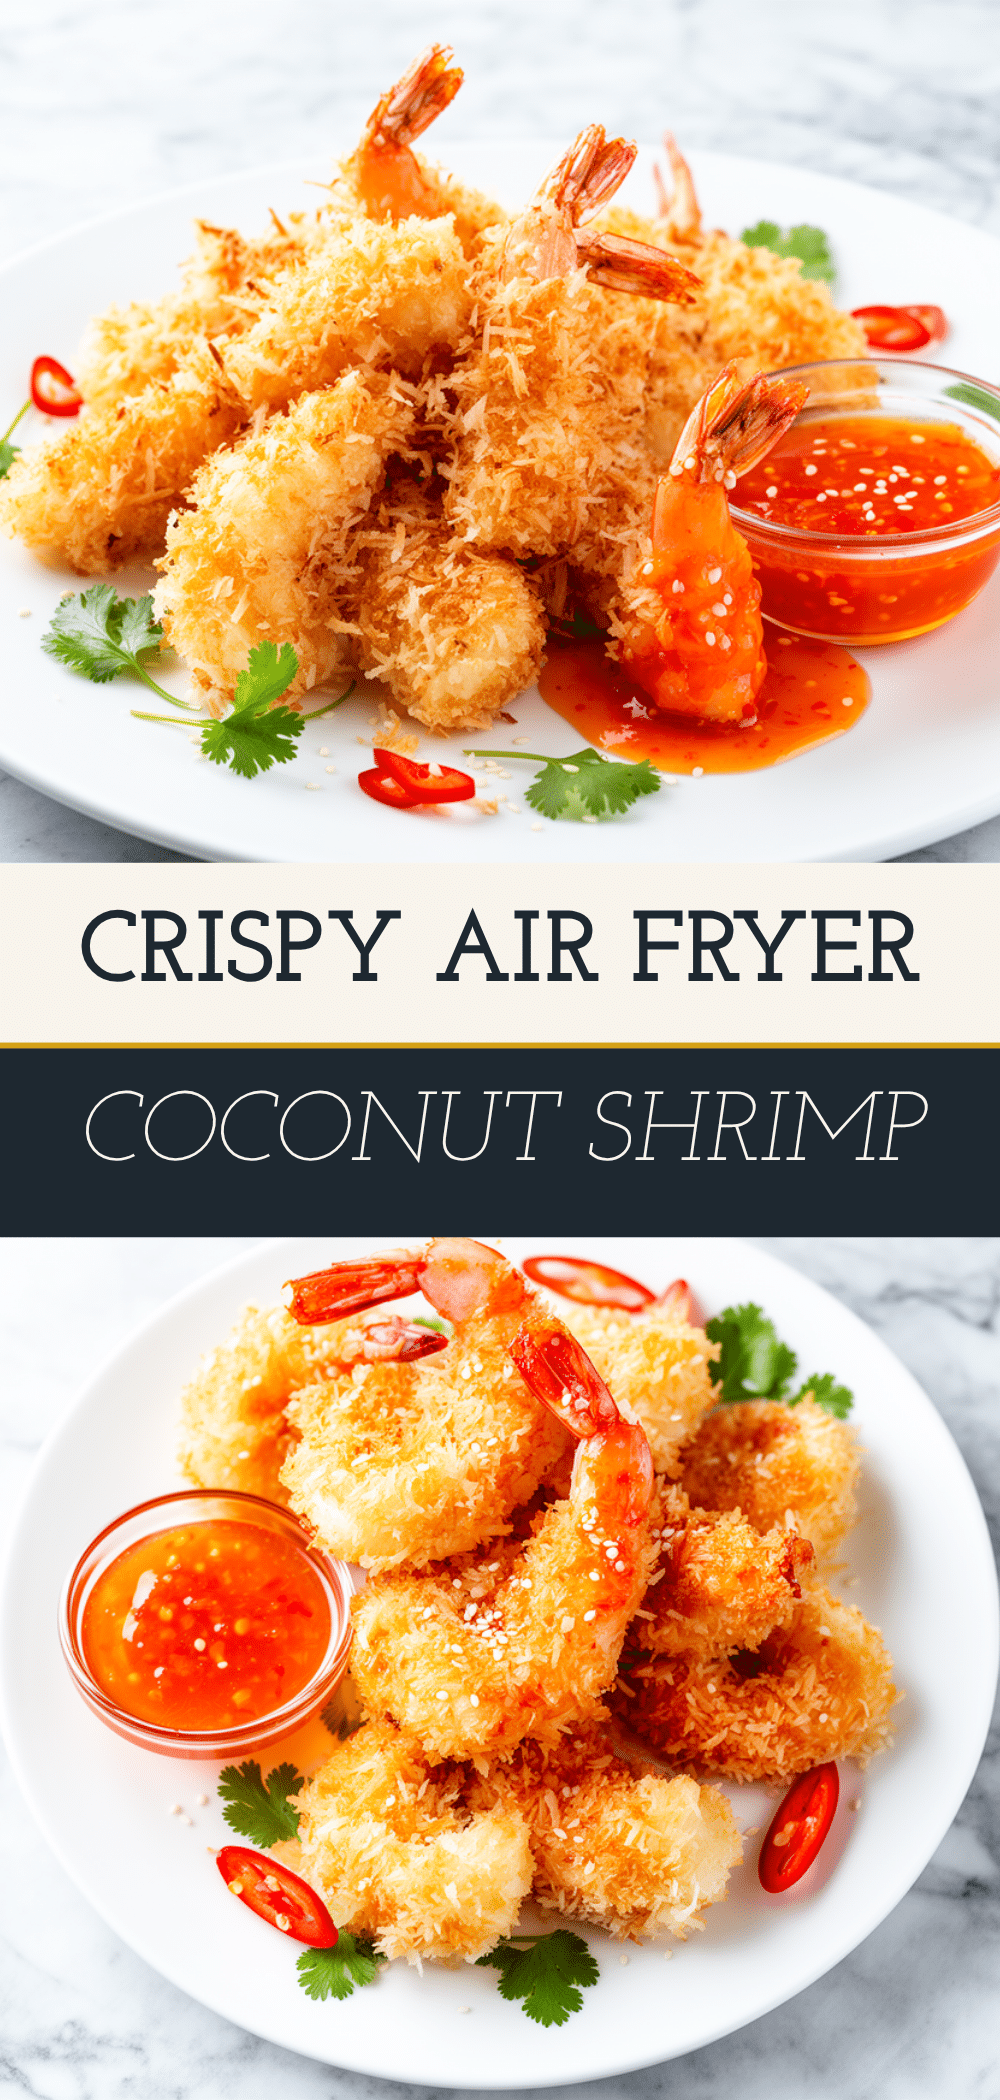
Crispy Air Fryer Coconut Shrimp: Best Homemade Recipe
- Total Time: 25 minutes
- Yield: 4 servings 1x
Description
Achieve takeout-quality crispy coconut shrimp at home using an air fryer. This recipe is faster, healthier, and crunchier than deep-fried versions, featuring a simple dredging process and a homemade sweet chili sauce.
Ingredients
- 1.5 lbs large shrimp (21–25 count), peeled and deveined
- 1 cup all-purpose flour
- 2 large eggs, beaten
- 2 cups unsweetened shredded coconut
- 1 cup panko breadcrumbs
- 1 teaspoon garlic powder
- Salt and black pepper, to taste
- 1/2 cup ketchup
- 1/4 cup honey
- 2 tablespoons rice vinegar
- 1 tablespoon soy sauce
- 1–2 teaspoons sriracha or chili garlic sauce
- 2–3 tablespoons water
- 1 clove garlic, minced
- Olive oil spray
Instructions
- Thaw frozen shrimp in cold water if necessary, then peel and devein. Pat shrimp completely dry with paper towels.
- Set up three shallow bowls: one with flour mixed with half the garlic powder, salt, and pepper; one with beaten eggs; and one with coconut, panko, remaining garlic powder, salt, and pepper.
- Dredge each shrimp in the flour mixture, shaking off excess. Dip into the egg wash, letting excess drip off. Press firmly into the coconut-panko mixture to coat evenly.
- Preheat air fryer to 390°F (200°C) for 3 minutes. Lightly spray the basket with oil.
- Arrange shrimp in a single layer in the air fryer basket, ensuring they do not overlap. Spray tops lightly with oil.
- Cook for 4 minutes, then flip shrimp. Spray the other side with oil and cook for another 4-6 minutes until golden brown and opaque.
- While shrimp cook, combine ketchup, honey, rice vinegar, soy sauce, sriracha, minced garlic, and water in a small saucepan. Simmer over medium heat for 2-3 minutes until slightly thickened.
- Serve shrimp immediately with the warm sweet chili sauce on the side.
Notes
Ensure shrimp are completely dry before coating to prevent soggy results. Do not overcrowd the air fryer basket; cook in batches if necessary. Coconut burns easily, so watch closely during the last few minutes of cooking. For a gluten-free version, use GF flour and GF panko or crushed cornflakes.
- Prep Time: 10 minutes
- Cook Time: 15 minutes
- Category: Appetizer
- Cuisine: Asian Fusion
Nutrition
- Serving Size: Approximately 8-10 s
- Calories: 280
- Sugar: 12
- Sodium: 450
- Fat: 12
- Saturated Fat: 8
- Carbohydrates: 25
- Fiber: 2
- Protein: 18
Keywords: air fryer coconut shrimp, crispy shrimp, homemade sweet chili sauce, easy appetizer, healthy fried shrimp, gluten-free option


