Last Thanksgiving, I walked into my living room to find my aunt holding a single dinner roll like it was a precious gem. She wasn’t even eating it yet. She was just staring at it, marveling at how it yielded under her fingers. “I’ve made rolls for forty years,” she whispered, “but I’ve never seen one this soft.” That moment changed everything for me. Before that, I treated bread as an afterthought—a store-bought loaf to fill the gap between the main course and dessert. But after that Thanksgiving, I realized that the right roll doesn’t just fill you up; it sets the tone for the entire meal.
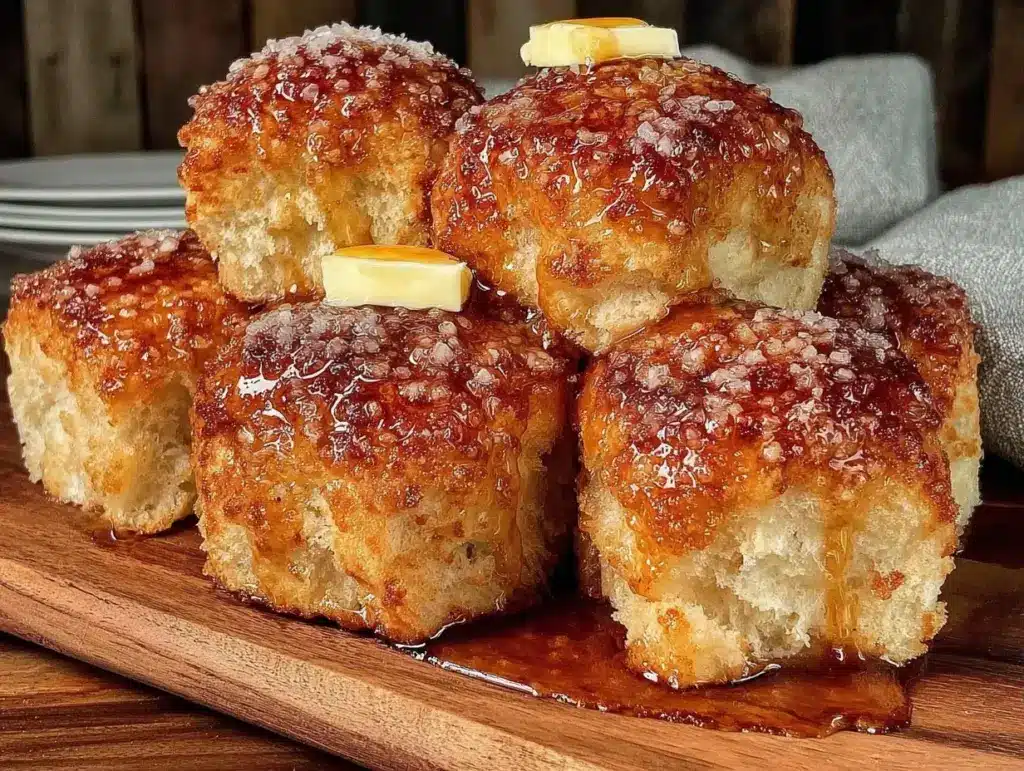
I spent the next six months obsessed. I tried high-hydration doughs that collapsed, enriched doughs that tasted like cake, and no-knead recipes that were dense as bricks. I burned three batches of honey butter because I forgot to turn off the stove. But finally, I nailed it. This Extra-Soft Dinner Rolls with Honey Butter Brush recipe is the result of all those failures. It’s not just bread; it’s an experience. The crust is barely there, giving way to a crumb that tears apart with zero resistance. And that honey butter brush? It soaks into the top, creating a shiny, golden glaze that smells like comfort and smells like victory.
Why do I love this Extra-Soft Dinner Rolls with Honey Butter Brush recipe so much? Because it takes the intimidation out of entertaining. You can make the dough the day before, let it rise while you’re out, or prep it in the morning and bake it when your guests arrive. The smell alone has people wandering into the kitchen asking, “What is that?” It’s the kind of Extra-Soft Dinner Rolls with Honey Butter Brush that makes people ask for the recipe immediately, and more importantly, makes them feel welcome. There’s something deeply generous about tearing into warm, pillowy bread with your hands. It slows everyone down. It invites conversation. It’s edible hospitality.
Why You’ll Love This Honey Butter Roll Recipe
There are a hundred bread recipes out there, but this specific combination of techniques and ingredients creates something special. Here’s why this Extra-Soft Dinner Rolls with Honey Butter Brush has earned a permanent spot in my hosting rotation.
- Pillowy, Cloud-Like Texture — The secret is in the hydration and the resting time. These rolls don’t just rise; they puff up. When you pull one apart, the strands are long and delicate, not gummy or dense. I’ve tested this with friends who are picky about texture, and even the skeptics admit these feel like eating a cloud.
- The Honey Butter Glaze Factor — Most dinner rolls are dry without butter. This recipe includes a honey butter brush applied immediately after baking. The honey keeps the crust slightly tacky and sweet, while the browned butter adds a nutty depth that regular butter can’t match. It’s not just a topping; it’s a flavor enhancer that soaks in.
- Make-Ahead Friendly — I know hosting is stressful. You don’t want to be wrestling with dough when your guests are knocking on the door. You can shape these rolls, let them do their final rise in the fridge overnight, and pop them in the oven first thing in the morning. Or, you can let them rise fully, freeze them raw, and bake them later. It’s a lifesaver for busy hosts.
- Visually Stunning — These rolls look professional. They bake into a cohesive, golden mound that looks impressive on the table. The honey glaze gives them a bakery-shine that screams “I put effort into this,” even if you started the process hours ago.
- Perfect for Dipping — Whether you’re serving them with a rich soup like my ultra-creamy loaded baked potato soup or just with a plate of roasted vegetables, these rolls are sturdy enough to hold up to dipping but soft enough to melt in your mouth. They are the ultimate sidekick.
This is my go-to when dinner needs to just work. It’s reliable, it’s delicious, and it makes you look like a pro baker.
Key Ingredients for Perfectly Soft Rolls
Bread baking is chemistry, but it’s also intuition. Here’s what you need to make this Extra-Soft Dinner Rolls with Honey Butter Brush work, and why each component matters. I’ve included exact measurements because precision helps you succeed the first time.
Dough Ingredients
Bread Flour (500g / 4 cups) — I use bread flour instead of all-purpose. It has more protein, which means more gluten development. More gluten means more structure and, ultimately, that airy, chewy texture. If you only have all-purpose, you can use it, but the rolls will be slightly denser. I recommend King Arthur or Gold Medal for consistency.
Whole Milk (240ml / 1 cup) — Warm to about 110°F (43°C). Milk adds fat and sugar, which tenderizes the crumb. Water-based doughs can be chewier; milk makes these rolls softer and richer. Don’t skip it for water unless you have a dairy allergy, as it significantly impacts the mouthfeel.
Unsalted Butter (57g / 4 tbsp) — Softened to room temperature. This goes into the dough itself, not just the glaze. It coats the gluten strands, making the final product tender. If you use cold butter, it won’t incorporate evenly, leading to dense spots.
Granulated Sugar (60g / 1/3 cup) — Sugar feeds the yeast and adds sweetness. It also helps with browning. Don’t reduce this too much, or the rolls won’t get that beautiful golden color.
Instant Yeast (7g / 1 packet) — I prefer instant yeast because you can mix it directly with the dry ingredients. Active dry yeast works too, but you need to bloom it in the warm milk first. If you’re using active dry, add an extra 5 minutes to the rise time.
Egg (1 large / ~50g) — An egg adds richness and helps the dough rise higher. It acts as a binder and adds fat. For a richer roll, I sometimes use two egg yolks, but one whole egg is perfect for this balance.
Salt (10g / 2 tsp) — Salt controls yeast activity and strengthens gluten. Without it, the yeast goes wild, and the bread tastes bland. Use fine sea salt or table salt.
Honey Butter Brush Ingredients
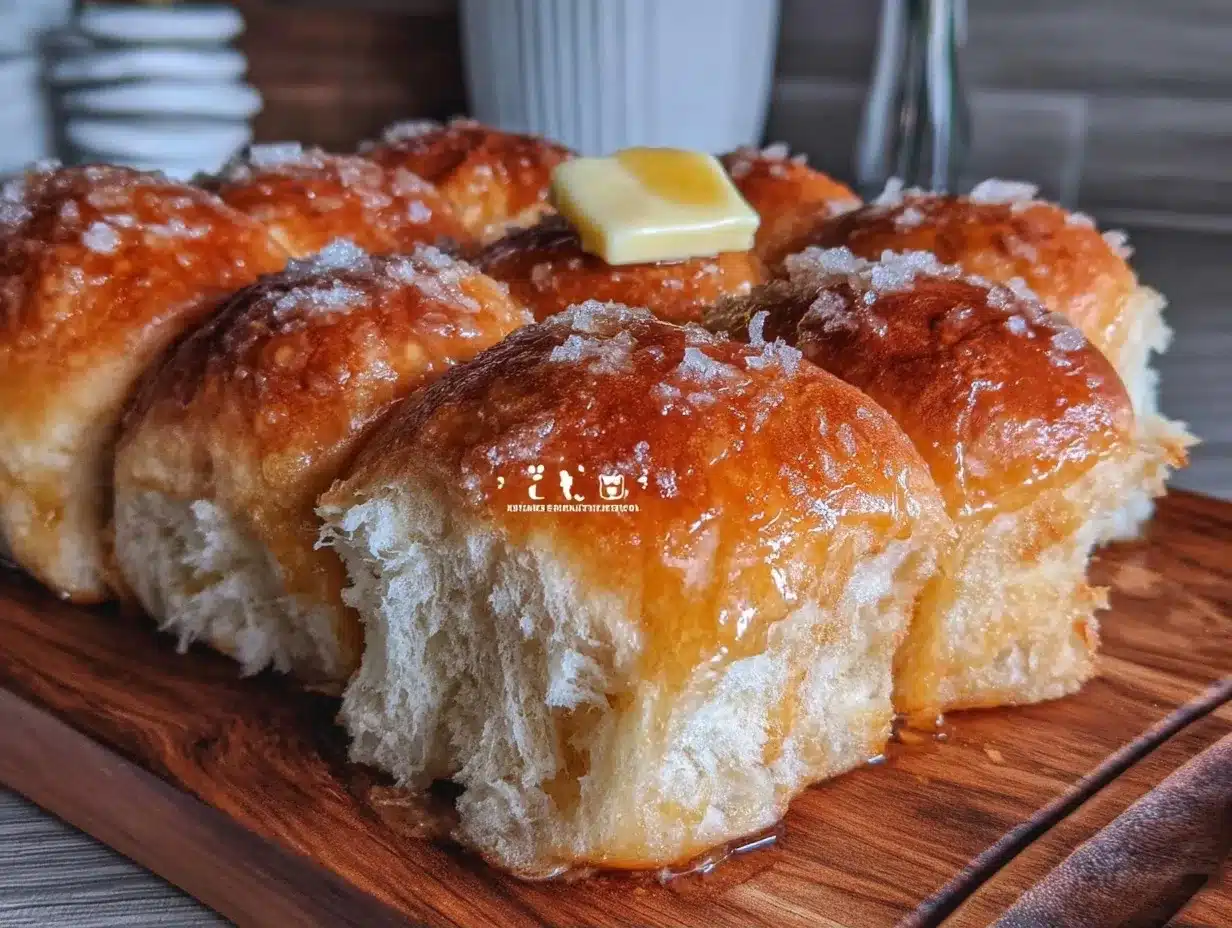
Unsalted Butter (113g / 1/2 cup) — This is for the glaze. We will brown this butter first for extra flavor. If you skip browning, it’s still good, but browned butter adds a toasty, nutty aroma that elevates the whole dish.
Raw Honey (60ml / 1/4 cup) — Local honey is best for flavor, but any mild honey works. Honey is hygroscopic, meaning it attracts moisture. This keeps the crust soft even after it cools.
Vanilla Extract (5ml / 1 tsp) — A tiny splash enhances the sweetness and adds a warm, bakery-like aroma. It’s the secret ingredient that makes people wonder what’s different about your rolls.
Tools Needed for This Recipe
You don’t need fancy equipment. Here’s what I use to make this Extra-Soft Dinner Rolls with Honey Butter Brush efficiently.
Kitchen Scale — I cannot stress this enough. Measuring flour by cup is inaccurate and leads to dry dough. A scale ensures your hydration is correct. 500g of flour is consistent every time.
Stand Mixer with Dough Hook — Kneading this dough by hand is possible, but it takes 15 minutes of elbow grease. A stand mixer does the work in 5-7 minutes. If you don’t have one, a large bowl and strong arms will do.
9×13 Inch Baking Dish — This size allows the rolls to touch each other, which encourages them to rise upward rather than outward, creating that soft, pull-apart texture.
Pastry Brush — For applying the honey butter glaze evenly. Silicone brushes are easier to clean than bristle ones.
Clean Kitchen Towel — To cover the dough while it rises. It doesn’t need to be airtight, just enough to keep the surface from drying out.
How to Make Extra-Soft Dinner Rolls with Honey Butter Brush
Let’s get into the nitty-gritty. This process is straightforward if you pay attention to the cues.
Step 1: Mix the Dough (5 minutes)
In the bowl of a stand mixer, combine the bread flour, sugar, yeast, and salt. Mix on low to combine. Add the softened butter, egg, and warm milk. Attach the dough hook. Mix on medium-low speed for 2 minutes until the ingredients come together into a shaggy mass. If the dough is too sticky, add flour 1 tablespoon at a time. If it’s too dry, add water 1 teaspoon at a time. The dough should be soft and slightly tacky, but not sticky to your hands.
Step 2: Knead Until Smooth (5-7 minutes)
Increase the speed to medium. Knead for 5-7 minutes. This is crucial. You’re looking for the “windowpane test.” Take a small piece of dough and gently stretch it. If it stretches thin enough to let light through without tearing, it’s ready. If it tears immediately, keep kneading. Under-kneaded dough results in dense rolls. I’ve made that mistake, and I don’t recommend it.
Step 3: First Rise (1-2 hours)
Lightly grease a large bowl with oil. Place the dough inside and turn it once to coat. Cover with a towel or plastic wrap. Let it rise in a warm, draft-free spot until doubled in size. This usually takes 1-2 hours, depending on your kitchen temperature. In winter, it might take longer. Don’t rush this step. The yeast needs time to create air pockets.
Step 4: Shape the Rolls (10 minutes)
Punch down the dough gently to release large air bubbles. Turn it out onto a lightly floured surface. Divide the dough into 12 equal pieces. I use my scale for this to ensure even baking. Roll each piece into a smooth ball by tucking the edges underneath. Place them seam-side down in a greased 9×13 inch baking dish. They should be touching each other. This pressure helps them rise up.
Step 5: Second Rise (30-45 minutes)
Cover the dish with a towel. Let the rolls rise again until they are puffy and nearly doubled. They should look jiggly when you shake the pan. This usually takes 30-45 minutes. While they rise, preheat your oven to 375°F (190°C). If you skip this step, your rolls will be dense and flat.
Step 6: Bake (18-22 minutes)
Place the rolls in the preheated oven. Bake for 18-22 minutes. They should be golden brown on top. If they start browning too quickly, tent them with foil after 15 minutes. The internal temperature should reach 190°F (88°C) if you have a thermometer. When you tap the bottom of a roll, it should sound hollow.
Step 7: The Honey Butter Glaze (2 minutes)
While the rolls bake, make the glaze. Melt the butter in a small saucepan over medium heat. Swirl it occasionally until it turns golden brown and smells nutty. Remove from heat and stir in the honey and vanilla. Immediately after taking the rolls out of the oven, brush this mixture generously over the top. The heat will help it soak in. Let them cool in the pan for 5 minutes before serving.
Total Time: Prep: 20 mins | Rise: 1.5-2.5 hours | Bake: 20 mins | Total: ~3-4 hours (mostly hands-off)
Expert Tips from a Roll Obsessive
Here’s everything I learned from making this too many times. These tips separate the good rolls from the great ones.
The Game-Changers
Don’t Overbake
Overbaking is the enemy of softness. These rolls continue to cook slightly after you take them out. Pull them when they are golden, not dark brown. Dark brown means dry. I once left mine in for 25 minutes instead of 20, and they were perfectly edible but lacked that pillowy softness. Trust your eyes, not just the timer.
Brown Your Butter
I know it’s an extra step, but browning the butter for the glaze adds a depth of flavor that raw butter can’t match. It tastes like a high-end bakery. The nutty aroma pairs perfectly with the honey. If you’re in a huge rush, melted butter works, but don’t skip the browning if you want to impress.
Keep Them Covered
As soon as you brush them with honey butter, cover them with a clean towel for the first 10 minutes of cooling. This traps the steam and keeps the crust soft. If you leave them uncovered, the crust will harden as it cools. We want soft, not crunchy.
Common Problems & Solutions
Rolls are dense — This usually means the yeast was dead or the dough didn’t rise enough. Check your yeast expiration date. Also, ensure your milk wasn’t too hot (killing the yeast) or too cold (slowing it down).
Rolls are flat — You likely didn’t let them do the second rise. Or, you shaped them too tightly. Be gentle when forming the balls.
Glaze isn’t sticking — If the rolls are too cool when you brush them, the butter will sit on top rather than soak in. Apply the glaze immediately while they are piping hot.
Pro Tricks
Freeze for Later
After the second rise, you can freeze the raw rolls in the pan. Wrap tightly in plastic and foil. When you’re ready, let them thaw and rise until puffy, then bake as directed. This is perfect for meal prep.
Recipe Variations
Once you’ve nailed the basic version, here’s how to mix it up. The base dough is versatile.
Garlic Herb Rolls
Add 1 teaspoon of garlic powder and 1 tablespoon of dried parsley to the dry ingredients. Brush with the honey butter mixed with minced fresh garlic and rosemary. These are amazing with pasta dishes.
Cinnamon Sugar Rolls
Skip the honey butter. After baking, brush with melted butter and sprinkle with a mixture of cinnamon and sugar. Great for breakfast or dessert.
Whole Wheat Twist
Substitute half of the bread flour with whole wheat flour. The rolls will be slightly denser and nuttier, but still soft. Add an extra tablespoon of milk to compensate for the flour’s absorption.
Gluten-Free Option
Use a 1:1 gluten-free flour blend with xanthan gum. The dough will be stickier, so you may need to chill it before shaping. The texture will be more cake-like than chewy.
Dairy-Free Variation
Use olive oil instead of butter in the dough, and plant-based milk. For the glaze, use olive oil and maple syrup. They won’t be as rich, but still delicious.
Serving & Storage
Serving Suggestions:
These rolls are incredibly versatile. They pair beautifully with rich mains. I love serving them alongside my crockpot creamy tuscan garlic chicken because the rolls soak up that creamy sauce perfectly. They also go great with roasted meats, soups, or even just a simple salad with a vinaigrette. Serve them warm, directly from the pan, with extra honey butter on the side.
Storage:
Store leftovers in an airtight container at room temperature for up to 2 days. The honey butter keeps them soft, but they will stale eventually. Do not refrigerate, as the fridge dries out bread faster than the counter.
Freezing:
These rolls freeze exceptionally well. Once completely cooled, wrap them tightly in plastic wrap and place in a freezer bag. They last for up to 3 months. To reheat, thaw at room temperature and warm in the oven at 300°F for 10 minutes, or microwave for 20 seconds. They will be soft and fresh-tasting.
Nutrition Information
I’m not a nutritionist, but here’s the breakdown. Keep in mind that these are enriched rolls with butter and honey, so they are calorie-dense.
| Nutrient | Per Roll (1/12 of batch) |
|---|---|
| Calories | 180 |
| Protein | 5g |
| Carbohydrates | 28g |
| Fiber | 1.5g |
| Fat | 6g |
| Sodium | 220mg |
My Take: These are indulgent comfort food. They are not diet food. But they are made from scratch with real ingredients, so you know exactly what’s going in. One or two rolls with your meal is a perfect treat.
Final Thoughts
Making bread from scratch can feel daunting, but this Extra-Soft Dinner Rolls with Honey Butter Brush recipe is designed to be approachable. It’s forgiving, it’s flexible, and the result is absolutely worth the effort. There is nothing quite like the smell of fresh bread filling your home, or the sound of your guests tearing into a warm, soft roll with their hands. It creates a sense of warmth and welcome that no store-bought loaf can match.
If you make this, I’d love to hear how it turns out. Drop a comment below with your thoughts, or tag me on social media. I love seeing how everyone makes this recipe their own. Whether you stick to the classic honey butter or try a garlic variation, I know you’ll love them. Happy cooking!
FAQs
Can I use active dry yeast instead of instant yeast?
Yes, you can. You’ll need to bloom the yeast in the warm milk with a pinch of the sugar from the recipe for about 5-10 minutes until it gets foamy. Then proceed with the recipe. The rise time might be slightly longer, so keep an eye on the dough size rather than the clock.
Why did my rolls turn out flat?
Flat rolls usually happen because the second rise was skipped or too short. The rolls need to be puffy and jiggly before they go in the oven. Also, check your yeast. If it’s old or expired, it won’t create enough lift. And make sure your oven was fully preheated before putting the rolls in.
Can I make these rolls ahead of time?
Absolutely. You can shape the rolls, let them do their final rise in the fridge overnight (covered tightly), and then bake them straight from the fridge the next morning. You might need to add 5-10 minutes to the bake time since the dough is cold. This is my favorite method for holiday hosting.
What if I don’t have a stand mixer?
You can make this by hand. It will take more effort—about 10-15 minutes of kneading—but the result will be the same. Just be patient with the kneading. You need to develop that gluten structure for the soft texture. A sturdy wooden spoon can help bring the dough together initially.
How do I keep the rolls soft for longer?
The honey butter glaze helps, but the key is storage. Keep them in an airtight container at room temperature. Do not refrigerate them, as the cold air dries out the starches in the bread. If you need to keep them longer than 2 days, freeze them instead.
Can I add cheese to these rolls?
You can, but it changes the texture. If you want cheesy rolls, add 1/2 cup of shredded cheddar or gruyere to the dough before the final rise. However, the cheese might weigh down the dough slightly, so keep an eye on the rise. The honey butter might not pair as well with heavy cheese, so you might want to stick to a simple butter glaze.
Pin This Recipe!
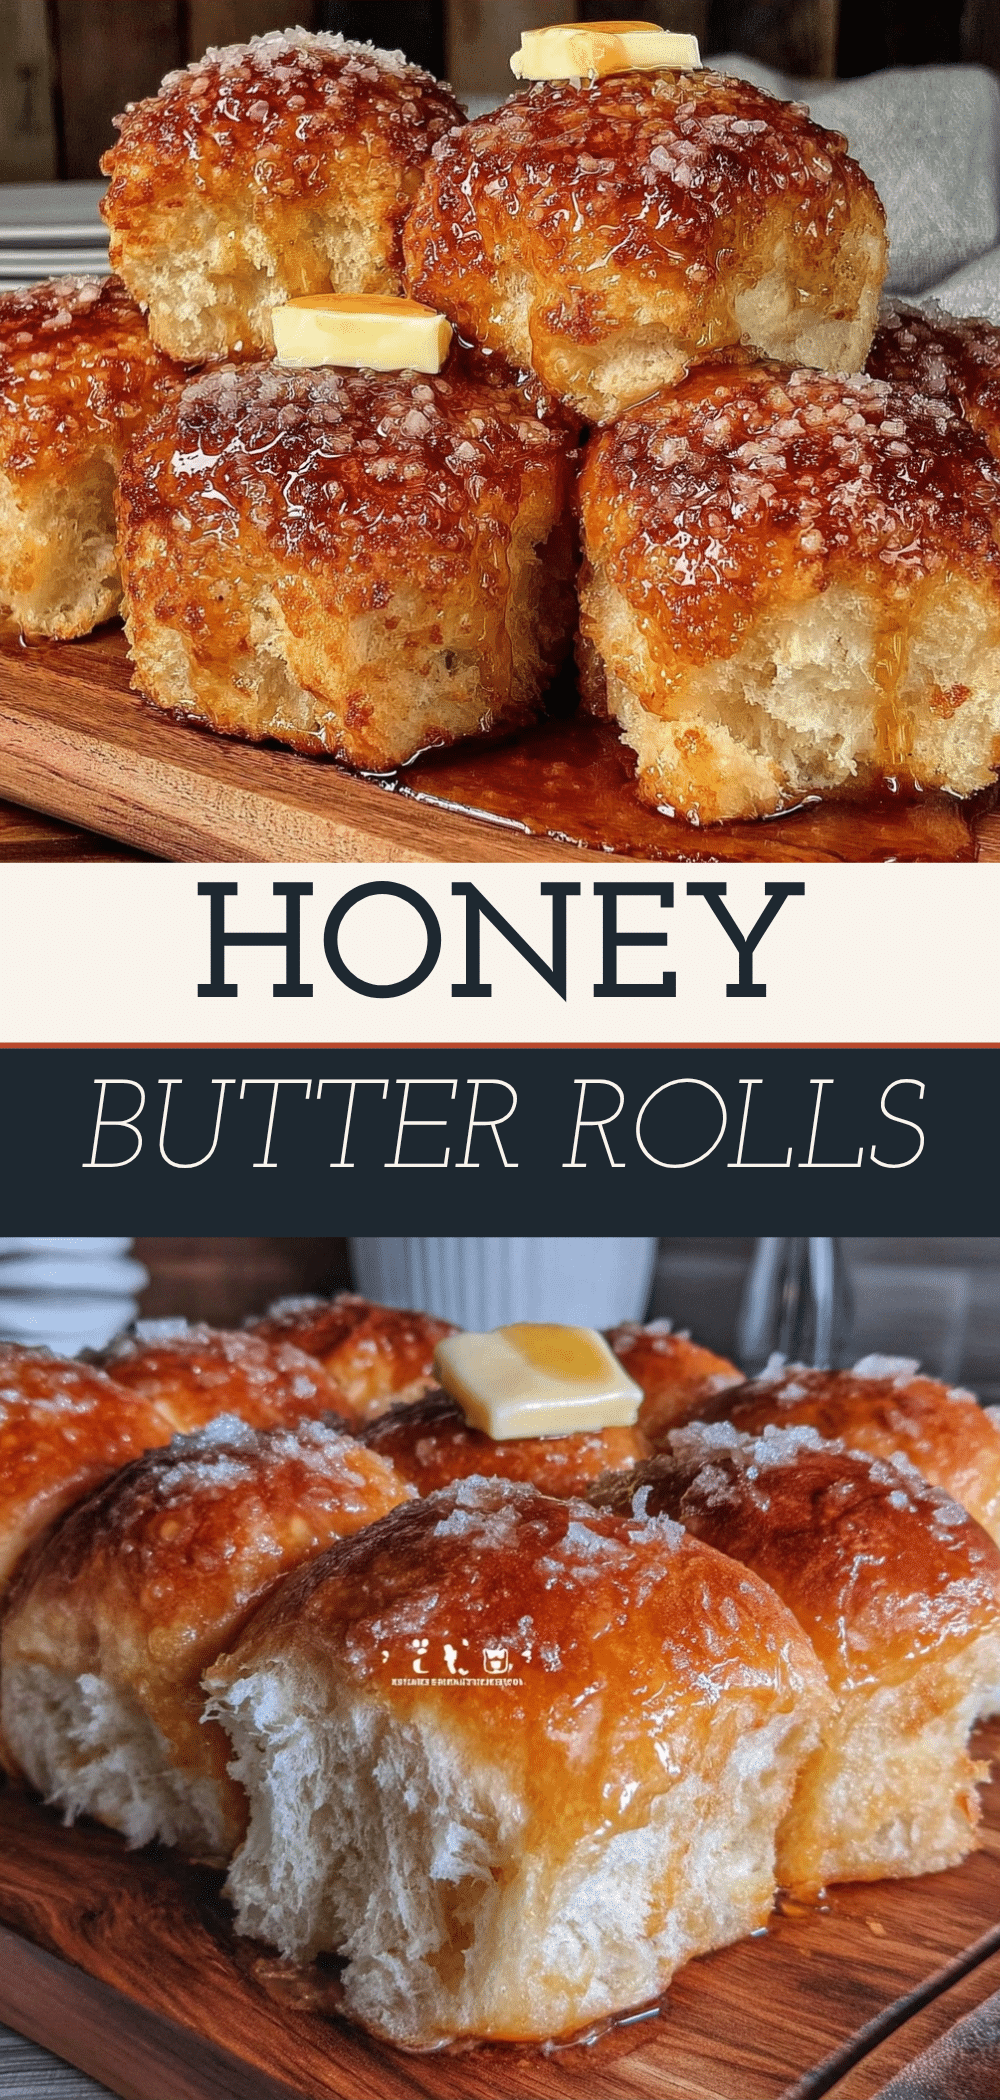

Extra-Soft Dinner Rolls with Honey Butter Brush
- Total Time: 3-4 hours
- Yield: 12 servings 1x
Description
These extra-soft dinner rolls feature a pillowy, cloud-like texture and are finished with a shiny, golden honey butter glaze. They are make-ahead friendly and perfect for entertaining.
Ingredients
- 500g (4 cups) Bread Flour
- 240ml (1 cup) Whole Milk, warmed to 110°F (43°C)
- 57g (4 tbsp) Unsalted Butter, softened
- 60g (1/3 cup) Granulated Sugar
- 7g (1 packet) Instant Yeast
- 1 large Egg
- 10g (2 tsp) Salt
- 113g (1/2 cup) Unsalted Butter (for glaze)
- 60ml (1/4 cup) Raw Honey
- 5ml (1 tsp) Vanilla Extract
Instructions
- Mix the dough: In a stand mixer bowl, combine bread flour, sugar, yeast, and salt. Add softened butter, egg, and warm milk. Mix on medium-low for 2 minutes until a shaggy mass forms.
- Knead: Increase speed to medium and knead for 5-7 minutes until the dough passes the windowpane test (stretches thin without tearing).
- First Rise: Place dough in a greased bowl, cover, and let rise in a warm spot for 1-2 hours until doubled in size.
- Shape: Punch down dough, divide into 12 equal pieces, and roll into smooth balls. Place seam-side down in a greased 9×13 inch baking dish, ensuring they touch.
- Second Rise: Cover rolls and let rise for 30-45 minutes until puffy and nearly doubled. Preheat oven to 375°F (190°C) during this time.
- Bake: Bake for 18-22 minutes until golden brown and internal temperature reaches 190°F (88°C).
- Make Glaze: While rolls bake, brown the butter in a saucepan. Remove from heat and stir in honey and vanilla.
- Finish: Immediately brush the hot honey butter mixture over the baked rolls. Cover with a towel for 5 minutes before serving.
Notes
For best results, use a kitchen scale to measure flour. Do not overbake to maintain softness. Keep rolls covered with a towel after glazing to trap steam and keep the crust soft. Can be frozen raw after the second rise or baked and frozen for later.
- Prep Time: 20 minutes
- Cook Time: 20 minutes
- Category: Side Dish
- Cuisine: American
Nutrition
- Serving Size: 1 roll
- Calories: 180
- Sugar: 12
- Sodium: 220
- Fat: 6
- Saturated Fat: 3.5
- Carbohydrates: 28
- Fiber: 1.5
- Protein: 5
Keywords: dinner rolls, honey butter rolls, soft bread, homemade rolls, holiday baking, make-ahead bread, comfort food