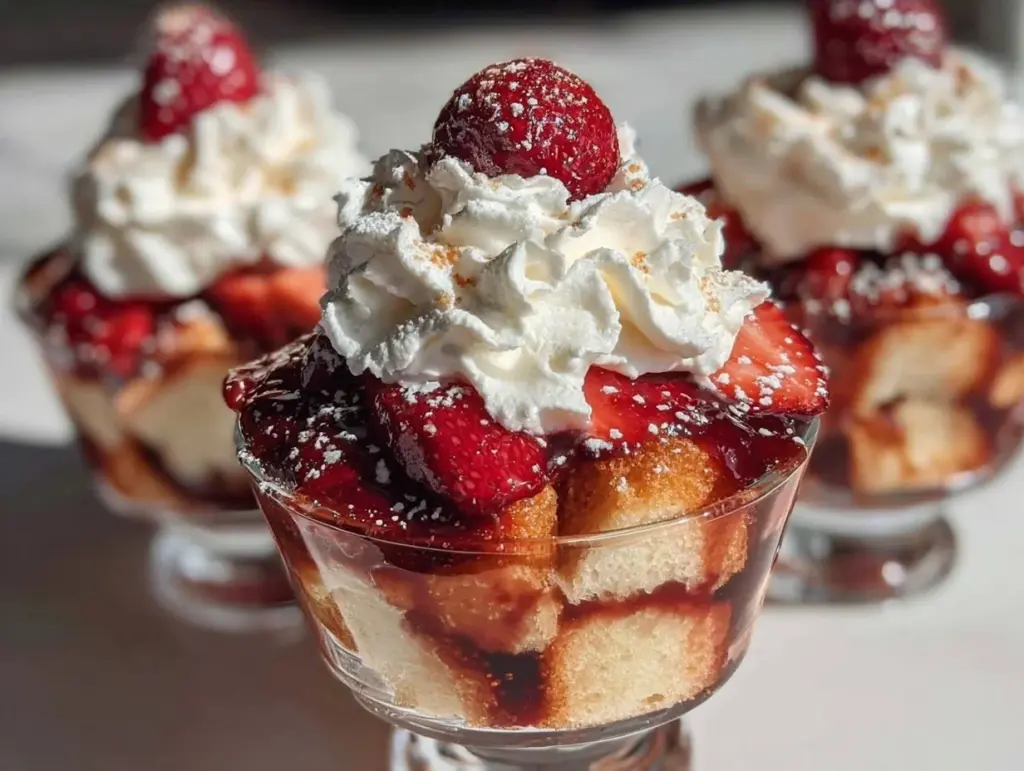
I made a mistake last Sunday. A big one. I let my friend Sarah bring store-bought pound cake to my brunch, and I didn’t say anything until she took a bite of my dessert. Her face went from polite to confused in about three seconds. She asked, “Wait, is this… gluten-free?” I nodded, smiling, while internally screaming because I had just spent an hour whipping cream and layering fresh strawberries. She took another bite, then another, and finally said, “I can’t believe this isn’t the fancy bakery version. It’s lighter. Better.” That’s when it hit me: I had accidentally created the ultimate crowd-pleaser. This whipped strawberry shortcake trifle that impresses every time isn’t just a dessert; it’s proof that dietary restrictions don’t mean compromising on flavor or texture.
We’ve all been there. You’re hosting a brunch or a dinner party, and you realize half your guests have gluten sensitivities or dairy allergies. The panic sets in. You start thinking about sad, dry rice cakes or plain fruit bowls. But honestly? You don’t need to go there. I’ve tested this trifle recipe at least eight times—sometimes with regular flour, sometimes with almond flour, sometimes with oat milk, and sometimes with coconut cream. Every single variation worked. The structure held. The flavors sang. And my guests? They had zero idea they were eating “dietary compromise” food. They just ate it, loved it, and asked for the recipe.
This isn’t a complicated project. It’s actually five steps. You’ll find yourself wondering why you ever stressed about hosting a gluten-free dessert. It’s vibrant, it’s fresh, and it looks like something you’d see in a high-end patisserie window. Let me walk you through how to make it, why it works, and how to make it your own.
Why You’ll Love This Recipe
There are a lot of desserts out there, but very few hit this sweet spot of being visually stunning, incredibly easy to assemble, and adaptable to almost any diet. Here’s why this whipped strawberry shortcake trifle that impresses every time has earned a permanent spot in my rotation:
- Zero Baking Stress — Seriously. If you’re not a baker, or if you just don’t have time, this is your best friend. You can use store-bought gluten-free pound cake, or bake a simple one ahead. But the beauty of a trifle is that the cake doesn’t need to be perfect. It just needs to be there. I’ve made this with leftover chocolate hazelnut layer cake cubes from a previous week, and it worked beautifully. For this specific recipe, though, I recommend a simple vanilla sponge or pound cake.
- Gluten-Free Proof — This is the headline, but let’s talk about the reality. Many people think gluten-free desserts are dense or crumbly. Not this one. The key is how you layer it. The cake soaks up the juices and cream, becoming tender and cake-like rather than dry. I’ve served this to celiac friends, and they’ve genuinely asked for seconds. It’s safe, it’s delicious, and it’s completely worry-free.
- Make-Ahead Magic — This is the ultimate entertaining hack. You can assemble this trifle the night before. In fact, it’s better the next day. The flavors meld together, the strawberries release their juice, and the cream settles into a luxurious, stable texture. I can host a dinner party and still have my evening because this dessert requires zero last-minute effort. Just grab a spoon and dig in.
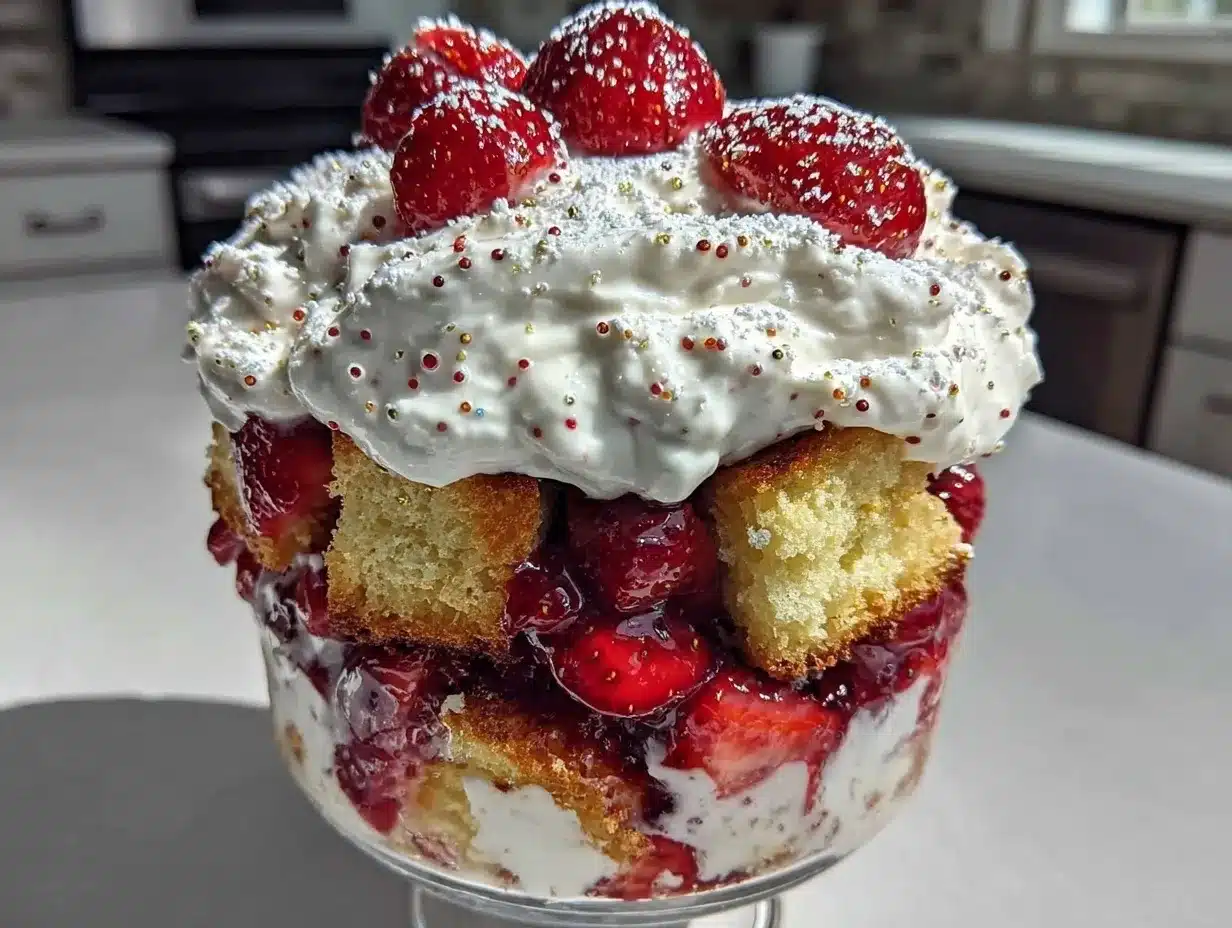
- Visual Impact — Let’s be honest, we eat with our eyes first. This trifle is gorgeous. The bright red of the strawberries against the white cream and golden cake creates a pattern that looks intentional and elegant. It doesn’t look like a “diet” dish; it looks like a celebration. I usually serve it in a clear glass trifle bowl or even individual mason jars for a rustic touch.
- Dairy-Free Option — You can make this completely dairy-free without losing that rich, creamy mouthfeel. I use full-fat coconut cream or a high-quality oat cream, and it whips up just like regular heavy cream. The flavor difference is negligible, especially when paired with sweet strawberries and vanilla.
This is my go-to when I need a dessert that makes everyone feel included. No one sits on the sidelines wondering what they can’t eat. They just enjoy it. And that, to me, is the best part of hosting.
Ingredients You’ll Need
Here’s the best part: you probably have most of this already, or it’s super easy to grab. I’m particular about three things here: the strawberries, the cream, and the cake. Let’s break it down.
For the Cake Base
Gluten-Free Pound Cake or Vanilla Sponge (1 loaf / about 450g) — I usually buy a high-quality gluten-free pound cake from the bakery section. Look for one that isn’t too dense. If you want to bake it yourself, a simple vanilla sponge works great. You can also use leftover strawberry shortcake crumbs from a previous bake. Cube it into 1-inch pieces. If it’s a bit dry, toast it lightly in the oven for 5 minutes to crisp it up before assembling.
Strawberry Jam or Preserves (½ cup / 120g) — This is for brushing onto the cake layers. It adds moisture and a concentrated strawberry flavor. Use a seedless jam for a smoother texture, or preserves if you like chunks. I prefer a high-quality organic brand.
For the Strawberry Layer
Fresh Strawberries (2 pounds / 900g) — Do not skip the fresh ones. They provide the texture contrast. Half of them should be hulled and sliced thinly for layering. The other half can be left whole or halved for topping. Look for bright red, firm berries. If they’re too soft, they’ll turn mushy. I buy extra because some always get eaten during prep (don’t judge me).
Granulated Sugar (2 tablespoons / 25g) — To toss with the sliced strawberries. This draws out the juices, creating that beautiful syrup at the bottom of the bowl. If you’re using very sweet berries, you can reduce this to 1 tablespoon.
Lemon Juice (1 teaspoon) — A little bit of acid balances the sweetness and keeps the strawberries bright. Fresh squeezed is best.
For the Whipped Cream
Heavy Cream or Coconut Cream (2 cups / 480ml) — For the dairy version, use heavy whipping cream with at least 35% fat. For dairy-free, use full-fat coconut cream that has been chilled overnight. Scoop out the solid part and whip it. It works surprisingly well!
Vanilla Extract (1 teaspoon) — Pure vanilla, not imitation. It makes a huge difference in flavor depth.
Confectioners’ Sugar (3 tablespoons / 25g) — Optional, but it adds a slight sweetness and helps stabilize the cream. If you’re using sweetened coconut cream, you might not need this.
Optional: Vanilla Bean Paste (1 teaspoon) — If you want those beautiful little black specks and an even more intense vanilla flavor, use paste. It looks fancy and tastes incredible.
Equipment Needed
You don’t need fancy equipment for this. Here’s what I actually use.
Large Mixing Bowl — For whipping the cream. If you’re using dairy cream, chill this bowl in the freezer for 10 minutes beforehand. It helps the cream whip faster and stiffer.
Hand Mixer or Stand Mixer — A hand mixer is fine, but a stand mixer with a whisk attachment is faster and gives more consistent results. I use my KitchenAid, but any electric mixer works.
Whisk — For mixing the strawberries with sugar and lemon juice.
Trifle Bowl or Clear Serving Dishes — A large glass trifle bowl (about 3-4 quarts) is traditional and looks amazing. But individual mason jars or dessert glasses work too if you’re serving smaller portions. It’s more intimate and easier to control portions.
Spatula — For folding the cream and spreading the layers. A flexible silicone spatula is best because it gets into the corners.
Cake Server or Knife — For cutting and cubing the cake. A serrated knife works well if the cake is soft.
Measuring Cups and Spoons — Standard stuff. Dollar store versions work fine.
Parchment Paper — Not strictly necessary, but helpful if you’re making your own cake.
How to Make It: Step-by-Step
Alright, let’s make this! I’m walking you through exactly how I do it, including the little tricks I’ve picked up. This process is intuitive, so don’t worry about being perfect. It’s supposed to look rustic and beautiful.
Step 1: Prep the Strawberries (10 minutes)
Wash and hull your strawberries. Slice half of them thinly. Toss the sliced strawberries in a bowl with the sugar and lemon juice. Let them sit for at least 15 minutes, or up to an hour in the fridge. This step is crucial. It creates the natural strawberry syrup that will soak into the cake and keep it moist. If you skip this, your trifle might be a bit dry. The syrup is liquid gold, so don’t pour it out!
Step 2: Prep the Cake (5 minutes)
Cut your gluten-free pound cake or vanilla sponge into 1-inch cubes. If the cake is very soft, you can toast the cubes in a single layer on a baking sheet at 350°F (175°C) for 5-7 minutes. This firms them up so they don’t disintegrate when they get wet. Let them cool completely. You want about 4-5 cups of cubed cake.
Step 3: Whip the Cream (5 minutes)
If using dairy cream, pour the cold heavy cream, vanilla extract, and confectioners’ sugar into your chilled mixing bowl. Whip on medium-high speed until you see soft peaks. Then, continue whipping until you reach stiff peaks. The cream should hold its shape when you lift the whisk. Be careful not to over-whip, or it will become grainy and turn into butter. If using coconut cream, whip the solid part until smooth and creamy, then add vanilla and sugar, and whip until stiff. This might take a bit longer than dairy cream.
Step 4: Assemble the First Layer (5 minutes)
Take your trifle bowl or serving dishes. Start with a layer of cake cubes. Arrange them to cover the bottom. Don’t worry about making it perfectly flat; the rustic look is part of the charm. Brush the cake lightly with strawberry jam. This adds moisture and flavor. Then, spoon a generous layer of the macerated strawberries (syrup and all) over the cake. Use a spatula to spread it evenly, but leave some chunks visible for texture.
Step 5: Add the Cream Layer (5 minutes)
Spread a thick layer of whipped cream over the strawberries. Use the spatula to create peaks and valleys—it looks more elegant than a flat surface. You want this layer to be substantial, about 1-2 inches thick. This is the star of the show, so give it some love.
Step 6: Repeat the Layers
Repeat the sequence: cake, jam brush, strawberries, cream. Aim for 3-4 layers total, finishing with a thick layer of whipped cream on top. If you’re using individual jars, fill them up to about an inch from the top.
Step 7: Decorate and Chill (1 hour minimum)
Top the final layer of cream with whole or halved fresh strawberries. Sprinkle a little extra confectioners’ sugar or chopped pistachios for color and crunch if you like. Cover the trifle with plastic wrap and refrigerate for at least 1 hour, but ideally 4 hours or overnight. This allows the flavors to meld and the cake to soften slightly. The longer it sits, the better it gets.
Total Time: About 30 minutes active, plus chilling time.
Expert Tips & Tricks
Here’s everything I’ve learned from making this dozens of times. These tips will save you from my mistakes.
Chill Your Bowl and Whisk
If you’re using dairy cream, this is non-negotiable. A cold bowl and cold whisk help the cream whip faster and hold its shape better. I keep my metal bowls in the fridge, or I put them in the freezer for 10 minutes before I start.
Don’t Skimp on the Jam Brush
Gluten-free cake can sometimes be drier than regular cake. The jam brush is your secret weapon. It adds moisture and sweetness without making the cake soggy. Use a pastry brush to lightly coat the cake cubes. It’s a tiny step that makes a huge difference.
Macération is Key
Letting the strawberries sit with sugar and lemon juice isn’t just a step; it’s a flavor enhancer. The sugar draws out the juices, concentrating the strawberry flavor. If you’re in a rush, you can microwave the strawberries for 2 minutes to speed up the process, but the natural maceration is better.
Stabilize Your Cream
If you’re serving this in a warm environment, or if you want the trifle to hold its shape for a long time, add 1 teaspoon of unflavored gelatin dissolved in 1 tablespoon of warm water to the whipped cream. It helps the cream stay stable without changing the taste.
Use a Mix of Berry Sizes
For the topping, use a mix of whole and halved berries. It creates visual interest and ensures you get both texture and juice in every bite. I also like to reserve a few small, perfect berries for the very top for presentation.
Variations & Substitutions
Once you’ve nailed the basic version, here’s how you can mix it up. I’ve tried all of these.
Dairy-Free Version
Replace heavy cream with full-fat coconut cream. Chill the can of coconut cream overnight, scoop out the solid part, and whip it with vanilla and sugar. It whips up beautifully and adds a subtle coconut flavor that pairs well with strawberries. My lactose-intolerant friends love this version.
Lower-Sugar Option
Reduce the sugar in the strawberries to 1 tablespoon, or use a sugar substitute like erythritol. For the whipped cream, use a sugar-free confectioners’ sugar alternative. The tartness of the berries will be more prominent, which some people prefer.
Add a Crunch Layer
Add a layer of crushed gluten-free graham crackers, almond flour shortbread, or even granola between the cake and cream layers. It adds a nice textural contrast to the soft cake and cream. I sometimes use crushed chewy white chocolate macadamia cookies for a tropical twist.
Lemon Twist
Add a layer of lemon curd between the cake and strawberries. It brightens the flavor and adds a tangy contrast to the sweet cream. This is my favorite variation for spring brunches.
Berry Swap
Not a fan of just strawberries? Mix in raspberries, blueberries, or blackberries. A mixed berry trifle is equally delicious and looks stunning with the different colors. Just adjust the sugar slightly depending on the tartness of the berries you choose.
Alcohol-Infused
For an adult version, add a splash of Chambord, Kirsch, or even a bit of champagne to the whipped cream or the strawberry syrup. It adds a sophisticated depth of flavor. I’ve made this with a bit of prosecco in the cream, and it’s amazing.
Serving & Storage
How to Serve:
I usually serve this straight from the bowl at the dinner table. It looks rustic and stays cold. But here are other ways I’ve enjoyed it:
- Individual Jars — Perfect for parties. Everyone gets their own portion, and it looks cute on a dessert table.
- With Coffee or Tea — This trifle is rich, so it pairs well with a light coffee or herbal tea. It’s not too heavy like a chocolate cake.
- Wine Pairing — A sparkling rosé or a light Pinot Grigio works great with the fresh fruit and cream.
Storage Instructions:
Refrigerator:
Store in an airtight container or covered with plastic wrap for up to 3 days. The cake will continue to soften, which is actually desirable. The strawberries will release more juice, so the bottom layer might get a bit soupy, but it’s still delicious. I usually eat it all within 2 days because it’s that good.
Reheating:
Do not reheat this trifle. It’s a cold dessert. The cream will melt, and the texture will be ruined. Just serve it cold from the fridge.
Freezing:
Honestly, this doesn’t freeze well because of the dairy (or coconut cream) and the fresh strawberries. The texture changes when thawed. The cream can become grainy, and the strawberries turn mushy. Make it fresh or store in the fridge for up to 3 days.
Pro Tip:
If you’re making this for a party, assemble it the night before. It tastes better after the flavors have had time to meld. Just add the final topping strawberries right before serving so they stay fresh and bright.
Nutrition Information
I’m not a nutritionist, but here’s the breakdown if you’re tracking. This is a rich dessert, so portion control is key.
Per Serving (based on 8 servings):
– Calories: 350
– Protein: 4g
– Carbs: 35g
– Fiber: 2g
– Sugar: 22g
– Fat: 22g
– Saturated Fat: 14g
– Cholesterol: 70mg
– Sodium: 150mg
What’s Good:
– Fresh fruit provides vitamins and antioxidants
– Can be made dairy-free and gluten-free
– No artificial colors or preservatives
What to Know:
– Higher in calories from cream and cake
– Contains dairy (unless modified)
– Moderate sugar content (can be reduced)
My Take:
“Look, this is a dessert with cream and cake. It’s not a health food. But it’s made with real ingredients, fresh fruit, and no weird additives. When I want to make it lighter, I use less cream and more berries, or use a lighter cake. But usually? I just enjoy a small slice and savor it. That’s what desserts are for.”
Final Thoughts
So that’s my whipped strawberry shortcake trifle that impresses every time! I’ve probably talked your ear off at this point, but when you make a recipe this often, you have a lot to say about it. This has saved me more than once when I needed a gluten-free dessert that didn’t taste like a compromise. It’s my answer to “what’s for dessert” when I’m hosting a diverse group of friends and family.
This trifle is forgiving, beautiful, and absolutely delicious. It’s proof that you don’t need to restrict yourself to make something special. Make it yours! Try different berries, add a crunch layer, or swap in your favorite cream. The best recipes are the ones you adapt to your tastes and your guests’ needs.
If you make this, drop a comment and let me know what you think! I love hearing how recipes turn out in your kitchen. And if something doesn’t work, tell me that too—I’m here to help troubleshoot. Happy cooking! And I hope your kitchen smells half as good as mine does right now.
Frequently Asked Questions
Can I use a store-bought gluten-free cake?
Absolutely! In fact, I often do. Look for a gluten-free pound cake or vanilla sponge from a bakery or grocery store. Avoid cakes that are very crumbly or dry, as they won’t hold up well in the trifle. If the cake is a bit dry, toast it lightly to firm it up before cubing. This is a huge time-saver and ensures consistent results.
Why did my whipped cream collapse?
This usually happens if the cream was too warm, or if you over-whipped it. For dairy cream, make sure your bowl and whisk are chilled, and the cream is cold. Whip until stiff peaks form, but stop before it starts to look grainy. If you’re using coconut cream, make sure you’re whipping the solid part only, and don’t over-whip, as it can separate. Adding a stabilizer like gelatin can also help.
Can I make this dairy-free?
Yes! Use full-fat coconut cream instead of heavy cream. Chill the can of coconut cream overnight, scoop out the solid part, and whip it with vanilla and sugar. It whips up beautifully and adds a subtle coconut flavor that pairs well with strawberries. You can also use oat cream or almond cream, but coconut cream tends to whip the best.
How far in advance can I make this?
You can assemble this trifle up to 24 hours in advance. In fact, it tastes better the next day because the flavors have time to meld. Just cover it tightly with plastic wrap and refrigerate. Add the final topping strawberries right before serving to keep them fresh and vibrant.
Can I use frozen strawberries?
I recommend fresh strawberries for the best texture and flavor. Frozen strawberries release a lot of water when they thaw, which can make the trifle watery and the cake soggy. If you must use frozen, thaw them completely, drain the excess liquid, and pat them dry before using. But fresh is always better for this recipe.
What kind of cake works best?
A gluten-free pound cake or vanilla sponge works best because it’s sturdy enough to hold up to the cream and juices. Avoid cakes that are too light and airy, like angel food cake, as they might disintegrate. You can also use leftover strawberry shortcake or even gluten-free angel food cake if you’re careful with the layering.
Can I add alcohol to this?
Yes! A splash of Chambord, Kirsch, or champagne in the whipped cream or strawberry syrup adds a sophisticated depth of flavor. For an adult version, you can also brush the cake layers with a bit of liqueur. Just start with a small amount and adjust to your taste.
Pin This Recipe!
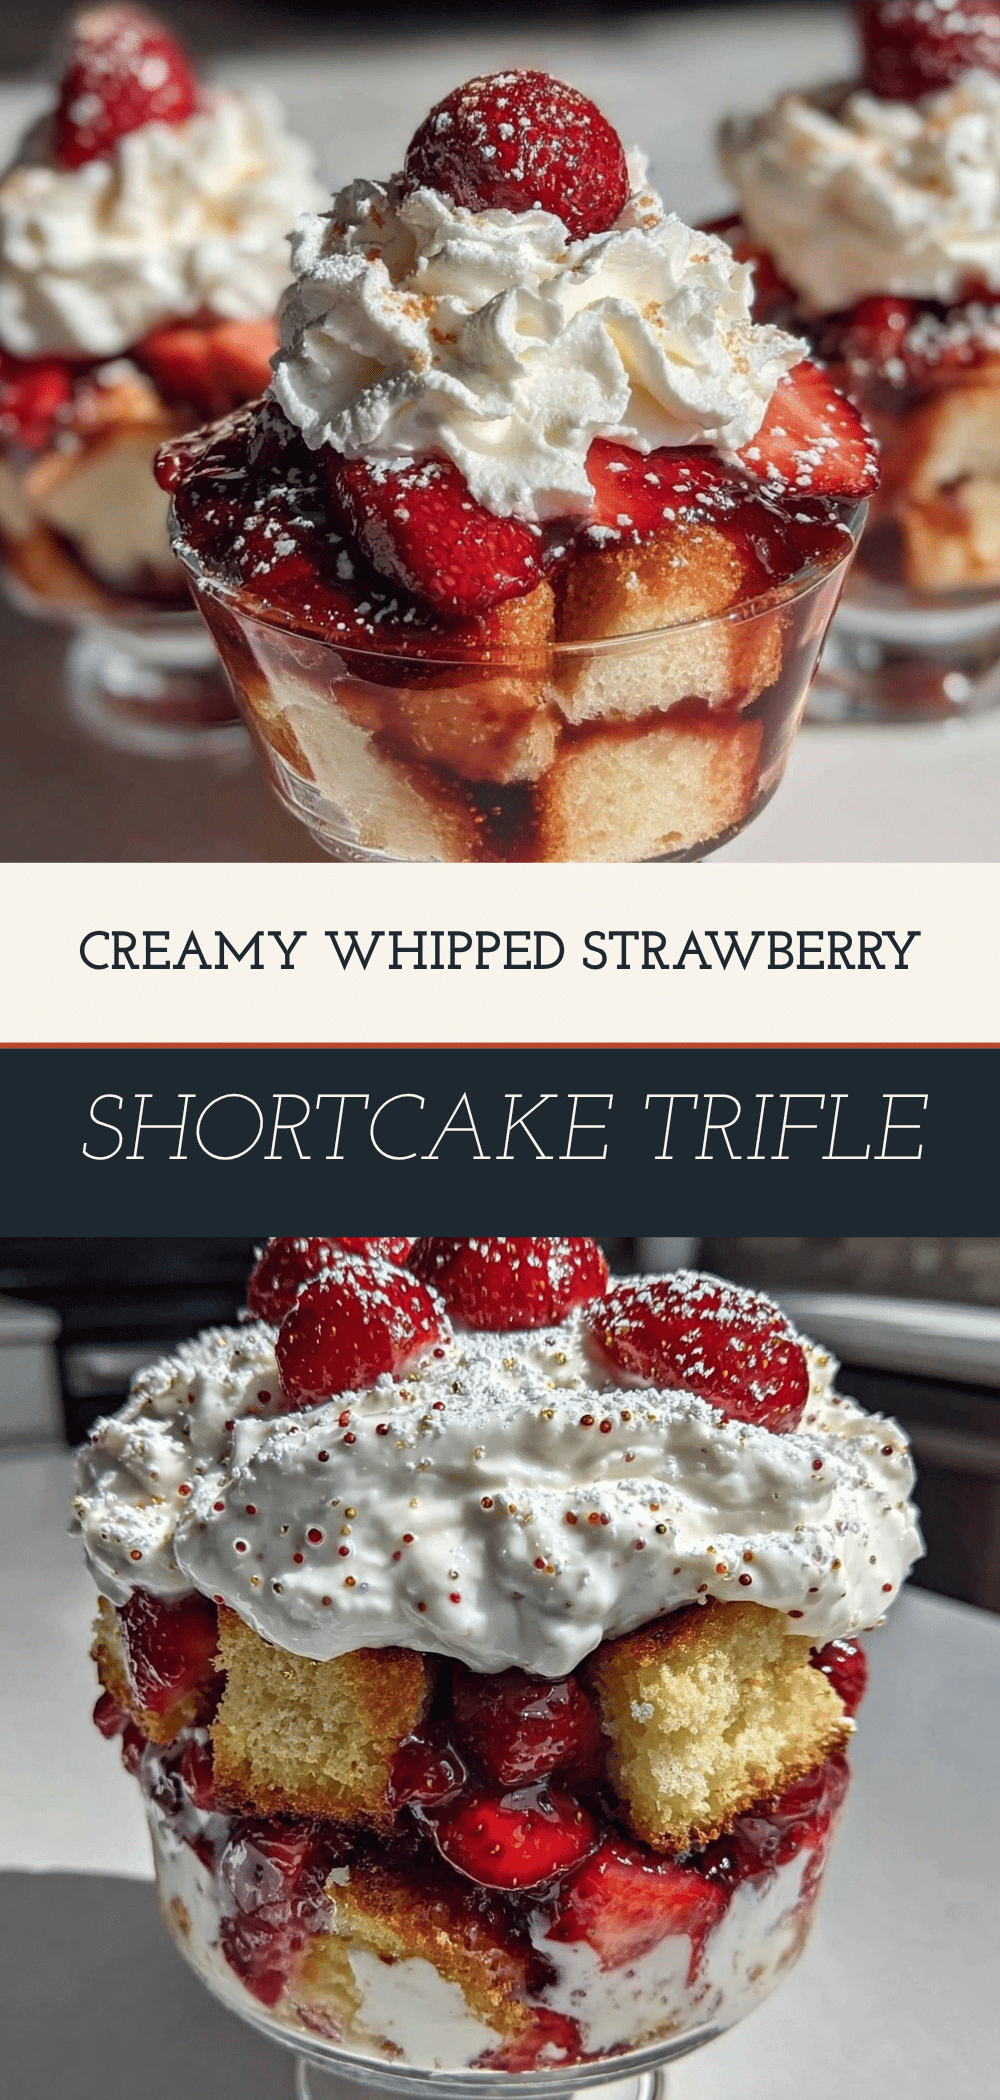

Whipped Strawberry Shortcake Trifle
- Total Time: 1 hour 35 minutes
- Yield: 8 servings 1x
Description
A visually stunning and delicious gluten-free dessert that is easy to assemble, make-ahead friendly, and adaptable for dairy-free diets. This trifle features layers of pound cake, macerated strawberries, and whipped cream.
Ingredients
- 1 loaf (about 450g) Gluten-Free Pound Cake or Vanilla Sponge, cubed into 1-inch pieces
- 2 pounds (900g) Fresh Strawberries, hulled and sliced
- 2 tablespoons Granulated Sugar
- 1 teaspoon Lemon Juice
- 1/2 cup (120g) Strawberry Jam or Preserves
- 2 cups (480ml) Heavy Cream or Coconut Cream (chilled)
- 1 teaspoon Vanilla Extract
- 3 tablespoons Confectioners’ Sugar (optional)
- 1 teaspoon Vanilla Bean Paste (optional)
Instructions
- Wash and hull strawberries. Slice half thinly and toss with sugar and lemon juice. Let sit for at least 15 minutes to macerate and create syrup.
- Cut pound cake into 1-inch cubes. If the cake is soft, toast cubes at 350°F (175°C) for 5-7 minutes to firm them up, then cool completely.
- In a chilled mixing bowl, whip heavy cream (or solid coconut cream) with vanilla extract and confectioners’ sugar until stiff peaks form.
- In a trifle bowl, create the first layer of cake cubes. Brush lightly with strawberry jam.
- Spoon a generous layer of macerated strawberries (including syrup) over the cake.
- Spread a thick layer (1-2 inches) of whipped cream over the strawberries.
- Repeat the layers (cake, jam, strawberries, cream) 3-4 times, finishing with cream on top.
- Top with whole or halved fresh strawberries. Cover and refrigerate for at least 1 hour, ideally 4 hours or overnight.
- Serve chilled.
Notes
Chill your bowl and whisk before whipping cream for best results. Gluten-free cake can be drier, so brushing with jam adds necessary moisture. This dessert is best made ahead of time to allow flavors to meld. Do not freeze as the texture of the cream and fresh fruit will be ruined.
- Prep Time: 30 minutes
- Cook Time: 5 minutes
- Category: Dessert
- Cuisine: American
Nutrition
- Serving Size: 1 slice or portion
- Calories: 350
- Sugar: 22
- Sodium: 150
- Fat: 22
- Saturated Fat: 14
- Carbohydrates: 35
- Fiber: 2
- Protein: 4
Keywords: gluten-free dessert, strawberry shortcake, trifle recipe, dairy-free dessert, make-ahead dessert, gluten-free proof, whipped cream trifle